All Posts By

Vandit Kalia

Shearwater Peregrine review

By Articles

SHEARWATER PEREGRINE REVIEW

by: Vinnie
Date: August 2020


Before I start, I should make it clear I am a big fan of Shearwater diver computers – in my experience, the Perdix and Teric are the best dive computers in the market today, and I believe this strongly enough to have purchased a Perdix AI for myself at full retail from a store in Singapore.

A full review of the Perdix is coming soon, but here is what sets it apart:  customizable algorithm, full features (trimix, Open Circuit, Closed Circuit), built-in compass, air integration, ability to handle more gas mixes than you are ever likely to use, user changeable battery, upgradable firmware and a fantastic, legible display, all in a sturdy housing that is designed for extreme use (this is certainly no dainty wrist jewellery).     There is literally NOTHING you are missing in this dive computer.

Unfortunately, all this comes at a price – the Perdix (and its sibling, the Teric) are not cheap.    While there is definitely something to be said for having a computer that is virtually future-proof and that you are not likely to outgrow, the price of the higher end Shearwater does tend to put off people looking for a more value-priced computer.     Enter the Shearwater Peregrine –  with an MRP of Rs 36,000 (at the time of writing this article) it is an “entry level” dive computer intended to bring the Shearwater experience within reach to more people.

Let’s see how it fares!

UNBOXING

I like the minimalist packaging that the computer comes in – it comes packaged in its own travel case, and inside, you find the following:

  • A 26mm rubber strap and a set of bungee cords
  • Locking bars and tools for attaching them
  • Wireless charger
  • USB cable
  • An inspection certificate
  • A couple of stickers
  • A spare screen protector

Everything that you need – and no huge amount of wasted plastics and paper.    Kudos to Shearwater for a very eco-friendly packing job.

Note that while my unit came with a black strap and a black bungee cord, you can get white or a matching blue rubber strap for the Shearwater Peregrine, if you so desire, as pictured below:
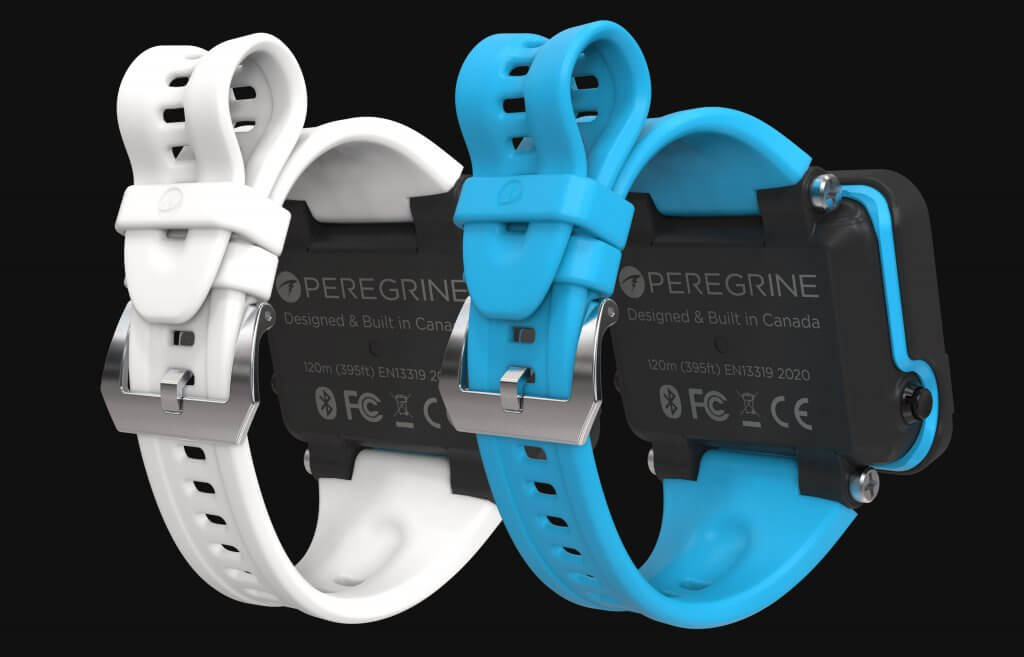
Peregrine_Rear_Duo_Rear-1024x657Colored straps are available for the Peregrine – never under-estimate the importance of color in making sure you stand out amidst a sea (pun intended) of divers all dressed in black!

FORM FACTOR, DISPLAY & ERGONOMICS

The Shearwater Peregrine is an over-sized dive computer – not a wrist-watch sized dive computer.         As you can see below, the screen is approximately the same size as the Perdix, but the casing has been slimmed down a significant degree.     The Perdix has a very strong “all business” look to it – this is a computer that is all business, all the time.   The lines of the Peregrine are a little more relaxed, with a pop of color in the form of the blue bezel around the screen (although that is the only color available at present).
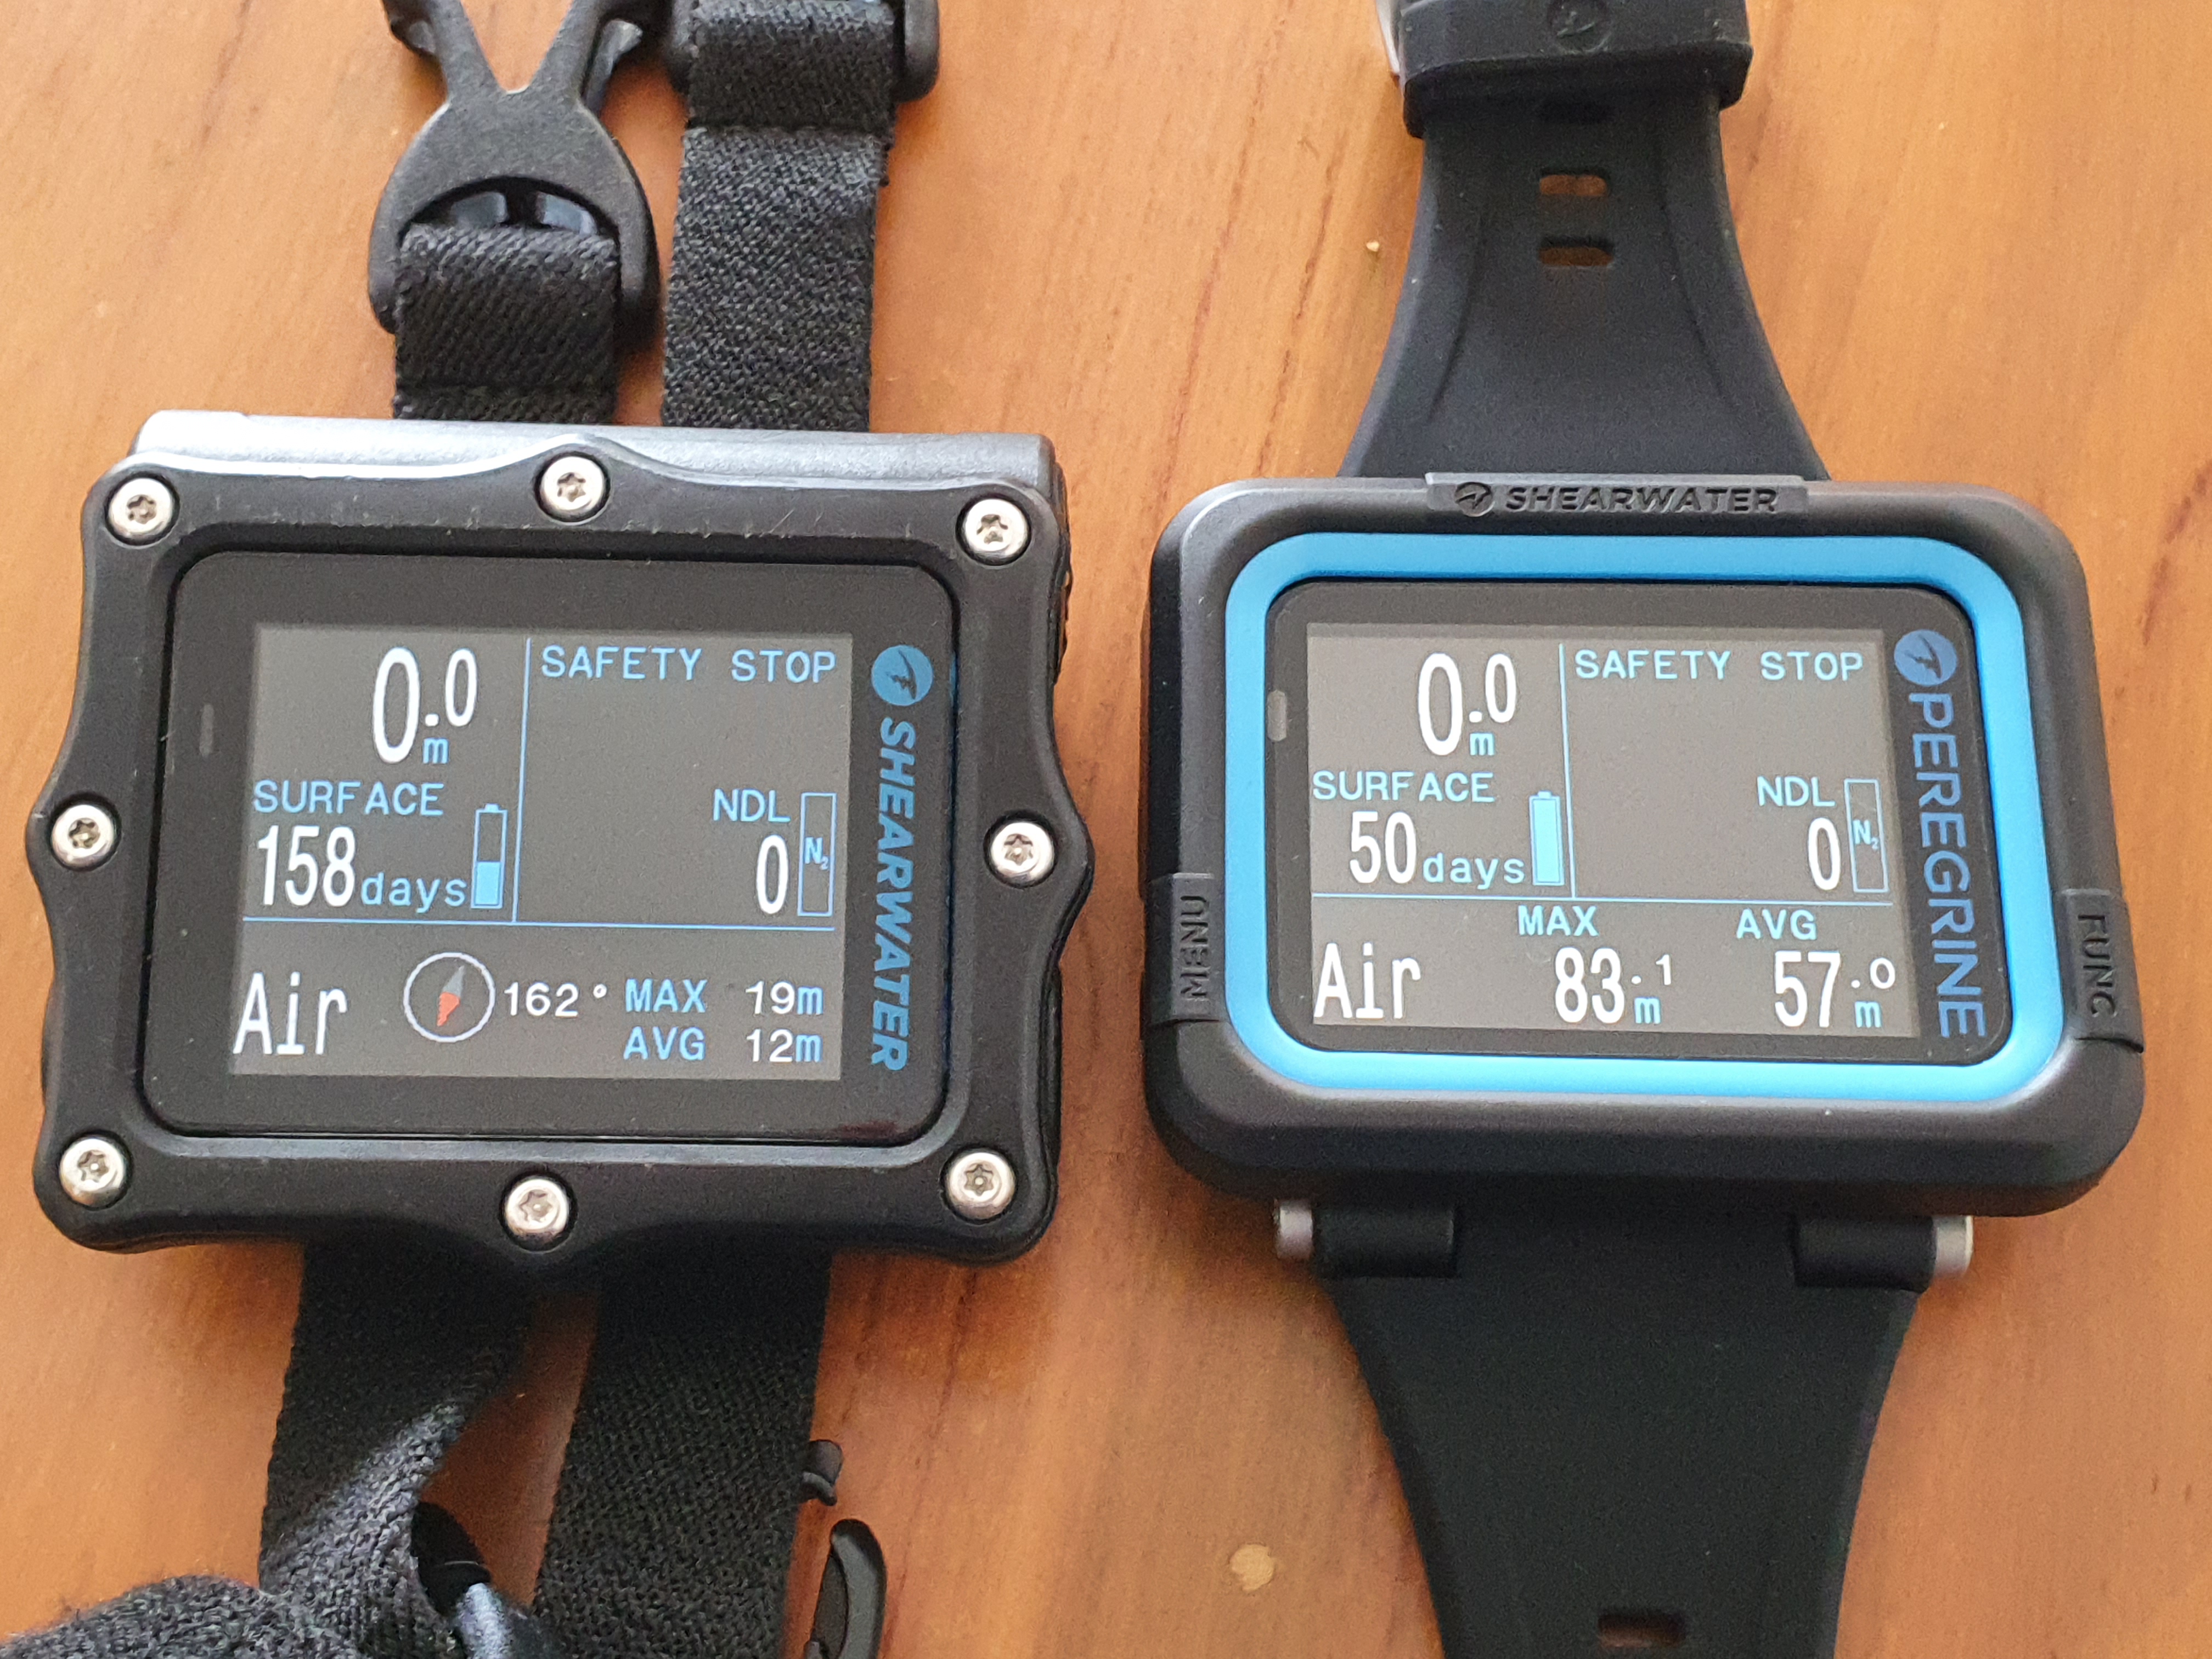
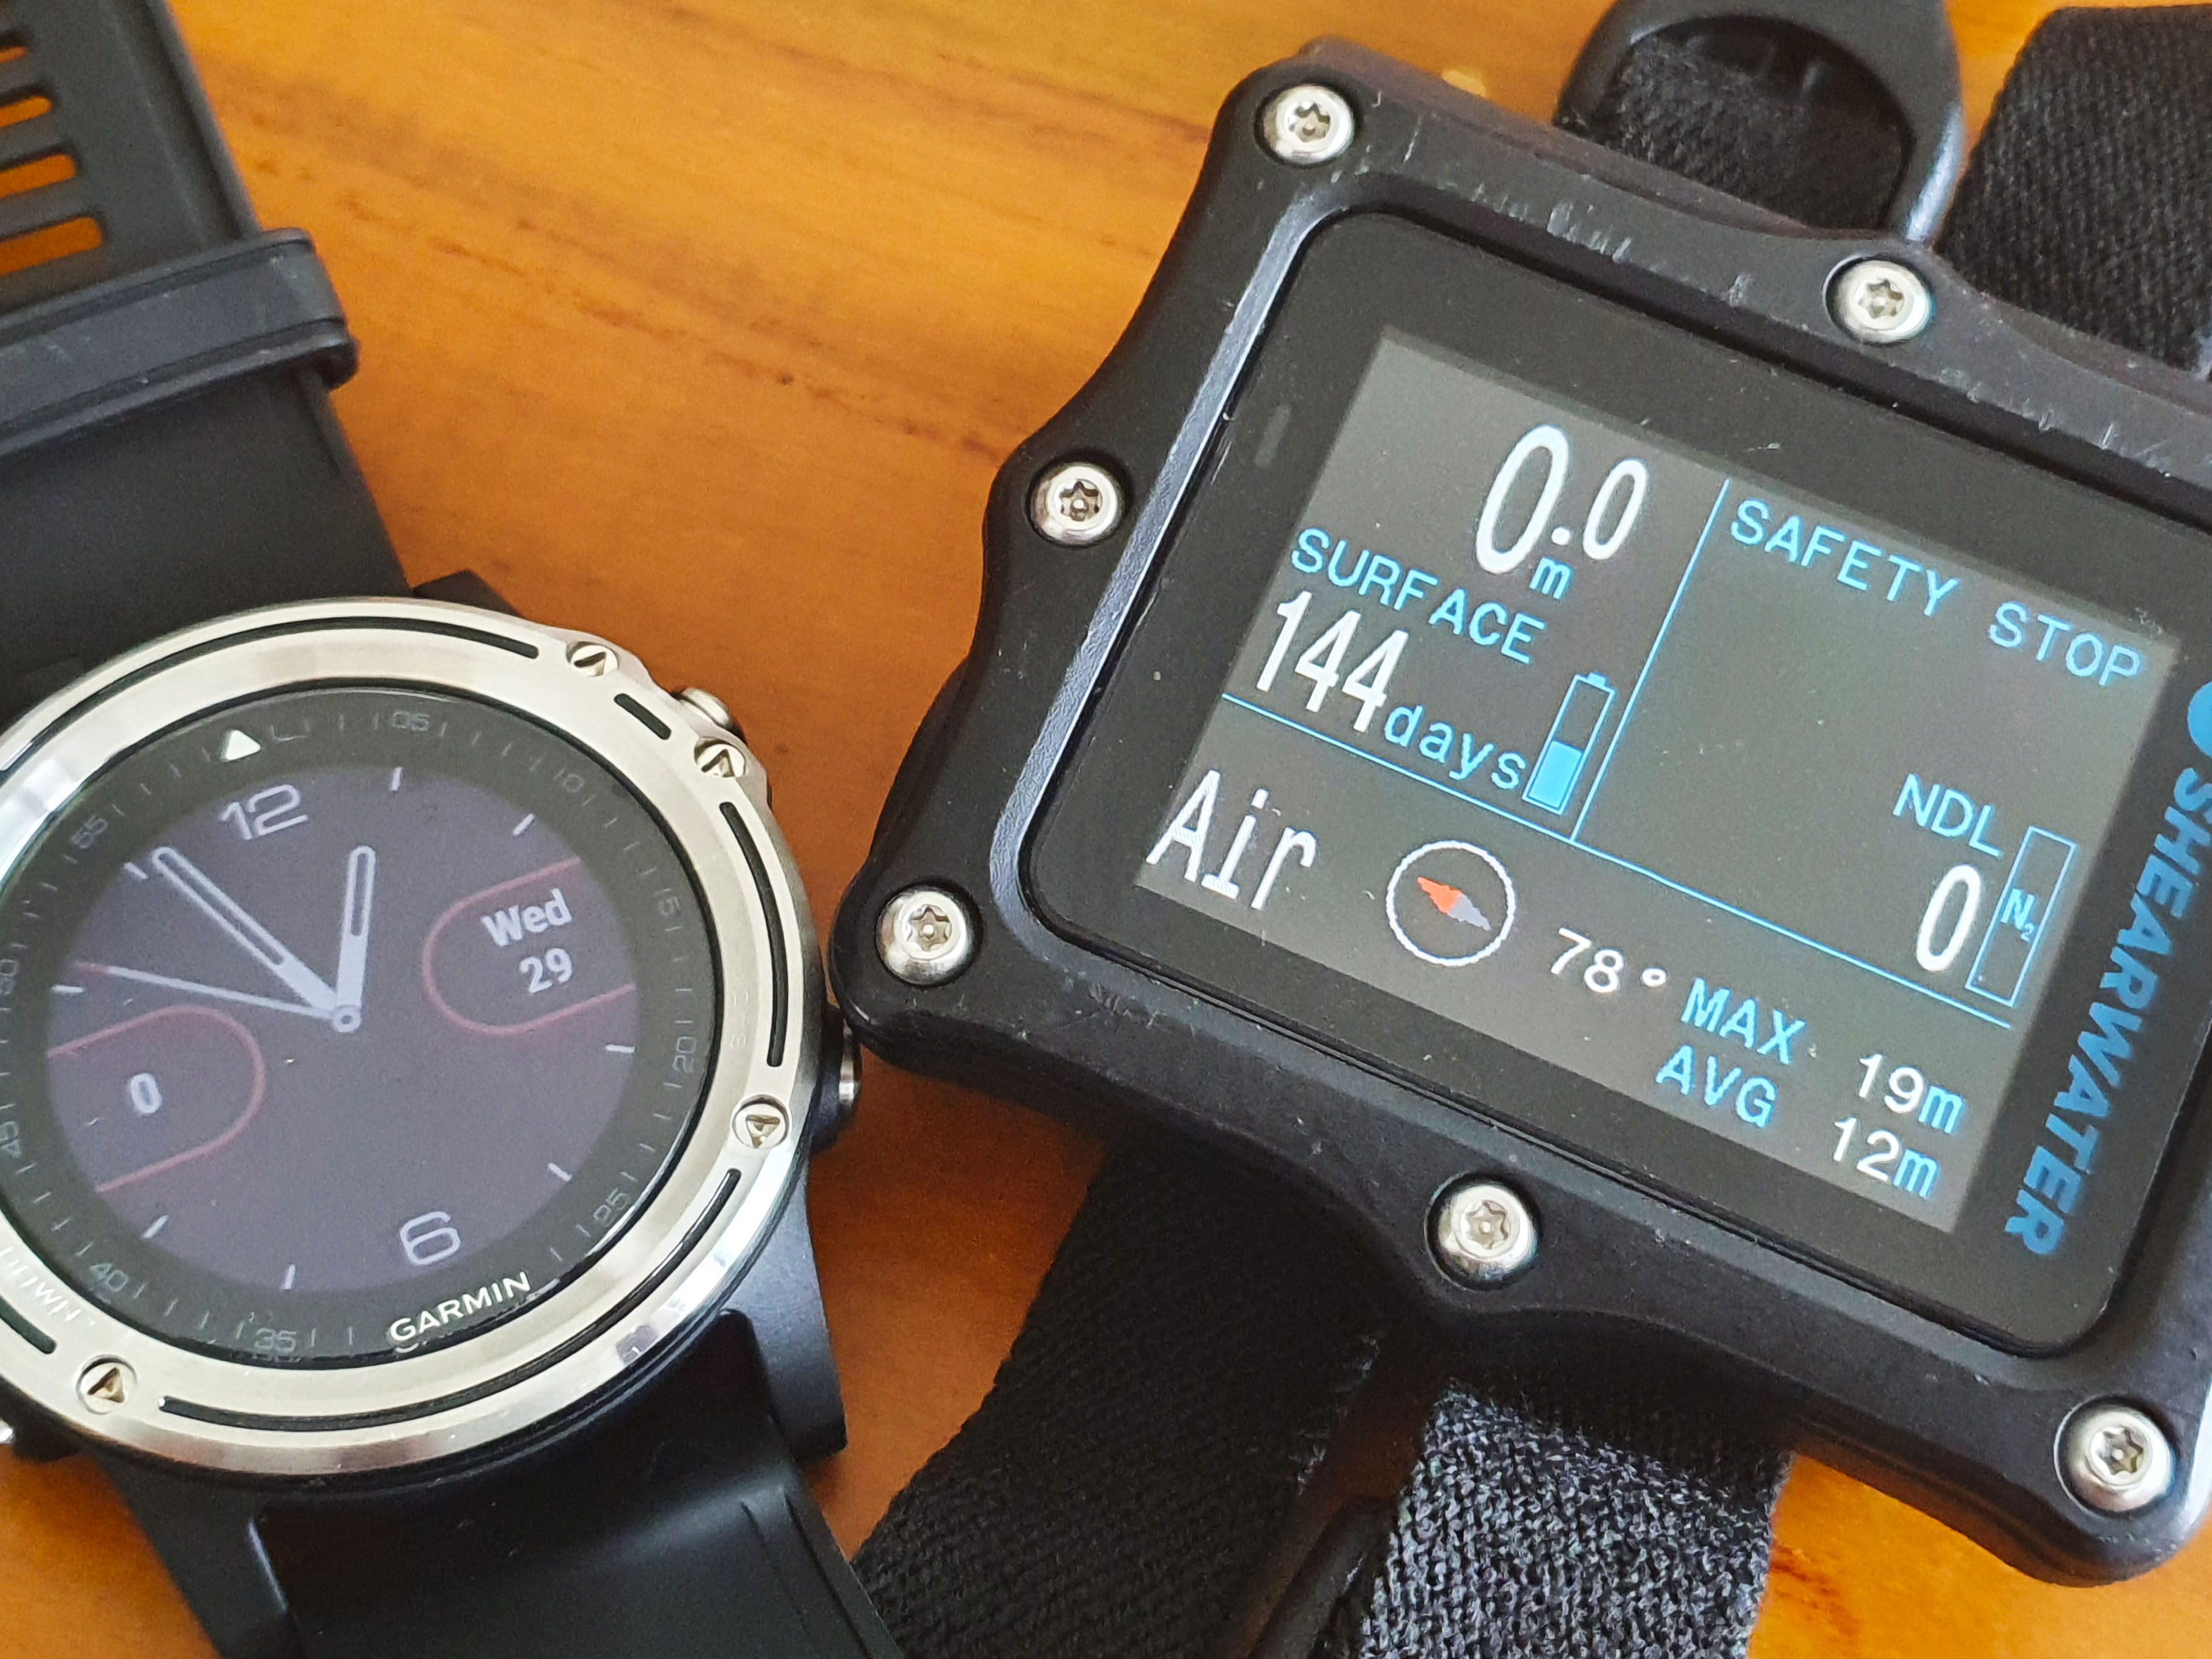
20200812_144505The Shearwater siblings – the Perdix on the left, the Peregrine on the right.   The 158 day surface interval on my Perdix is a sad testimony to the effects of the COVID pandemic!

Generally, all else being equal, I have a preference for wrist-watch sized computers:  they are easier to travel with, you are less likely to forget them in your hotel room on the morning of the dive, you don’t have to take them off before/after the dive while putting on your wetsuit (and so risk them getting damaged or even falling off the side of the boat!).

So why have I gone from a Suunto D9Tx, a watch-sized dive computer, to a Perdix, an oversized unit?    The key phrase is “all else being equal”.      In some cases, a larger dive watch is just an exercise in cost-cutting – miniaturization is expensive, after all.   In other cases, the larger form factors gets you more – better battery life, higher quality display, better presentation of information, etc.       I am happy to say that the Peregrine, like its bigger brother, does utilize this large form factor very well.

Take a look at this:
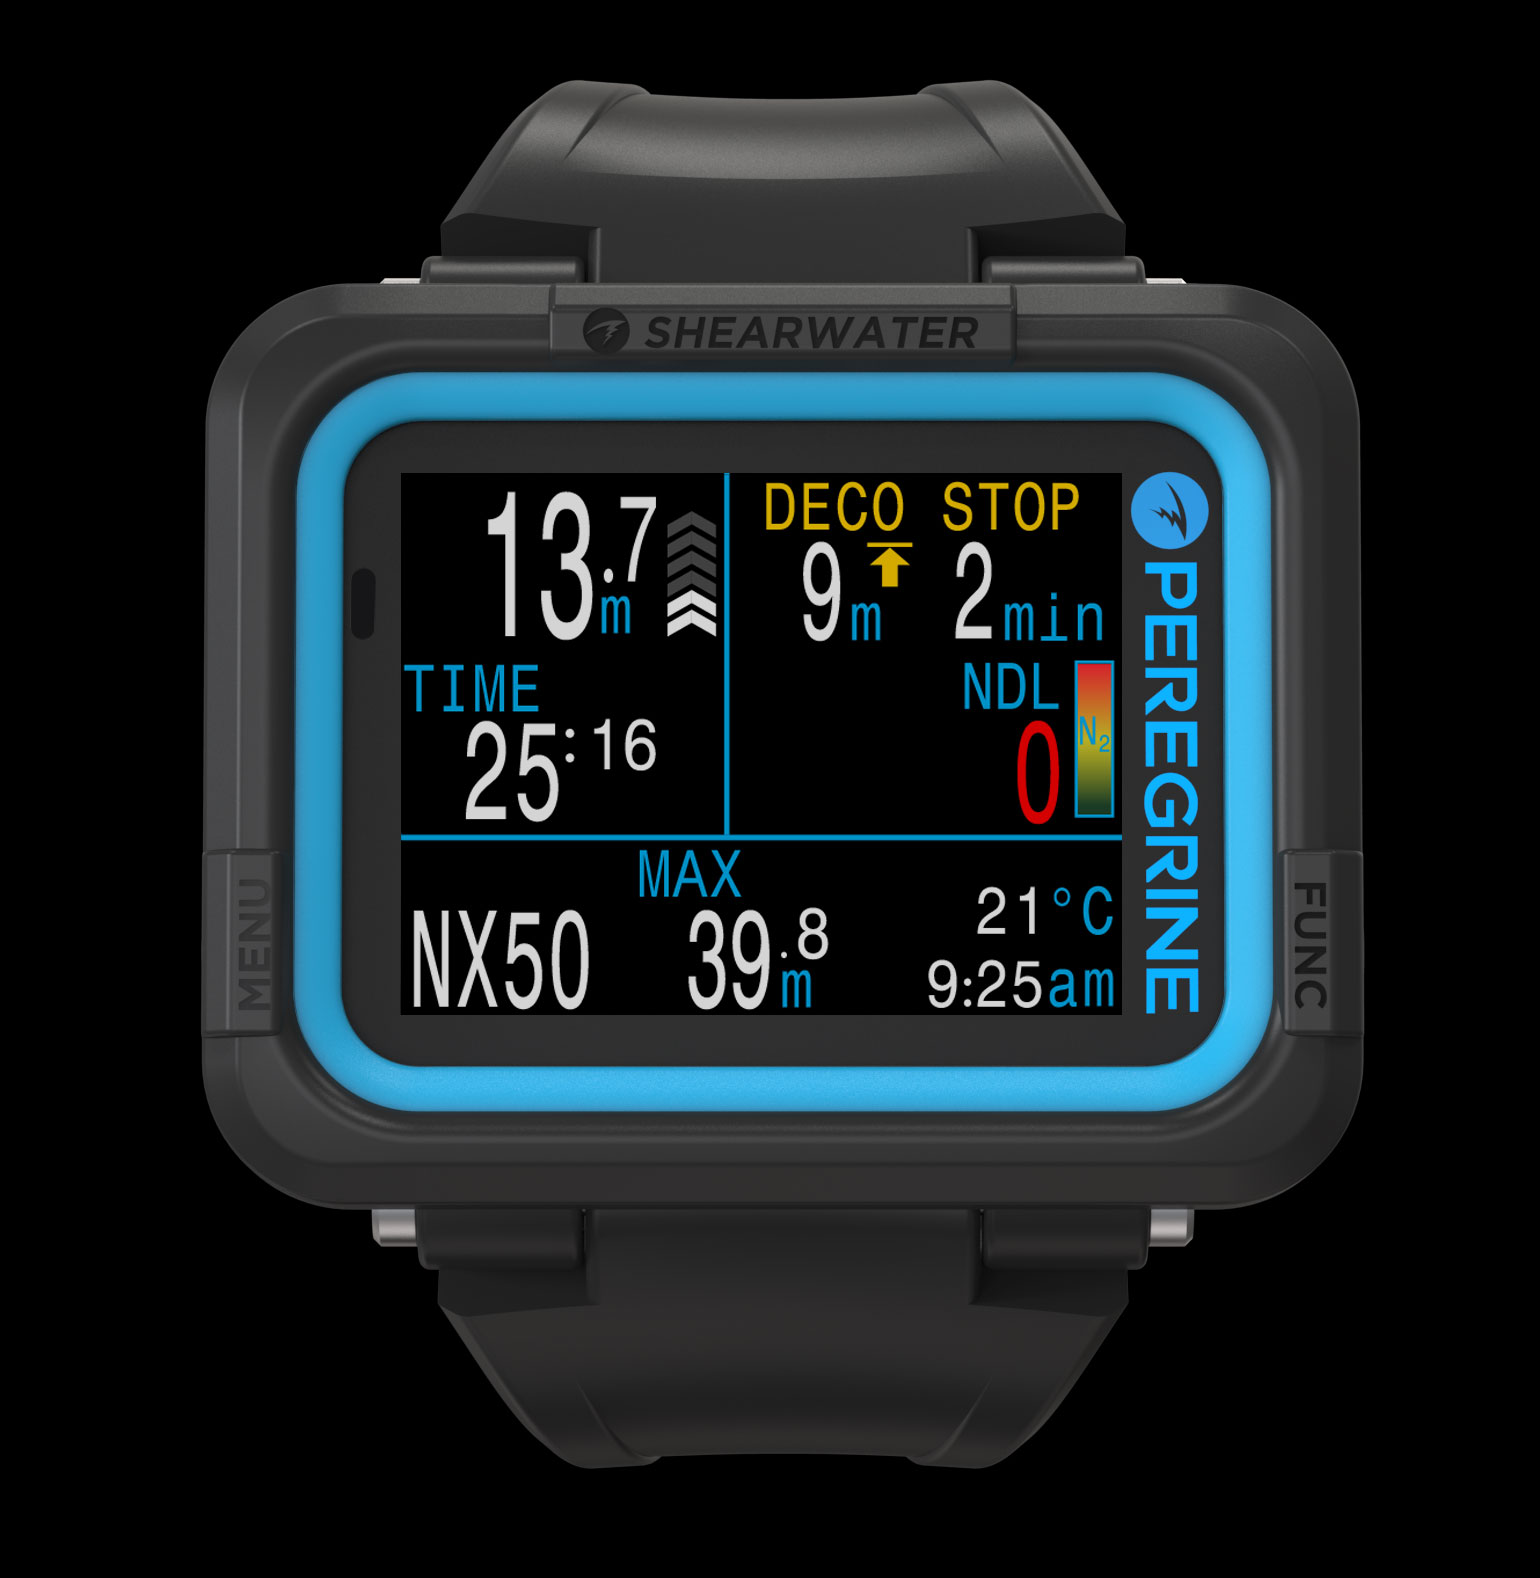
Peregrine_Front_NX50_Deco-1Peregrine Display (image borrowed from the Shearwater website, as I sadly have not been able to get into the water with my unit)

A few things jump about this display.   To start with, the legibility and ease of reading the info.    This is a modern display with a high degree of contrast and easily legible in all conditions.    Second, note the use of colors to highlight important information (eg, NDL reaching ‘0’ in this case).    And last and most importantly, notice how well the screen of computer displays information in an easy to read format.      As an added bonus, you can even change the font colors as per your preferences.

One of the most common issues I have seen with divers is while they may be familiar with the “regular” screen of their computer, they often cannot read the decompression screen that comes up if they exceed their NDLs – ie, the very information for which they bought the dive computer.     Shearwater’s experience with the needs of tech divers is clearly obvious here – in this example. the decompression information is clearly presented and cannot be confused with anything else.

It bears repeating – it doesn’t matter how high-tech your dive computer is:   if it isn’t intuitive to understand, especially in a stressful situation, it is not a good option.   The Peregrine is aces in this regard, and for these tangible improvement, I am willing to forego the convenience of a watch-sized form factor (same as the Perdix).

In terms of ergonomics, the Peregrine, like the Perdix, uses a 2 button interface.   I initially expected this to be fairly clunky, given my experience with other 2-button dive computers, but the interface is surprisingly intuitive.    It helps that Shearwater uses the display to give you very clear indications of what each button press is supposed to do.
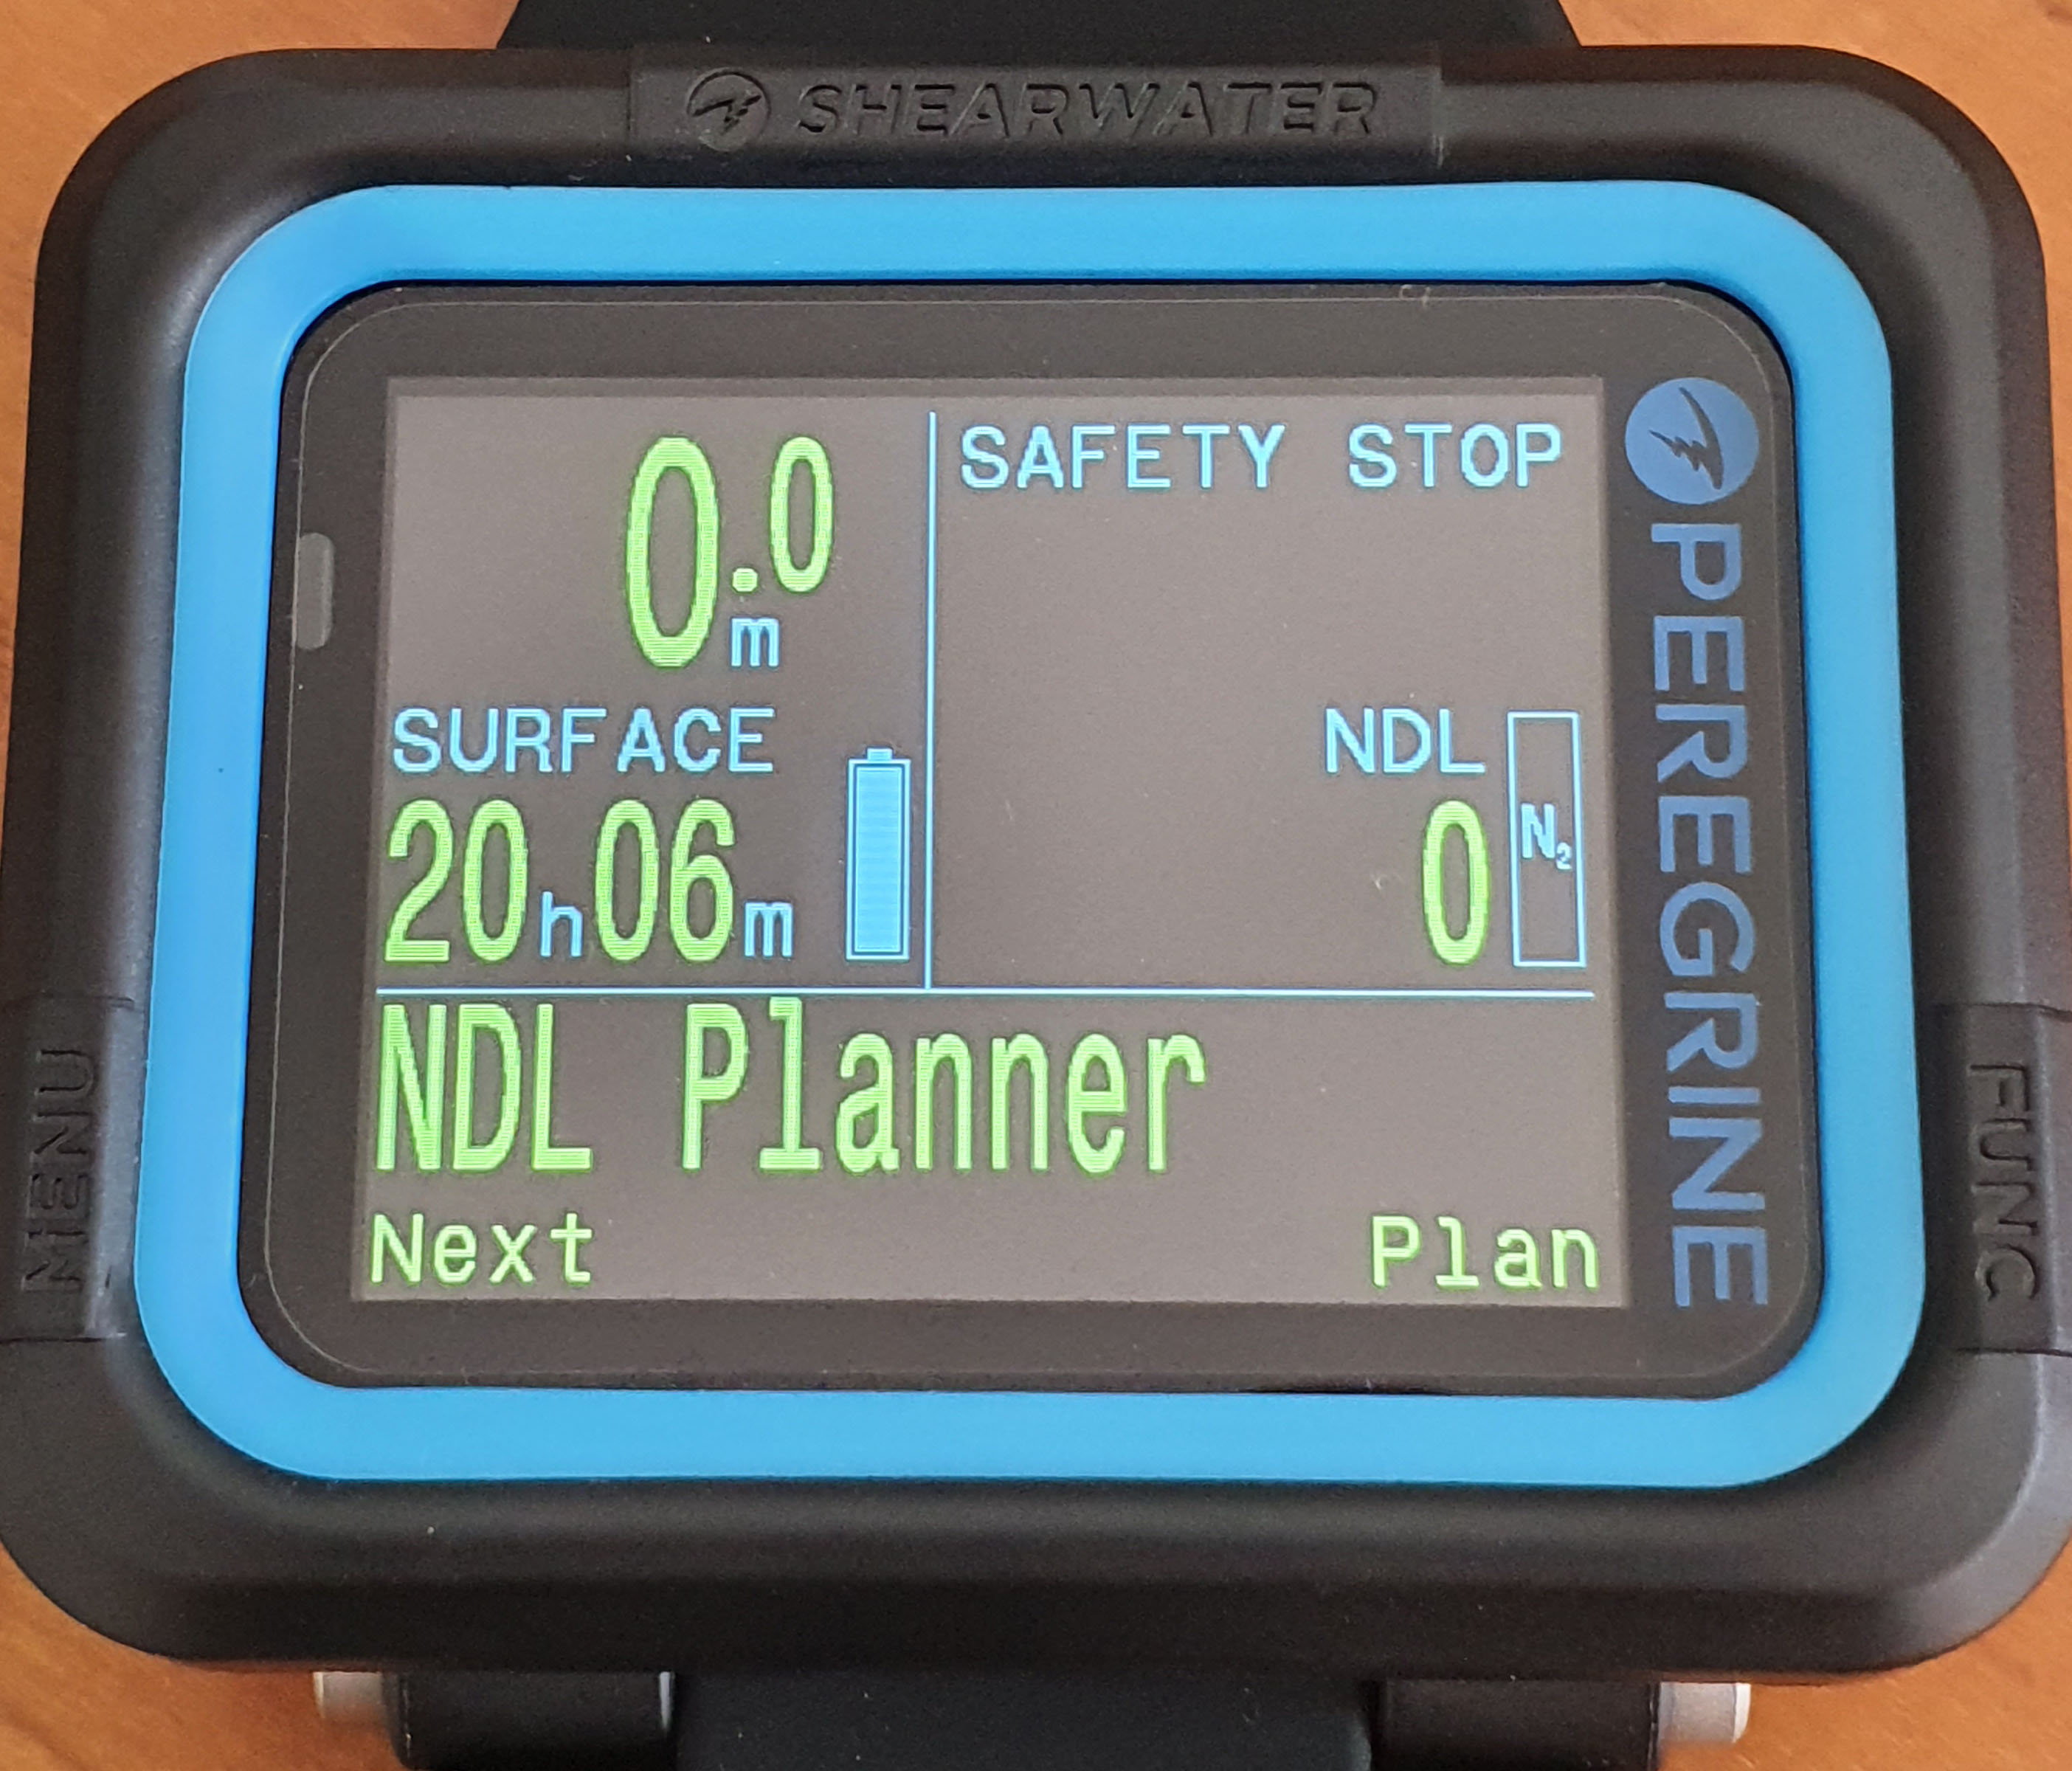
20200813_154611The labels at the bottom of the screen tell you very clearly what each button press does – in this case, pressing the left button takes you to the next setting, while pressing the right button goes into planning mode.    The logic is fairly intuitive and easy to pick up after a couple of uses.   Note the green color display – you can change font colors as well.

About the only downsize of this interface is that if you accidentally overshoot a setting, you have to scroll through the settings to get back to it.   But the buttons are have a great tactile feel (the ones on the Peregrine are actually a lot nicer than the ones on my Perdix) and it takes all of 5-6 seconds to do this, so it isn’t really a great loss.

FEATURES AND FUNCTIONS

While the Shearwater Peregrine dive computer is an “entry level” model, it is certainly not lacking in features.   Here is a short list of the essential features and functions.

For starters,  as you might expect from something carrying the Shearwater name, it is a full-featured computer designed for decompression diving.    Unlike many of the entry-level dive computers designed for recreational diving which often tend to penalize divers significantly if they go into decompression, the Shearwater Peregrine will work well if you decide to get into extended range or technical diving.    And of course, even if you accidentally go into decompression on a recreational dive, it will give you accurate information on how to handle your decompression safely.

Unlike its bigger brothers, the Perdix and Teric, the Peregrine does not offer trimix or closed circuit capabilities.   However, the Peregrine dive computers also offers a 3-gas Nitrox mode.  This lets you use 3 different nitrox mixes:  typically a bottom gas and 2 different decompression mixes for accelerated deco.    This makes it suitable for all air/nitrox based technical diving.

And of course, for recreational diving, the Peregrine has the standard modes:   Air, Nitrox and Gauge (no freediving mode but you would not wear a large dive computer like this for freediving anyway).     You have the option of setting both high and low PPO2 alarms, as well as depth and time alarms.   One cool feature:  you also get a vibration mode, in case you are diving with a thick hood and unable to hear audible alarms.   Pretty neat!

The computer is based on the Buhlmann ZHL-16C:  the industry-standard algorithm, proven and refined over decades to offer the safest possible approach to decompression today.      As is typical for most dive computers, you get 3 different conservatism settings – Low, Medium and High.      Even at its lowest setting, the Peregrine is not excessively liberal – so this actually is a setting that may work for a lot of divers, depending on their preferences (see my article on How to Pick a Dive Computer for a more in-depth discussion on conservatism).

However, what sets the Peregrine apart is the ability to customize the GFLow / GFHigh percentages, if you so desire – this is a fantastic feature and is absolutely amazing to find it in this price range.
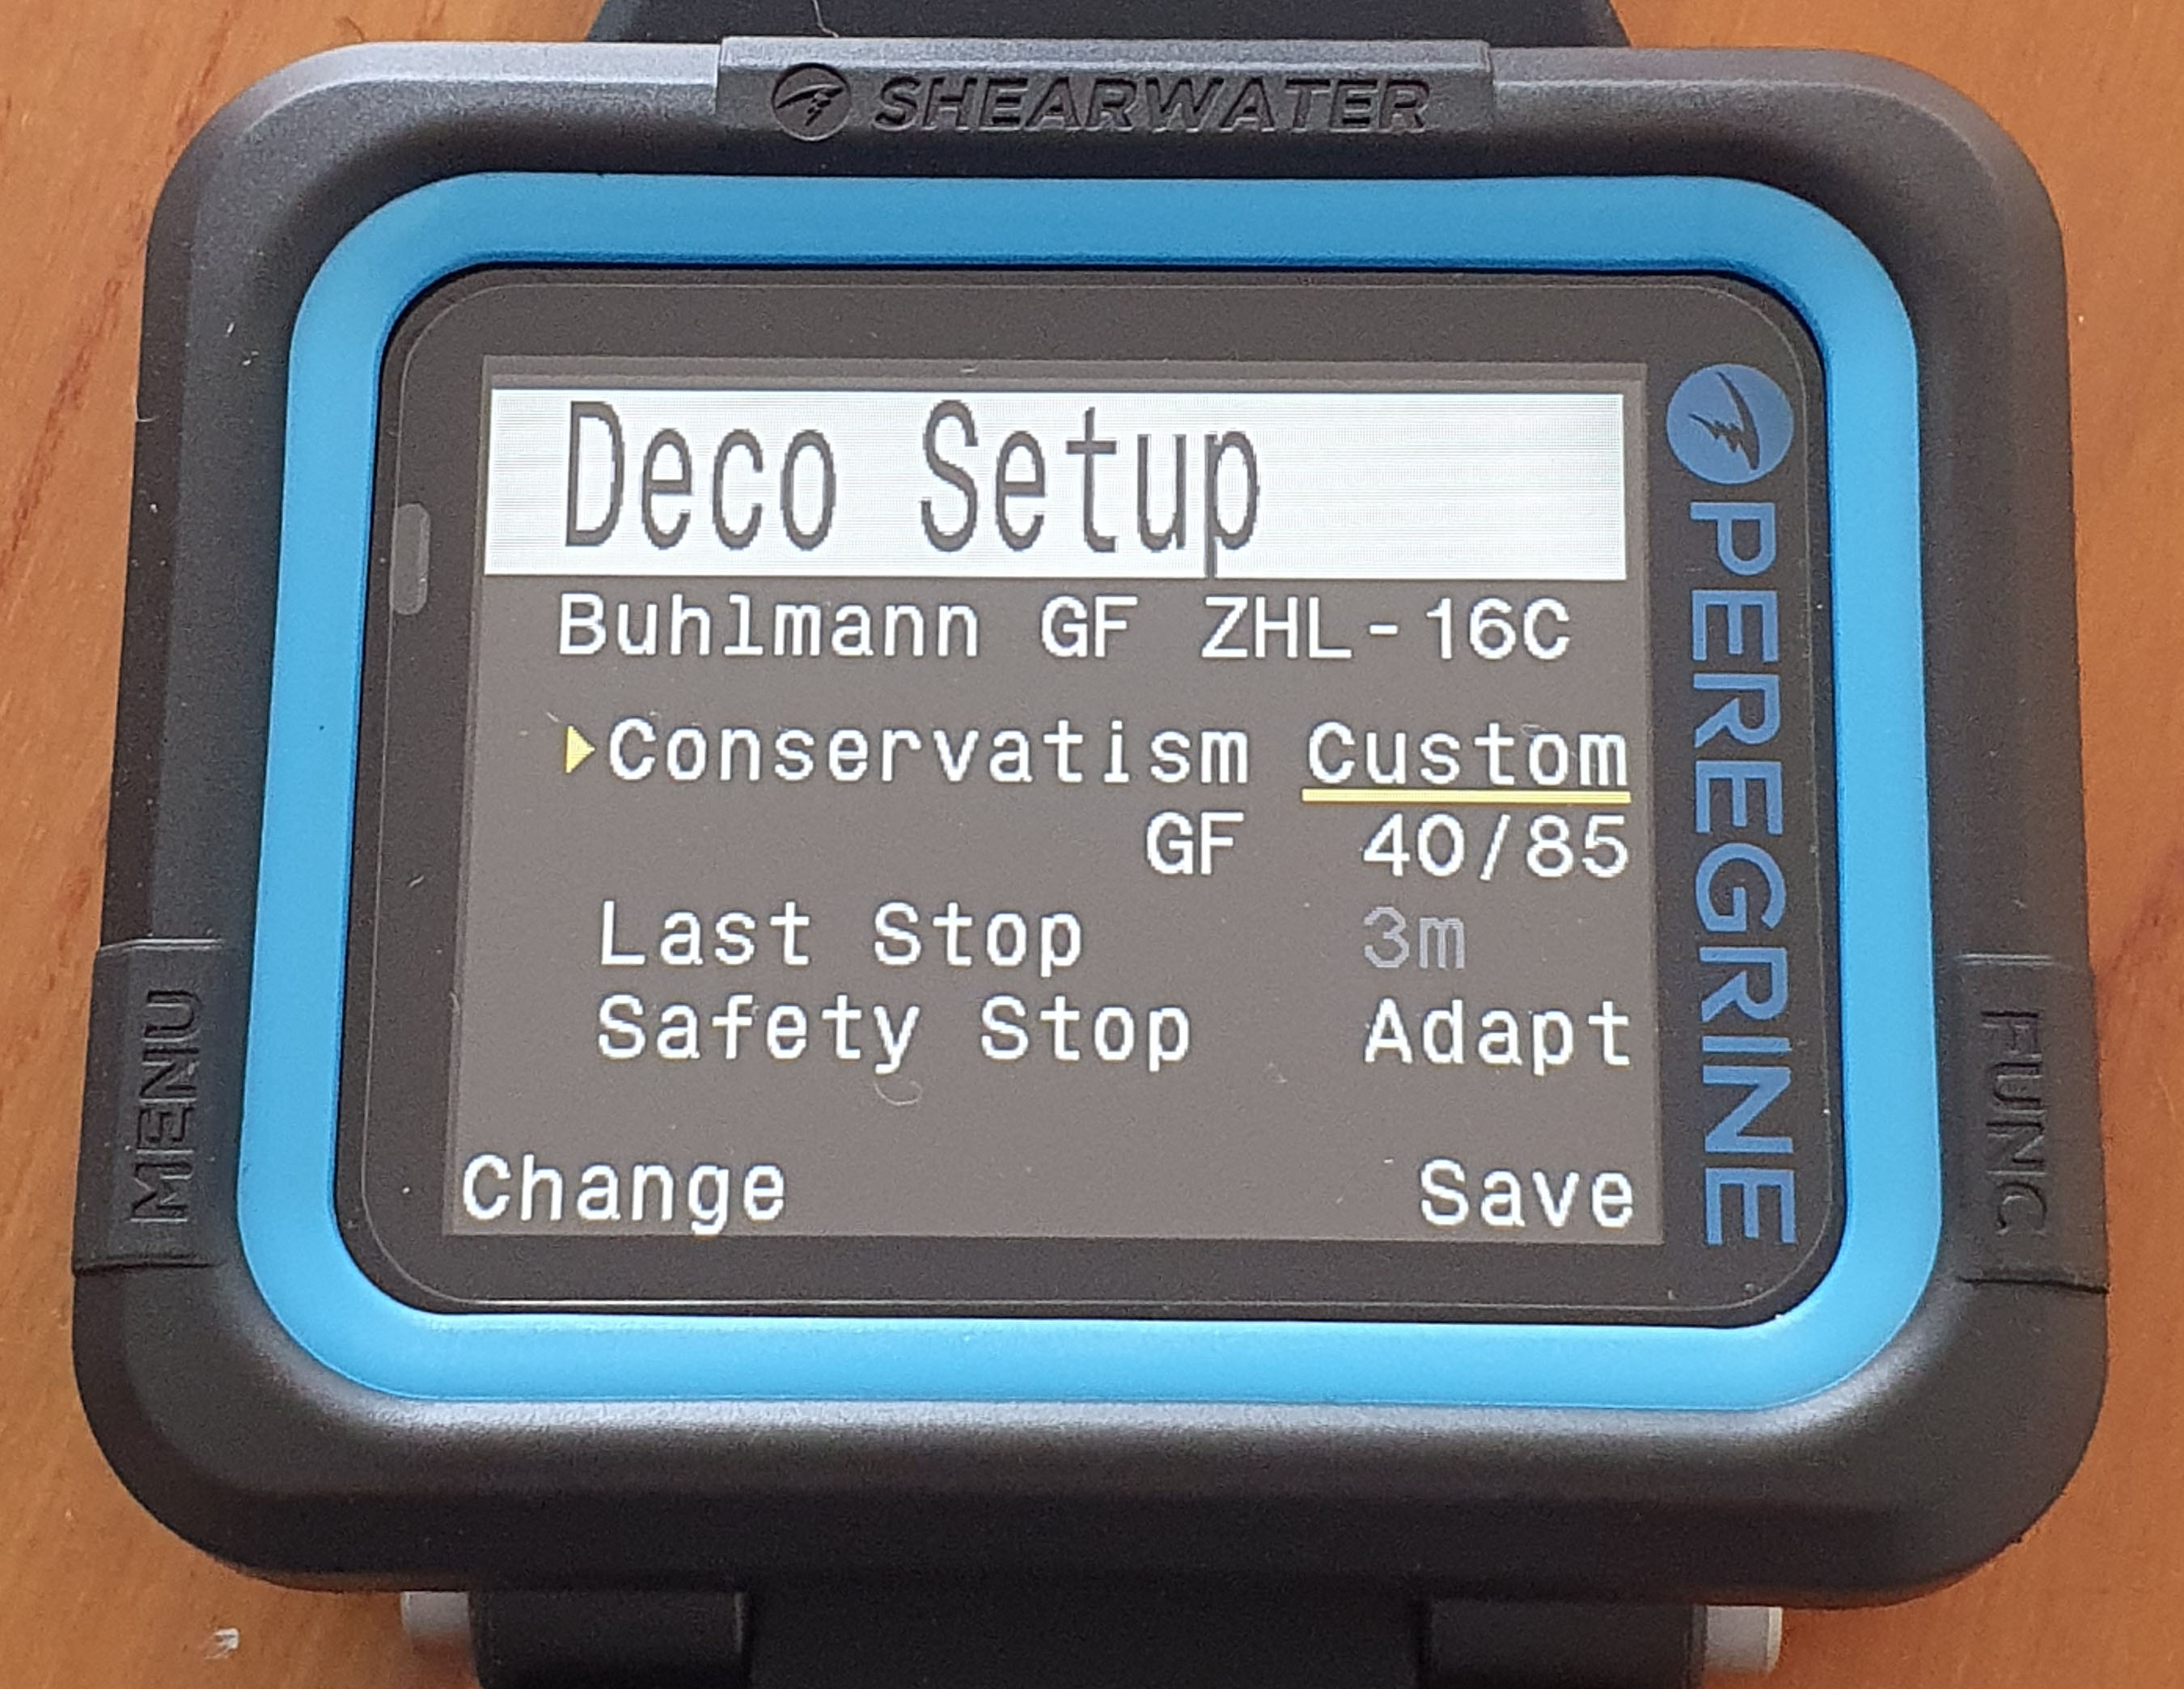
deco-editAbility to adjust the conservatism setting on the Shearwater Peregrine

Do note that this feature is for experienced divers with an in-depth knowledge of decompression theory as well as their own personal risk tolerances – so I will advise not messing with it unless you are very sure you know what it does (hint:  if you have to ask someone what settings to use here, you are not ready to use it.   When you are ready to use this feature, you will know how to set it, and you will be thankful you have had this feature).

In addition, the Peregrine also checks off my other vital criteria – a battery that is either rechargeable or user-replaceable.   Unlike the Perdix, which uses a user-replaceable AA battery, the Peregrine offers wireless charging – place it on the provided USB mat and it charges.     The mat is slightly smaller than the dive computer, so easy enough to pack and carry on a trip.   For what it is worth, the Peregrine also seems to charge off the wireless charger I use for my mobile phone.

The Peregrine also has Bluetooth connectivity with Shearwater’s desktop or phone (Android/iOS) app, which lets you upload your dive logs to Shearwater’s cloud-based server and view them on the app.
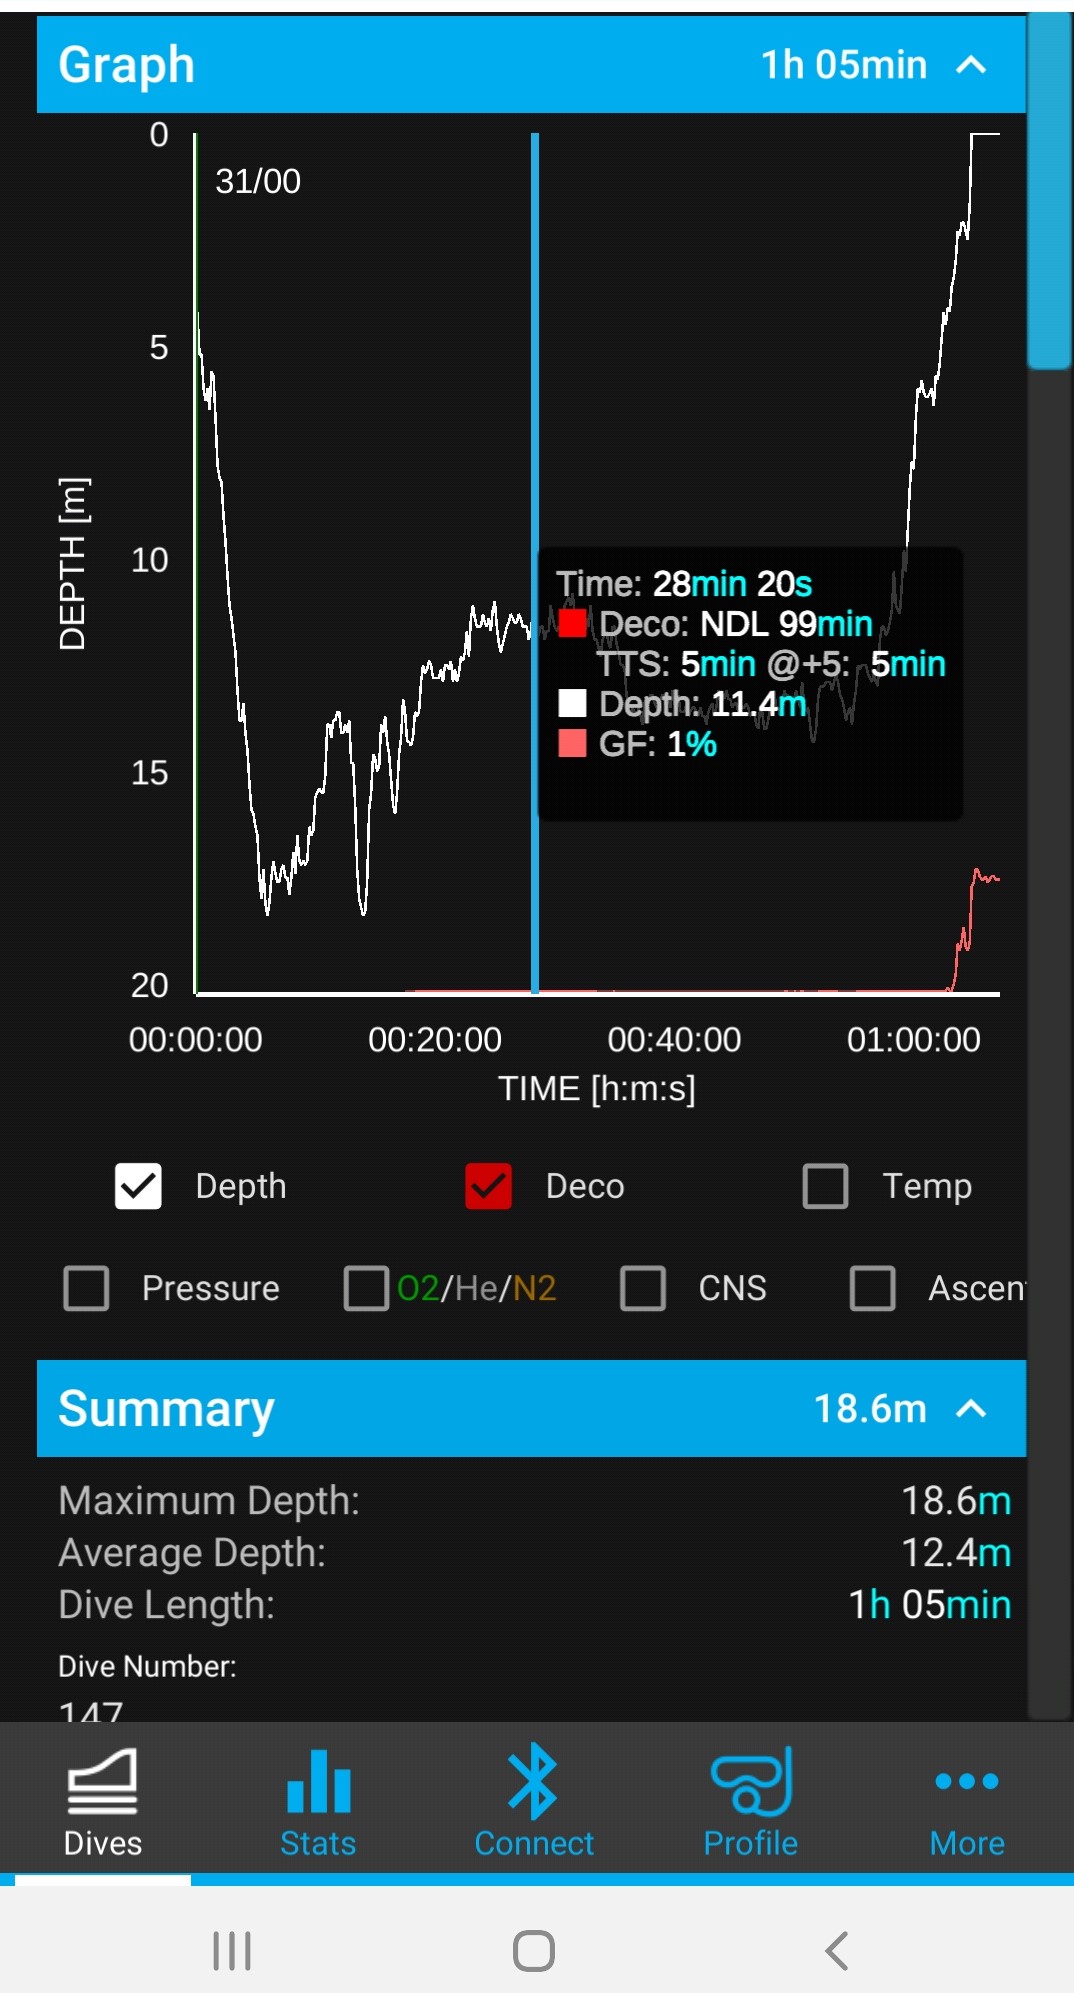
Screenshot_20200813-212446_ShearwaterDisplaying the dives on the Shearwater app

The dive log on the Shearwater app shows you your profile as well as tissue loading at any time.   This log is from a Perdix, but the Peregrine information is very similar.

The app also allows you to upgrade your computer’s firmware.

Unlike the Perdix, the Peregrine does not offer a digital compass or air integration.  While neither of these features are essential, they are certainly nice to have.   However, to be fair, the computers offering these features are all one entire price tier above the Peregrine in price as well (typicall Rs 10,000 – Rs 15,000 more expensive).

USAGE

While I didnt have a chance to take the Shearwater Peregrine dive computer into the ocean for a dive, I did do a little freediving with it to see how it behaved.   Also, a lot of my experience with the Perdix translates over directly to the Peregrine as well – after all, both these operate on more or less the same platform.

From an algorithm point of view, there is nothing to say about the ZHL-16C – as mentioned earlier, it is the gold standard of decompression algorithms.      So what remains is ease of use, along with features.   And “ease of use” has always been a strong point of Shearwaters, given their origins in tech diving.

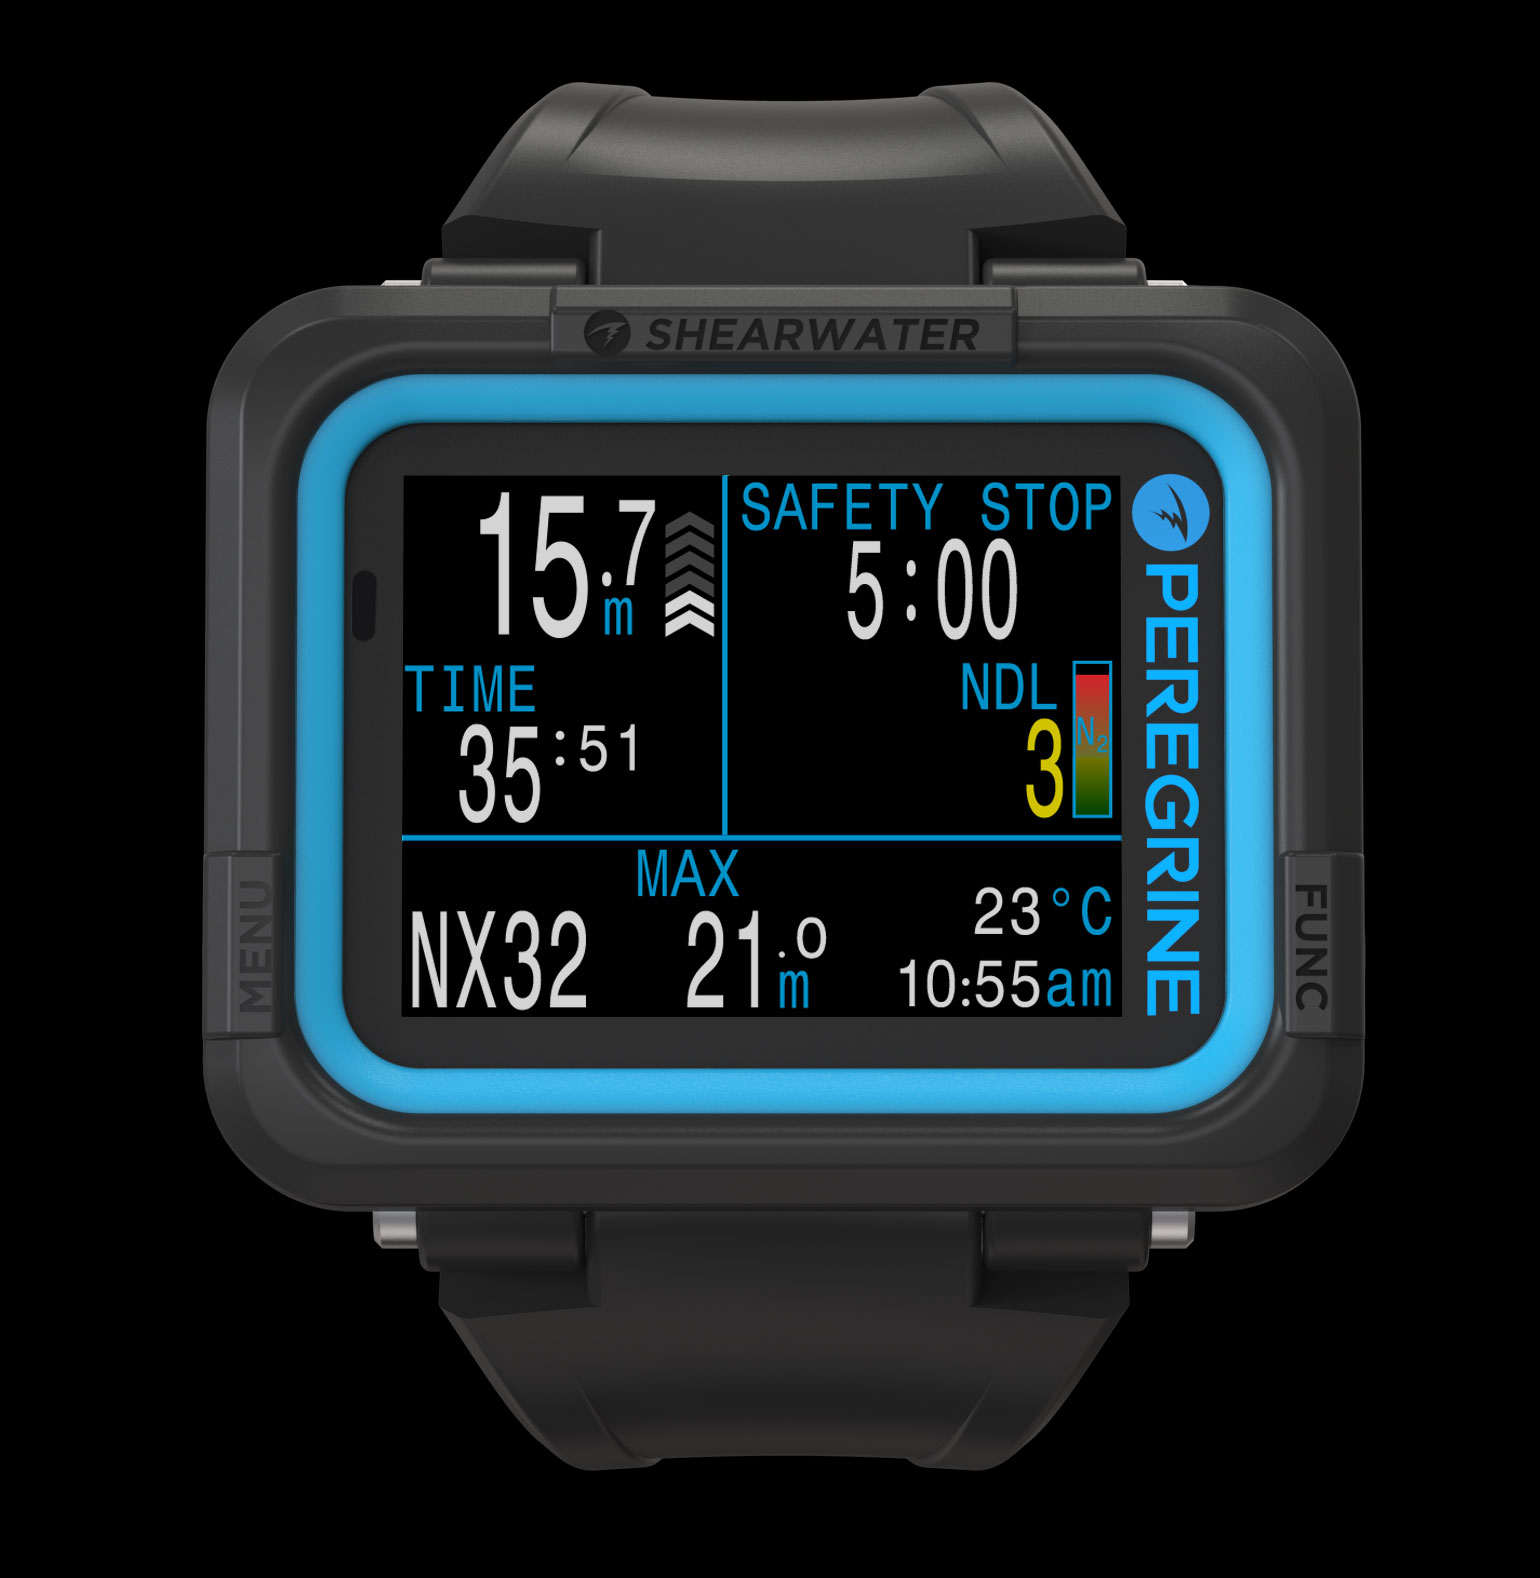
Setting up a computer before the dive is very easy – it is a few buttons to adjust the nitrox and once you do, the nitrox percentage is clearly visible on your display.        As with most computers these day, the Peregrine turns on automatically once you descend to about 1m of water.   And as discussed earlier, the display is super legible and easy to read.

Peregrine_Front_NX32_15.7MPicture courtesy Shearwater

The Shearwater display breaks up into 3 panels.   The upper left panel shows you the dive depth and time.   The upper right panel shows you decompression information (critically, the no-deco info and deco info are displayed in different locations, to prevent you from confusing the 2 numbers).     And the smart use of color coding highlights important information – eg, that you are running low on NDL in the photo above.

The bottom panel can be customized as per your preferences.  On my unit, I have replaced the time and temperature with average depth, which is useful for me to estimate my air consumption and overall nitrogen loading (just because my computer is doing that for me doesn’t mean I switch my brain off!).

You can also get a visual display of your tissue loading, for each of the 16 compartments in the Buhlmann model – while this is typically not the most actionable of information, I find it a very useful learning tool to correlate nitrogen loading from actual diving to the theory of decompression.   Seeing how the graph changes over the course of a diving vacation, or even after a shallow dive vs a deep dive can be very instructive.
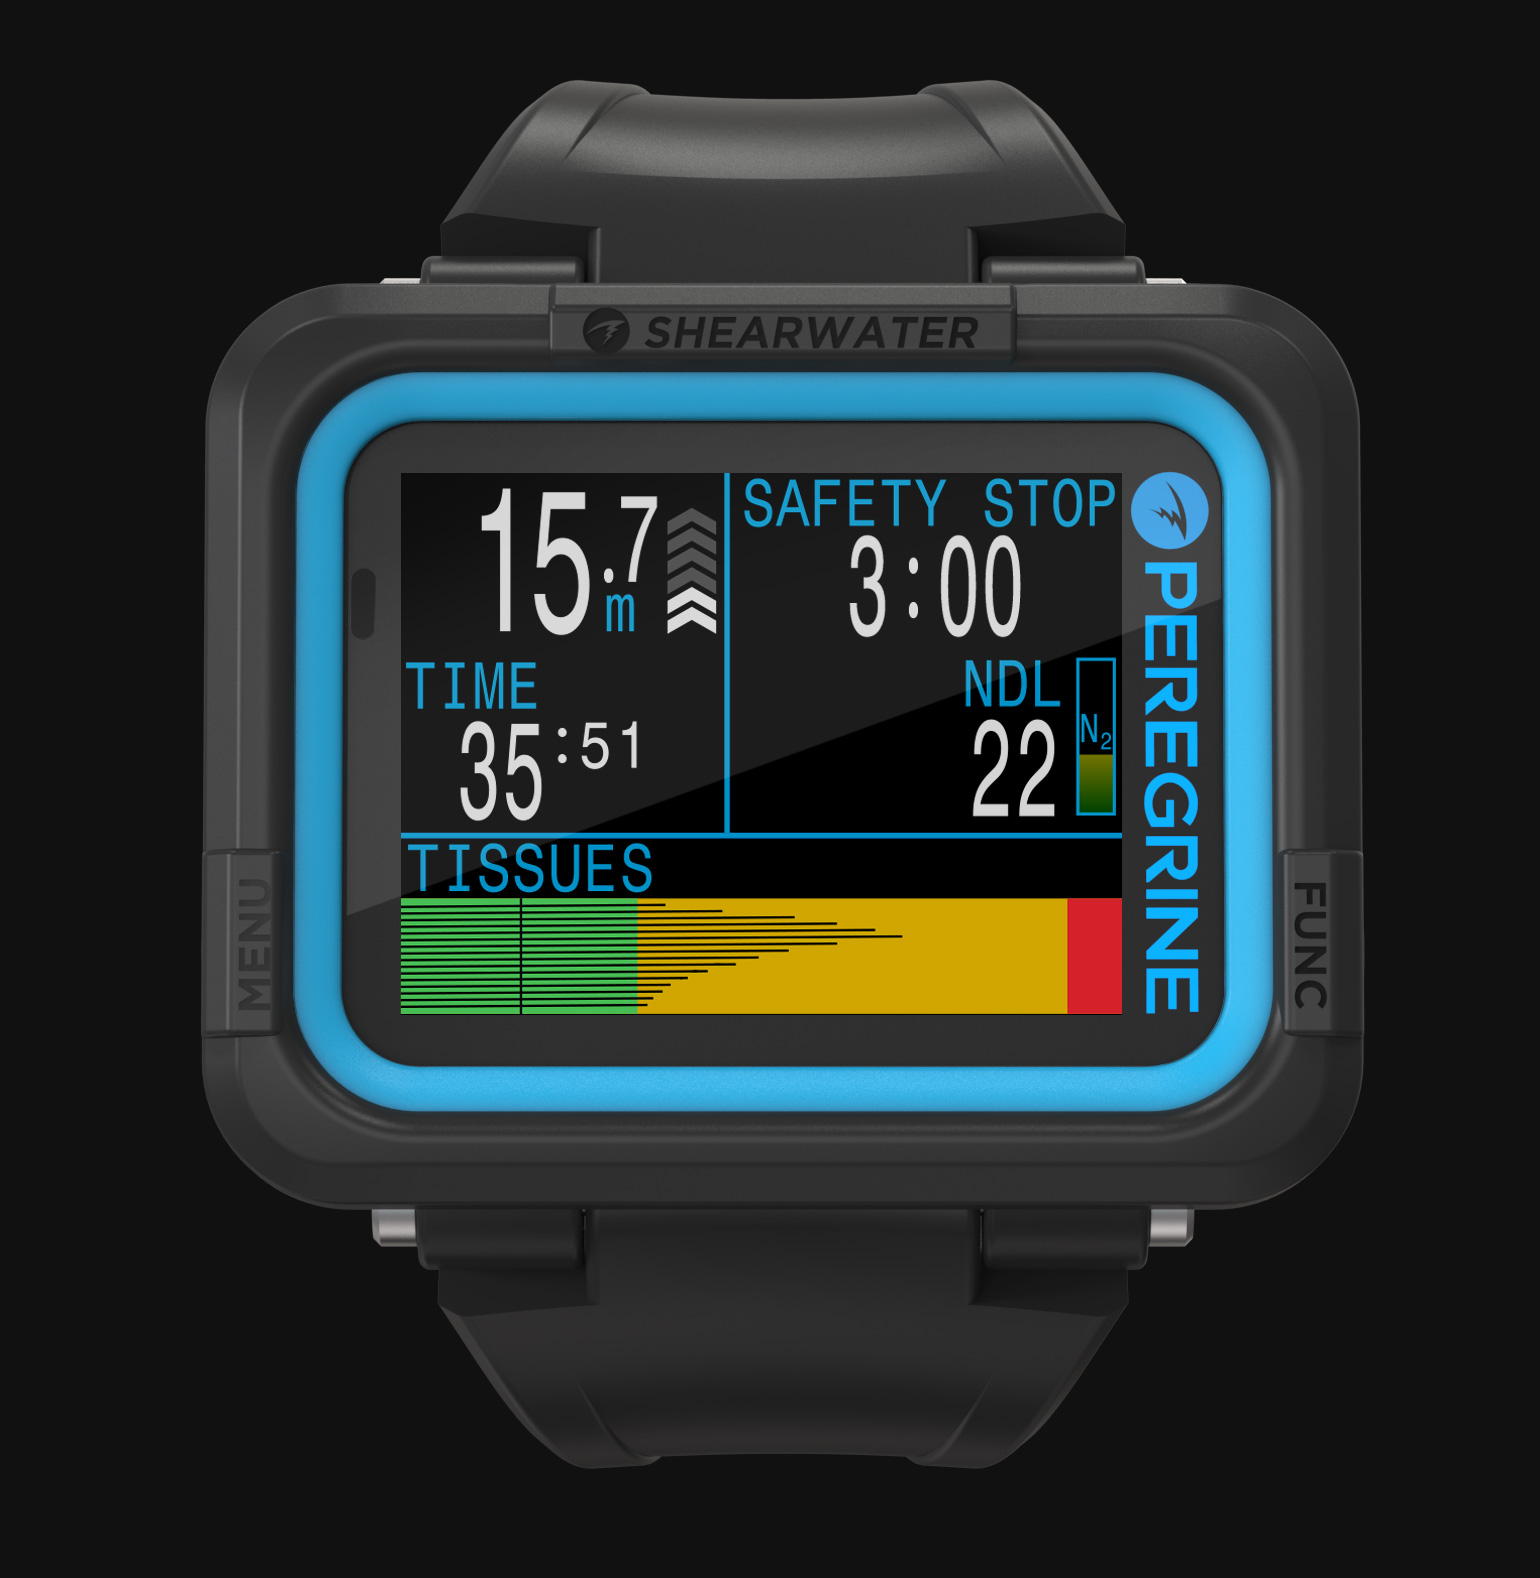
Peregrine_Front_Air-15M_TissueTissue loading as a visual graph – as always, color coded to make it easy to understand

The Shearwater also has a very easy to use dive planning mode – you can choose to plan your dive as if it were about to start immediately or after some time (eg, if you still had some more surface interval to complete), and figure out your NDLs accordingly.
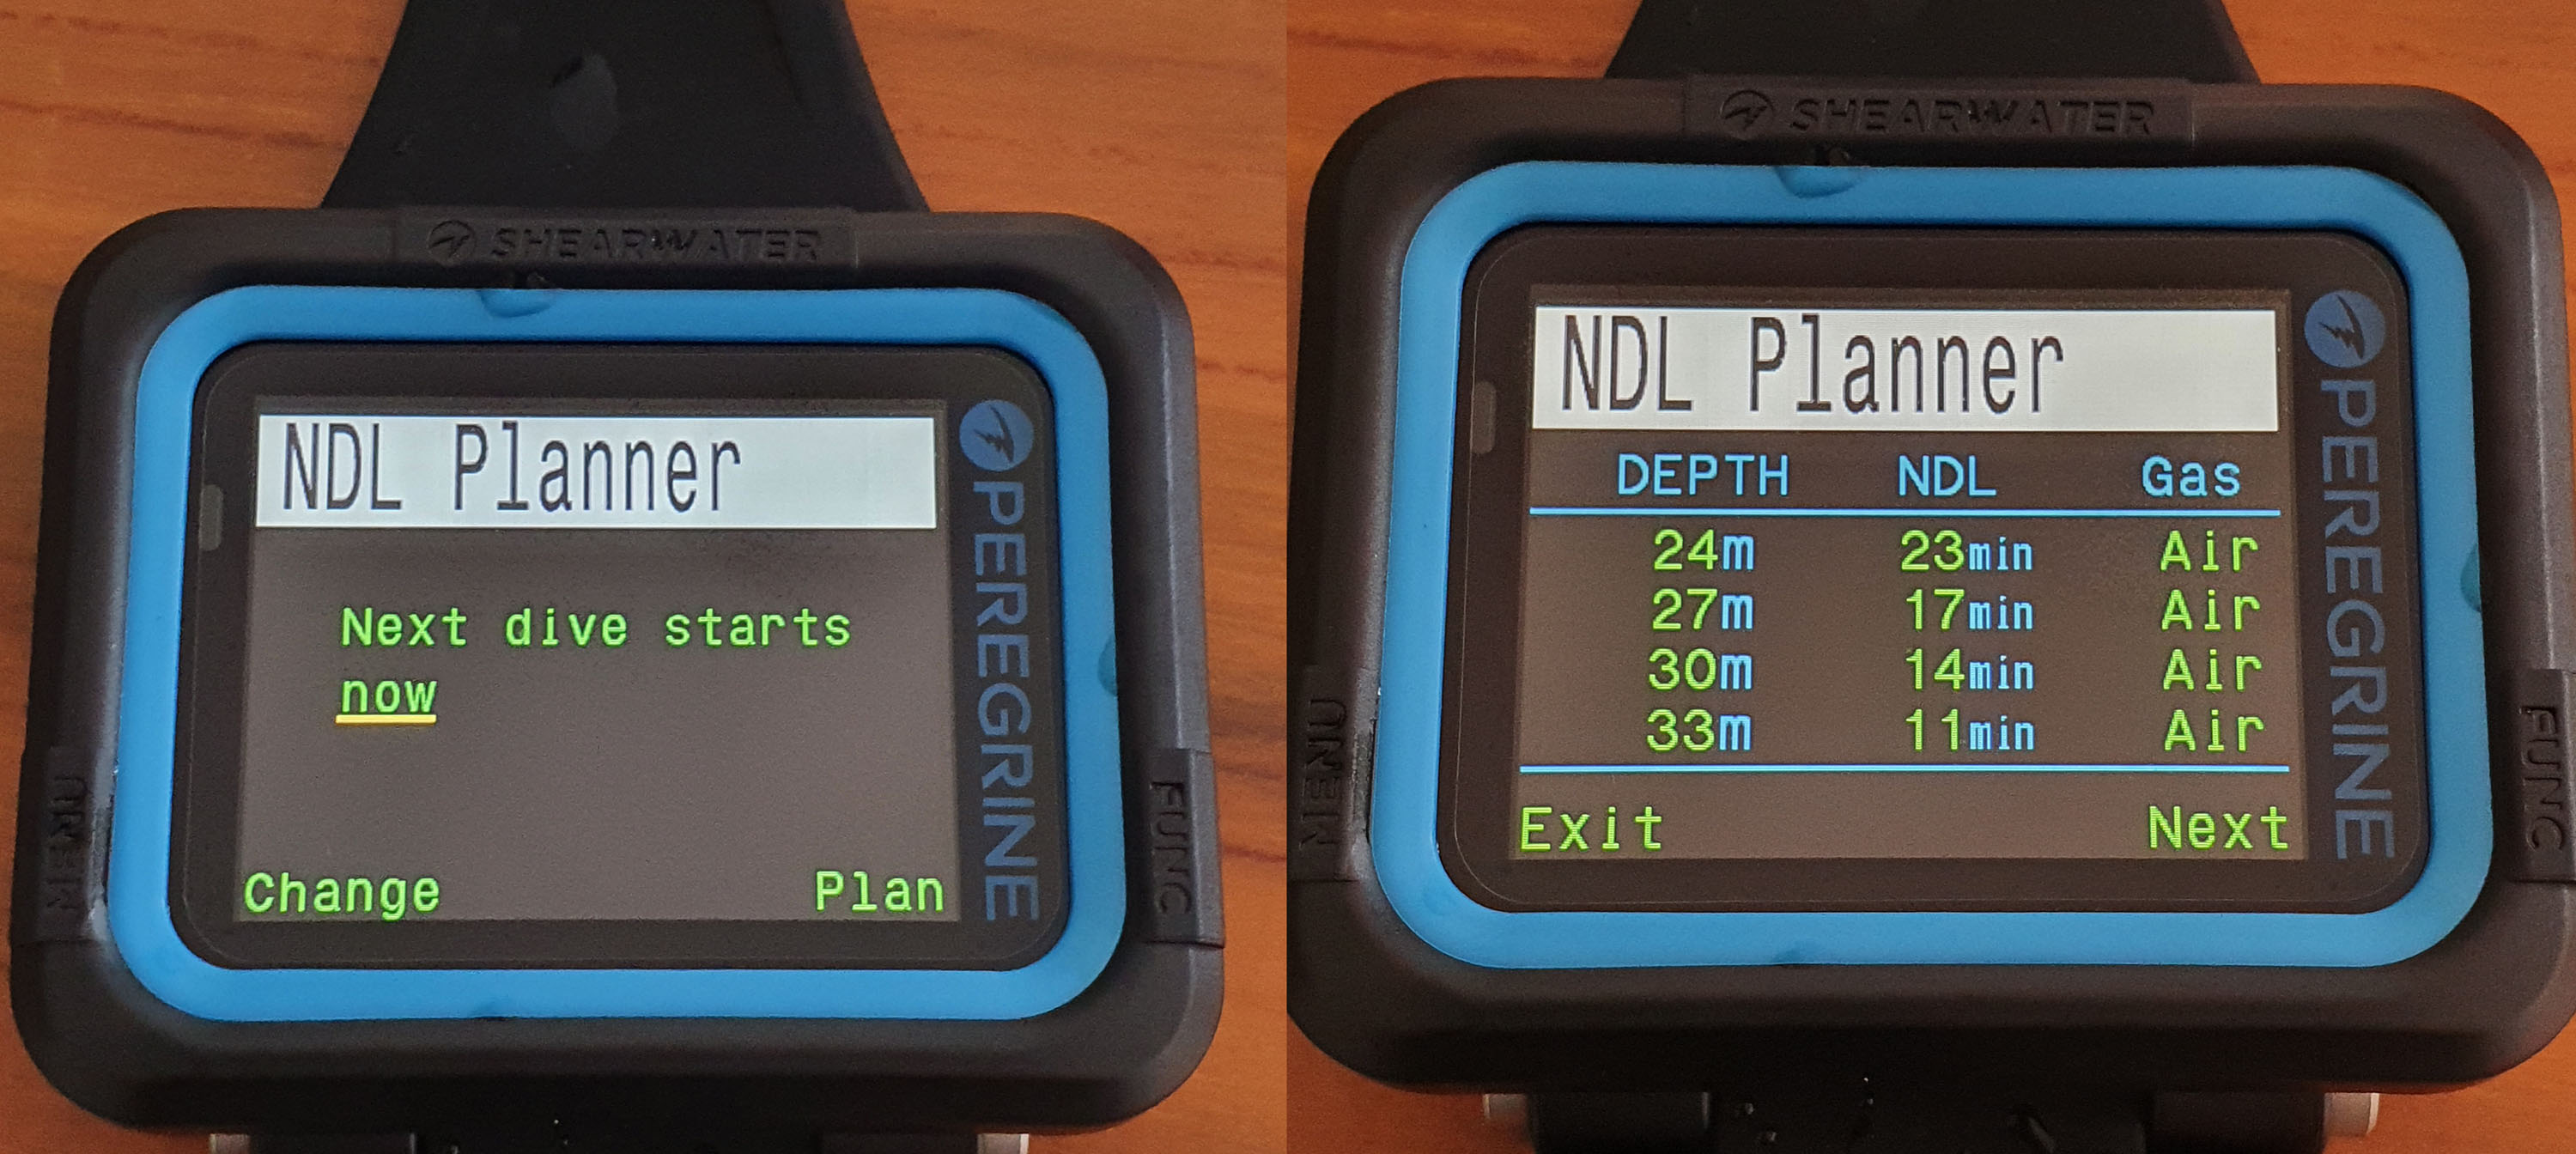
20200813_173040Use the screen on the left to set when the dive is starting (now or later) and then, on the subsequent screen, you can see your NDLs

And as mentioned, the solid, easy to press buttons make the entire experience of navigating the Shearwater Peregrine dive computer an absolute pleasure (users of the Suunto Zoop, for example, will know and appreciate what I mean!).   Having used and reviewed a LOT of dive equipment, I cannot describe how happy I get when I see manufacturers getting ergonomics and usability right – these are things that you appreciate every single minute of use, and mean far, far more to me than a laundry list of features which are a nightmare to actually use.

Lastly, battery life is rated up to 30 hours, give or take, depending on screen brightness.   I haven’t had a chance to test this but after a few days of playing around with the dive computer quite thoroughly, including some water sessions, the battery indicators still reads full.   So I expect it to be more or less as per spec- this means you can easily get one dive trip out of it, without needing to faff around with charging the unit every day or two.

SUMMARY AND CONCLUSIONS

So how does the Shearwater fare against the competition and is it worth buying?

At a price of Rs 36,000 (at the time of writing this article), the Peregrine is more expensive than the Aqualung i200 and the Mares Smart, both of which have an MRP of around Rs 27,000.

However, while it may be marketed as an “entry level” computer by Shearwater, that is only when compared to Shearwater’s offerings.     As computers go, the Peregrine is far more advanced than typical entry level computers – it may not have all the bells and whistles of its bigger brothers, but when it comes to basic decompression horsepower, it stomps over everything else:  decompression, 3 gas tech open circuit, customizable deco profile, a fantastic color display – these are all features you typically find on computers costing well over Rs 60,000.

As you gain skills and expand the scope of your diving, it is possible for you to outgrow the entry-level computers fairly quickly.    However, the Peregrine’s advanced deco capabilities means that it will stay with you for everything short of rebreathers or trimix.    Personally, this is a tradeoff I would be very happy to make:  while the absolute entry-level computers do get the job done, the Shearwater is a big step up in terms of ease of use and also scalability, in terms of growing with you as a diver.

That said, there are a couple of features that it is missing – air integration and digital compass.   These are both nice-to-have features for sure and given a choice, I would have preferred a dive computer which had these options.    But keep in mind that all dive computers with these options cost a lot more (Rs 45,000 and higher, and that excludes the cost of the air transmitter) – and those computers also lack the same functionality when it comes to core decompression features.

So as far as tradeoffs go – compared to the next pricing level, you are gaining a far more advanced computer and saving a significant chunk of money but by giving up on a couple of nice-to-have but non-essential attributes.     Is that a fair trade-off?   It really depends on your personal preferences.

Ideally, I would rather pay more and not to make a trade-off at all.    But if I had to, I’d pick the Shearwater options.  The way I look at it:   I can always get a small compass and clip it to the side of the computer’s strap or to my BCD, if need be (and while it may be important to me, I also realize a compass isn’t something most recreational divers use a lot).     And while I really like air integration and would dearly love to have it if given a choice, I would pick a customizable algorithm and ability to handle multiple gas mixes over it:  one is “nice to have”, the other actually impacts my diving in a meaningful way.   And then there is the matter of the price difference too – skipping these extraneous features saves you a lot of money.

What the Peregrine lacks in bells and whistles, it makes up by in core functionality that no one else offers for anywhere close to this price:  you are getting most of the core functionality of the Perdix, for only a modest premium over an entry-level computer.

Very highly recommended – and definitely makes our “Recommended Gear” list!

Purchase

DIVEIndia is an authorized distributor for all Shearwater products, including the Peregrine, and you can use the link above to purchase your own unit.

Do note, however, that our reviews are not affected by the fact that we sell the item – rather, we only sell the items that we like.   We sell Mares, Aqualung, Tusa, Scubapro, Shearwater and more – between them, there are enough quality dive products that we have absolutely no need to push gear that isn’t up to the mark.   The stuff we recommend is the stuff that we believe in ourselves.

How to pick a dive computer

By Articles, Gear, Reviews

HOW TO PICK A DIVE COMPUTER – A BUYER’S GUIDE

By: Vandit Kalia (Vinnie)

One recurring theme that you may have noticed in my articles – and if you do any course with me – is my tendency to get on a soapbox and talk about divers taking ownership of their own safety by engaging their brains.     That is the windmill I have chosen to joust against, and, for better or worse, will continue to do so.

But a fundamental requirement to taking ownership of your own safety is having all the information needed in order to do – information drives decision-making, after all.     What information are we talking about ?   Dive time, depth, no deco time and air left at minimum – direction and air consumption rate as nice-to-have extras.       This is the information you need in order to make an informed decision about your dive, and you get this information from a dive computer.

I really cannot stress this enough – if you are diving, you really should own your own dive computer.   And no, I don’t say this because we sell dive computers.   We make a few thousand rupees on each sale.  It is hardly the sort of stuff that is going to let me retire to a tropical island.

Now, many people – especially those used to diving in tropical locations – will be used to having the DM lead the dive, and often, the DM also has the dive computer and manages the dive profile for everyone.      Let’s face it – ideal or not, this system works and thousands of people dive daily following this approach.   But there is a reason this is not ideal and is not recommended:  when it works well, it works well.   But if something goes wrong, it compounds the dangers.     What if you get separated from the group?   What if you end up going a little deeper during each dive, for multiple dives?     Most importantly, this habituates the diver into doing “trust me” dives, and prevents them from engaging their brain on each dive – this significantly hampers their development as a diver because if a problem happens, they have not developed the judgement or critical thinking skills or discipline needed to solve the problem.

That is why I push dive computer ownership more aggressively than, say, doing a Specialty Course with us (which earns us more).   It is one of the best investments you can make in controlling your own safety and eliminating variables which can add complexity to a problem.

So the next question (and one of the most common ones I get asked over email or Whatsapp) becomes – what dive computer should I get ?   There is a bewildering array of dive computers out there in the market, ranging from under twenty thousand rupees to well over one lakh (a few hundred dollars to well over fifteen hundred).

The purpose of this article is to demystify dive computers and give you the information you need to pick the dive computer that works very best for your budget and preferences.

dc1


THE FUNDAMENTALS:  NO-DECO INFO & DIVE COMPUTER ALGORITHMS

The main reason you get a dive computer is to know how much no-deco time you have left – everything else can be figured out through some combination of a dive watch, depth gauge, SPG and/or compass.       So it stands to reason that this should be the most important thing, right?     Well, yes and no.

Yes, it is indeed the most important thing.    However, the good news is that virtually all dive algorithms being used today are robust/reliable enough to provide safe information to most divers.     Let’s talk about that in a little more detail.

As you guys may remember from your Open Water course, the decompression model is basically an empirical curve that is fitted onto existing data about safe/unsafe dive profiles.  It is essentially a probability curve which predicts the risk of getting DCS for a dive to a given depth/time.     The No Deco Limit is basically a point along the probability curve where the risk of DCS is deemed to be very low.

The most popular – and industry standard –  decompression model is the one you learned about in the Open Water course:  it was created by John Haldane and refined further by Dr Albert Buhlmann, into its current iteration, the ZHL16 – most computers today use a variant of this model, with some tweaking done as per each company’s preferences.     Another popular model is the RGBM model, developed by Dr Bruce Weinke, which focused not just on the traditional tissue absorption model but also on controlling the build-up of silent bubbles.      In addition to that, several other brands have added more significant tweaks, by trying to factor in things like age, heart rate, etc and using those to adjust the No Deco Time.

While a detailed comparison of the various models is outside the scope of this article, and the arguments of the pros/cons often resemble holy wars when it comes to the fervor of the participants on each side, it is worth noting that at the recreational level, either of these models is perfectly capable of keeping you safe.        Yes, that is correct – from a safety point of view, there is no evidence that indicates that one model is better than the other for recreational diving.

What does vary between dive computers is how conservative or progressive they are.     On a weeklong dive holiday, you might find that 2 dive computers often diverge by as much as 5-10 minutes when it comes to no-deco time.      At this point, I can hear you going “wait a minute – how can 2 dive computers be so different?   Which one is correct?”

Remember – there is no correct answer.   These are just models using probability curves and taking into account multiple factors to arrive at a single number – what you see as being a higher or lower number is merely a function of which factor has been given more or less weight.         All these models keep you safe – they just do it differently.     So “which is correct” is the wrong question to ask.

A more appropriate question is – which one is better for me:  more conservative or more progressive.

As a general philosophy for diving, we can all agree that “more conservative is better”.   But as with everything in life, you reach a point of diminishing returns.    That’s why we don’t wear helmets when we drive, or elbow/knee pads when we walk, for example.    So if we are on an expensive dive holiday to a dream destination, do we necessarily want a dive computer which cuts out dive time short by 10-15 minutes on each time?

In my experience, experienced divers often have a good idea of which algorithm has worked well for them and are also aware of any personal risk factors that may apply – they would be better off with a more progressive option, as this would let them build in additional safety margins if needed, and give them more bottom time otherwise.   On the other hand, beginner divers may still be developing their diving discipline/awareness, and so may benefit from a more conservative dive computer, which gives them a margin for error (which, to be clear, is not something you rely on!).      Also remember – you can add conservatism to a more progressive dive computer via its settings, but you cannot make a conservative dive computer more progressive.

So my recommendation is that if you think you have the discipline and awareness to add your own safety margins when applicable (eg, if you are tired, been in a strong current, etc), then a progressive dive computer would be fine for you.   If you are a diver who is at greater risk of DCS (age, weight or other factors), or want the comfort of added safety margins, then a more conservative option would be better for you.

FEATURES OF A DIVE COMPUTER

So if a cheap dive computer keeps you just as safe as a more expensive dive computer, why is there a price difference? The answer is simple – due to features. Some features are virtually essential and greatly enhance the utility of a dive computer (and make it less likely that you will outgrow it). Others are convenient and nice-to-have. And yet others are a matter of personal preference.

So here is a list of popular features and some details about them, which you can use to determine whether or not you want them.

Nitrox:

In this day and age, you should not buy a dive computer that does not have Nitrox mode.    Even if you are not Nitrox certified now, you may choose to get Nitrox certified later (and there are very good reasons for doing so:  namely, extended bottom times) – and having a dive computer that allows you to dive with nitrox will help.  Dive computer manufacturers realize that – it is very hard to find a computer that does not have Nitrox.      Do look into how easy it is to set the nitrox, and whether there is an easy way to check what mix you are diving with.      Failure to set the mix correctly (or forgetting to switch back to air later) are very common mistakes, and the easier it is to set/see your nitrox mix, the less likely you are to make this mistake.

Ascent / depth / time alarms:

I cannot think of a single computer that does not have them.   What does change is how loud those alarms are.   So if they matter to you, look into whether or not you can hear them (or feel them, if there is a vibrate mode).

Legible Display:

The benefits of a display that is easy to read, even in poor conditions, should be obvious to everyone.    Sometimes, this can take the form of a backlight – other computers have active LED displays which are much brighter.     However, legibility goes beyond just that.     Is it easy to understand what all the elements in the display mean – this is especially true when you go into accidental decompression, when you are faced with a display that you may not have seen before:  can you clearly identify that you are now in decompression?   Are all the numbers clearly labelled and can you tell what they mean?

Battery Life and Charging:

One of the banes of old dive computers used to be the need to send the entire computer to the shop to have the battery changed.     And imagine the feeling of being 2 days into a week-long dive holiday and having your computer battery die!    We have seen this happen with quite a few divers who have come to dive with us, and I have had it happen to me when traveling.   So I firmly believe that any computer that you use today should be one with either a rechargeable battery or a user-replaceable one.    Rechargeables are easier, but rely on a proprietary connector.    User-replaceables require you to have a spare battery of the appropriate type.     So there is a tradeoff.

The other element here is battery life.    Some dive computers have great, colorful displays but may last only a couple of days.    Others go up to 40-50 dives.   Yet others can go a few hundred dives.     Typically, the brighter/more colorful the display, the shorter the battery life.   And rechargeable dive computers (usually but not always) tend to have shorter battery lives than those using AA batteries.       Which one you go with is a matter of personal preference.

Planning Mode:

Most computers have some kind of a planning mode, which lets you figure out how much bottom time you have at various depths, which is important for dive planning. The most basic dive computers only give you the allowed bottom time if you were to dive immediately. Other dive computers let you add on additional surface time and calculate the allowed bottom time in such cases. This is very handy for dives where you plan to go to a specific depth, as it lets you figure out how much surface interval you need.

20200729_144303

Screen showing the Shearwater Perdix in planning mode.   You can also increase the surface interval and see how that affects the NDL

Ergonomics:

How easy is it to change the settings on your computer – such as nitrox percentage, depth alarm, personal conservative factor, etc? How easy is it to scroll between displays when diving? With enough practice, you can get used to pretty much any device, of course – but what if you pick up the computer after a gap of 5-6 months and then, while on a dive boat, realize you need to change a particular setting? Will you remember what to do?
One of the most common questions I get asked on a dive boat is “hey Vinnie, how do i set the nitrox on this thing”, as someone hands me an unfamiliar dive computer. The easier it is to remember, the less likely you are to mess it up.

Deco diving / Tech Features:

All computers will handle accidental decompression – ie, if you accidentally exceed NDLs. However, not all computers react the same way afterwards. Some computers are designed for decompression diving – eg, Suuntos, Shearwater and more. If you go into deco, they tell you want to do and happily keep purring afterwards because their standard algorithm is compatible with decompression diving. Others are not: while they will give you the info you need to complete your accidental deco, they will get more conservative later because their algorithms are not designed for decompression diving.

In addition, some dive computers designed for tech diving will allow you to switch between different gas mixes.   Yet others are capable of working with trimix.      Typically, only higher-end dive computers have these features.   Are they need for recreational diving?    Not at all.  But if you plan to get into tech diving, then getting a computer with these features ensures you won’t outgrow the computer.

Digital Compass:

One of the least-developed skills among recreational divers – especially in tropical reefs – is navigation. That reason is obvious: most of the time, you are following your DM, who handles the navigation for you, and so you don’t get a chance to practice. Having a compass is useful as it lets you work on your navigational skills at all times – and of course, if you and your buddy plan to dive without a guide (or you get separated from the guide), the compass becomes an essential part of your toolkit.

You can get an external compass and mount it on your console or clip it to your BCD, or you can get a dive computer with a built-in digital compass. I have a strong preference for the last option – neater and always there when you need it. This is a very under-rated but nice-to-have feature.

Air Integration:

If you had asked me a few years ago what I thought of air integration, I would have said “not for me”. Then I got the Shearwater and have been using its air integration feature, and am getting sold as to its benefits. It’s really convenient to be able to see all your information, including air, in one go. But one very nice benefit is that it also lets you see your air consumption rate on the fly – so if you are breathing a little faster for some reason, you will see that and can adjust your breathing rate accordingly. Eg, my breathing rate often goes up when I am taking photos, as I use my lungs and legs to compensate for currents while I try to get a precise composition – sometimes, my gauge has provided a very useful reminder that I am being too inefficient and that perhaps I should try a different method to stay in position.

Higher-end models even let you add multiple transmitters – so for example, you can see not just your air but also that of your buddy (or air of 2 different tanks, if you are diving sidemount or have deco bottles with you).

Essential? Of course not. But definitely very nice to have. When I use my other dive computer, which lacks air integration, I definitely miss it.

Form Factor:

Some dive computers are large and chunky. Others are more wrist-watch sized, not much larger than a regular watch. And this does matter. A larger dive computer will have a more legible display. But it is also one extra thing to pack and carry, and also something you will have to take off/put on every time you get in and out of a wetsuit. By contrast, a wrist-watch sized dive computer is something you just put on and forget – no risk of it falling while on the dive boat, no risk of forgetting it in your hotel room on the morning of the dive, etc.

Heck, you can just wear it every day as your regular watch – so if an unexpected dive opportunity comes up, you are good to go (I used to do that with my old Suunto dive computer – and it came handy when I was traveling through Africa for 4 months, and got some unexpected opportunities to go diving). I personally have a very strong preference for wrist-watch sized dive computers (and am considering switching my personal Shearwater from a Perdix to a Teric for this very reason). But larger displays are also nice, especially for older eyes. So think about what matters more to you.

Materials, Straps & Colors:

Dive computers can be made of polycarbonate or have a steel (or even titanium) case – metal cases look nicer and may be preferable if you want to wear the dive computer as a watch.    That said, polycarbonate is very robust and has good shock absorption properties, so don’t rule it out as being “lower quality”.

Straps can be of rubber, metal, elastic or fabric – the last two are often one-piece and so add a degree of reliability in case you lose a spring bar where the strap attaches.

And of course, choice of colors varies by model/brand.

20200729_151013

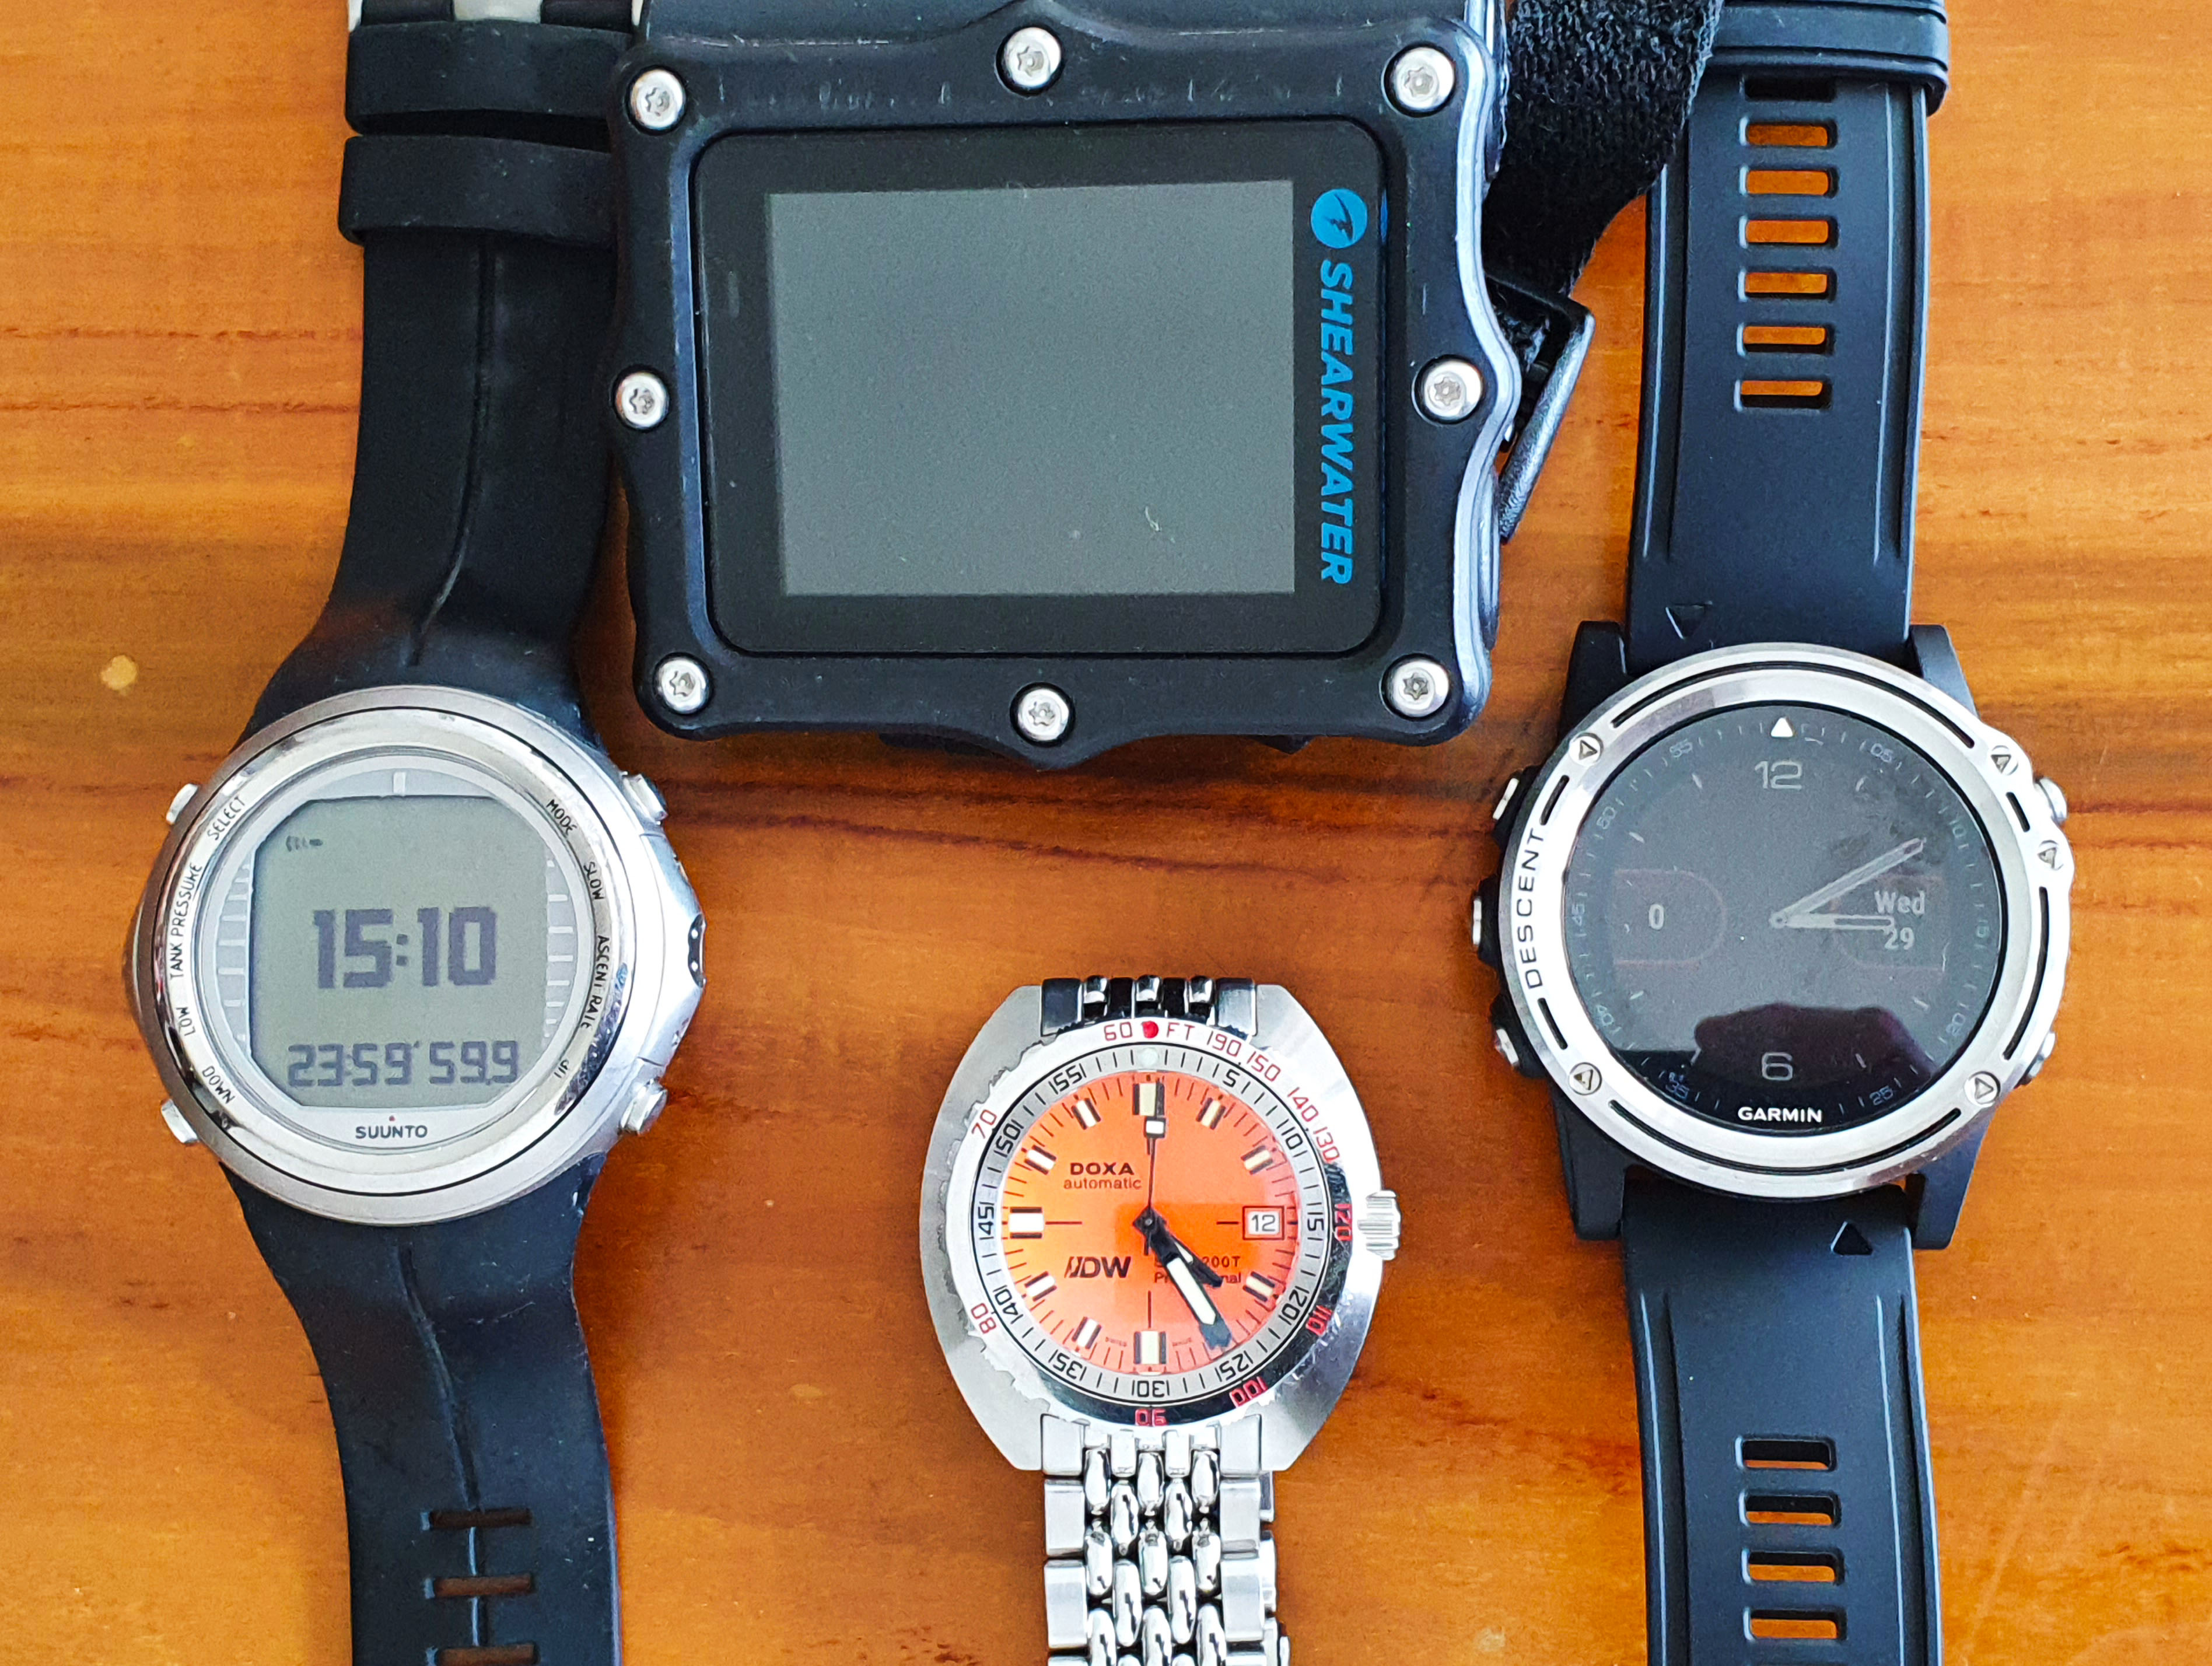
Form factors  compared:   Shearwater Perdix, Suunto D9Tx, Garmin Descent and a Doxa 1200T dive watch

Freediving/gauge modes:

This is also something that comes standard with virtually all dive computers have these days.    Gauge mode is great if you want to use your dive computer as a bottom timer (eg, as a timer backup to a different computer) – it switches off deco calculations and just gives you depth/time.   Freediving mode, as the name implies, is used for freediving/skindiving/apnea, and tracks dive duration, average depth, recovery times, etc.

Personal / altitude adjustments:

Virtually all computers let you adjust for altitude by changing a setting.    They also let you adjust how conservative the model is – in most computers, you can make the computer more conservative, although some let you tweak in either direction:  make it more or less conservative.    Typically, these are just pre-cooked settings, but some high-end computers like Shearwater actually let you precisely adjust the gradient factors, so that you can customize the dive computer precisely.

Digital Logs:

Some dive computers allow you to download your dive info into the brand’s app via a cable. Others do it wirelessly. Yet others have a full ecosystem built around uploading, geo-tagging and sharing your dives with other divers. I havent logged my dives for over 20 years and if I did, I would use paper – but I know many people prefer digital logs. If so, wireless transfer may be something to consider.

Other Features:

Some dive computers use a heart rate belt and factor in your heart rate when calculating your decompression info. That’s pretty slick, I have to say. Does it make you materially safer? I cannot say. Other computers combine activity tracking (steps, heart rate, etc) and are basically smartwatches + dive computers rolled into one. Are any of these essential for diving? No. Are they cool as heck? Oh yes. Should you get them? Depends on your budget and preference.

SUMMARY

In general, there are 3 price points for most dive computers.

At the entry level, you get the standard features:  nitrox, freediving, gauge, alarms and algorithm modes (eg, standard, conservative, more conservative).    These are sufficient for most recreational diving.      Typical pricing for computers in this range is Rs 25,000 – Rs 35,000, more or less.

In the middle range, you get extra features like digital compass, air integration and more premium materials – this is a range from Rs 35,000 – Rs 50,000 or so, approximately.

At the high-end, you get no-holds-barred devices, with a lot of neat extras, like customizable/upgradeable algorithms, ability to handle trimix, ability to handle multiple air transmitters and so on.     Prices for these can run to over a lakh.

What should you get?     The answer is – it depends on your budget and preferences.   The entry-level is where the value lies.    That said, if budget allows, the mid-range lets you get computers which, while not essential, add a fair bit of convenience to your diving.    And of course, the high-end gets you amazing devices that do pretty much (except spot hammerheads).

Hopefully, this article gives you enough information to help you reach a decision.

Oh, and we do carry a range of dive computers in our online gear shop – Mares, Aqualung, Deep Blu, Scubapro, Shearwater and Garmin – at very competitive prices (hint, hint!).   Feel free to drop us an email at sales@diveindia.com if you have any questions and we would be happy to help you pick the right dive computer for yourself.

Deepblu Cosmiq+ Dive Computer Review

By Articles, Gear, Reviews

Review: DeepBlu Cosmiq+ Dive Computer

Reviewed by:   Vandit Kalia (Vinnie)
Date of review: May 2020

The Deepblu Cosmiq+ is an entry-level dive computer and one of the more interesting units I have had a chance to try out of late.

Headquartered in Taiwan, Deepblu positions itself primarily as a community and marketplace for divers first, and gear manufacturer second.   So it is not surprising that their dive computer also emphasizes this community aspect, and also relies heavily on a smart phone for controlling and uploading, eschewing the desktop-based apps of the traditional manufacturers.

Read on for a hands-on review of its pros and cons, as well to find out whether it makes our recommended kit list.

THE BASICS

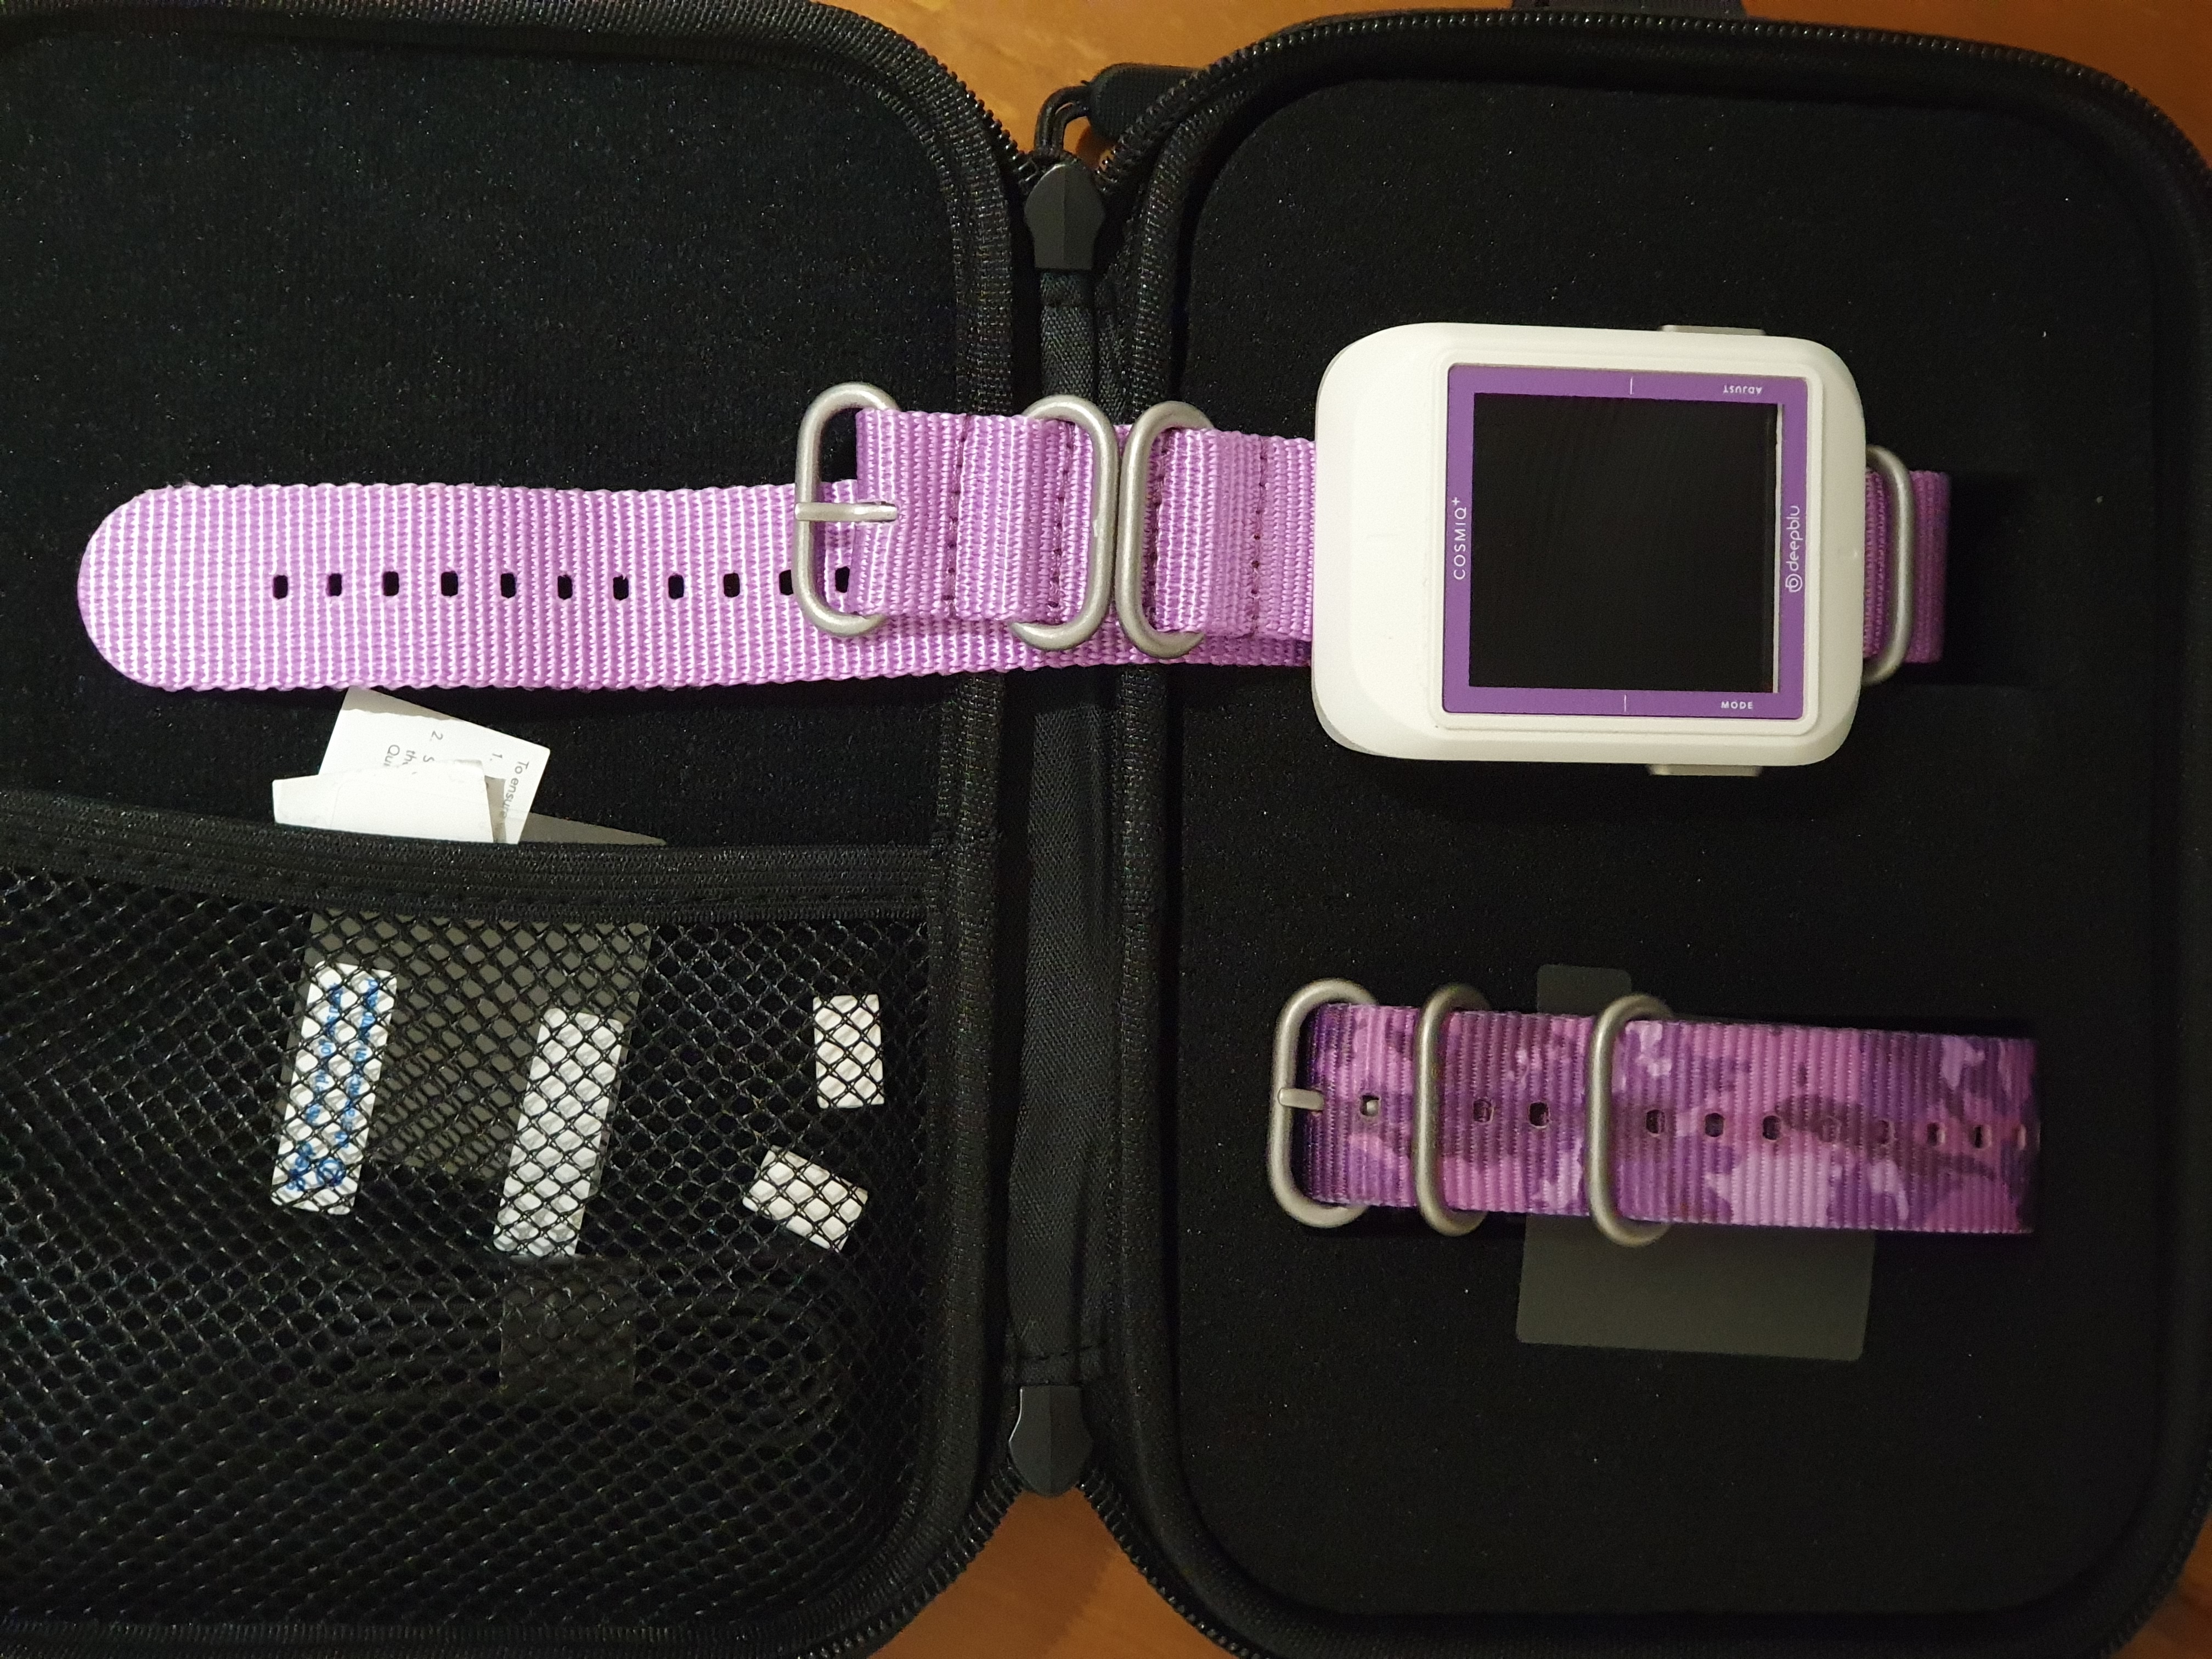
The Deepblu Cosmiq+ dive computer is an oversized, entry-level model designed to be easy to read and easy to use.   It came packaged in a nice hard case, inside of which you find the computer and 2 straps that match the accent color of the computer.

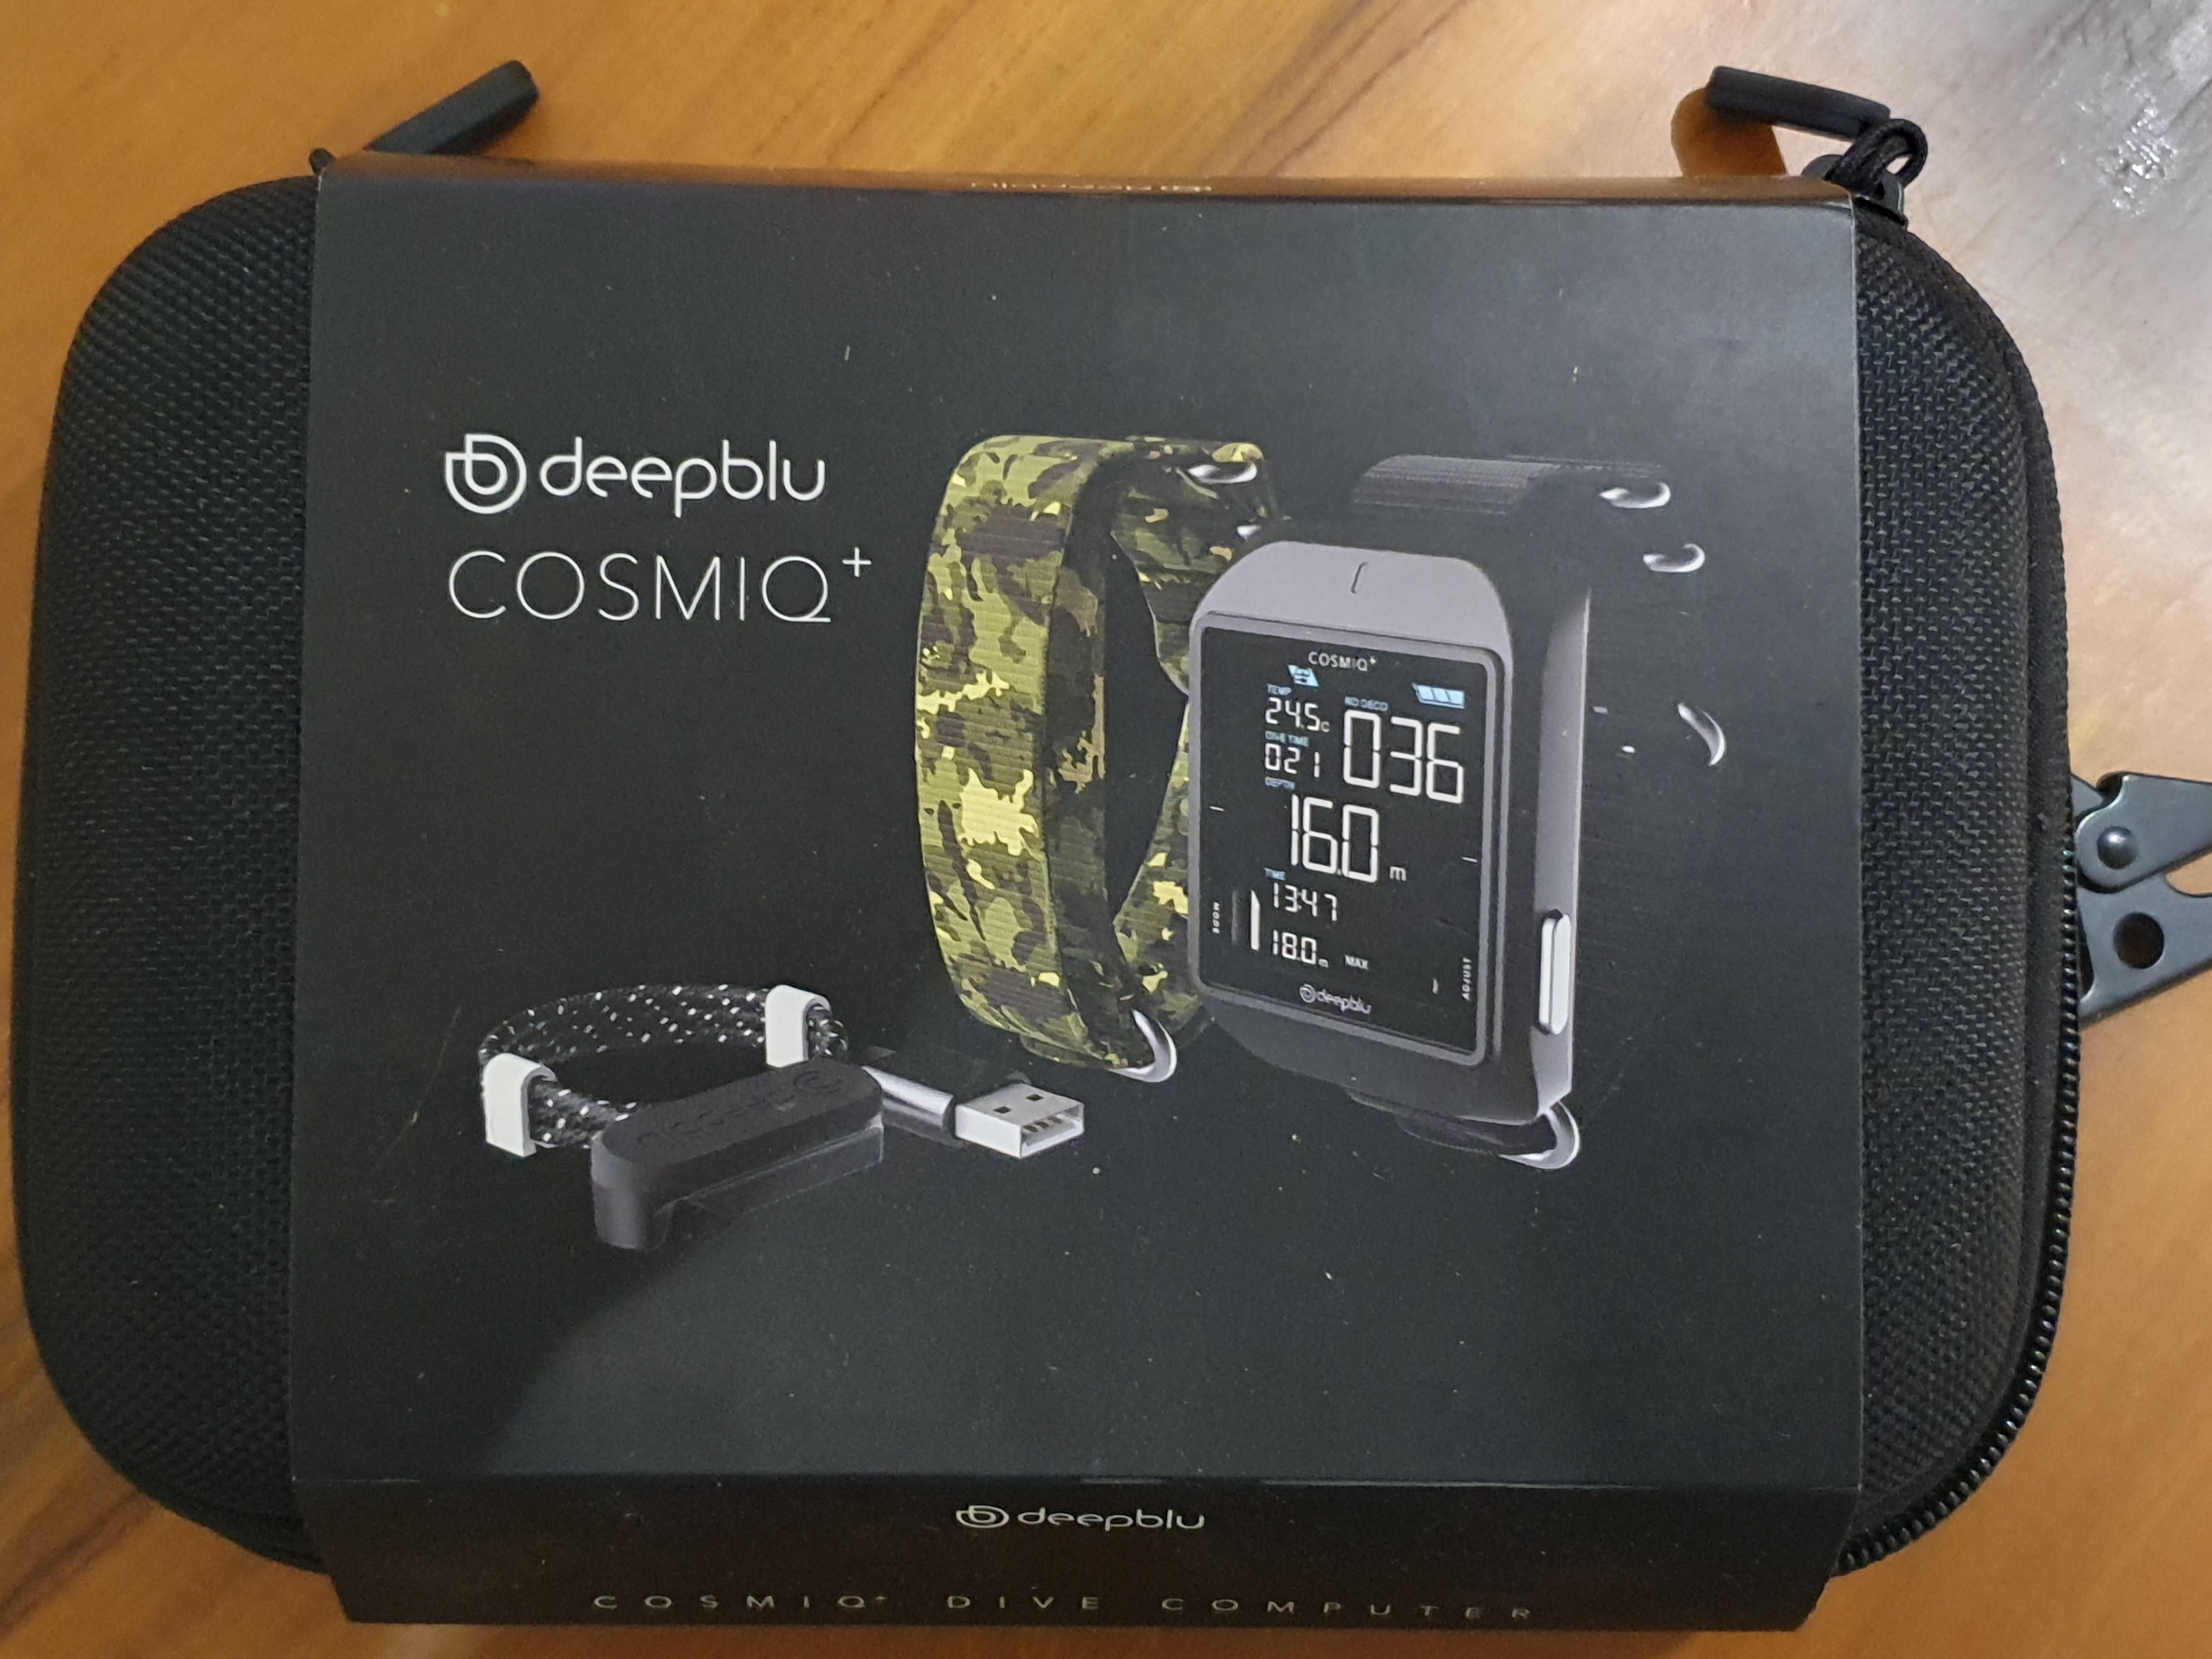
The Deepblu Cosmiq+ comes in a nice, sturdy case.

You have a choice of accent colors when you buy the computer – the one I got was pink (my wife claims that it is lilac or maybe lavender, but I don’t believe in those colors.    Pink it is), and so the 2 matching straps were in pink:  one in a solid color and the other with a camouflage pattern.      Yes, you read that correctly – a pink camouflage pattern.

I have pink sneakers, pink slacks and pink shirts (and no, I don’t wear them all at once), so I am a sucker for pink.    And once I got past the ridiculousness of the concept of pink camouflage (make up your mind, bro – do you want to be seen or not?), I had to admit that the color actually looked quite funky – and it also matches with a few BCD and masks that we sell, so there is that.

The straps are NATO-style pass through straps and are super sturdy – there is near-zero chance of this computer coming off accidentally, no matter what you do.   And they will last a lot longer than rubber straps too, which can become brittle with age.

Inside the box are the computer and 2 heavy duty fabric straps.

The case itself is a nice sturdy unit and packs the computer safely and securely.     Now, unlike a watch-sized computer which you can just wear when you travel, oversized computers typically get carried in your carry-on bag.    Many people prefer to use a padded box for carrying their dive computer – while you can use this box for that purpose, it is a little too big for carry-on (and you shouldn’t be checking in your dive computer).     Compare that to the Shearwater, which comes in a really compact case that is perfect for the computer and a couple of spare AA batteries.

But then, you can buy 3 of these computers for the price of a Shearwater, so it is not a perfect comparison.   And in any case, given carry-on weight restrictions, I personally don’t really use any boxes.   I just toss my Shearwater into a pocket in my bag and leave it there – it is sturdy enough and I haven’t had any issues.     Given that this computer also has a hard plastic case, I wouldn’t expect any issues with it either.   Wrap it in a sock or T-shirt, if you must or stick a screen protector on the display.

The Cosmiq+ case vs the Shearwater case.

FEATURES

As mentioned, the Deepblue Cosmiq+ is an entry-level computer designed for recreational divers.   So obviously, you don’t get tech features like use of gas mixes containing more than 40% O2 or the ability to switch gas mixes.   You also miss out on some nice-to-have premium features such as air-integration & built-in compass – but that is to be expected at this price range (you typically will need to spend Rs 10,000 – 15,000 more to get those features).

What the computer does have are the essentials, as to be expected from even entry-level dive computers these days:   ability to use nitrox mixes up to 40%, a gauge mode and a free diving mode.     It has the usual full set of alarms – depth, time, deco, ascent rate, MOD/PPo2 violation, CNS O2 Clock limit and more.    And it packs all of this in a lovely, oversized display with a lot of contrast and which is very easy to read.

ALGORITHM

The Deepblu Cosmiq+ uses a Buhlman variant as its algorithm – the industry standard which has been around for decades.   Does it have fancy features like heart-rate related adjustments, or RGBM and such?    No.     But the Buhlman algorithm has withstood the test of time and proven itself to be safe and reliable – and as far as I know, the human body hasn’t changed significantly over the past 30 years.

As someone who once used to geek out on the latest decompression algorithms, I have realized that for recreational diving, this plays a very minimal role in safety – different algorithms may produce numbers that vary, but in the real world, as long as you follow sensible diving practices, any algorithm in a mainstream dive computer is more than capable of keeping you safe.

To provide additional flexibility in terms of matching the algorithm to your personal preferences, you can adjust the algorithm on the Cosmiq+ to be normal, conservative or progressive.

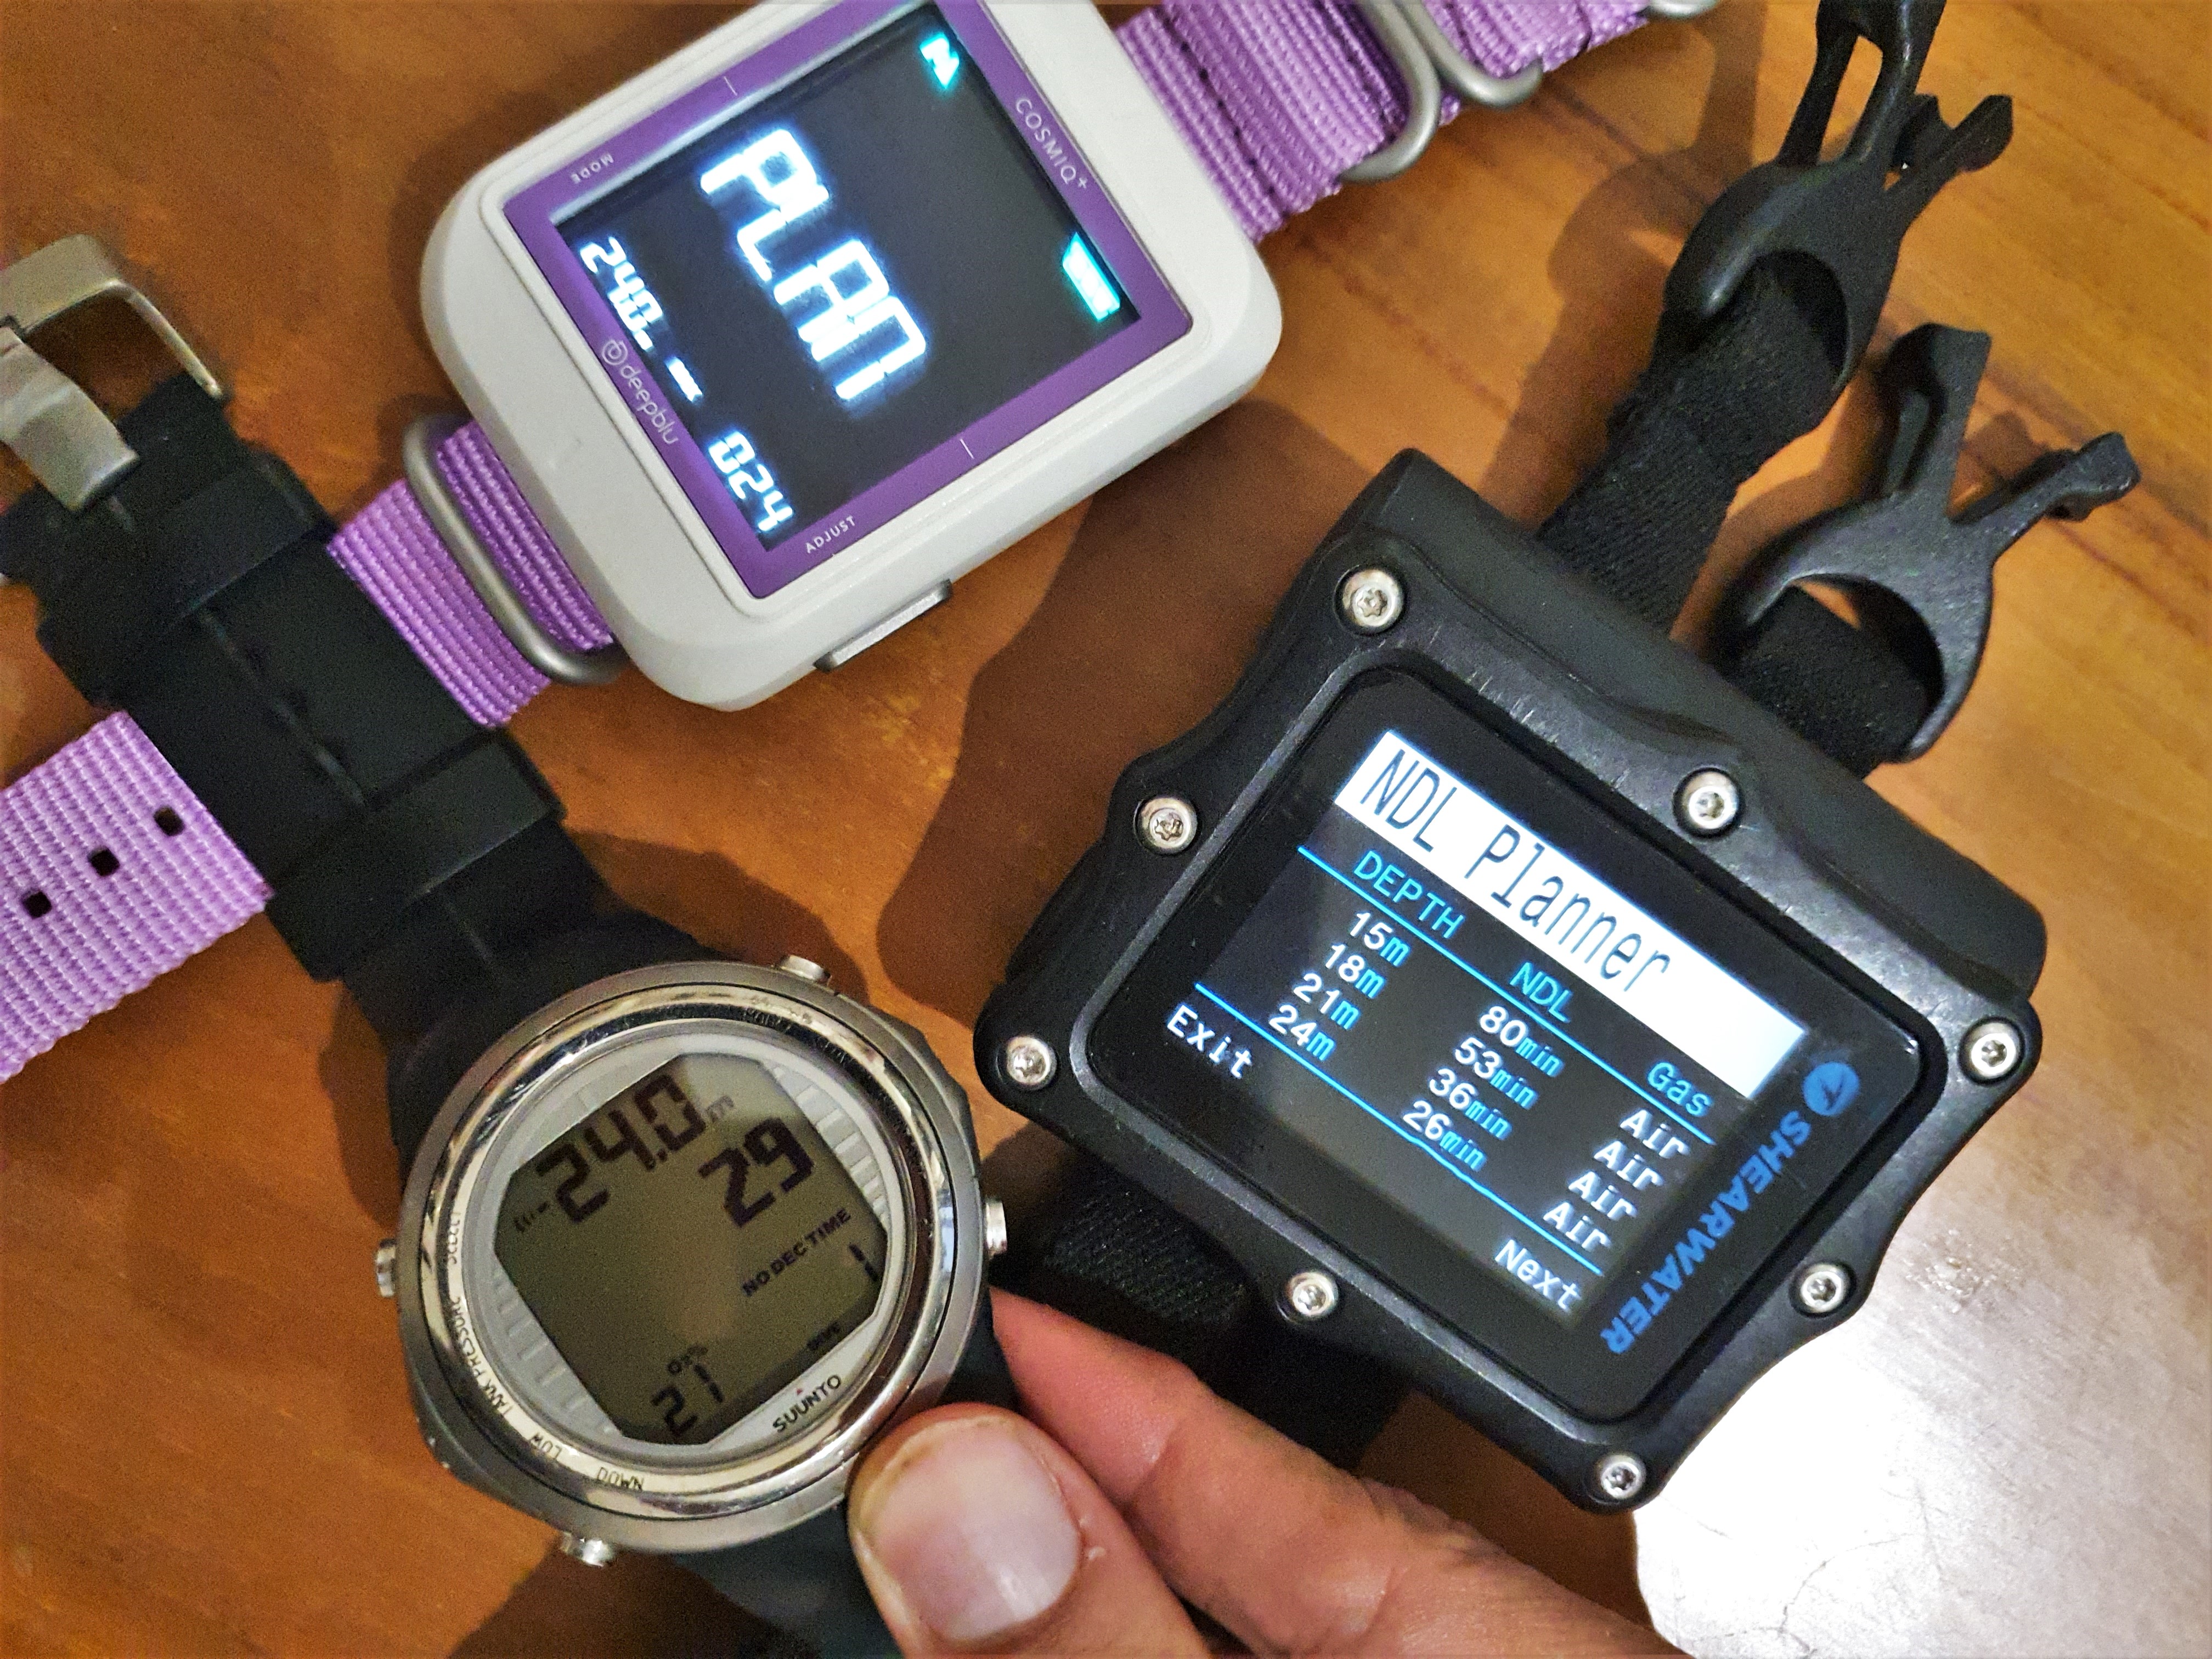
The normal implementation of the Buhlman on the Cosmiq+ is quite conservative to begin with, compared to both my Shearwater and my Suunto D9Tx (set at 50% RGBM).   At 24m, the Suunto gives me 29 minutes of bottom time, the Shearwater gives 26 min and the Cosmiq+ gives 24 min.   At 30m, the difference is even more stark – 18 min for the Suunto, 17 for the Shearwater and 14 for the Cosmiq+.

The Cosmiq+, compared to my personal dive computers – the Shearwater Perdix and Suunto D9Tx

On subsequent dives, the gap to the Suunto narrows, as the Suunto’s RGBM algorithm tends to be more conservative compared to Buhlman.      But it is still on the conservative end of the scale – although not as excessively so as something like the Suunto Zoop.

That isn’t a bad thing –  for beginner divers, having slightly more room for error isn’t a bad thing.    And as you gain experience, improve your diving discipline and also gain familiarity with diving algorithms, you now have the option of using the progressive option – I did not have a chance to test it too extensively, but from the few dives I did on it, it seems to be a “sensible” degree of progressiveness that should work for most experienced divers.

And obviously, if personal or other conditions warrant, you can set the computer to be even more conservative.  So very sensibly done.

Lastly, this computer is not designed for decompression diving, and going into deco will punish you fairly heavily, in terms of bottom time for the next dive.     Which is fair – you should not be doing decompression dives if you are not trained for it, and if you are trained for it, you should know better than to use a recreational computer for that purpose.

SIDE NOTE ON CONSERVATIVE / PROGRESSIVE COMPUTERS

On one hand, we can all agree that more conservative is always better – atleast as a general philosophy and approach to diving.   On the other hand, if you have spent good money going on a diving holiday, do you really want to cut each dive short by 10-15 min because your computer is less conservative?    So which is better?

To start with, keep in mind that there is no “correct” number.     The No Deco Limit isnt a hard line, but a probability curve, and algorithms are basically a mathematical model fitted to simulate the probability curve of getting DCS for a vast and varied population of people.     So each number is, to some degree, an arbitrary cut-off point on the probability curve which is deemed “safe enough” for most people, with an additional safety margin added on.

Experienced divers often have a good idea of which algorithm has worked well for them and may choose a more progressive option because they are disciplined enough not to need a lot of additional safety margins:   they build it in themselves.    Such divers typically also tend to be more aware of conditions that may increase their pre-disposition to DCS and so know to be more conservative if those conditions apply, and so are able to handle this well.    In other words, they also keep their brain engaged while using the computer.
On the other hand, beginner divers may still be developing their diving discipline and awareness of NDL, depth and air.     They may also not have the best buoyancy and be going up and down a little.   In such cases, a more conservative computer may be a better option, as it gives them a little more margin for error (which, to be very clear, is NOT something that you ever plan to rely on!).

Gun to head, if you force me to pick an option, I will pick a more progressive computer, as you can always make them more conservative by tweaking their settings.    That said, if you are a diver who is at a greater risk of DCS (age, weight, other factors), or if you feel that you would benefit from a greater safety net, or if you are more risk averse, then yes, a more conservative option might be better for you.

BATTERY

The next key feature that I think is important is a rechargeable or user replaceable battery.     I am happy to say that the Cosmiq+ comes with a rechargeable battery – it comes with a USB cable with a magnetic charger on one end, which snaps to attach to 2 contact points on the underside of the body.

The magnetic charger and the contact points on the Cosmiq+

However, the battery life of the computer needs improvement – I tested it in Raja Ampat, where we were doing 3-4 dives a day, and it did not always last 2 days.    I’d estimate the battery life at around 6-7 hours or so from a full charge (which I never got – I will talk about that further down).      To be safe, I would recommend charging it every day if doing 3 or more dives, and definitely every 2 days.

Is that ideal?   Depends on what you like.   My Shearwater uses a AA battery and gets well over 30-35 hours of battery life with the air transmitter connected.    And if I have an issue, a AA battery is one of the easiest things to find.     On the other hand, this makes for a large form factor and the spare battery is still one extra thing to carry (and make sure it is fully charged) – whereas with the Deepblu Cosmiq+ all you need is its USB charging cable and a USB output, and you are good to go.    But you do have to charge it regularly.      Personally, I am not used to  charging my computer regularly, and having had this reinforced for 30 years, I have a “get off my lawn” moment at the idea of needing to do so – even though I, like almost everyone else, have other devices that I do charge daily without complaint.  Go figure.  Whether this is an issue for you is a personal choice.

The magnetic charger attached to the Cosmiq+ body – this is not a very secure connection

And speaking of charging:  my other issue with battery life is related to the reliability of the magnetic connector of the charging cable – in my experience, this was not very robust and was dislodged a bit more easily than I would have preferred:  sometimes, the very act of putting down the computer after attaching the charger to it would cause the connection to become loose.     On more than one occasion, I woke up in the morning to find that the charging cable had come loose at some point and the device had not charged properly.   Luckily, this was my backup unit, but if this was my main unit and I woke up with an uncharged dive computer and 3 dives to go in Raja Ampat, I would have been very upset!

To be fair, once I became aware that the connector was a little finicky and easily dislodged, I started taking extra care in how i put the dive computer down after attaching the cable and did not have any problems afterwards.    But for someone like me, who isn’t really good with being so fastidious with things like charging cables, this is something I would prefer to avoid entirely.

Reading the specs, the battery life is supposed to be 8 hours – a fair bit more than the 5-6 hours I got out of it – and I wonder if my woes had something to do with the connector woes.   Also, to be fair, you can reduce the brightness of the screen (it is VERY bright by default – cutting it in half will not affect legibility and significantly increase battery life).

But be that as it may, this is definitely an area where the Deepblu Cosmiq+ could be improved.

USING THE COMPUTER

Due to some last minute issues, I only had 3 hours to pack my dive gear and my camera system before leaving for a Diveindia Outbound trip to Raja Ampat – in that hectic rush, I completely forgot to read the Cosmiq+ user manual before leaving.   I chucked the computer and cable into my bag, and carried on packing.

At breakfast on the morning of the first day of diving, I was doing what I always tell people not to do – trying to figure out a new computer.   Luckily, it was surprisingly easy to do:  the computer has 2 buttons and remarkably easy-to-understand interface:   pushing one button changes between modes (and icons at the top of the screen tell you what mode you are in), pushing the other button lets you make some changes.   About the only changes I wanted to make were the nitrox setting and it took me perhaps 2-3 minutes before I figured it out.   That’s a win.

The computer turns on automatically in the water and the display is very bright and legible.     Not only that, it is very sensibly marked and it is very easy to see all your dive information – depth, time, NDL, MOD and more.  There are visual indicators to indicate how much NDL and CNS O2 Clock you have left, and also alarms if you go up too fast.    The safety stop countdown is also easy to read.

One of the biggest challenges with many computers is that the deco screen can be quite confusing to divers who inadvertently end up exceeding their NDLs.    I personally know of atleast 2 cases  where divers did not realize that they had gone into deco, and continued diving, assuming that their deco time was their NDL (and oblivious to the fact that this number was increasing).    As you can guess, that could have been very, very dangerous.

Not so with the Cosmiq+.    I did end up putting the Cosmiq+ into deco on one dive, because I was using my Shearwater for the dive profile and just using this unit for comparison.         There was absolutely no mistaking the information – the computer clearly told you that you were in deco, by how many minutes you had exceeded your limit, how much deco you had to do and what depth you should ascend to (and all this info was clearly labelled and displayed in a manner that made it nearly impossible to confuse with the regular display screen).

Overall, the additional screen size of the oversized computer has been put to very good use here and information is displayed cleanly and with proper labelling  – unlike many manufacturers, who use the same screen logic on small and larger computers, just with bigger fonts.

Mantas on Manta Ridge, Raja Ampat (Dampier Strait)

THE DEEP BLU APP

And now we come to what sets this computer apart from the rest:  the DeepBlu App, available on Android and iOS.

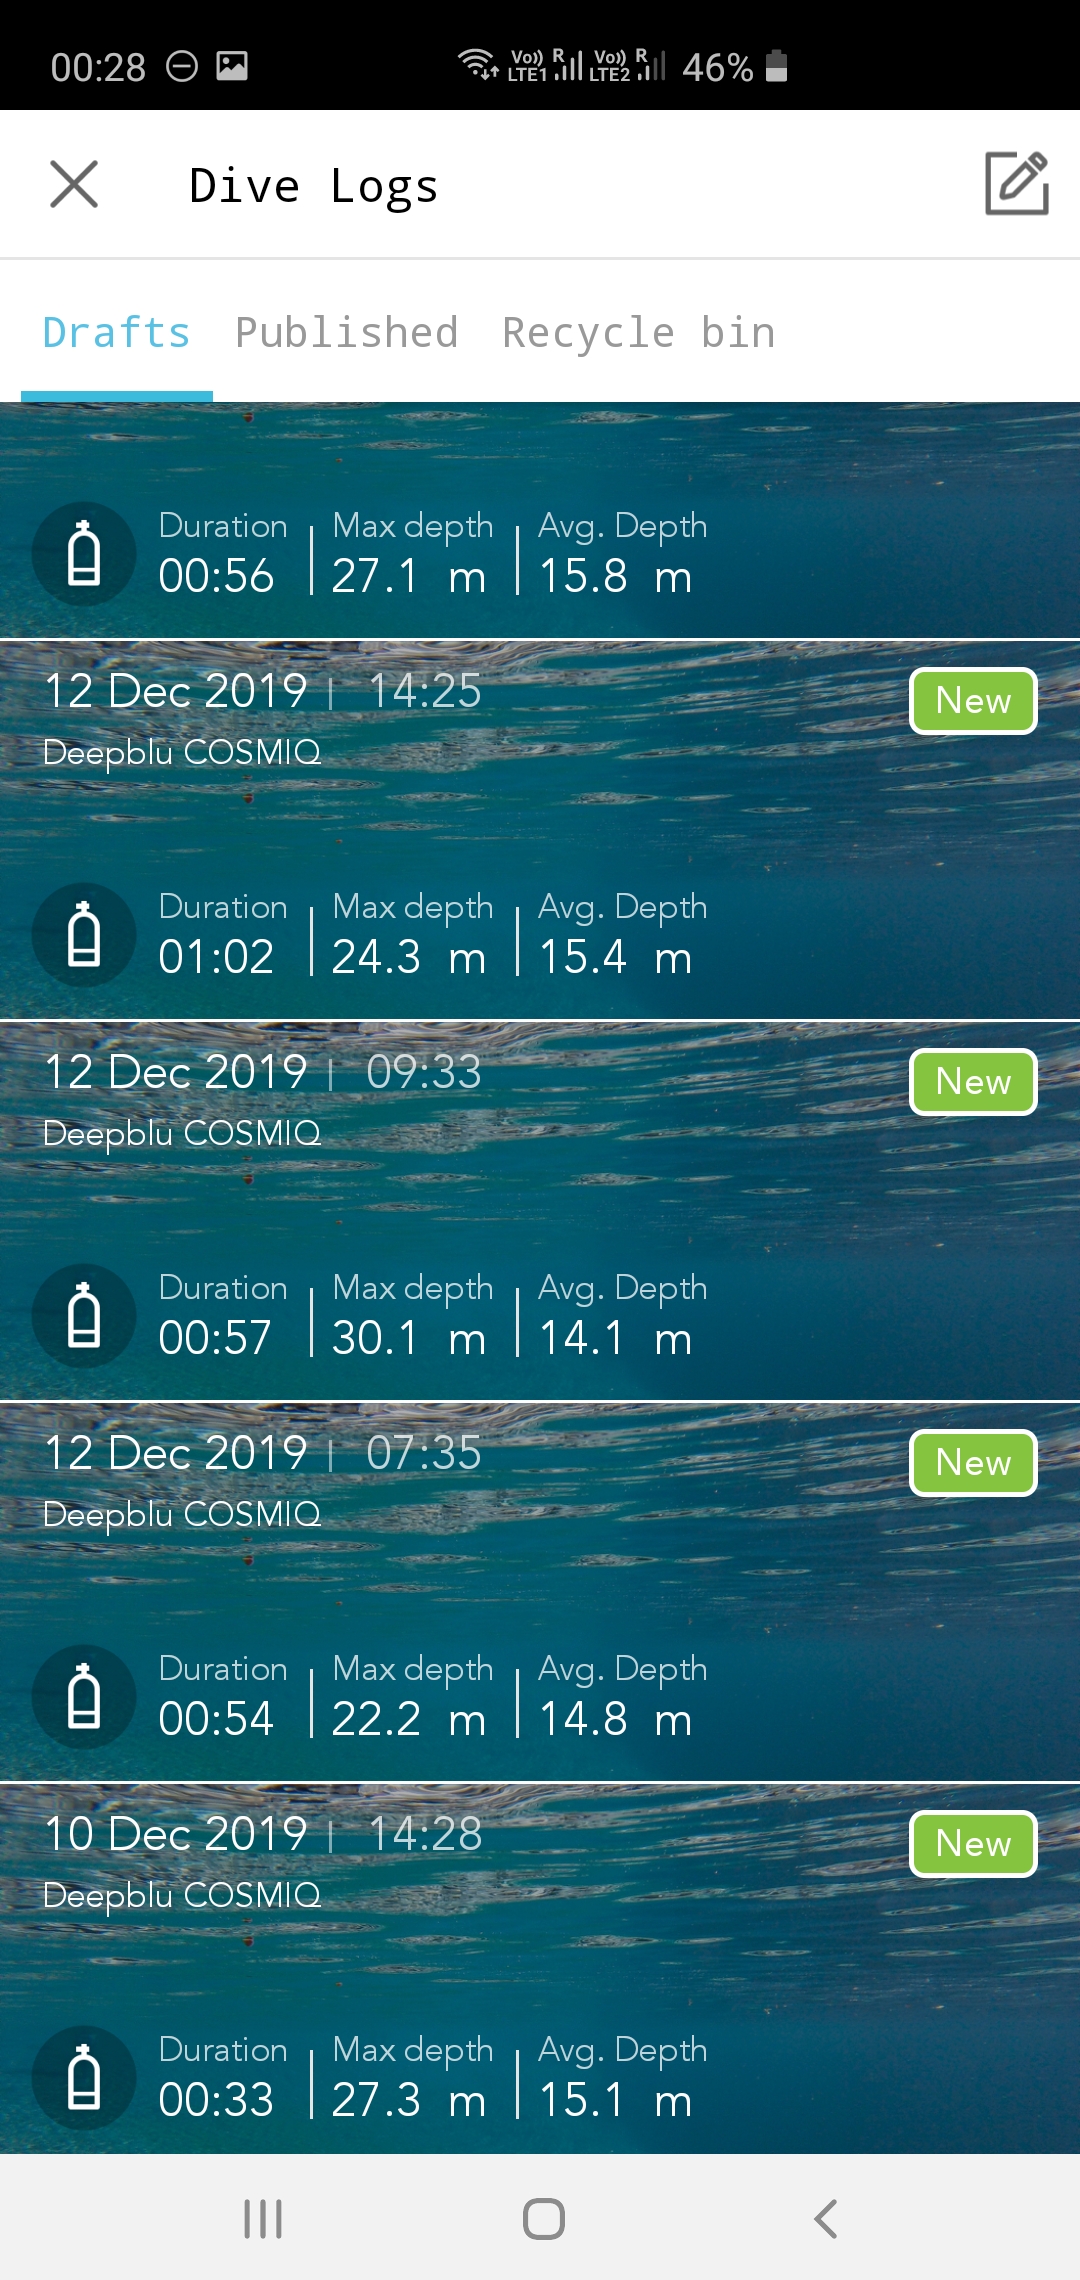
The App let you do a lot of things – log your dives (you can pair other brands as well), post your dive photos and see posts of other divers in a social-media-like setting, learn more about dive sites in various locations, stay in touch with your dive buddies, and join clubs/groups.    It also lets you change all the settings of your computer very easily.

The day after my first dive, I tried to set up the app.    Yes, I know normal people would do it before, especially given how the app is the ideal way to set up your computer, but I was in Raja Ampat, this was not my main computer and I got distracted, ok?

The  first thing it required me to do was create an account – I could link to my FB or use an email.   I went with the latter.     The app sent me a confirmation email with a code I was supposed to enter.  10 minutes later, I still hadn’t gotten the code.   So I gave it up and went outside to look at stingrays playing under my water bungalow’s balcony,.    He, Raja Ampat vs messing around with my phone?   Phone is gonna lose every single time.    Instead, I continued to set the nitrox mix directly on the computer – something I was able to do without RTFMing (which is good) or needing the app (also good).

After a few days, I remembered about the app and tried again.    This time, I was able to get the verification code and register properly.   Then I tried pairing the Cosmiq+ to my phone – and nothing happened.   After 3 attempts, I ended up hitting Google for answers: clear the DeepBlue app data and try again.   Ok – and hallelujah, this worked.    Pairing was easy and after this, consistent.

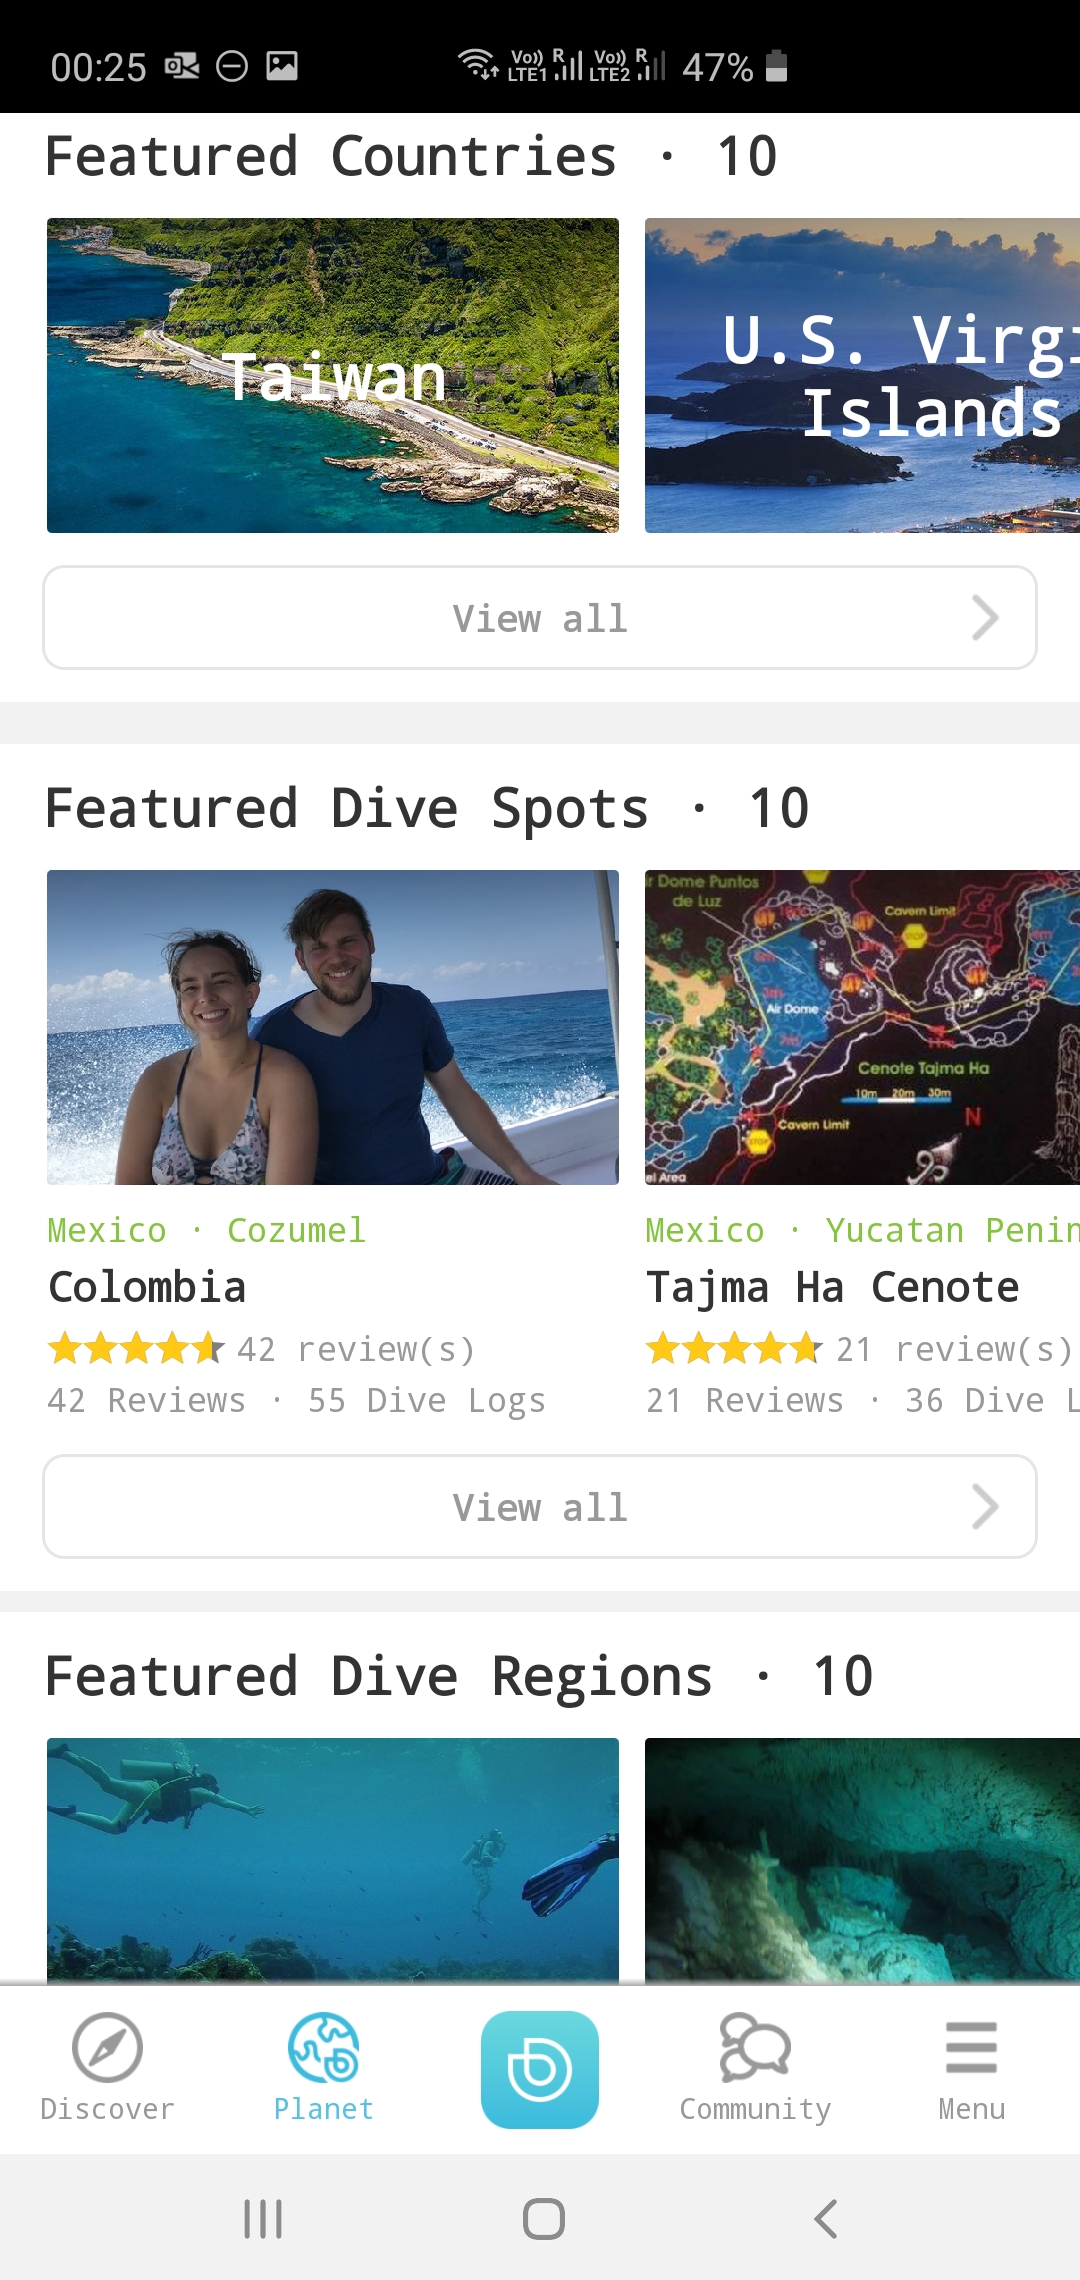
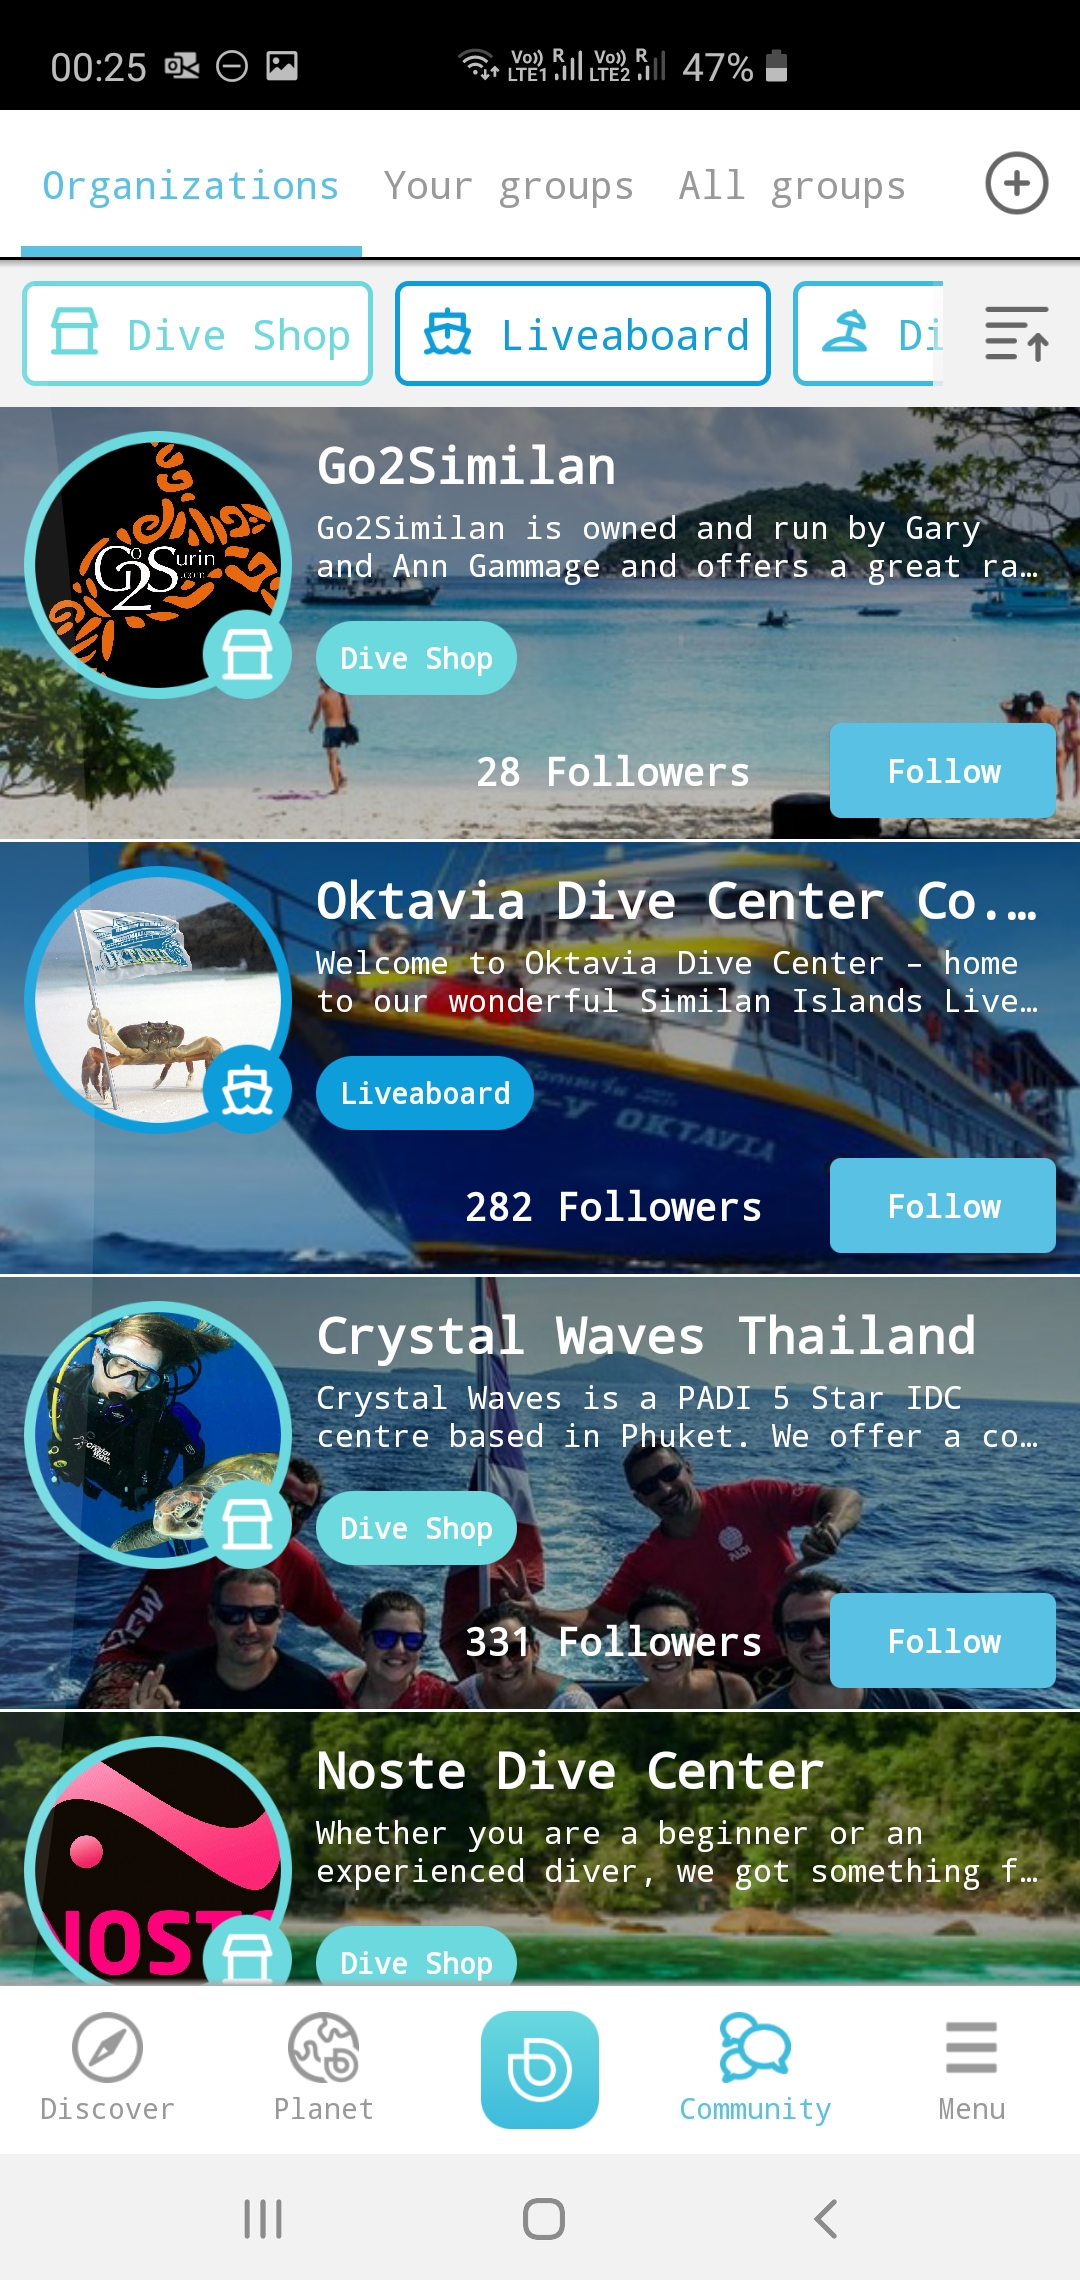
As mentioned earlier, the App is a combination of a social media platform for divers, review site, online dive log and controller for your dive computer.    It has 4 main sections:    DiscoverPlanet, Community and Menu.

The “Discover” section is like a mini Facebook/Instagram for divers, where you can share your photos/dive log and see details of other people’s dives.    The “Planet” section is a review/information section, where you can research dive sites, read and post ratings and reviews and get all sorts of dive-related info.

The “Discover” section

The “Planet” section

The “Community” section lets you follow various groups, such as dive clubs, groups belonging to various dive operators, etc.      In the interest of full disclosure, I did not spend too much time on these features.

Lastly, there is the “Menu” section.     This is where you can adjust the settings of your dive computer and wirelessly upload the dives from the Cosmiq+ dive computer to the app.   Then you have the option of sharing those dives as part of your own feed in the community section, or just keeping it private for your own viewing.

The “Community” section

Uploaded dive logs are found in the “Menu” section

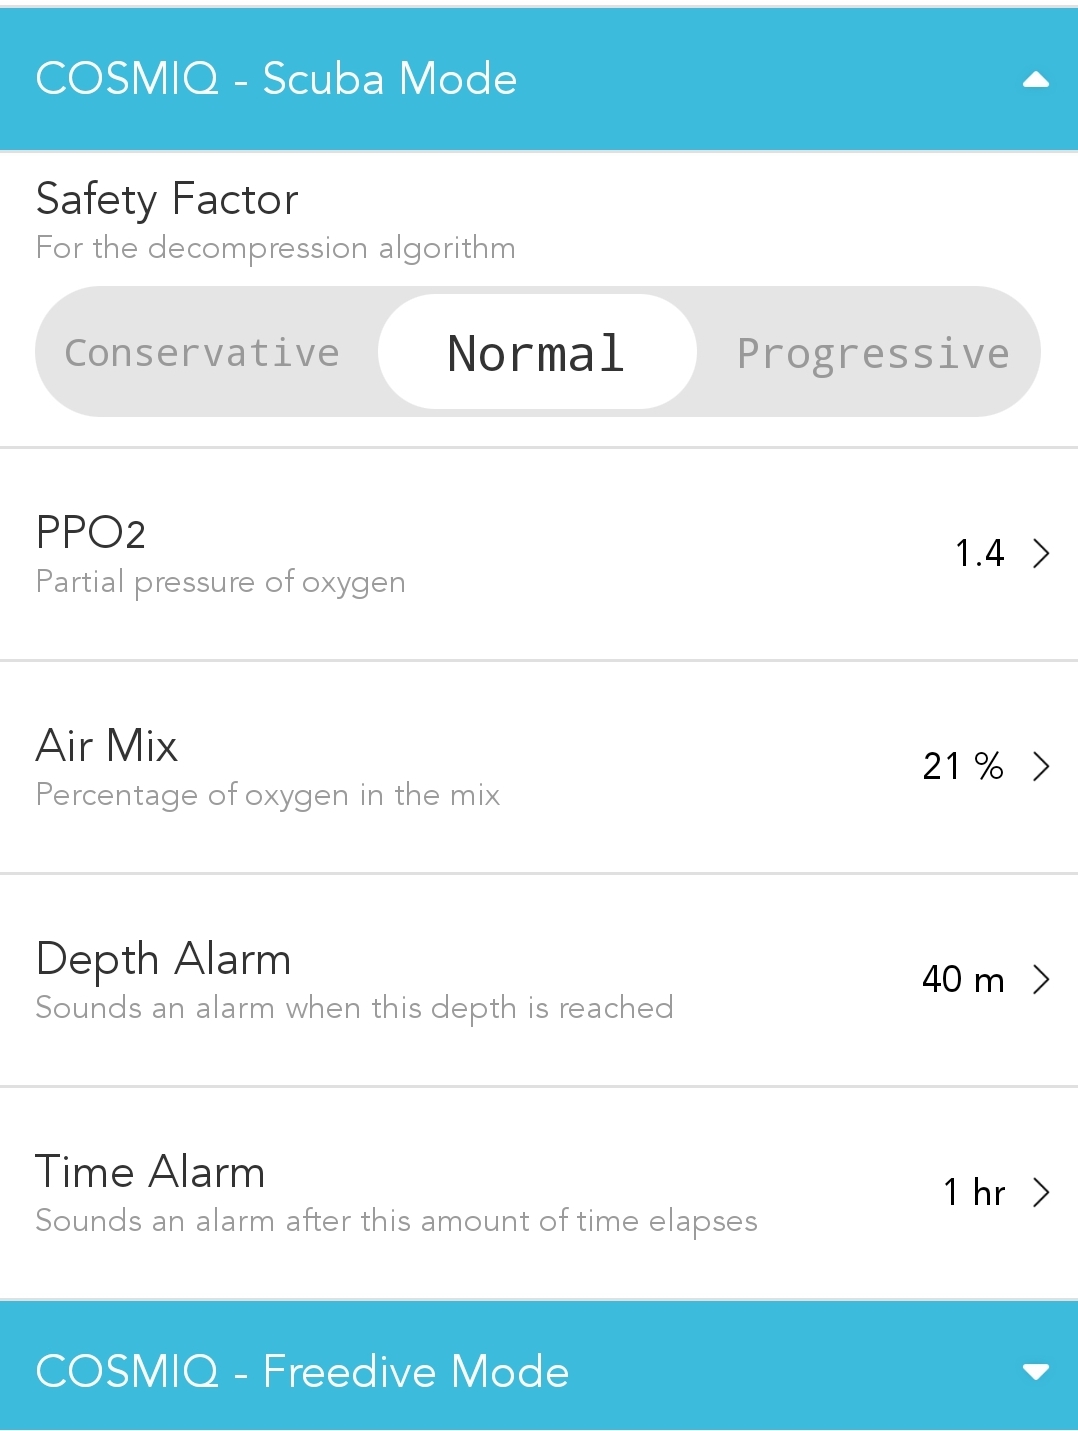
The “Menu” section also lets you add buddies, see your dive log, edit app settings and, as mentioned earlier, set up your dive computer.       You can change units, salinity level, conservative factor, nitrox percentage, screen brightness and also set various alarms, all on the app.

This is a really smart idea – one of the biggest issues with computers that I see on dive trips is people not remembering how to set their computers and fumbling around before the dive, pushing buttons at random.     The app eliminates all that – switch on your phone, make the settings on the app and voila, your computer gets set automatically.

Of course, the downside is that you need to have your phone with you.    On many dive boats and liveaboard dive platforms, this may not be the case.       The good news is that most of the settings are not things that you would change on a dive to dive basis – mainly, only the nitrox mix.   And this can be done without a phone, if need be.

The “Menu” section also lets you adjust the various dive settings of the computer

Adjusting the settings is very easy and intuitive

SUMMARY

So in summary, would I recommend it?

The computer has a lot going for it – a bright and legible display, well-labelled information presented in an easy-to-understand format (one of the best I have seen in an entry-level computer and which mitigates one of the biggest failure points of dive computers:  user error) and easy to set up/sync via the app.      It was very easy to use and overall, a really nice dive computer.   And, of course, the fact that you can tweak the algorithm up or down to meet your preferences is a huge positive.

However, there are 2 downsides to the unit.

The first is a matter of personal preference – for me, I strongly prefer watch-sized computers.  My Shearwater Perdix is the first oversized dive computer I have used since 2001 and while I love it to bits, I am seriously contemplating selling it and getting a Teric mainly for the small form factor.   The reason for this is that it is easier to travel with the computer and also, easier to manage it on a dive boat before and after a dive.   Of course, on the flip side – the larger screen is also why the information is presented so clearly and legibly, so there’s the tradeoff for you.
The second is more significant, however:   the below-average battery life and connection system.      Are they deal breakers?    Absolutely not.     If you are careful with how you attach the charging cable, and are ok with doing so every day or two while on a dive trip, it is certainly something that can be managed.   It is, however, a potential – and foreseeable – problem if a diver is careless or forgetful.  From what I have seen, many divers do tend to be a little forgetful on holiday and all it takes is one such incident and you can potentially end up messing a day’s worth of diving.

So for that single reason, the Cosmiq+ does not make our Recommended Gear list– that selection is reserved for gear which we think is the best fit for most people, and can be recommended without any qualifiers.   To be honest, it is a bit of a shame as otherwise, I really do like this dive computer.    However, at this price point, the Cosmiq+ is competing with the Mares Smart and the Aqualung i200.   Both have a watch-sized form factor, sensible algorithms and while the display isn’t as sexy and you do need to read the manual to understand the settings, the battery life on both is significantly better and so there are fewer caveats about usage.

However, that is not to say that the Cosmiq+ doesn’t deserve consideration or is not competitive – the legible display, app-based settings and cloud-based dive logging  make it a refreshingly different alternative in a world of otherwise fairly similar entry-level computers.   If the battery issues are something that you can work around, it is definitely worth considering (and arguably outperforms the other options in its price range).

So yes, I would recommend it, but with the caveats described.

Reviewed by: Vandit Kalia (Vinnie), resident gear head of Diveindia.   This unit was provided as a demo for testing, and was returned after the test period was over.   As always, these reviews represent our honest opinions on the product in question – we are beholden to you, our divers, and not to manufacturers.

DIVEIndia has the DeepBlu Cosmiq+ available for sale at a very competitive price – if this computer fits your needs, please contact us for current pricing and to purchase.

UPDATE FROM THE MANUFACTURER

Apparently, the battery life issues were not just limited to me:  Cosmiq has recognized that and released a firmware update that improves the battery life, as well as a Gen 5 version with a larger internal memory for logging 200 dives, as opposed to 25.   Supposedly, there is also an upgraded charging cable as well.  If the battery life issues have been resolved, then yes, this computer makes it on to our Recommended Gear list.   We will update the review if and when we get a chance to try out the newer version.

How To Make Your Scuba Diving Holiday Go Smoothly

By Articles

How to Make Your Next Scuba Diving Holiday Go Smoothly

Scuba Diving Articles

It is the one thing we all dread the most – having a much-anticipated holiday not go as planned.     After the anticipation, use of valuable vacation time and the not-inconsiderable expensive involved in going on a dive holiday, we all want things to go smoothly.

And the good news is – so do most dive centers and other divers.    The people running the dive center got into the business primarily due to a love for the sport – and the other divers are in the same boat as you (literally and figuratively):  they want to have a great trip.

But often, small mistakes, minor miscommunications, cultural differences and varied expectations can cause stress on a diving trip.       But it is very easy to avoid them – and with just a little bit of care and attention, it is very easy to ensure that your trip goes smoothly.

Join Vinnie in this recording of his FB Live Session on how to ensure that your diving trip goes smoothly.

About Vinnie:
Vinnie is a fictional character created by the golden retrievers that secretly run DIVEIndia (and generated using CGI in this video). In the narrative, he is an experienced tech diver, long-standing instructor and keen underwater photographer. Carefully planted rumors lend credence to his existence – some people have been paid handsomely to claim that they have seen him and even dived with him.

Scuba Diving in the city

Scuba Diving in the city

By Articles, Scuba diving Courses, Training

Scuba Resources in your Home City

Scuba Diving in the city

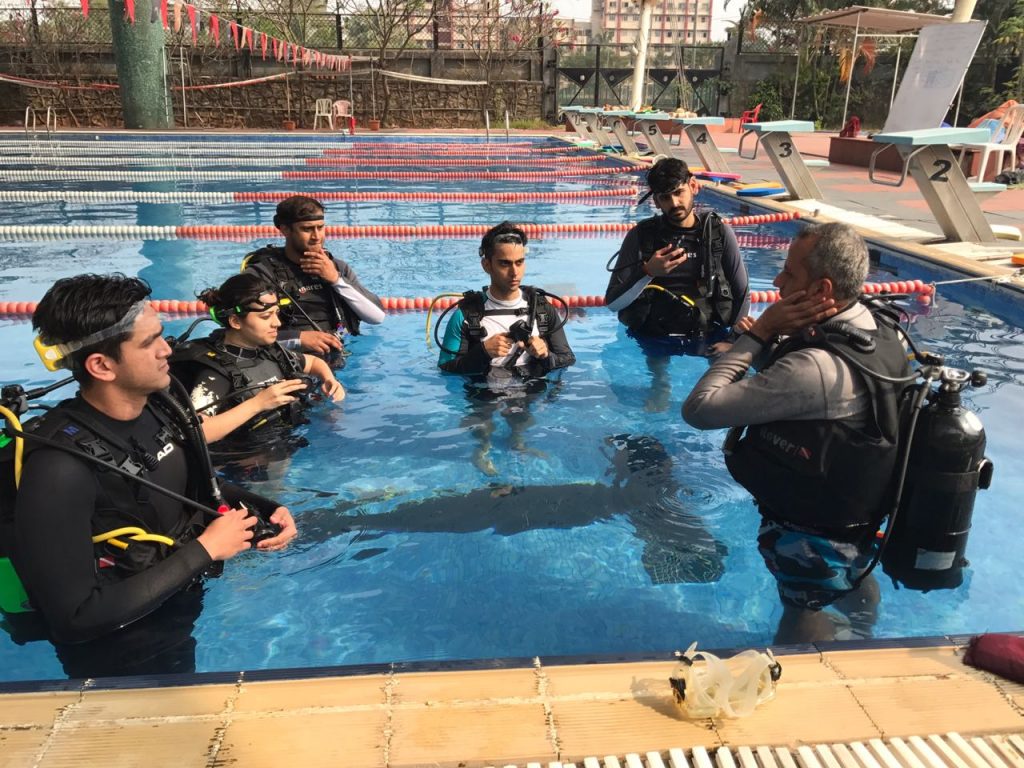
If you are a beginner looking to try the sport, why not give it a go right at home?    No need to book an expensive holiday – try diving in a pool and see if you like it (be warned – you will!).   And after that, complete your theory sessions as well as skill development sessions in the city itself, as your convenience and without feeling rushed.    Then, when you go on a holiday, you can go straight into the ocean and not spend valuable vacation time in a classroom.

And the benefits don’t stop just with certification.    Diving does not have to be something you only do a couple of times a year on vacation. Stay involved with the sport, keep your skills fresh and continue to develop as a diver right in your home city…. Vinnie tells you how in the video below.

While this video was shot during the COVID lockdown, a lot of the benefits of staying involved with diving on a continual basis still apply – whether it is polishing your skills, trying equipment, doing some theory online or generally hanging out with fellow divers.

And yes, we almost always have something or the other going on with regarding to diver training @home as well, in our dive  centers in Delhi, Bombay, Bangalore and Chennai.   So do contact us if you have any questions or are interested.

About Vinnie:
Vinnie started to dive back in 1991 and spent the first decade of his diving existence exploring the shipwrecks of the cold frigid waters of the North Atlantic (including the Andrea Dorea, although he regretably was unable to get a plate from the wreck).    A trimix diver since the late 1990s, a scuba instructor since 2001 and a Course Director/Instructor Trainer, first with NAUI and then with SSI since 2008, he is India’s most experienced dive instructor and also founder of DIVEIndia.     He currently conducts training in DIVEIndia’s @Home centers in Bangalore and Chennai.

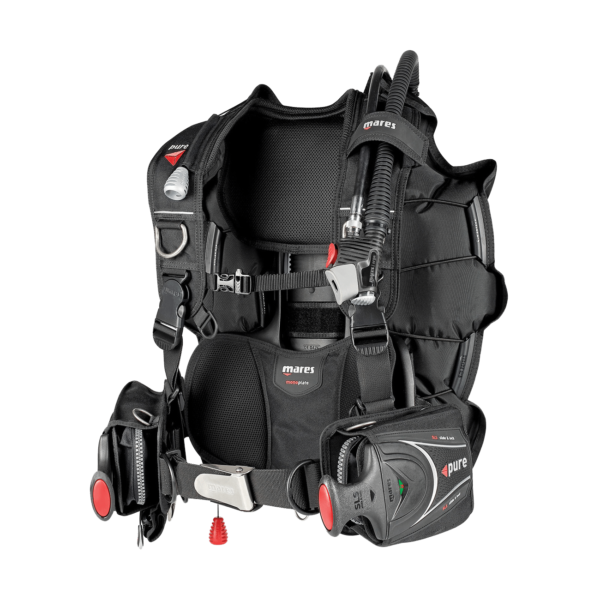
Review Mares Pure SLS BCD

How To Prioritize What Scuba Gear To Buy?

By Articles, Gear, Opinions

How to prioritize what scuba gear to buy?

What scuba gear to buy 1st

Article by:   Vinnie

One of the most common questions newly certified (or even moderately advanced) divers have is, what gear should I buy?      This is fuelled in no small part by the various certifying agencies and dive centers, all of whom have a vested interest in pushing sales of gear.   In fact, in a lot of places, divers are required to buy their own set of personal gear before they sign up for even their first certification course – and many places often push divers to buy a full set of dive gear before they have even gotten certified!

Now, don’t get me wrong – there are very good reasons to buy/own your dive equipment:  good fit, convenient features like integrated weight pockets that are usually not present on rental kit, lighter gear for easy traveling, consistency in buoyancy and trim, familiarity with gear (which can be critical in an emergency) and also pride of ownership (let’s face it – dive gear is cool).    And a lot of these benefits are not obvious until you have actually owned your own dive gear and realized how much better your dive experience is, as a result.   If money wasn’t an issue, I’d suggest everyone buy a full set of gear as well.

But sadly, money is an issue for most of us.    So the question becomes, how do you prioritize what to buy?      As with most things in life, there are no short and easy answers which apply to everyone.   But the purpose of this article is to give you the pros and cons of each piece of kit, so that you can decide for yourself.

A word of warning:  the video and the attached article are unabashedly subjective and opinionated.   My opinions.    I have been doing this long enough that I think my opinions have a very sound basis in reality, but there certainly are other sensible ways to look at this issue which may be different.      Also, this article is geared towards the typical tropical/vacation diver and also does not take into account any unique needs or specific requirements people may have.

MASK

Masks are the most commonly recommended item for people and with good reason.   An ill-fitting or easily-fogging rental mask can reduce the enjoyment of your dive.   As masks are fairly inexpensive and easy to carry, there is no real reason to not get a mask.    That said, the downsides of not having your own mask are fairly low as well –  fogging is relatively easy to fix, and most people generally are able to find a mask that fits their face fairly easily.     However, for those of you with prescription glasses who do not want to wear contacts, a prescription mask becomes a near-essential piece of kit.

Recommended for:   Everyone
Essential for:  People who struggle to get a good fit with regular mask, people who need a prescription fit

SNORKEL

Snorkels are great for snorkelling.    Or if you are doing long surf entries.     They are absolutely a menace around dive boats – having your face in the water, unable to see or hear anything, is not really a good idea around a boat that may be pitching in the water.      29 years of diving, 6000+ dives later, I have yet to have a single dive where I have gone “gee, I sure wish I had a snorkel with me”. But your mileage may vary – if you feel uncomfortable on the surface with your head upright, then yes, a snorkel does make it easier to breathe, especially in choppy seas.

Recommended for:   Those whose special dive conditions require a snorkel
Essential for:  Snorkelers

THERMAL PROTECTION

Most tropical water dive centers issue 3mm shorties to divers.    These are great for a moderate amount of warmth and some protection from stinging objects.      If you tend to get cold easily, you will need a 3mm wetsuit – and it is nice to have your own, to ensure you get a good fit.   Other pieces of kit that are nice to have are a full sleeved rashguard (sun protection, protection from small stingers in the water) or neoprene vests/jackets like the Mares Ultraskin / Sharkskin.      There are various bits of kit you can buy, which can let you dial in the perfect combination to cover your diving situations – eg, I own a 1mm lycra fullsuit, a 3mm neoprene wetsuit, a full sleeves fleece+neoprene jacket, a hooded vest and a separate hood (and this ignores my older cold water gear – a drysuit, 7mm suit, etc).        To get the most of this, it is  better to gain some experience and understand how prone you are to getting cold, what sort of conditions you will be diving in, etc and then make a purchase decision, however.

Recommended for:   Everyone, as they gain some experience and start to understand their own requirements
Essential for:  People diving regularly in colder water

FINS

Making people aware of the importance of fins has become a bit of a personal crusade of mine.     People obsess and agonize over what regulator to buy, for example, when you can pretty much pick any regulator in the market and get more-than-adequate performance.     But pick the wrong fins and you have ruined your dive.    Wrong fins make it harder to swim in challenging  conditions (read:  stronger currents) and can also ruin your trim by making your legs go up/down too much.

Recommended for:   Everyone
Essential for:  Those who struggle with currents or trim

BCD

Diving with the same BCD helps you dial in your trim more consistently, manipulating all the buttons and clips becomes a part of your muscle memory and you can customize your setup (storage of things like cutting tool, octopus, lift bag and reel) to be consistent every time.     And most importantly, you know where the emergency dump valves are located and how much modulation they (and the inflator) need.    The reason not to buy?    These are all mainly matters of comfort and convenience.   But don’t under-estimate the value of comfort and convenience:  this is one of those products where you will not really miss having your own, higher-end BCD until you actually own one – but once you own your own, you will not want to go back to a rental.

Recommended for:   Everyone, budget allowing;  underwater photographers, wreck divers, people who dive enough to justify the savings in gear rental
Essential for:  Cold water divers

REGULATOR

It is somewhat ironic that the most essential item in scuba, in terms of being safety-critical, is also the most reliable and relatively undifferentiated.   Yes, manufacturers all tout superior materials, better breathing rates, etc. etc. but in real world conditions, there is very little difference between regulators that you would notice without doing an A/B  comparison.      That said, for experienced divers, it is good to own your own reg so you can customize hose routing, gauges, etc as per your requirements.    Also, if saving weight is important for you, then having a travel-specific regulator can save you 500-1000gm over a normal regulator.    Lastly, having your own regulator means that you know its service history and it is less likely to have minor leaks and issues than a rental regulator.

Recommended for:   Those who value low weight, who want the peace of mind of knowing their regulator’s service history or experienced divers who like consistency in all aspects of their gear setup, people who dive enough to justify the savings in gear rental
Essential for:  Tech or cold water divers

COMPUTER

To me, a computer should be mandatory for diving.  When you have your own dive computer, you have all the information that you need to dive safely, and also to handle any emergency that may come up:  depth, time, no-deco info (or deco info), ascent rate and with high-end computers, compass/heading and air time remaining.      Relying on a dive guide’s computer or sharing a computer between buddies – both common practices – is a little better but over the course of a dive holiday, small variations in dive profile can add up to a significant difference.   Not to mention what happens if you are separated from your buddy:  that is a stressful event and being without a computer at that time only makes things worse.    Quite simply, as a diver, you are in charge of your own safety – and you cannot do that without a dive computer (don’t even mention tables).   Yes, you can rent dive computers on trips – but it is preferable to have your own computer, where you understand what the displays mean, how to adjust the settings, etc.  Dive computers are fairly cheap, starting at a little over Rs 20k for a computer –  there is no real reason not to own one.

Recommended for:   Everyone
Essential for:  Everyone

ACCESSORIES

There are plenty of useful accessories divers can own – SMBs, whistle, reels, a small cutting tool, a small dive light, reef hooks and pointer sticks.     Of these, I would say SMB/whistle are essential if you are boat diving;  cutting tools are handy if there is a risk of entanglement, reef hooks for hooking in during currents (if allowed by the dive center – this is a debatable practice, which is a separate discussion), etc.     A lot of these can also be rented as needed, so there is no great impetus to own these other than the convenience of always having them with you in case of an unexpected need.

Recommended for:   As needed
Essential for:  n/a

SUMMARY

So – what do you actually need?       Personally, I would suggest starting with the following 2 items as your initial purchase:  mask and computer.   These have the biggest and most immediate impact on comfort and safety.      Then, once you have gotten some experience, add a pair of suitable fins (based on having tried out various options) and appropriate thermal protection (rashguard, jacket, vest or full suit) – both of these are probably just as important, if not more, for comfort than a mask but you need some experience in order to make the right purchase here.   The regulator and BCD can come last – or you might find that you don’t dive enough to warrant purchasing these and are ok to rent – these definitely fall in the “nice to have” category (or the “will save money” category for frequent divers).

With all diving products, especially if you are starting out – nothing beats the advice of experienced professionals who can help you select the product that best fits YOUR needs, as opposed to what they have in stock.   As much as possible, do try out the product you are buying in the water, if you can – just because something works very well for others doesn’t mean it will for you.

Ultimately, there is only one question that matters:   will a particular piece of kit make diving more comfortable/enjoyable?         Anything that gets you diving more is a win – the sticker shock of the purchase goes away, but the memories of great dives stay with you forever.

How to Become a Better Scuba Diver

By #OceanLove, Articles, News, Training

How to Become a Better Scuba Diver

How to Become a Better Scuba Diver

A common misconception among divers is that learning to dive is where you acquire all the skills that you need to dive.   That is incorrect.    The certification course gives you enough skills in order to get you STARTED in the post.  It is only the beginning – becoming a better diver is a path on which each and every one of us are walking.

And while we would love to have you spend all your money with us, and do as many courses as possible with us, you don’t have to do so in order to improve.      In fact, for most divers, just continuing to develop the skills and concepts that they learned in the Open Water course is all that is needed in order to improve their scuba skills and comfort significantly.

In this recording of a Facebook live session shot during the COVID lockdown, Vinnie shares some practical, real-world tips on how to take ownership of your dive experience, and how you can do small things to continually improve your skills, both mental and physical.

About Vinnie:
Vinnie started to dive back in 1991 and spent the first decade of his diving existence exploring the shipwrecks of the cold frigid waters of the North Atlantic (including the Andrea Dorea, although he regretably was unable to get a plate from the wreck).    A trimix diver since the late 1990s, a scuba instructor since 2001 and a Course Director/Instructor Trainer, first with NAUI and then with SSI since 2008, he is India’s most experienced dive instructor and also founder of DIVEIndia.     He currently conducts training in DIVEIndia’s @Home centers in Bangalore and Chennai.

Underwater Photography Guide For Beginners: Building A System Around A Compact Camera

By Photography, Underwater Photography

PUTTING TOGETHER AN UNDERWATER PHOTOGRAPHY SYSTEM BASED ON A COMPACT CAMERA

Are you interested in taking high quality underwater photos?  Or perhaps upgrading from your GoPro to something that takes better images and also is more scaleable?   Does the complexity of an underwater camera system and all the bits and pieces needed put you off buying one?

In this video and article, we are going to talk about the various components of an underwater photography system and what attributes to look for – a system that may not be the cheapest to start with, but also a system that will grow with you as your interests develop (which works out to better value in the long run).

For the purposes of this article, we are going to ignore ILC (Interchangeable Lens Cameras, like DSLRS and Mirrorless) – while they are technically the best solution, they also require a commitment in terms of money and approach to diving that is not suitable for most people, atleast not initially.   For the vast majority of divers, a compact camera system actually is the better tool.

1:  THE CAMERA

When picking a camera, the obvious point is to make sure there is a housing that is made for that specific camera model.  That aside, please look for one with the following attributes:

  1. A good wideangle – the wider the better: Underwater photography is all about getting close to your subject, and a wider angle lens lets you get closer to subjects ranging from turtles, large coral outcrops, divers, etc.  This means that your images are going to be better lit, sharper and have more detail/contrast.  By contrast, the telephoto range is not as important, as you will rarely be shooting something too far way.
  2. A good close-up/macro mode: Among the most rewarding – and easily accessible – category of subjects in underwater photography are macro subjects: nudibranchs, shrimps, etc. And here too, you want to get as close as possible, to fill the frame with your subject.
  3. Fast autofocus: While modern cameras have improved substantially compared to the Olympus C3000 I started shooting with, back in 2001, there still is a difference in autofocus, especially in poor light and low contrast (ie, your typical dive).  Faster AF will result in a much greater percent of keepers, especially for fish portraits.
  4. Easy to access controls:  Operating a camera underwater means working through a housing, which is typically via buttons and dials.   A camera which requires a lot of use of touchscreen or rotating dials typically does not pair well with these buttons and dials, and so may limit your ability to set key parameters underwater.
  5. Built-in flash: One feature I didn’t mention in the video is a built-in flash, mainly because virtually every camera does come with a flash. This is mandatory – that built-in flash is what controls your strobe (see section 3).  No flash = no strobe, and you might as well just shoot with a GoPro.

In addition to this, a nice-to-have feature (for me) is built-in waterproofing.  This way, if or when the housing floods, there is a good chance you may save the camera.  You can also use the camera for other activities associated with the diving trip – beach, snorkelling, etc. and not have to worry about it getting splashed.

This is the camera I used underwater (at the time of writing this article): an Olympus TG5.  It has the best macro modes out of all the compacts in the market at present

As camera housings are specific to individual cameras, you obviously need to pick a camera model which has at minimum a housing made for it and ideally, a range of accessories to support the system.   The 3 brands which I recommend are Canon, Olympus and Sony.  Each of them make cameras that are very popular with underwater photographers, and so it is easy to find housings and other accessories for them.

Do note – if you have a compact camera already, you can likely get a housing for it and wont need to buy a separate camera.  However, I do encourage read up on the housing section to determine what features to look for when it comes to building a scaleable system, and whether you particular camera + housing combo meets those requirements.  In some cases, it may be better in the long run to buy a new camera, rather than build a compromised system around a less-than-ideal camera.

2: THE HOUSING

The housing is the waterproof case within which the camera is kept while shooting underwater.    When looking for a housing, look for the following 3 main attributes:

  1. Ergonomics: What you want is a housing which feels easy to grip in your hands and where the important shooting controls – focus, change AF point, change exposure – are easy to reach with your fingers, without you needing to take your hand off the grip every time.  I cannot overstate what a big difference this makes when you are actually shooting – if you are struggling with your camera, you will not be able to get the best shots.
  2. Access to controls: Most camera housings do give access to all the essential controls when shooting underwater – however, in several cases, many “nice to have” functions may not be accessible. For example, if you rely on a particular custom function button or a rotating control dial, please make sure you can access it from within the housing.
  3. Ability to easily add accessories: This is the single biggest attribute when it comes to determining whether your system will scale up or not.  As your needs evolve, you may find you want greater close-up capabilities or the ability to go wider for impressive reefscapes.   Does your housing allow you to add these components easily?   At a more basic level, can you connect to your strobe using standard connectors or are you dependent on proprietary connectors that limits your choices?  Ideally, you want a housing with a threaded filter mount in the front, which will let you screw in additional accessories and a port for plugging in an optical fiber cable to sync your external strobe with the camera’s strobe.

This is the Olympus PT-058 housing I use with the TG5.  The front of the port has 58mm threads for screw-in accessories and there are 2 ports for fiber optic cables on the upper right of the port – allowing me to attach 2 strobes directly to the camera

Housings can be made by the OEM (camera manufacturer) or by a third-party manufacturer like Nauticam, Fantasea, Seafrog, etc.    OEM housings are generally relatively inexpensive and made of polycarbonate.   Third-party housings often tend to be a bit more expensive, and often made of metal.

Often (but not always), third-party housings may have a better ecosystem of accessories – which is a good reason to pay a premium for them.  In addition, while OEM housings are typically rated to 30m or 40m, metal third party housings may be rated to 60m or deeper – for divers looking to shoot at tech depths, a more expensive 3rd party housing may often be the only solution.

The housing has a large window in the back for looking at the LCD screen and all the buttons are large and easy to access

However, purely in terms of reliability and functionality, I have not found 3rd party housings to be more reliable or less prone to flooding.  Personally, as long as the housing met my preferred depth rating and checked off the three attributes listed above, I would happily buy the cheapest housing – as long as it was from a reputable brand.  There are plenty of horror stories about ultra-cheap housings flooding due to poor QC – that is not a risk I am willing to take, so save $100-200.

The shutter button has a large lever, making it easy for most hand sizes, and the zoom and power buttons are also easily accessible.  There is also a cold shoe on the left, for mounting additional accessories

3: THE STROBE (UNDERWATER FLASH)

Photography is, in its essence, the act of recording light.   It doesn’t matter how expensive your camera – if the light is poor, the image will be poor.  And underwater, the natural light is always poor: you will need a powerful flash to not just brighten the scene but also to add in the reds that have been absorbed by the water.

Simply put – the strobe is the single most important element in taking high quality images.  Period.  This is one area where you should not skimp (and unfortunately, this is the one area where most people do try to cut corners).   A good strobe has the following attributes:

  1. Power: Power is represented by something called Guide Number. Without getting into the specifics of what it means, the main thing to know is that bigger = better.  You want as high a GN as possible – ideally, atleast 20-22, or even more if budget allows.   Once the payment is made, you will never regret having a more powerful strobe.
  2. Angle of coverage: Along with power, you also need to know the angle of coverage of the strobe beam.  Many cheap strobes may appeal due to their high GN, but the angle of coverage is very low, which can be a problem when it come to lighting a scene.  You want an angle of coverage of atleast 90 degrees – and as before, more if you can afford it.
  3. Beam uniformity:  This is another area where cheaper strobes cut corners.  A good strobe will have even lighting across the entire beam.  No hotspots, which can cause uneven exposure when shooting underwater
  4. Manual controls: Most strobes have an automatic mode, where they work seamlessly with the camera’s TTL exposure mode (unsure what TTL is?  Just think of it as fully automatic, with the camera effectively controlling the strobe).  This is great when you are starting out or for macro, but auto mode is unreliable with many subjects, such as wide angle and reflective fish.  For more consistent results, you want the ability to set the strobe’s power manually.   This is a lot easier than it sounds, and is something many photographers gravitate to as they evolve.    Is it essential?  No.  But having this feature ensures you will not outgrow the strobe.
  5. Additional features:  These include things like focus lights, torch functionality and red light (for focus assist in the dark with shy subjects).   While not essential, they do make your diving a lot easier – which is always nice.

The Inon Z240 (top of the range strobe from Inon in its time) has a full array of controls and also a standard 1” ball mount for attaching to other hardware.

One thing worth noting- manufacturers often tend to be very optimistic with their claims about power and angle of coverage.  And unfortunately, in the case of really inexpensive products sold on Ali Express and elsewhere, they flat out lie – and I say this as someone who uses dive lights and bicycle lights that I have bought (and will continue to buy) on those sites.

Also, video lights are not a substitute for strobes.   Video lights put out a lot less power than strobes – even a $1500 video light will not have as much power as a $500 strobe.  So while they may work for macro and closeup work, they are not as good for wide angle photography.

Given the importance of the lighting to underwater photography (I really think your strobes are the centrepiece of your system), I cannot overstate the importance of allocating ample budget towards them.    Typically, most people skimp out and get budget strobes.  Then after a few dive trips, they end up upgrading.  It is better to just get it right the first time – and also more economical in the long run.

It is one thing to buy inexpensive torch lights or video lights (which are really torch lights with a wide angle of view) – however, the moment you add in sync circuitry and greater power needed for strobes, cheap becomes a losing proposition.  I recommend Inon and Sea&Sea as 2 brands offering very good power, reliability & features for the money.

Also, as your photography skills improve, you may want to add a second strobe.  But for now, it is better to start with 1 good strobe.

The controls may look intimidating, but are fairly easy – clockwise from bottom left: (1) button for turning on the torch (and locking it), (2) setting the various strobe exposure modes, (3) adjusting the strobe power in manual control modes and (4) adjusting for camera with or without pre-flash.  I typically set the strobe on M on the upper left dial, and use the upper R dial to increase/reduce the power.

4: THE SYNC CABLE

This is a piece of fiber optic cable that connects your camera to the strobe – when your camera’s flash fires, that triggers your external strobe.  Depending on what mode you are using, the strobe will either then put out a specific amount of light (manual mode) or will also shut off when the camera’s strobe shuts off (auto / TTL mode).

The main thing to look for is a cable whose terminators are compatible with your system.  The standard used is a push fit (also known as the Sea & Sea connector, after the popular strobe maker).   Inon strobes use a screw-in terminator, which is not very popular outside of Inon products, but less prone to popping out (which isn’t really a big deal, though).

The cable on the left has Sea&Sea connectors on both ends;  the cable on the right has a Sea&Sea connector on one end (this plugs into the housing) and an Inon connector on the other (this screws into my strobe).   You can also connect your strobe to the camera via electrical cable, but that is for DSLRs with hot shoes only, not for compact cameras.

5: THE CONNECTING HARDWARE

The camera, housing, strobe and cable are the essential bits needed to take the photo.  But you also need a bunch of accessories to physically combine them into one unit and also to position your strobe underwater when shooting.  These are the following:

a. The base tray / handles:

The base tray is a plate that connects via a screw to the tripod mount at the bottom of most housings.    It will have 1 or 2 handles on the side (depending on the option you get), for mounting most accessories.

The standard for connecting multiple pieces of hardware is 1” ball mount, as shown in the photo below.    There are other connecting mechanisms as well, but try to get this, as this gives you the most options for putting together different hardware elements.

Two different trays – one is a single-handle tray (the handle actually goes on the left as my right hand holds the housing), and the other is a dual-handle tray.  The latter lets you attach 2 strobes.  Both the trays have the standard 1” ball head terminators for adding more hardware

b. Strobe arms:

Strobes are typically mounted on strobe arms, to get them further away from the central axis of the camera/lens (this reduces backscatter).

A common option are flex arms – they are easy to use and do not require a lot of other hardware.  The downside is that they are limited in length and also positional flexibility.

Flex arms are an inexpensive solution to get started but limit flexibility when it comes to strobe positioning.  Note the 1” ball heads at each end

In my opinion, rigid strobe arms are a better option for enthusiasts – by using 2 of these arms to connect each strobe, you have maximum positional flexibility for lighting (and remember – underwater photography is all about lighting).   Strobe arms come in various lengths – for someone starting out with underwater photography, two 6” arms per strobe is a good starting point and well suited for everything from macro to wide angle.

Different types of arms. From left to right: 10” arms used for wide angle photography on my ILC system; 6” arms recommended for compact camera systems and 4” arms used for macro photography on my ILC system.  The 10” and 4” arms have floats to adjust the buoyancy of my ILC system.  As with everything else, each of these arms ends with 1” ball adapters and you can see how they connect using butterfly clamps.  

As with the tray/handles, make sure you get arms with 1” ball terminators on each end.

c. Butterfly Clamps

These are clamps for connecting 2 separate hardware components, each of which has a 1” ball terminator.

For each strobe, you will need 3 of those – one to connect the handle to Arm 1, a second to connect Arm 1 to Arm 2 and a third to attach the strobe to Arm 2.

Butterfly clamps are used to join 2 separate pieces of hardware via their 1” ball heads.  The nature of the ballhead and clamps allows for very easy movement underwater, along any axis

The good news is that here, you can DEFINITELY save money by buying inexpensive arms and clamps off Ebay, Ali Express or wherever.  These are simple pieces of machined metal and do not require high technology or high QC – and the generic hardware costs a fraction of what the branded ones do.

So once you have a camera, housing and strobe, all neatly mounted on a tray and strobe arms, you are ready to go shooting.   And indeed, you have all the tools you need to take excellent photographs – in fact, as long as you can get close to the subject and light it properly, the images from a compact camera will not be too different from that taken with an ILC.

However, where the compact camera typically falls short of an ILC is in ability to get really close (near lifesize or 1:1 reproduction) of really small objects, or its ability to encompass sweeping wide views of reefs or really large animals like whalesharks, etc.

The former requires really good macro capabilities (which most compact cameras lack – the Olympus TG series being an exception).  The latter requires an ultra-wide angle of view, which is also not possible with compact cameras.

However, there are ways to get around this – by using adapter lenses.   You can get close-up adapters, which let you get closer to a subject (and thereby increase magnification).  You can also get wide angle adapters, which widen the field of view of the camera, thereby letting you get closer to large subjects or wide vistas.  These are typically called wet lenses, as you can attach and remove them underwater.  There is a small optical tradeoff compared to the specialized gear that ILCs use, but you make up for it by being able to shoot both wide angle and macro on the same dive.

6: ADD-ON ACCESSORIES

A Kraken UWL wet lens – this increases the field of view of my Olympus system from an average 100 degrees to a very wide 140 degrees: great for impressive wide angle shots.

Ability to use wet lenses depends primarily on being able to attach them to the front of your housing – typically, this can be done via a proprietary bayonet mount (specific to individual 3rd party manufacturers) or via a standard threaded screw mount (58mm or 67mm are typical sizes).   I am a big fan of screw mounts, as it lets you add components from a wide variety of manufacturers.

If you are starting out, you do not need to spend money on these – but do make sure your housing has an option to add these later.

Summary

If you were looking for a magical solution to putting together a system for underwater photography on the cheap, I am sorry to disappoint.  Versatile, cheap, quality – you can only pick two, unfortunately.   I have chosen to focus (no pun intended) on putting together something that is significantly better than what you can shoot with a GoPro.

The system I have suggested is going to cost somewhere in the following ballpark:
– Camera:  Rs 30,000
– Housing:  Rs 25,000
– Strobe:  Rs 35,000
– Sync cable:  Rs 5,000
– Tray:  Rs 2,500
– Arms + connectors:   Rs 6,000

So about Rs 1 lakh / $1300 or so for the whole thing, give or take 10-15%.

Is it cheap?  No.   But I also think that there is no point spending $400-500 / Rs 30,000-40,000 and getting something that is only a little better – you might as well just stay with what you have.  If you are going to upgrade, you might as well upgrade to something that is truly and noticeably better.

Also, it is better to spend a little more to buy the Right Stuff, as opposed to buying something cheaper which is a compromise, which you have to upgrade later.   Almost every photographer goes through a stage like this (eg, with tripods) – and virtually every experienced photographer later advises against it.

If you are on budget, consider buying used/NOS.  The previous generation camera and the previous generation housing can be had for substantial discounts and with relatively negligible difference in performance.    Used strobes can also be a good deal, but a bit harder to source in India.

In the grand scheme of things, look at it from the lifetime utility point of view.  Given how much a diving trip costs, the small increment you pay for better quality pales into insignificance, especially when you amortize it over the number of years of use you will get from it.

Anyway, I hope you found this article useful – do give us a follow on Facebook and Instagram, and perhaps share this link, if you did.

Where should you go scuba diving – havelock or neil island?

By Articles, Blogs, Dive Sites, Scuba Diving Andamans

Best Place for scuba diving in India

Where should you go Scuba Diving next?
Havelock Island (SwarapDweep) or Neil island (Shahid Dweep)

Where should you go Scuba Diving next? Here are the best dive sites in Havelock Island and Neil Island to help you decide where you should dive next.

Best Place for scuba diving in India
Havelock Dive Sites:

Dixon’s Pinnacle – Three pinnacles at different depths with abundant soft coral growth on them. Depths range from 17mtrs – 32mtrs. Schooling fish like snappers, fusiliers being hunted by trevally, banner fish, red tooth trigger fish, juvenile emperor angel fish, peacock mantis shrimp, Moray Eel, cleaner shrimps, turtle if you’re lucky. A dive site that is good irrespective of visibility because there’s so much to see. Ideal site for nitrox

Johnny’s Gorge – A gorge with rocks scattered around. Strong currents sometimes at this site. Depth ranges from 18mtrs – 30mtrs. Massive schools of snappers (different types), fusiliers being hunted by trevally, banner fish, White tip reef sharks, occasional turtle, Barracuda school, lovely swim throughs, shit loads of moon jellyfish in summer when waters get warmer…

Jackson’s Bar – Primarily a deep dive site ! A long bar which starts and stays at around 22-23mtrs with the edges dropping down to 30-35mtrs. Lots and lots of sting rays on the bar, soft coral, occasional rays gliding by, huge school of snappers, lots of Moray Eels… I can’t remember much about this site now cuz it’s been that long ?

The Wall – As the name suggests, a reef with one side dropping off to 60mtrs and the other side gently sloping down in the form of huge steps. Soft coral at depth but fish life concentrated between 9 – 15mtrs. Again, massive schools of fish like fusiliers, trevally, snappers, lionfish, angels, octopus, morays, crocodile flatheads, ghost pipefish, scorpion fish and a whole lot more. Easy dive site even if there is a strong current because you can simply hide from it. Perfect for all levels of divers. Except for try divers.

WhiteHouse Rock – Oh boy, where do I even start with this site. My favourite in the Andamans. Coming up from about 60 odd mtrs to as shallow as 8-9 mtrs, this dive site offers everything ! Insane variety of soft coral, fish life like groupers, residential turtles, octopus, Scorpion fish, Barracuda, trevally, rays if lucky. Swimming through the soft ‘black coral’ is like swimming through a forest, then around the corner the type of coral and colours start to change ( I need to look at the names of all those corals, forgot ) perfect site for deep,, Nitrox, fish id specialty dives…

S.S Inchket – Steam Ship Inchket was a Japanese cargo vessel which sank in 1950 (I can’t remember exact date) after hitting a huge rock. It took a long time for the ship to sink and so there were no casualties. The wreck is now an amazing site for all sorts of marine life. Coral, invertebrates, molluscs, reef fish, turtle -all reside here… The ship is broken in two parts and has a couple of narrow swim throughs, however, Penetrating the wreck entirely is not possible. The site ranges from 5mtrs at the bow to the deepest point being at the stern at 18mtrs. Visibility at this site is usually quite low but tends to surprise on some days. Currents if any are quite mild and most often because of thermoclines. A lovely site overall. One of the furthest dive sites from Havelock apart from WhiteHouse Rock, diving these sites requires planning based on the tide to have best conditions.

Best Place for scuba diving in India
Neil Dive Sites :

Junction – called junction because it’s right at the junction of Neil and Havelock ! This is a deep dive site and topography is similar to Jackson’s Bar. Starts off at 23mtrs and goes down to 33mtrs, this dive site has a lot of soft coral and Gorgonian Fan coral in particular. The currents at this site can get really strong and since the life is primarily deep, dives tend to be shorter than others. Huge school of fusiliers feeding on plankton and being hunted by trevally make for an epic dive even if it is short. Strong currents at the junction could be an ideal place for pelagics and so drifting off if you have plenty Air after running low on bottom time could be fruitful.

Bus Stop – Bus stop is a gently sloping dive site with patches of reef and sparkling white sand in-between the reefs. Most often always very clear water at this site. The patches of reef are home to the reef fish and Moray Eels. One particular area where there is a fan coral has around 35 lionfish and can make for quite a site if they are all out in the open and not hiding under the overhang. Sandy bottom is home to a carpet of garden eels facing the direction the current is coming from. This site ranges from 13-22mtrs and continues sloping gently..

Margarita’s Mischief – Another patch reef, this dive site has patches of reef of what is supposed to be volcanic rocks. The way the reef is formed makes the reef patches look like it were some ancient construction with very rectangular shaped rocks placed horizontally and vertically. In between these rocks are invertebrates, morays, sand filled with sting rays, anemones, feather stars, and beautifully colourful Anthias. Surgeon fish, snappers, banner fish, red tooth trigger fish always cloud up the visibility. One section on the reef is where a lot of hunting happens when the current and visibility are just right – most often ! The site is fairly flat and ranges from 12mtrs over the reef patches, to 16mtrs in the sand… Beautiful site for all certification levels.

Fish Slate – Jeeeejus ! Whatasite ! Suitable for all levels of divers from DSDs to experienced certified divers. This site is a reef fringing Neil Island. Has amazing coral life starting at very shallow depths of 5mtrs. Boulder and a variety of branching and table coral make for picturesque views. Visibility at this site is most often clear and schools of fish are massive. Schools of Midnight snappers, chubs, red tail butterfly fish, sweetlips and a whole lot of fusiliers always hovering over the reef are a perfect safety stop. Reticulated Dascyllus and freckled Hawkfish are always above and between the branches of the staghorn coral. If this site really wants to show off, then even a turtle or dugong may show up. The max depth at this site is 12mtrs and currents are mild. A site you should definitely dive at from Neil Island

Busy Buro – A site just out of bounds for open water certified divers in terms of depth. Starts at 16mtrs, this is a flattish reef of volcanic rock. Not too much coral at this site but lots and lots of fish. Schools of yellow snappers at the start, stingrays or marble rays in the sand, lobsters and cleaner shrimp in the crevices followed by white snappers and golden sweetlips at the other end of the rock at 19mtrs make this another site off Neil with different schooling fish. Trevally hunting fusiliers is exciting to watch at this site because of the coordination of the trevally hunting and fusiliers darting all of a sudden.. Currents could be from none to moderate.

K Rock – haven’t dived it much. Only a couple of times so far..

Anchor Line – Another reef fringing Neil Island, a site ideal for DSD and open water course divers. This site has a  Sandy bottom at 6mtrs and reef filled with live boulder and branching coral. Schooling fish doing their thing and the sand bed right by it, makes it a perfect dive site for beginner divers to watch and understand why one gets hooked to diving. Easy relaxing dive site !

Nursery – This site is on the western side of Neil Island and again is a reef fringing the island. Schooling fish, lobsters, stingrays, octopus and cuttlefish are what can be seen here. A site suitable for all levels of divers starting at 6mtrs and upto about 12mtrs.

How to Become a Better Scuba Diver

How to become a marine biologist – Tamanna Balachandran

By Andaman scuba diving course, Articles, PADI underwater naturalist, Scuba Diving Careers in India, Underwater Naturaliast Course

How to become a marine biologist?

Essay by Tamanna Balachandran
How the marine ecology camp from last year influenced her and her decision to become a marine biologist.

The first time I experienced what the ocean had to offer was when I scuba dived, in the waters of Havelock. Then, I was a ten year old girl who had just fulfilled a life-long dream, mesmerised by the beauty of the underwater world I had gotten my first peek into.

When I returned five years later, a couple inches taller but with the same zeal for marine exploration, I decided to take part in the marine ecology camp. Over the course of the camp, I learnt more about the ocean I adored, from how corals were formed to figuring out how a particular fish hunts just by observing its features. I went on dives, guided by Chetana, where I was able to observe the subtlest interactions and behaviours, like the goby fish protecting the shrimp as the shrimp dug a safe home for the two of them, or parrot fish sleeping in mucus bubbles of their own making. The more I learnt, the more I felt like I understood. And I began to view the ocean no longer as a picture perfect fantasy world, but as a living breathing ecosystem held together by fragile, intricate relationships between its biotic and abiotic components. I realised that our ocean is straining to deal with the effects of our actions and it is our responsibility to fix what we’ve caused.

After the camp, I learnt and explored even more, and firmed my decision to play my role in marine conservation more actively. I attended wildlife conferences, heard from experts that had spent decades studying animals. And I decided to share my thoughts with the world; in August of 2019, I gave my first TED talk, titled “Bulldozing Our Oceans’ Integrity”. I shared my concerns about the effect that commercial fishing techniques like trawling were having on our oceans. Having decided a career path that will lead me to becoming a marine biologist, it is vital I continue learning and sharing my ideas but, also starting to take action for the cause. And so, this summer as well I’m returning to Havelock to intern in their marine conservation programme.

Photo credits Umeed Mistry

×

Hello!

Click one of our contacts below to chat on WhatsApp

× How can I help you?