Best Dive Sites in Havelock

By Articles
Best Dive Sites in Havelock

Best dive sites on Havelock Island – Updated Feb, 2023


Human beings!

Though we all are different in our own unique ways, the common feeling of curiosity makes us special and feels Human. It is wider than the sky and deeper than the ocean. We are constantly searching for new worlds and novel realms to experience something magical, feel something mystical and go beyond the frame of life where no one has been before. 

Well, while scientists try to prove this with experiments and filmmakers create their own fantasy worlds, let’s go on a journey underwater to explore the mega verse of marine life in Havelock Island. 

“Ask a diver, why do you dive?”

His answer will be complex. 

For some, it’s to see the fascinating fishes. 

For a few, it’s the feeling of liveliness and peace. 

For many is the adventure of exploration. 

The list goes on forever. 

Call it a Pandora from the movie Avatar or even a piece of paradise; Havelock from the Andaman and Nicobar Islands, India, is one of the global hotspots for Scuba diving. It’s not just the home to exotic beaches and dense forests; it’s a marvel with copious amounts of dive sites and aquatic life. It is a safe haven and a diver’s dreamland to witness the wonders underwater and learn the craft of Scuba Diving with finesse. 


Now, gear up!


Here are the 10 best dive sites on Havelock.

1. Jhonny’s Gorge – 

Depth – 25- 30M

Type – Advanced 

If the divers of India and South East Asia have a bucket list of dive sites, the 3 names that will take the top spots are Jhonny’s Gorge, Dickson’s Pinnacle, and Jackson’s Bar. These world-class dive sites were discovered by the legendary masters of Scuba Diving from Andaman and Nicobar Islands – The Poayasay Brothers and our own team of pros led by Vandit “Vinnie” Kalia.

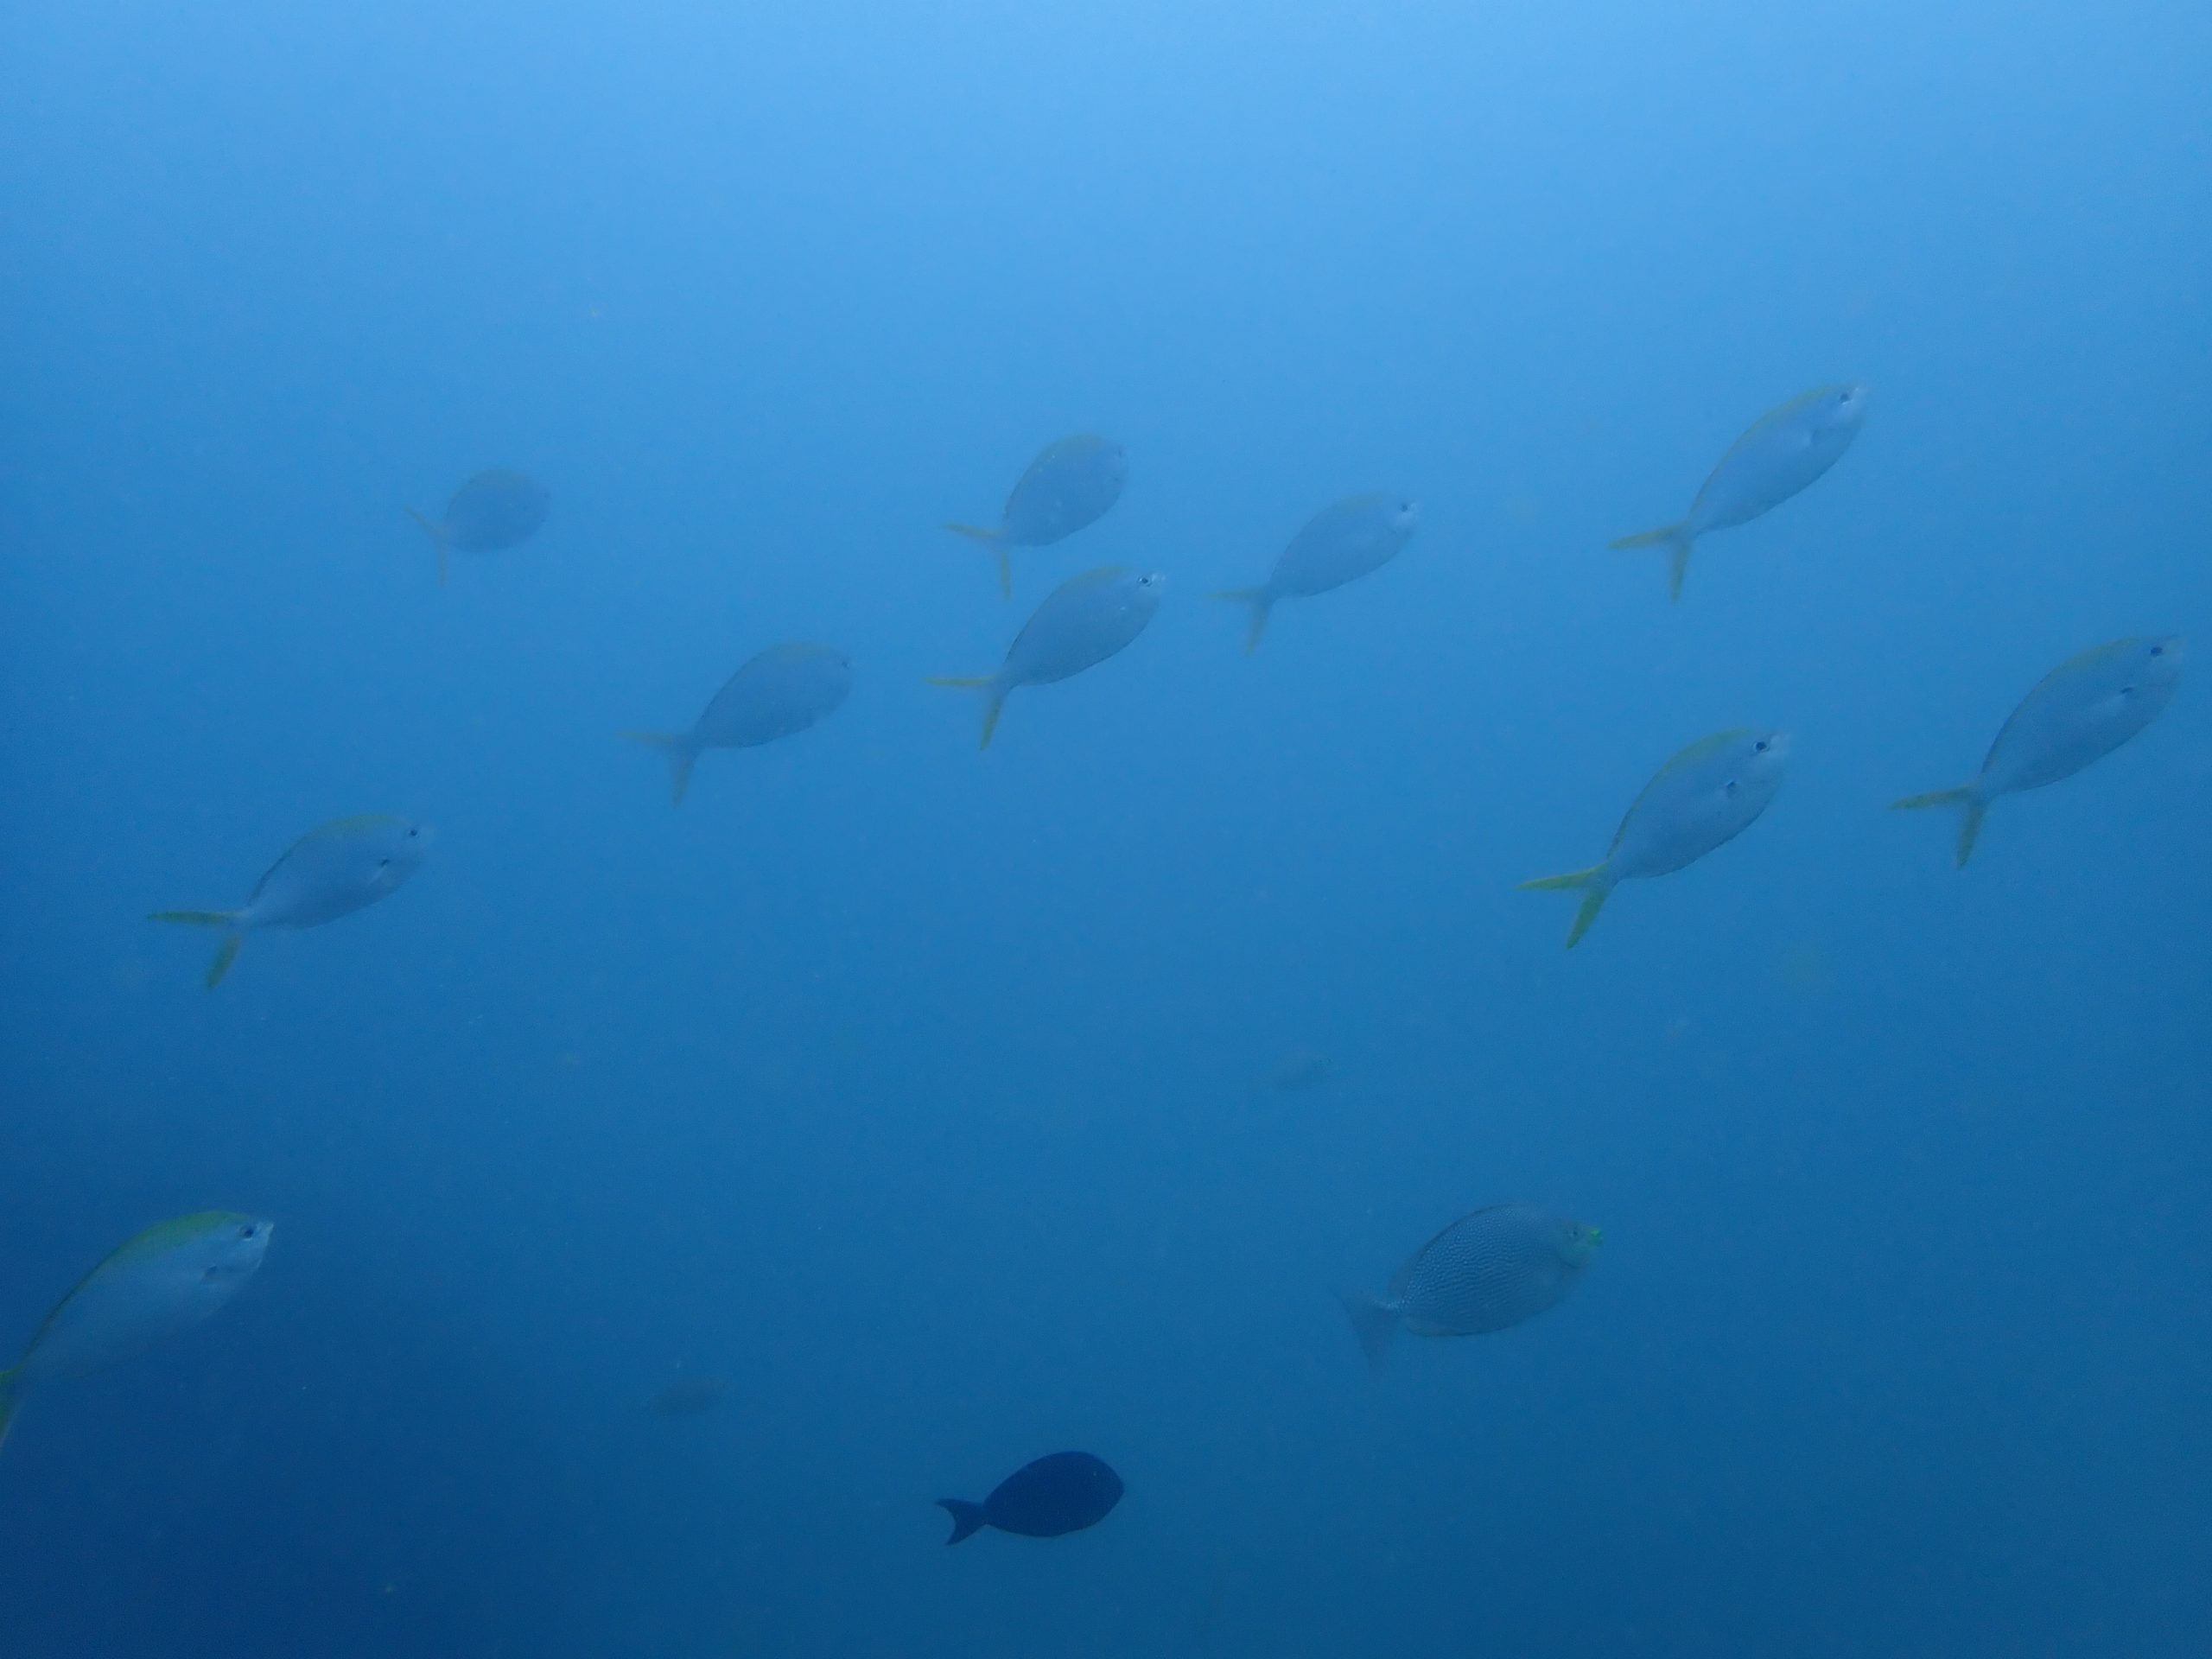
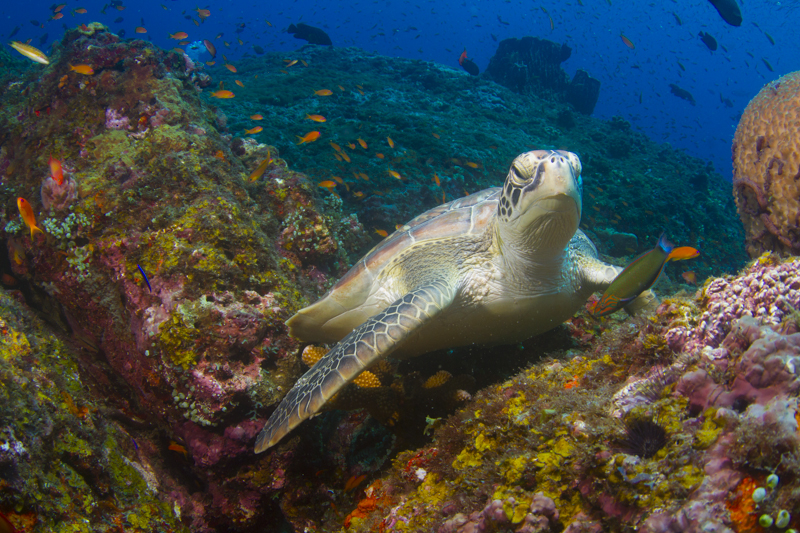
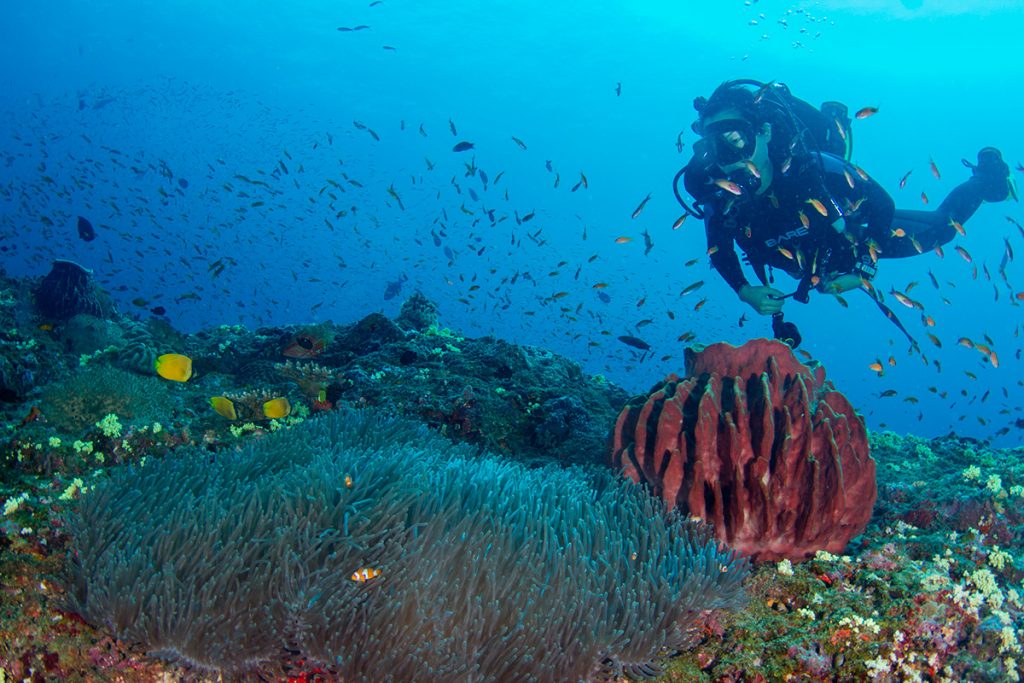
Speaking of Jhonny’s Gorge, it’s an unparalleled concert of marine life you cannot miss. While the schools of jackfishes, barracuda, and trevallies play their sweet melody in harmony, you can spot the rays resting on the sandy surface of the ocean bottom amidst a vast belt of coral reefs. The symphony occurs in a circular area where the showstopper and the master of ceremony are the reef sharks. The ambiance and vibe get even better with supple performers like the octopi, lionfish, and large groupers. A single dive here will grant you a natural song that will stay forever in your memory. 


2. Dickson’s Pinnacle – 

Depth – 20-30 M

Type – Advanced 

Behold the drama, fun, and action. 

It’s a wild west set up underwater. 

Instead of sand, we have vibrant corals. 

Instead of horses, we have some rare sea creatures. 

Instead of gunslingers, we have some photographers. 

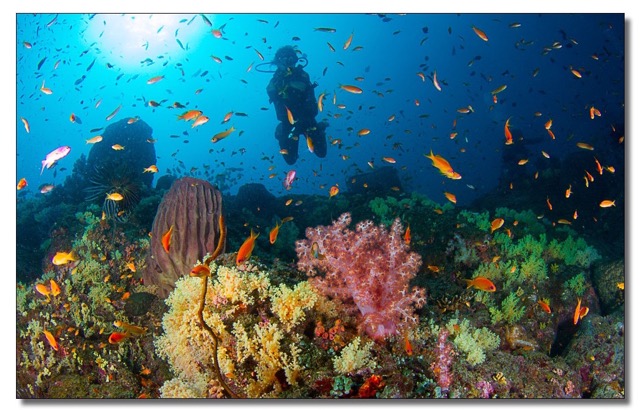
The dive site harbors three colossal pinnacles adorned by soft, dense, and diverse coral reefs. The elevated podiums are a natural home for exotic and exquisite fishes like surgeons, banners, Napoleon Wrasse, and butterfly fish. The actual action begins when the rare visitors drop in – whale sharks and reef sharks. There is a lot of chasing, swimming, and even gliding. The intriguing location is also a cleaning spot where turtles, rays, groupers, puffer fish, etc., come to get cleansed with the help of other small organisms. It’s a symbiotic sight to savor. 

 A new story awaits you every time you dive here with some dramatic screenplay of nature. 


3. Jackson’s Bar – 

Depth – 25- 30M

Type – Advanced 

Imagine a bar with engaging personalities. There will be a storyteller, a music lover, and even a crazy person venting out his problems. Now imagine the fishes doing the same underwater. Yes, Jackson’s Bar is a classic site with interesting personalities of fish. The clouds of Bengal snappers, the nosy movements of fusiliers, and the funny expressions of sweet lips are a sight to relish and revisit. If you are a fan of the Dragons from Game of Thrones, you might love the short flight of majestic sting rays hovering over the flat rock bottom for fodder. 

Diver’s alert – The currents here are strong. If you are looking for a challenging site, this is your place. 


4. The Wall – 

Depth – 10-55 M

Type – Intermediate 

A masterpiece for havelock and DIVEIndia. Being our first and foremost find in 2004, The Wall is a crazy dive site with phenomenal topography, sandy beds, and coral rocks. The dive commencing from a ridge,  descends down to an enchanting drop off, introducing a wall where we can witness hues of camouflaging reef fish, octopus, cuttlefish, and squids. Look out for the floating ink; they resemble the falling feather of a bird.

The vibrant wall extends 80M with hydroids, light feather stars, and dark caves. Giant groupers, sweet lips, parrot fish, angel fish, moray eels, and scorpion fish are familiar residents here. The key highlight of the sight is when the trevallies and huge barracuda fish barge in to hunt scats and mackerel. It’s a breathtaking window of marvel to experience and explore. 


5. Pilot reef – 

Depth – 16-18M

Type – For all

Peek a Boo – I see you!

What if you get a chance to play hide and seek while diving? 

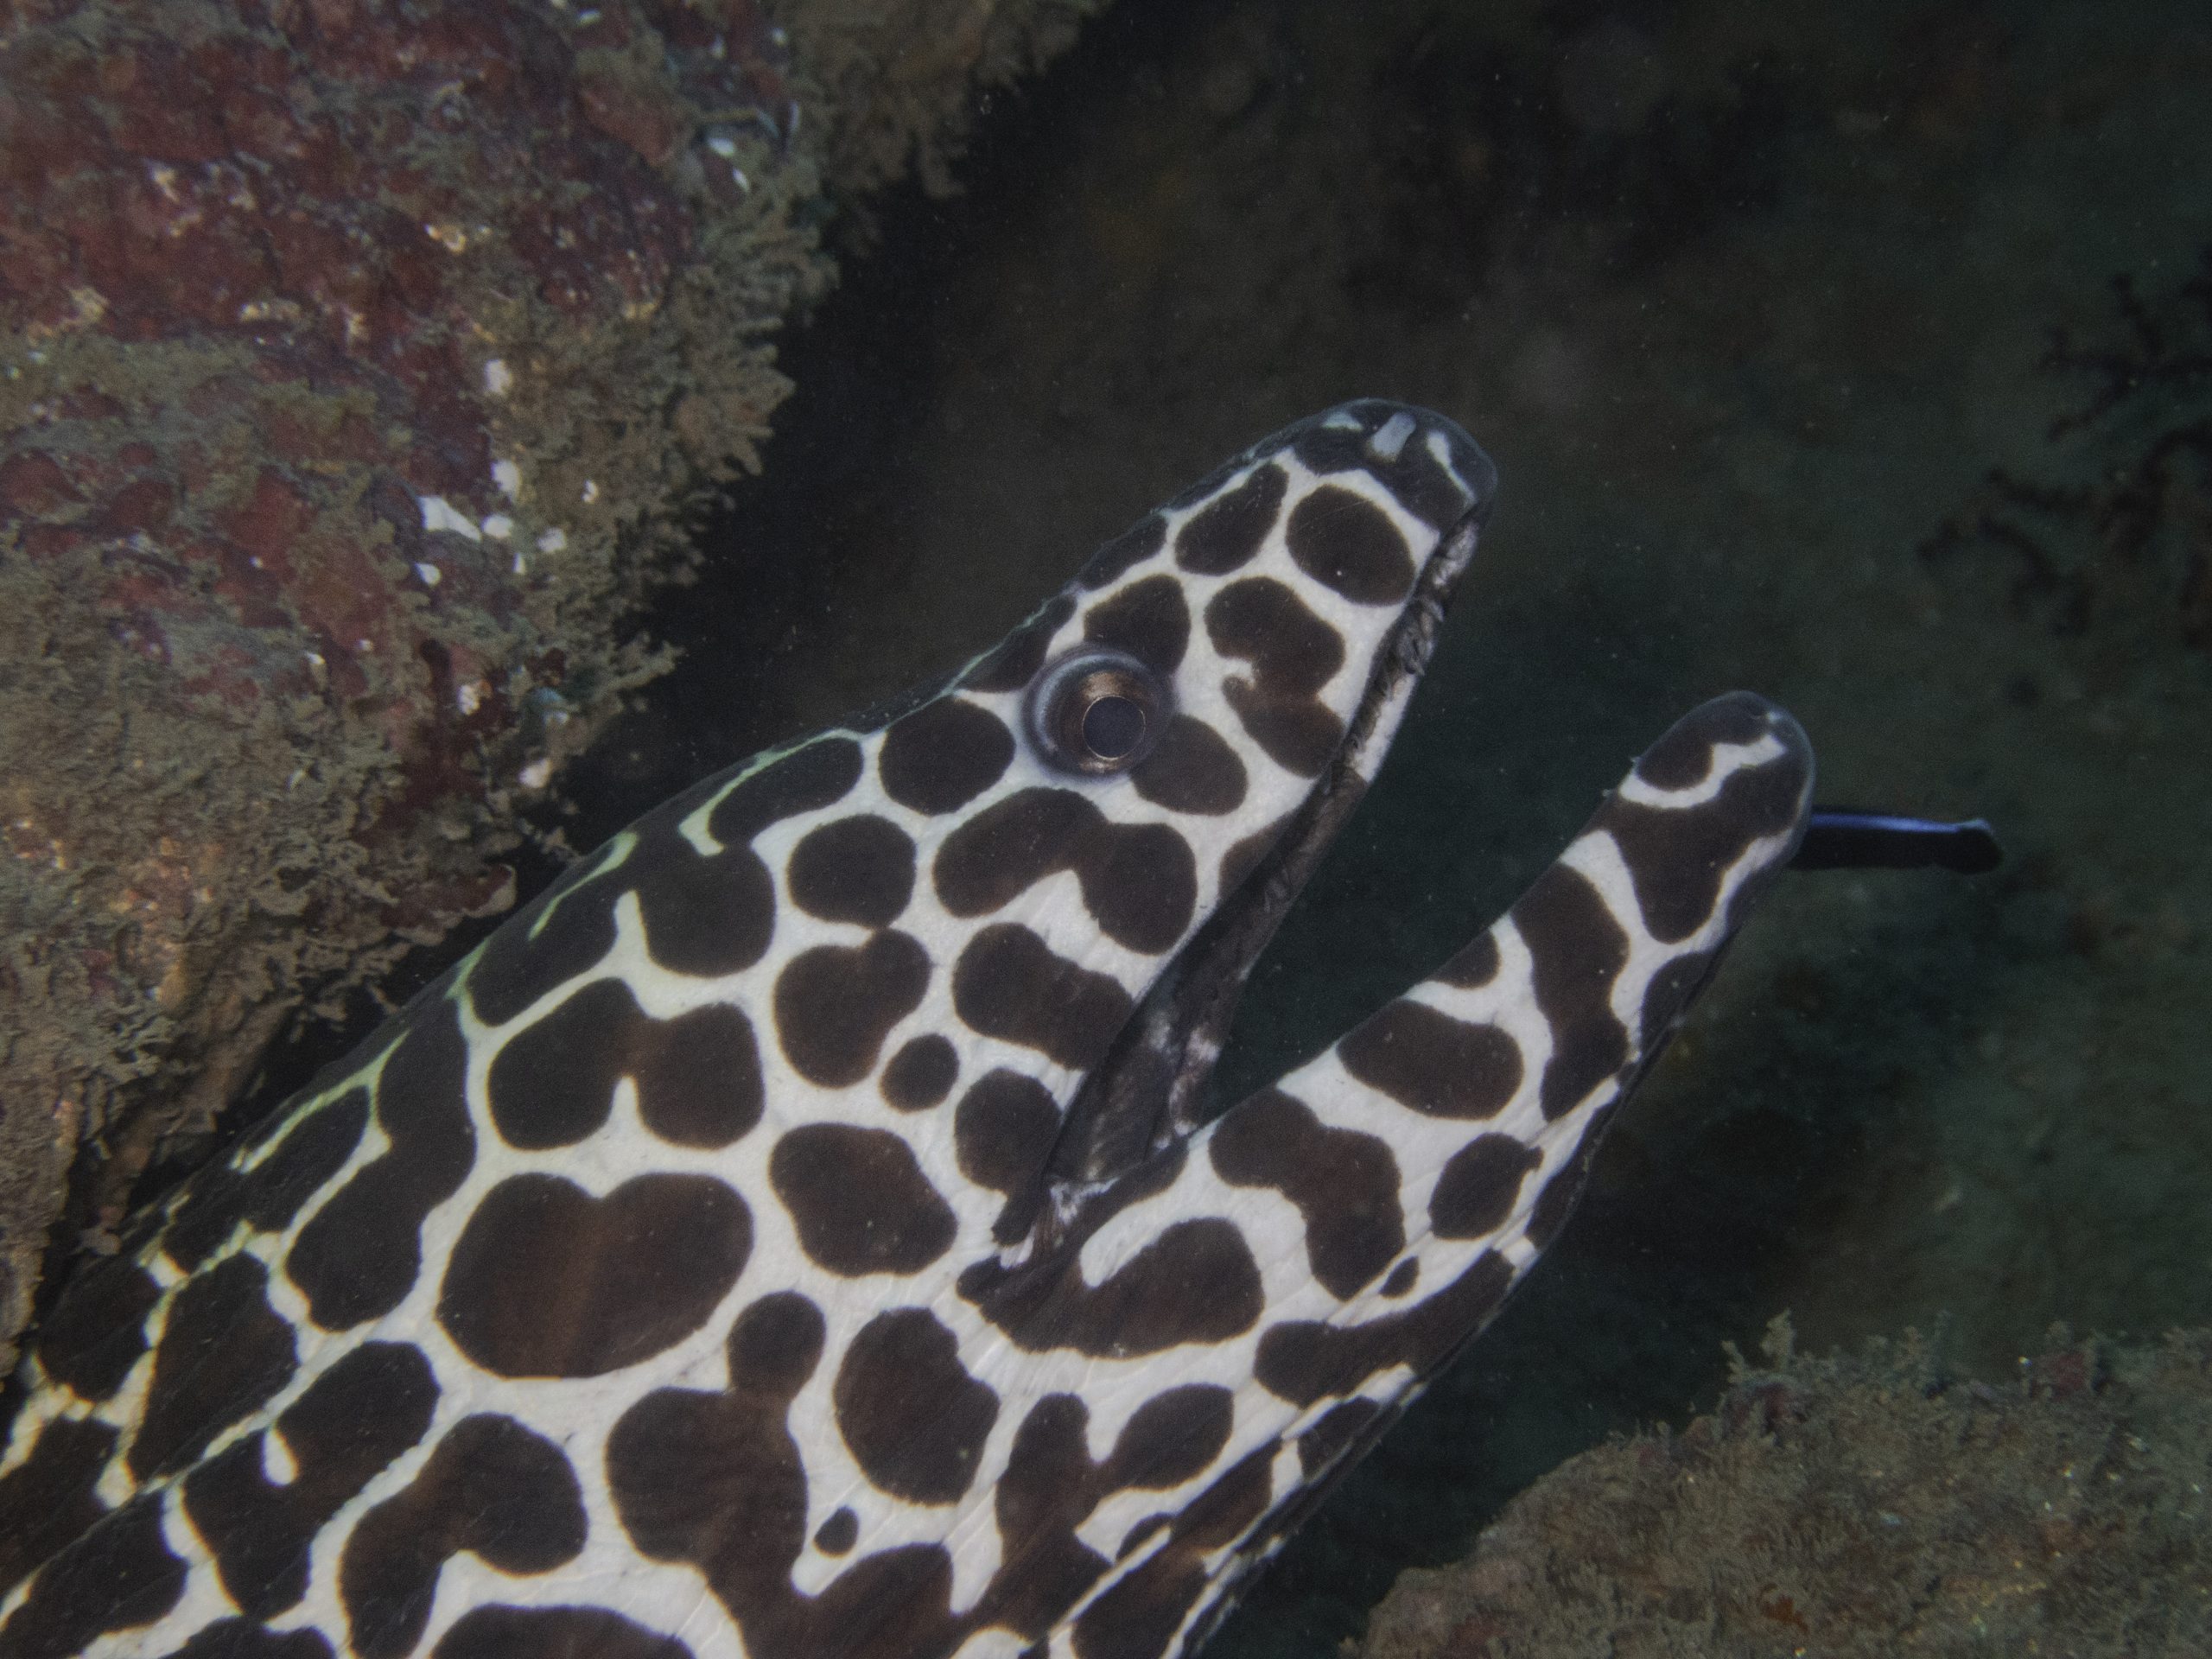
The rocky-tall reefs at the sandy bottoms of the dive site cover a variety of rich coral reefs on its surface. The true fun begins when we come across tiny caves and crevices. It holds some mysterious creatures like the white-eyed moray eels, sweepers, soldier fish, and sharks. If a diver passes by, they come out to take a sneak peek at who is entering their territory. The marine life that makes this site special and unique from the other sites are the orange spine unicorn fish, longnose butterflyfish, and trumpet fish. If you have attention to tiny things in life, the Pilot reef offers a vast range of macro life to observe, like crawfish, prawns, and shellfish. Overall, it’s a fulfilling site with loads of life forms to study. 


6. Broken Ledge – 

Depth – 16-25M

Type – Advanced 

The broken ledge is a deep-sea dive site with rifts, cracks, gaps, and openings. The fascinating topography of the site holds a landmark ridge with a broken tip, giving it the name Broken Ledge. Massive turtles, eels, and sea krait toggle between the gaps and rifts to scan for fresh crops and grass. Yellow Fin Tuna and marble rays are a few regular visitors you can often spot here. If you are in the vicinity of a turtle or an eel, remember to maintain a distance. They are shy and easily get scared by an external influence. 


7. Nemo Reef – 

Depth –   5-15M

Type – For all 

It’s a common mission for all divers and water enthusiasts worldwide to find Nemo. Your search ends and enhances at the Nemo Reef near Havelock. Nemo Reef is the perfect training ground not just for beginners but also for experienced divers to relax, glide and have a fun dive. Because of its controlled conditions, the perfectly sheltered site offers a safe, f, and peaceful ambiance for divers. The shallow waters provide a swimming pool-like setup where torrents of banner fish, rabbit fish, sweetlips queen fish, needlefish, and chubs flow in stimulating patterns. 

Did you know there are five varieties of Clown Fishes here? 

Yes, you can spot all of them in Nemo Reef. (Biological name – Anemonefish)

A few of the other astonishing natives of this reef are the popular cephalopods like octopus, squids, and cuttlefish. So, a delightful shore diving experience and a relaxed reef with pulsating life forms welcome you at Nemo Reef. 


8. Peel Light House – 

Depth – 12 M

Type – For all 

Peel Light House is a mysterious and spherical dive site with a titanic red-light house amidst pastel-grey sands on all sides. During the full moon and new moon, we can experience the gushing force of strong currents here. Mesmerizing corals like barrel sponges, soft coral, and fan corals will cast an everlasting spell of wonder on your five senses. Like the famous TV series Temple of Doom, divers experience the thrill of finning beneath the gaps of the fallen pillars. The lush ecosystem grips our attention with captivating creatures like feather duster worms, cowries, slugs, and puffers. Fortunate divers even get a rare chance to meet and greet the Kuhl’s sting ray from a distance. Peel Light House is one of the adventurous dive sites of Havelock. 


9. White House Rock – 

Depth – 10- 50 M

Type – Advance 

When a barrage of schooling fishes revolves around, above, and beneath you, where will you see? 

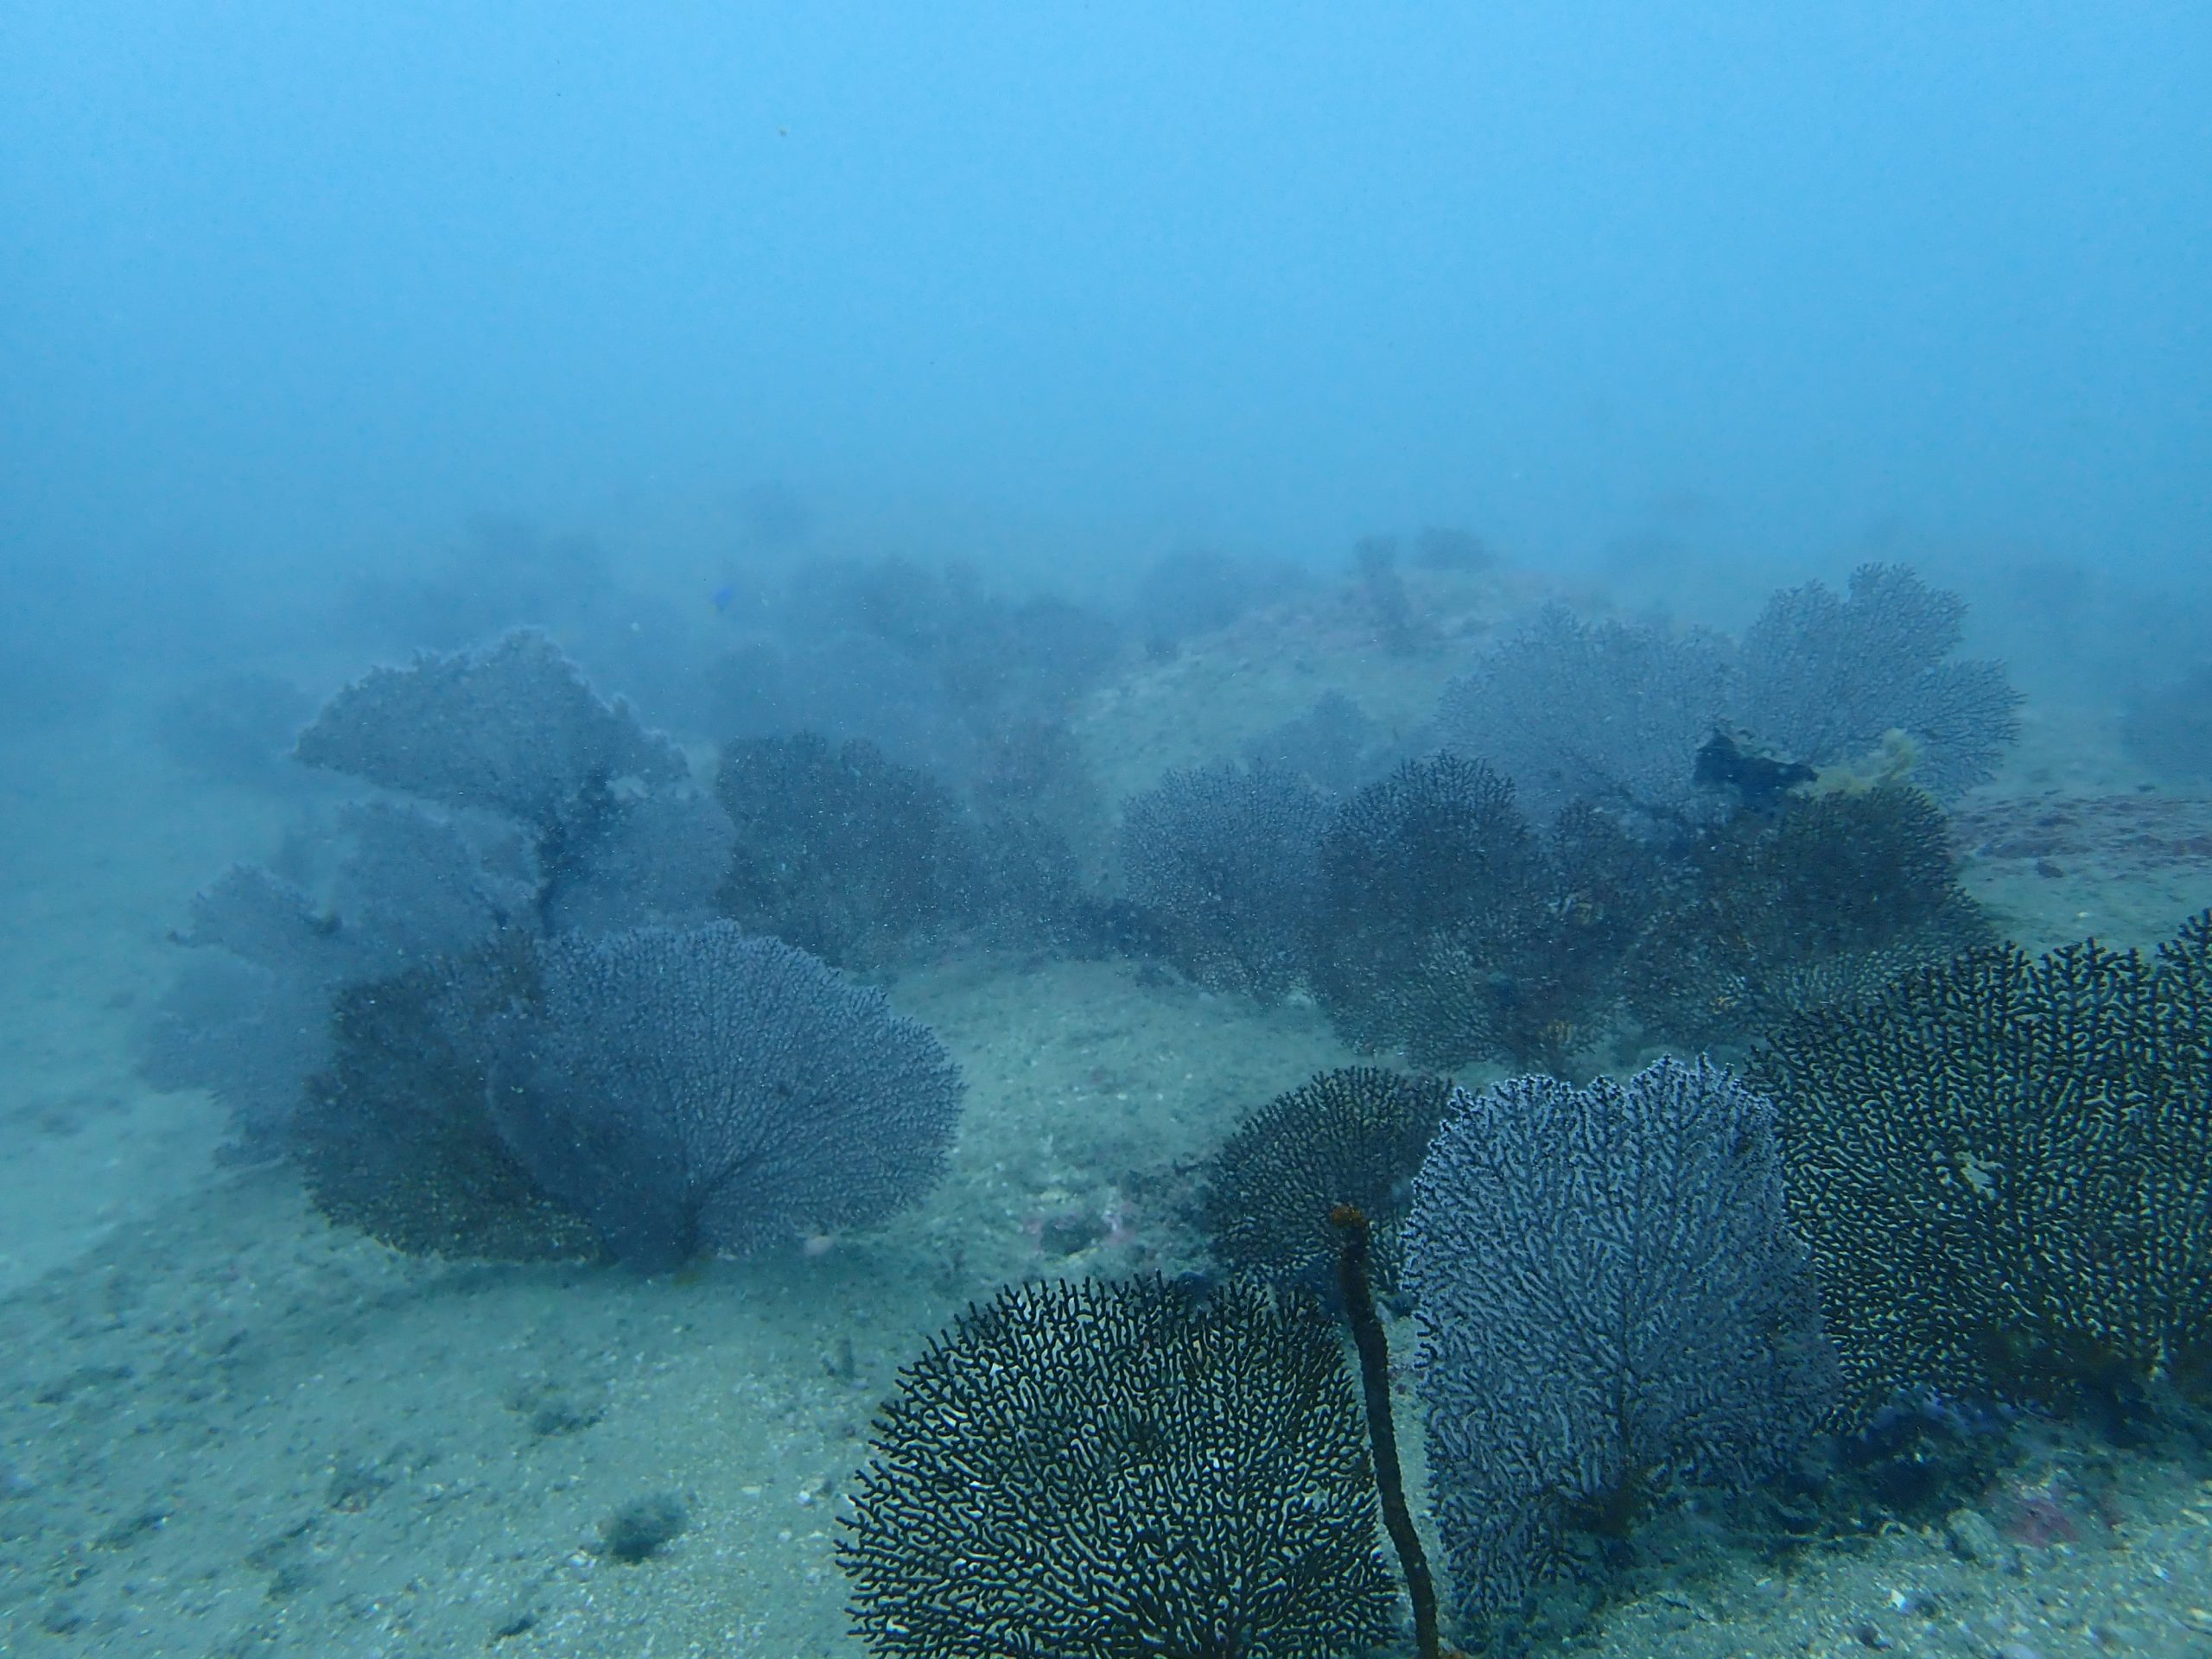
The White House rock is an incredible spot that offers an immersive experience with its copious amounts of snappers, tunas, elegant white corals, and much more. A fascinating fact about the White House Rock is that it’s actually made of black corals. Over the years, the black corals slowly developed glimmering snow-white polyps around its body, retaining the black shade on its stem. If we look into the captivating topography of the site, about 10 M into the depth, a straight-vertical drop-off extends for 50 M on one side, and a gradual 60-degree slope outspreads on the other side with gorgonian fans. 

A rare sight you may encounter here is the mating ritual of the trevallies. Don’t worry; if you don’t get to see it, you can always see the fast-paced scenes of trevallies hunting fusiliers. Barracudas and trevallies go on a roller coaster ride through the diverse collars and suspended particles here, giving the whole place a lively vibe, just like a crowded carnival in cities. A fun activity you can do here is trying to spot the scorpionfish. Their body is naturally designed to be cloaked within the dense ecology of corals. They vary in color, and they are masters in hiding.


10. SS Inchkett – 

Depth – 6-18 M

Type – For all

Tune in to your goth music and get ready to experience a pleasant yet ghostly site. In 1950, a whopping Japanese cargo ship hit a rock and sank down near Havelock Island. Over the years, marine life gradually covered the entire ship making it one of the famous and most desired wreck sites of the Andaman and Nicobar Islands. Deep sea molluscs and reef fishes lurk around the rusty slits and cracks of the ship, creating a montage of cinematic sceneries. The massive ship is broken into two parts where the bow and stern are slightly separated for a few meters with a giant rock between them. The mysterious ambiance gets more intense when lobsters, turtles, and Pufferfish suddenly pop out from the ship’s chambers. 

We hope you enjoyed the above list. Honestly, this is just a teaser. Havelock has more than 25 dive sites, and our experts are searching for more. So, if you are interested in them, feel free to reach us.

Scuba diving in Neil

By Scuba Diving Andamans

Scuba diving in Neil – All you need to know in 2023

Why should you Scuba Dive in Neil Island? 

Beyond the clutters of modern cities lies a tiny abode for peace, serenity, and tranquility deep within the lap of the pristine oceans – The Neil Island (Shaheed Dweep).

Located in the south of Andaman and Nicobar Islands, this tiny utopia is unique and untouched with massive coral reefs, sparkling sandy-rocky beaches, lush green forests, stunning marine life, and a soothing tropical climate. This tiny island is a concise dose of nature that fits in with a circumference of 10-13km, and it’s just a 2.5-hour ferry ride away from Port Blair. 

Hold on!

It’s different from Goa, Hawaii, or Maldives. 

It’s different. 

Neil Islands is remarkably diverse and distinct from the Populus island destinations of the world because of the lesser crowd and calming silence, and it’s still uninfluenced by tourists. Yes, it’s a cut above the rest when it comes to peace and nature. Speaking of vibes, Neil offers the best of both adventure and comfort. If you just want to lean back on a handmade wooden chair, sip some fresh coconut water and watch the simmering sunset in high definition or venture into thrilling water sports like snorkeling and scuba diving, this is the perfect spot for you. 

Now, if you are an underwater enthusiast and love to dive,

Here are the top 5 reasons why you should dive in Neil Island – 

1. Clear blue waters – 

As soon as you land at Neil, you can notice a spectrum of blue shades surrounding the entire island. Be it Bharatpur, Sitapur, or even Laxmanpur beach, the lively blues are a constant you can never miss. The topography around the island has lower sedimentation runoff. Because of this natural phenomenon, the vibrant blues are untainted by the blacks and browns of the sand. 


2. Unexplored coral reefs – 

The vast and massive coral reefs of Neil Island are still unexplored by the masses. It’s fresh, dynamic, and unaffected by population and pollution. As soon as you take a dive and observe them from a distance, you can see the patterns, textures, and picturesque forms they come in. Overall, it’s an art and part of the island’s ecosystem. They live in unison with the aquatic fishes providing them shelter, fodder, and protection. The antique coral reefs extend for several kilometers from the coastal lines to the depths of the oceans with cinematic sceneries and vibrant colors. 


3. Marine life – 

Expert divers, researchers, and aqua lovers from around the world visit Neil Island for its diverse and dense marine life. The iconic waters of Neil give us several opportunities to witness rare flora and fauna underwater. To name a few, do not miss the sight of a school of snappers, the flight of a gliding marble ray, unicorn fish piercing through the current, the graceful dance of the turtles, and the goofy movements of the goat fishes. If you are lucky, you can witness the gentle giant in action – Dugong. To sum it up, it has a plethora of options to explore. 


4. Less crowd – 

Imagine a dive where you are alone with your group and have the entire dive site just for you. This diver’s dream can happen only in the waters of Neil Island. There are just a few boats on the shore and fewer people on the dive sites. What else does a diver need? With a mix of deep and shallow waters, Neil Island is an ideal option for advanced divers to learn and hone their skills. 


5. A partial offline life – 

A video call or maybe a YouTube video in low res is easy in Neil. But if you think of streaming an OTT platform, it’s a big no. The network on Neil Island is not as strong as the mainland’s network. This gives you the luxury of time to finish that favorite book, take a long walk along the sunset, ponder upon valuable memories or make some new memories on the beach. It’s a place just to chill, relax and let the ocean breeze take away all your stress. 


Suppose Havelock Island is the heart of Scuba Diving in India. The Neil Island is for your mind’s space. It provides a calm, composed, rich, and less crowded diving environment. You get extra focus and attention for extra fun. 

PS – A soul-string experience awaits you at Neil Island.

Scuba Diving in Havelock

By Articles, Scuba Diving Andamans, scuba diving in india

Scuba Diving in Havelock – All you need to know in 2023 

Why should you Scuba Dive in Havelock Island? 

In the world of adventure in India – 

The Himalayas is famous for Mountaineering. 

Rishikesh and Zanskar are famous for Kayaking. 

Gulmarg is famous for Skiing. 

And for Scuba Diving? 

It’s Havelock Island – The heart of Scuba diving in India and home to millions and billions of dazzling marine life. 

But, ever wondered how Havelock became so popular? Where did this craze for Scuba Diving come from? 

The answer lay in 2003. So, let’s rewind a bit!

The Poayassay brothers – Jackson, Dickson, and Jhonny from the Karen community in Andaman- are one-of-a-kind, born-to-dive professionals in the industry. When they joined hands with Vinnie from DIVEIndia (The Pioneers of Diving in Havelock), they unlocked a whole new world of opportunities for Scuba Diving with their exploratory dives and underwater recces. Gradually, in 2006, they unfolded the 3 iconic world-class dive sites – Dickson’s Pinnacle, Jhonny’s George, and Jackson’s Bar. Over the years, by word of mouth and with the power of social media, the discovery of the 3 sites elevated Havelock’s identity and embedded it in the world’s radar. Today, experts and people who intend to venture into Scuba Diving aim to land at Havelock to experience at least these 3 famous dive sites apart from the surplus options to be explored.

And that’s how Havelock became India’s most demanding hub and a haven for Scuba Diving. 

Coming back to the narrative, nestled in the south east corner of the Great Andaman, Havelock is one of the largest islands in the Ritchie’s Archipelago within the Andaman & Nicobar Islands. This small wonder extends 18 kms long and 8 kms wide, with lush flora and fauna, and has something for everyone. If you have a taste for comfort and luxury, you can find star hotels with exotic packages. If you are a backpacker and an adventure buff, it has affordable accommodations with customized itinerates. If you are not able to decide, settle down for a “workcation” and experience comfort and thrill at the same time. It has all the conveniences of a city and more. 

The entire island is adorned with one of nature’s finest and most intricate underwater architecture, the colossal coral reefs. With a blend of rich green forests, serene beaches, and crystal-clear blue waters, the vibe here offers an enlightening experience to our mind, body, and soul. Apart from the massive number of exotic dive sites, one of the key highlights is the charming Radhanagar beach – renowned for its name as Asia’s best beach. Also, do not miss the lip-smacking and tongue-tingling tasty seafood here. It has a variety of options and flavors to choose from. 

Still curious why you should be scuba diving in Havelock? 

Here are the top 5 reasons to scuba dive in Havelock

1. Controlled conditions – 

The diverse dive sites of Havelock are burrowed and perfectly sheltered between a group of islands, making way for cambelts in and around the landscape. This paves the way for both shallow and deep waters for divers, accessible under controlled conditions offering a stress-free and safe atmosphere. 


2. Training Reefs – 

The training reef near the shores of Havelock Island is the ideal key to unlocking the next level of diving. The reef provides access for instructors and students to conduct, practice and learn several integrated courses and skills to begin or even continue your journey as a scuba diver. 


3. 20+ dive sites – 

Deep or Shallow. 

Dense or light. 

Compact or open. 

You name the type you want, and you will get it. Havelock is the treasure trove of magical dive sites. Apart from the 3 famous hotspots mentioned above, Havelock offers an array of charming underwater sites. Aquarium, Slope, Turtle Beach, K-Rock, Lighthouse, J-Table, Minerva’s, The Wall, and Vinnie’s Wreck are a few of the never-ending list. Keep your fingers crossed; our dive pros are on the lookout for more. 


4. Marine life – 

The marine life of Havelock is similar to Neil Island. If you are diving for the first time, keep your eyes peeled for the roaring lionfish, tiny barnacles playing hide and seek, gothic cuttlefish with tentacles, elegant feather dusters, groups of Tuna moving in sync, and hungry parrot fishes. Neither a single dive nor a 100 would suffice to spot the splendors of these mesmerizing sea creatures and their eco systems. 


5. Work-life balance – 

Maintaining a perfect balance between work and life is a herculean task. What if you get a chance to ace it? 

Here in Havelock, with nature at its best, people get some much-needed positive vibes to focus on their work with ease and peace. No matter the stress, the beaches are just a few minutes away. Every day is pleasant, and every weekend is a vacation in Havelock. To make it simple, your search for bliss ends here. 

So, if the oceans are calling out to you or you have an unquenchable thirst for diving and exploring the marvels of marine life, you now know where to go or, better yet, perhaps call a 2nd home.


Warm regards, 

Havelock 

Tusa Paragon Mask Review

By Articles, Gear, Reviews

PARAGON TUSA MASK – REVIEW

Tusa is a line that we started carrying recently – a Japanese brand well known for making sensible, reliable products at sensible pricing.     I have also been on the look-out for a mask to replace my current one (a Mares Ultravision LS, which, while a fantastic mask, is starting to show the effect of age and abuse).    My eye was caught by the Tusa Paragon masks – on seeing them, I was reminded that one of our instructors had been raving about them a couple of years ago, so I decided to look up the pricing.

And that’s where I had my first shock – these things had an MRP of Rs 15,200 for the double-pane version and Rs 16,000 for the single pane version (we sell it for a lot less, but still…).       That’s over twice the price of my Ultravision, which was one of our most premium masks.

My first response was to laugh in disbelief.    Had this been any other brand, I would have written this off as a halo product and moved on to something else.   But this was Tusa – as grounded a brand as it gets.    And I remembered our instructor and how excited he had been about this mask (it takes a lot to get a dive pro excited about gear – for most of us, these are tools and we want the product that is reliable and good value, not the fanciest/most expensive).

So rather than jump to a hasty conclusion, I decided to order one of these masks to try out for myself.

FIRST LOOK VIDEO

Let’s start by taking a look at the mask:

(Yes, I was so shocked by the price that I actually got it wrong in the video.   You might say i lost my head for the bulk of the video)

QUALITY AND CONSTRUCTION

As mentioned in the video, all you need to do is look at the mask and you can tell that this is an ultra-premium, high-end product.    Visually, it has a combination of aesthetics, solidity and finishing that just screams “high end”

Let’s start with the frame.   Made of three materials – actual, honest-to-goodness metal, polyurethane and polycarbonate – it has a rigidity that is leagues apart from the polycarbonate frames of other masks on the market.     Tusa claims this frame is designed for professional use – and that is very obvious when you hold it in your hand.

The frame is a discreet unit, as opposed to one that has been molded together along with the skirt as a cost-saving measure.

Another area where you can see the emphasis on quality is the silicon skirt.     Not all silicon is the same – thicker silicon tends to be more robust but less pliable, whereas thinner silicon tends to be more flexible (read: better able to form a seal) but also more liable to cuts.      And of course, a higher grade silicon will be more flexible and/or more robust for a given thickness than cheaper silicon.     One of the reasons why I am a fan of the Liquidvision silicon of Mares skirts is that it is very soft and pliable to fit well, but also robust enough to not get damaged too easily.

The Tusa silicon follows the same principle – the material is of different thickness at different places, adding robustness or flexibility where needed.     It also has rolled edges, which takes the pressure off the face and improves comfort.     In addition, Tusa uses varied surfaces on the silicon to add structure and stability to the overall skirt.     There is obviously a lot of detail that has gone into the materials here.

You can see the dots and the ridge on the silicone, meant to add structure to skirt.    Also visible is the thinner layer of silicon below the nose pocket, which would contact your upper lip, just below the nose.

Lastly, even the mask strap has been contoured to take into account the curvature of the human head against which it will rest.   Rather than trying to describe it, I will just borrow this graphic from Tusa that illustrates the point:Mask strap

As you can see, there is a near-obsessive amount of attention being paid to details that most people would not even notice.

ERGONOMICS, COMFORT AND FIT

I tend to get very excited about small touches which improve the diver’s usage experience.   With the mighty Shearwaters, it is the ability to color code the display as per your preference.      With BCDs it is a sensibly-designed octo holder that allows the user to deploy it with the mouthpiece in the proper orientation.   And with masks, it is swivel clips.

What these simple things do is allow you to move your strap up and down on your head without causing the mask itself to get pulled up or down.    A very small touch but once that adds that extra touch of comfort that can cause the mask to “disappear” on your face.     Personally, I am at the point where I simply do not buy a mask where the clips do not swivel.

Tusa Paragon ClipsSwivel clips, which are neatly tucked in behind the frame and do not stick out.
The mask fits very comfortably – the silicon truly is very soft and grippy, and feels very comfortable against the skin.   Even the mask strap wraps the head, as opposed to feeling stretched around it, if that makes any sense.    The nose pocket is large and roomy, even for my lumpy, twice-broken nose and allows a good comfortable grip on the nose for equalization.

About the only negative I can think in terms of fit and ergonomics is that it is not particularly low volume.   It sits a little further from my face than the Mares Ultravision, and so will require perhaps a little more effort to clear, if you were to flood it completely.   There is a reason for this, however – the sligthtly greater distance means that the frame of the mask is less likely to come in contact with the bridge of your nose, thereby increasing comfort.

Lastly, fit is a very personal issue – I personally had absolutely no issues with water coming into my mask, even when i made faces and moved my jaws around.    Given the stickiness and suppleness of the silicon of this mask, it wouldn’t surprise me if this mask fit a better percentage of people than most others.

THE VIEW

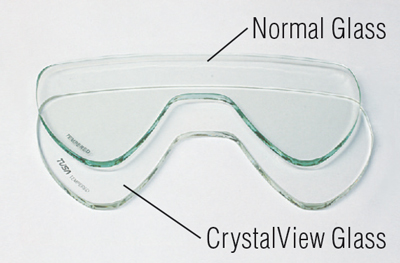
And now we get to what really sets this mask apart:  it is the quality of the optical lenses.     Tusa calls them Crystalview and touts their light transmission and sharpness:

CrystalviewPIC courtesy Tusa and presented for illustrative reasons only

For starters, they are a lot sharper/clearer than other mask lenses that I have used and also come with an anti-reflective coating meant to improve contrast, clarity and sharpness.     Tusa uses the term “Crystalview” to describe their optics – buzzwords aside, this was certainly noticeable when I did an A/B test with other masks that we had lying around the shop and tried to look at fine details in front of me.    It isnt as if the Tusa Paragon lets me see more detail – but the detail is just a little crisper/sharper/brighter.

Another very under-rated plus of the mask – it comes with UV protection.     That may not be so useful when you are diving, but what about the 5-10 minutes before and after each dive, when you are floating on the surface, doing a surface swim and/or waiting to get off/on the boat?    As someone who is very sensitive to harsh light, this is a feature that I am definitely willing to pay for.

However, there is one downside – due to the larger volume that I spoke of in the previous section (ie, the mask sitting further away from the face), the angle of view is good but not class-leading.   As its name would imply, when it comes to 2-window masks, my Mares Ultravision has a very large angle of view of approx 110 degrees and I would estimate the Tusa Paragon to have a field of view that is approx 5 degrees less (these are approximate estimates, btw).

CONCLUSION

Sooo… after all these words, what is the verdict?   Is it worth it or no?

Let’s first make it clear what this mask is NOT – it is not a “value for money” mask.     If you want to get the most utility per dollar, the entry level Mares Rover masks wins:  you can get 6 of those for the price of  this one and it will keep the water out of your eyes.   Or if you want something high end but still sensibly priced, the various Mares Liquidskin models in the Rs 5000+ range offer very good comfort for less than half the price.

BUT this mask has a bunch of features that are absolutely unique in the market:   optical-quality lenses.   UV protection.   Anti-reflective coating.   Highly engineered silicone skirt for more comfort.   Robust frame.     High quality finishing/visual appeal that no other mask can match.        Yes, we are entering the realm of diminishing returns here, but these are areas where this mask is tangibly better than the competition.

At the top end of the range of pretty much any product, it is not about getting value for money, but getting the best possible quality.    And when it comes to quality, I do not know of any mask that rivals the Tusa Paragon so far.

Luckily, in this case, getting the best is relatively affordable.   In my case, my gushing praise of the mask was not just for the purposes of this article:   the UV protection and the super-soft silicone were compelling enough reasons for me, and I have ended up getting this mask for myself.

NOTE

We do not get paid for these reviews and our reviews represent our true beliefs about these products.   Life is too short for us to push mediocre dive gear (there is a lot of other stuff that we also try out which does NOT make our review sections).

We do have these masks for sale.    You can purchase them here:
Tusa Paragon
Tusa Paragon S (single lens version of this same mask)

However, before doing so, please drop us an email to check stock as our inventory system is not online yet.

Scuba Diving Prices in the Andamans

By Articles

Scuba Diving Prices in the Andamans  – All you need to know


The following is our price list for the 2021-2022 season.

A word of pricing – while I know it seems self-serving to say so, we really do not recommend choosing dive centers purely on the basis of price.   While diving does follow common standards set by a central agency, so do schools.   Yet we don’t pick schools purely on the basis of price, do we?

How to pick a dive center is going to be the basis of a different post soon, but the short answer is – the experience of the instructors, their commitment to making sure that you are having a good time, the way diving is conducted, the group sizes, etc:  all of these play a big role in determining the “Fun” factor of your dive trip.

And here, we have a very simple philosophy for you on how we run our operations:  our approach is to run a dive center in a way that would make us happy if we or our friends/family were the customers here.

In any case, here are the prices.

They are valid until September 2022, they can be revised at any time prior if we choose, they are not binding unless quoted over email, blahblah-more-lawyer-talk.   You know how that goes.   Also note that 18% GST extra applies on all diving prices – other than that, the prices are inclusive, with no hidden catches or surprises.

Intro Programs For Beginners / Scuba Diving Prices for Beginners in the Andamans

The following half-day programs are designed for beginners who want to get a taste of scuba.   No swimming skills needed!

Program Havelock Neil
PADI DSD / Boat
Half-day boat trip and Discover Scuba Diving session, consisting of in-water training, one guided dive with an instructor, dive log and registration with PADI
Rs. 6,500 Rs. 6,500
PADI DSD / Shore
Half-day introductory Discover Scuba Diving session, consisting of in-water training, one guided dive with an instructor, dive log and registration with PADI
Rs. 4,500 n/a
Single Day / 2 Dive DSD Program
Full day session, starting with a PADI Shore DSD program in the morning, followed by a PADI boat DSD in the afternoon (subject to instructor discretion)
Rs. 10,000 n/a
Additional Boat DSDs
Additional boat DSDs conducted within a week of the initial boat or shore DSD
Rs. 5,000 Rs. 5,000
Upgrade to Scuba Diver certification
For boat/shore DSD participants only
Rs. 14,000 Rs. 14,000
 
Also, please note that in Neil, we only offer intro programs off the boat - shore programs are not possible (well, they are possible, but not worth it).

More information on the Try Diving / Intro to Scuba programs.

 Diving Courses / Scuba Diving Prices in the Andamans to get certified

As a PADI 5-star dive center, we are proud to present a full array of training courses, all the way from a beginner to an instructor.

Course prices include everything needed for your training – equipment rental, mandatory materials, certification charges, boat fees, etc.    There are no hidden surprises.   And with all our training, the course duration is determined by the student and their pace of learning – if you need more training time, that is included at no extra charge.

COURSES FOR BEGINNERS

COURSE # of dives # of days Prices – Havelock Prices –Neil
PADI SCUBA DIVER COURSE
Intermediate certification program – up to 12m
2 1.5 Rs, 17,000 Rs, 17,000
PADI OPEN WATER COURSE
Full entry-level diver certification – up to 18m
4 4 Rs. 27,500 Rs. 27,500
PADI OPEN WATER COURSE – REFERRAL
Completion of 4 OW dives, cost of certification not included
4 2 Rs. 16,000 Rs. 16,000
PADI OPEN WATER + ADVANCED OPEN WATER COURSE COMBO
Second level of certification – up to 30m
9 5-6 Rs. 49,500 Rs. 49,500

Note: The price of the Advanced course is discounted substantially – this price is only available for divers who have completed the Open Water course with us and want to do the Advanced course immediately after.

COURSES FOR CERTIFIED DIVERS

CORE SCUBA DIVING COURSES

COURSE

# of dives

# of days

Prices – Havelock

Prices –Neil

PADI ADVANCED OPEN WATER DIVER
Second certification level – up to 30m

5

2-3

Rs, 26,500

Rs, 26,500

EMERGENCY FIRST RESPONDER CPR/FIRST AID
Non-diving program, reqd for Rescue training

0

1

Rs. 11,000

Rs. 11,000

PADI RESCUE DIVER
Third level of certification

2

3

Rs. 20,000

Rs. 20,000

PADI RESCUE + EMERGENCY FIRST RESPONDER COMBO
Combo Rescue + CPR/First Aid program covering both courses


2


3


Rs 27,000


Rs 27,000

More information on continued education programs for certified divers.

SCUBA DIVING PADI SPECIALTY COURSES

COURSE

# of dives # of days Prices – Havelock Prices –Neil

CORAL REEF DIVER
Our custom & extensive u/w Marine Ecology training program.

4

2

Rs, 14,000

Rs, 14,000

BUOYANCY BOOTCAMP
Advanced buoyancy and trim master class

2

1

Rs. 8,000

Rs. 8,000

PADI DEEP SPECIALTY
Certification to dive up to 40m

3

2-3

Rs. 18,000

Rs. 18,000

PADI SIDEMOUNT SPECIALTY

3

2

Rs. 18,000

Rs. 18,000

PADI NITROX SPECIALTY
Extend your bottom dive – use of gas mixes up to 40% Oxygen

0

1

Rs. 9,000

Rs. 9,000

ADVANCED FUNDAMENTALS COMBO
Buoyancy, Deep & Nitrox specialties combo

6

3

Rs. 39,000

Rs. 39,000

UNDERWATER PHOTOGRAPHY
Add Rs 4000 for certification
4 2 Rs. 12,500

Rs. 12,500

We also offer NIGHT, NAVIGATION and SEARCH & RECOVERY specialties (as well as BOAT DIVING, COMPUTER DIVING and DRIFT DIVING, if you want). Please contact us for more info on these programs.

More information on continued education programs for certified divers.

Scuba Diving Prices in the Andamans for Fun Diving

For certified divers only.  Prices include gear rental, boat fees, snacks on the boat and group sizes of 4 divers or less per guide, typically.

DIVES (Days / Dives)

HAVELOCK

NEIL

1 day / 2 dives

Rs. 7,000

Rs. 7,000

2 days / 4 dives

Rs. 14,000

Rs. 14,000

3 days / 6 dives

Rs. 20,500

Rs. 20,500

4 days / 8 dives

Rs. 27,000

Rs. 27,000

5 days / 10 dives

Rs. 33,500

Rs. 33,500

6 days / 12 dives

Rs. 40,000

Rs. 40,000

Additional Diving (After 6 days)

Rs. 6,300

Rs. 6,300

A discount of 10% on the above prices is applicable for people that have their own equipment (BCD and regulator).

OTHER ACTIVITIES

HAVELOCK

NEIL

Afternoon Dive

Rs 5,000

Rs 4,500

Night Dive

Rs. 4,000

n/a

Dawn Dive

Rs 5,000

Rs 5,000

Remote Trip surcharge

Varies

Varies

Barren Isl/Invis Banks

n/a

Rs 25,000

Quick refresher

Free

Free

Full refresher + 1 dive

Rs 5000

Rs 5000

Private instructor - per day/part

Rs. 2,000

Rs 2,000

Private guide - per day/part

Rs 1,500

Rs 1,500

For people who have their own gear (BCD/regulator), there is a discount of Rs 300 for dawn/afternoon/night dives and a discount of Rs 1,000 for Barren Island/Invisible Banks/Expedition Trips.


More info on our dive trips for certified divers.

Professional Training

As India’s first/oldest instructor training facility, we offer PADI Divemaster and PADI Assistant Instructor training courses all year long.   In addition, we also offer PADI Instructor Development Courses (PADI IDCs) several times a year.

Please contact us for more information on professional training / more information on Scuba Diving Prices in the Andamans (Havelock and Neil)

Become a PADI Instructor – PADI IDC 2021

By Articles

PADI IDC 2021:  BECOME A PADI INSTRUCTOR

Divemasters interested in becoming PADI instructors – we have good news for you. After a pandemic-related delay, we are finally glad to announced dates for our next PADI Instructor Development Course in the Andamans:  December 1-10, 2021.

This program also has our usual IDC add-ons, designed to supplement your learning with valuable real-world experience:
– A 2 week prep program before the IDC, for you to go over your DM theory, dive skills and other pro fundamentals, for those of you who feel that they need a refresher and/or a tune-up
– A 2-4 week post-IDC instructor internship, where you work with our team of experienced dive pros and gain valuable teaching experience (and also log some certifications in the process) – this prepares you to work independently later.

There are a couple of different things to note about this IDC – the revised curriculum has made an already strong IDC program even stronger.

ONLINE SELF STUDY
As per the new PADI curriculum, there is a greater emphasis on the students completing their prep work online, using digital materials. Candidates can start this at any time – they do not have to wait for the IDC itself to start cramming the materials (unlike back in my day, when we spent all day in classrooms/water sessions and then did homework at night). We will be conducting regular review sessions of this between September and November, so you can actually get cracking right away. This means that when you get to the Andamans to do your PADI IDC, the focus is on shaping your knowledge and skills, not teaching you background material. This allows for more efficient use of instructor time cand greater development of the candidate into an effective pro.

OPTIONAL STANDALONE AI PROGRAM/INTERNSHIP
Second, we are offering an extensive PADI Assistant Instructor prep program for candidates who either do not want to do an IDC right away, or who want to split their training over a longer duration. The AI program will be conducted in Chennai and will also double as an extensive prep for the IDC. This will allow you to hit the ground running as an instructor, and give you greater confidence to teach independently. The AI Prep program is conducted by yours truly, Vinnie (I have been an instructor trainer since 2008).

ONE FREE IDC SLOT
We recognize this year has been hard on all of us. As a result, in conjunction with Dive-Careers, Platinum Course Director Mark Soworka and PADI, we are sponsoring a free IDC and free materials for one candidate. The candidate must be a PADI Divemaster already, must be an Indian national, must show genuine financial need, should have sincere environmental awareness and should be actively involved in the local diving community.

Email us for more information or to sign up.


Diving after COVID

By Articles

NOTE:   This article and the accompanying video are intended to provide a summary/top-level view of the risks associated with diving after COVID.     Many of these risks are theoretical;  further, the data as well as suggested best practices are in a state of evolution and so may be subject to change.     We will try our best to provide regular updates to this post, but please be aware that this is not intended to replace medical advice from a qualified doctor (Dr Google does not count – and yes, we are aware of the irony if you came across this article via Google!).


As the world starts to re-open, and we all start thinking of getting back under the water, please be aware that diving after Covid is not necessarily as simple as just “recover fully – go diving”.   Depending on the duration and degree of your symptoms, there may be associated risks that only make themselves known when you breathe pressurized air.

Now, keep in mind that at present, a lot of these risks are anecdotal, or at best, based on limited sample sizes.  So by nature, the recommendations made by the doctors are conservative in nature (and a list of references is provided at the end for those who want to dig deeper into the subject).

However, given the potential impact of these risks coming to pass, we strongly encourage you to spend the time and effort to get these tests done in advance before resuming diving.

RISKS ASSOCIATED WITH DIVING AFTER COVID

There are several risks associated with COVID, each of which can have an impact on you when diving:

General loss of fitness

While diving is mostly an easy activity, there are times when you do need to work a little – eg, surface swims in choppy waters or swimming against the current.     Loss of fitness obviously makes the dive more challenging physically, but can also induce psychological stress/sense of losing control, which is not a lot of fun.

Fibrosis/scarring of lungs

This is a big one.    Fibrosis/scarring of the lungs has been observed in a significant number of people and one of the most common issues associated with it is reduced pulmonary function, which can result in exercise-induced dyspnea (shortage of breath) and the same physical/psychological stress discussed earlier.

However, there is also a potentially increased risk of DCS (due to uncertainty about how this affects gas absorption models).       And there is also the potentially increased risk of lung barotrauma, due to gas getting trapped in the alveoli of the affected areas.

At present, studies are still ongoing on the actual risk, but until there is firm data on what those risks are, it is better to play it safe and be extra cautious.

Cardiac issues

A very large fraction (up to 25%) of people who were hospitalized with COVID have also been affected by cardiovascular complications of some sort or the other.     And given that diving poses an incrementally greater load on the heart due to the pressure of the blood, this means that again, there is a potentially greater risk of cardiac issues when diving.

The same caveats apply – the signs clearly indicate a potential risk.   So until there is further study on where the safety line gets drawn, it is better to err on the side of caution.

RECOMMENDATIONS FOR DIVERS

This bears repeating again:  we are not doctors.   We are dive bums who refuse to confirm or deny whether we pee in our wetsuits.     This is not meant to be specific medical advice for you.    This is just a general guideline based on various sources online as well as recommendations of our own diving physician.     Treat this is a bare minimum but speak to your doctor.   If your doctor recommends a more rigorous test procedure, by all means listen to your doctor.   And remember – nothing prevents you from choosing a more rigorous set of tests either.    Better safe than sorry!

Also, let’s define “COVID recovery” for the purposes of this section – it is defined as the time when you have (a) finally tested negative AND (b) are fully recovered with no lingering symptoms AND (c) have reached your normal baseline level of fitness.      All 3 conditions have to be met for you to consider yourself as having recovered.

With that out of the way, these are the current broad guidelines on when you can resume diving after Covid.   In all cases, please speak to the doctor who was treating you, and get his/her clearance – if s/he recommends a follow-up with a specialist, get that done.

Asymptomatic Patients

Asymptomatic COVID patients should wait a minimum of 30 days after COVID recovery (as defined above) before getting back in the water.

Mildly Symptomatic Patients

It is recommended that patients suffering from very mild symptoms wait for a period of 30 days to 3 months after full recovery, depending on the severity of their symptoms and then get, at minimum (or more if recommended by your doctor), the following tests done and reviewed by a specialist before getting back in the water:

  • Chest XRay/ECG
  • Clearance from a pulmonary specialist

Moderate to Severely Symptomatic Patients

If a diver has suffered severe symptoms, including hospitalization, s/he should wait a period of 3-6 months after full recovery (again, depending on the severity of the symptoms) and then undergo the following tests at minimum (or more, if recommended by your doctor) before getting getting back in the water:

  • Complete pulmonary testing
  • CT scan of lungs
  • Exercise/cardiac stress test, preferably with spO2
  • Clearance by both a cardiac and a pulmonary specialist

If you have been on a respirator, my personal recommendation is that you do not dive for now and wait for more detailed studies to be completed first.   It isn’t worth taking the risk!   Similarly, a few cases of people with long Covid also have reported issues of neurological or cognitive dysfunction – that has to be addressed/resolved before they are to be considered as  fully recovered.

In each of the cases above, note that you wait the appropriate duration and THEN undergo the appropriate tests.

If your doctor recommends a waiting period that is shorter than what is suggested above, we will still recommend you play it safe and wait for longer (obviously, if your doctor does have experience with diving medicine, that’s a different story).       This is not to impugn on the doctor’s credentials – but more to do with risk management as a diver.   Remember:   not many establishments in India have the expertise to deal with diving-related issues, and your typical dive destination is also further away from the top medical facilities.   So better to be safe.

Also, if you would like a consult with a diving specialist, please contact us and we will put you in touch with Dr Partha, our diving specialist.  

THINGS TO BE AWARE OF WHEN YOU RESUME DIVING

So you have done your tests, you have cleared the recommended tests, waited the appropriate amount of time (and then a bit longer, as befitting a conservative diver) and finally, it is time to go diving.

Be aware of a couple of things, especially initially:   the first is extra fatigue after diving, which could be a sign of sub-clinical DCS or a sign that something is not kosher with your cardio-pulmonary functions.    Also be very careful about shortness of breath – if you feel even remotely out of breath, abort the dive immediately and get back to the surface.

And be extra careful about your typical diving parameters – the first dive trip may be a good time to increase your computer’s conservative setting by one level, or to be extra cautious about staying within your NDLS.   Make sure you do a slow ascent and perhaps throw in a longer safety stop.   Hydrate well between dives.   Etc. etc.   You know the drill – you have learned it in Open Water.     Time to play it by the book, if you aren’t already doing so.

We understand the eagerness to get back in the water – we are itching to do so, as well.   But this is a sport for a lifetime – don’t ruin it for yourself by being a little too hasty initially.

Safe diving!


REFERENCES

The following is a list of useful articles to read.   When reading, please note the dates of publication and be aware that some of the info may be replaced by more recent findings.    This is very much an evolving science right now.

What divers need to know about cardiac health (general article on cardiac health for divers
AHA:  What COVID is doing to the heart, even after recovery (cardiac risks after COVID)
DAN Europe’s flowchart for resuming diving (based on current best practices – may be subject to change as the science and knowledge evolves)
USC San Diego Guidelines for Evaluating Divers during the COVID-19 pandemic (a leading report from May 2020 that is driving the direction of current thinking/research)
What you should know about diving after COVID-19 (an Apr 2021 summary, has links to additional studies as well)
DAN Europe Physicians’ Field Experience Regarding Diving after COVID-19 (an Apr 2021 report with more anecdotal info on the risks flagged by the USC report, and more)
NIH:  Fitness to Dive and Medical Assessment Guidelines (from Sep 2020)
Undersea & Hyperbaric Medical Society – Return to Diving Post Covid-19 (older paper from April 2020)

Scuba Diving in Bangalore

By Articles, Blogs, scuba diving in india

Learn Scuba Diving in Bengaluru (Pool Training)

One of the most common questions we get is – “why would we dive in Bangalore? What is there to see?”
The answer to the second question, of course, is nothing. But the answer to the first is, quite simply, because it is a great way to get started with the sport.

Typically, people associate diving with going on holiday, diving in colorful reefs amidst large schools of fish, etc.  And yes, that is indeed correct – that is why we dive, after all. But before you get to diving on reefs, you have to complete some theory (online learning and sessions with an instructor) and also some skills training (aka, confined water training).

Yes, you can choose to do it all while on vacation – a lot of people do just that. You can also choose to complete this training in one of our @Home centers, such as Bangalore. What are the benefits of doing so?

Here is a list:

– You don’t waste your precious vacation time in training, but can use this time to get some additional dives in – so you maximize your diving/leisure time while on holiday

– You can learn at your own pace, without the time pressure of a holiday

– You can even use this time to decide if diving is the sport for you (fair warning – for most people, the answer is “yes”).

Even if you are not planning to get certified, but just want to do an Intro to Scuba, doing a pool session first gets you comfortable with scuba diving in a familiar environment, and you are more likely to enjoy your diving experience, as opposed to going diving straight away.

And pool training is not just for beginners.

Perhaps you are a newly certified diver who wants to get more comfortable with some skills, or you want to familiarize yourself with new equipment. Or perhaps it simply has been some time since you dived last and you want a refresher? Again, why waste one of your precious holiday days with refreshers, when you can do that at your convenience at home?

Lastly, want to try out some new gear? We regularly have tester kit available to try – you are welcome to try new masks, fins, BCD, etc in a pool and get familiar with it, before buying.

Pool sessions are a great way to stay involved in the sport and make it a sport that you engage in all the time, and not just once or twice a year on vacation!

Here are a few of our happy customers and their journey from the Bangalore Pool to a remote diving destinations

Scuba diving in Chennai

By Articles, scuba diving in india

Scuba Diving in Chennai

Ever imagined how it will be to wake up in your own bed, pack only a swimsuit, hop in a car, drive to the shore, get on a boat, kit up and dive? Scuba Diving in Chennai is exactly that. We are here to celebrate your love for diving, right in your backyard.

‘Is there life in the seas here? Can you see anything at all in these green waters? Can a new diver like me dive in Chennai?’, you may ask. The answer is yes, yes and yes.

Chennai is one of the big players in Indian fishing industry, owing to the rich faunal diversity all along Tamil Nadu coast. Yes, the visibility under water is not the greatest, and yes, we pray to the Wind Gods for a successful day everyday, but reefs off Chennai are some of the most prolific reefs we have come across along the coast of mainland India.

Scuba Diving in Chennai – Best Dive Sites:

#1 Thoondil Street: One of our deeper sites where the world changes at about 18 meters, where the visibility shifts from tens of meters to only a few. However, the murky waters don’t stop marine life to thrive down there. The flat bottom that sits at 26 meters is made of rocks covered with soft coral and sponges. Right as you enter the murky waters, you are met with schools of snappers and fusiliers leading their fast paced lives and schools of sweet lips swimming around like a parade of soldiers. The bottom is busy with the groupers having one of their Mafia sit-downs and random excursions by sea snakes.

Thoondil Street - Best dive site in chennai

Scuba Diving in Chennai – Best Dive Sites


#2 Castle Rock:
This dive site is a beautiful example of conservation efforts by people concerned about the insistent overfishing along Tamil Nadu coast. This is one of the artificial reefs built to promote the use of traditional fishing gear like hook and line over the more destructive trawlers and seines. Sitting at about 25 meters, these blocks of concrete house a variety of fish species. On a good day, you might find yourself stuck here in a traffic jam of fish. Starting from patient groups of groupers, goofy gobies and gliding lionfish at the bottom, you will see fish like longfin banners, oriental sweetlips, snappers, fusiliers and surgeons schooling in hundreds over the structures.

Scuba Diving in Chennai – Best Dive Sites:

#3 Vaddi Pop & Garden Rock: These are our shallow dive sites, perfect for beginners to apply the skills learnt in confined waters. Starting at 12 meters, the sites are built of big boulders running parallel to the shore and go down till about 16 meters. The rocks are laden with sea fans and whip coral, gardened by butterfly and longfin banner fishes. Feather duster worms and nudibranchs can be seen beautifying these fans and rocks frequently.

One of our most treasured dive sites in Chennai, however, is not in the sea. In the hills of Kanchipuram, we have found this abandoned quarry which is just perfect to experience diving in its purest form, and never again be bothered by bad visibility, swells, currents or any out-worldly distractions.

Scuba Diving in Chennai – Best Dive Sites:

#4 ShowCat Boneyard: The smaller, right side of the quarry has submerged, mostly dead trees and shrubs growing on a bed of sedimentary rocks, eventually falling down into a valley upto 27 meters. The curious placement of rocks makes it a ‘site’ to behold.

Scuba Diving in Chennai – Best Dive Sites:


#5 Mayajaal:
The much larger, left side of the quarry seems like a scene out of Twenty Thousand Leagues under the Seas. After a gradual slope till 7 meters, the site drops straight to 27 meters along a humongous scarred wall of sedimentary rocks. Ideal for running deep scenarios, the flat bottom will keep you entertained with numerous crab gatherings, random appearances of truck headlights and tyres, TNT shells, fuse reels and scorch marks on the walls.

There is much more to diving in Chennai than what meets the eye. From rich marine ecosystems hidden in murky waters to new ecosystems sprouting in clear fresh waters, diving here is meant to change your perspective of the world underwater altogether. Contact us for more

Is Scuba Diving Safe in The Andamans

By Articles, Blogs, News

Is Scuba Diving Safe in The Andamans

As India (and most of the world) starts to open up and learn to live with COVID, a very common question we get asked is – is scuba diving safe in the Andamans, specifically from a COVID point of view.

To start with, let’s be clear on something – COVID hasn’t gone away and likely, will not for the foreseeable short/middle term. So the only way to maximize exposure to COVID is to stay at home and self-isolate.

When we go out and about – be it to the grocery store, be it to a restaurant, be it to work – we do have a certain additional risk that we are exposed to. So a more apt way of looking at things would be-  is that exposure greater or lower if we come to the Andamans for scuba diving?

In our opinion, coming for a trip to the Andamans does not pose a significant incremental risk – and in fact, is quite likely to result in a lower risk of exposure. This is for a bunch of reasons.

The first and foremost is that Andamans, at present, has negligible cases of COVID (4, at the time of writing this article on Feb 23, 2021). That means a very low risk of transmission by exposure.

Second, everyone who flies to the Andamans is required to get a COVID-negative test done within 48 hours of taking the flight. As is, the case load across the country has dropped significantly and by adding a COVID test, this minimizes the potential of exposure even further.

Thirdly, all tourist places are following regular safety protocols – sanitization, temperature checks, requiring people to wear a mask at all times.

Specifically to diving, we follow the protocols laid down by Divers Alert Network and PADI for sanitizing and disinfecting equipment between dives. We have also shifted much of our classroom training to online sessions, to minimize exposure and contact. Lastly, the fact that diving is conducted off a boat (ie, not in an enclosed space with recirculated air) also helps reduce the viral load, if any.

Look, we are not experts with complex mathematical models to determine risk. However, as people who live and dive in a place with no COVID cases (Havelock and Neil don’t have any recorded cases), we are acutely aware of the risk to ourselves, if nothing else. Based on the information available, we feel very confident that the risk – while not zero – is may actually be lower than what it would be based on just regular day-to-day life at home.

Which Island Is Better For Diving – HAVELOCK OR NEIL?

By Articles, Blogs, Dive Sites, Scuba Diving Andamans, Scuba diving Courses

Which Island is Better For Scuba Diving?
HAVELOCK (Swaraj Dweep) OR NEIL(Shahid Dweep)?

Another common question we get from our divers is – what is better for diving, Havelock or Neil?
The answer to that, of course, is… it depends.
It depends on what your experience level, the type of diving you want to do and what you are looking for in a vacation spot.

To start with, the 2 islands are very close together, so you are not going to see a significant change in the ecosystem and marine species between the two locations.
However, there are a few significant differences between the 2 locations:

  • Neil does not have the same mangrove cover as Havelock, and so tends to have lower sedimentation run-off. This results in generally better visibility closer to shore.
  • Havelock, by virtue of having the other islands of Ritchie’s Archipelago to the north, has a lot of sites that are sheltered no matter the wind or environmental conditions. This means that there are more shallow/sheltered sites for divers, where conditions allow access year long.
  • The drop-off into deep water is much closer to the southern side of Neil. This means a few more high-octane sites with a greater chance of seeing big pelagics (and we mean BIG).
  • Havelock has an excellent training reef accessible from the shore – a great place to do classes like Rescue Diver, Buoyancy, Navigation, Search & Recovery and more.

In addition to this, the islands themselves are fairly different. Havelock is all grown up now – it is has fiber optic internet, several restaurants and is pretty much a tourist island (albeit only relatively – compared to places like Goa, it is still positively rustic). Neil is still quieter and the package tourist hordes tend to give it a miss (or stay there only a night) – that gives it more of the quiet, “remote island” vibe of the Andamans. Depending on your preferences, you might find yourself gravitating towards one or the other.

Here is the list of top dive sites accessible from each island:

Best Dive Sites in Havelock:   The Wall, Slope, Pilot Reef, Aquarium, Nursery, Tribegate, Jackson’s Bar, Broken Ledge

Best Dive Sites in Neil:   Margherita’s Mischief, Junction, Bus Stop, Nursery (a different one!), Sea Fan City and a few more special ones that are going to be revealed over time.

Wait, wait, wait!

What about the Andaman, you ask – the world-class dive sites like Johnny’s Gorge, Dixon’s Pinnacle, V16, M/V Inchkett and Whitehouse Rock. The good news is – we can access them from both Havelock and Neil.

So as you can see, both Havelock and Neil are very good options. If we had to pick, we’d give Havelock a slight edge for newer divers looking to get some experience in controlled conditions or for divers looking to do some training courses. For advanced divers, we think Neil has the slight edge in terms of dives sites (although that edge is likely to increase in the next 6 months or so).

Scuba diving and Safety during Covid: Ensuring you’re safe.

By Scuba Diving Andamans

Scuba diving and Safety procedures during Covid


How do we ensure Safe Diving During COVID-19 Pandemic

As things open up, many people – including us – can’t wait to get back in the water again.     However, while we are all eager to start diving, we feel that some precautions are indeed necessary in these Covid times, both to ensure your safety as well as the safety of the dive professionals who will be taking you diving.

This blog is intended to discuss how to ensure maximum safety when diving.

To set expectations – nothing is perfectly safe.     The only way to be perfectly safe is to be completely isolated at home and avoid contact with others.      However, at this point, most of us are beyond that stage and are doing things like going to work, going out to eat, etc. etc.     So there is a certain “baseline exposure” that we have chosen to accept as part of our daily routines.

The purpose of these precautions is to try to mitigate any additional risk beyond this baseline when you go diving – or even to reduce that baseline level to some degree.

So how do you know the dive shop is safe to dive with, during Covid?

There are 2 main risk vectors when diving – one is risk of transmission from equipment and the other is risk of transmission from people.

As far as equipment risk goes, here are some of steps that responsible dive centers across the world are taking to mitigate it:

  • Sterilizing equipment after every day of use, using methodology recommended by Divers Alert Network or the various scuba manufacturers
  • Ensuring that second stages are not shared by multiple people
  • Changing mouthpieces for every diver
  • Tank filling to be done with the air intake valve kept away from people
  • Use of protective gear (mask, face shield) when filling scuba tanks
  • Regulator and mask to be handled only by the diver using them
  • Minimize handling of any scuba equipment by personnel other than the divers
  • Washed gear to be kept separately and not in contact with other gear
  • Sanitization of all frequent-contact surfaces on a regular basis


From a human transmission point of view, the same protocols that we are all used to so far still apply – social distancing, use of masks and frequent sanitization are still the key.      A few additional steps from a diving context:

  • Bring your own bottle for water and get it re-filled
  • Wear a mask/shield on the dive boat for as long as possible
  • Maintain some separation from other divers when on the boat
  • Put on your dive mask and keep it on at all times when on the land or on the boat
  • In the water, if you are going to blow your nose or something similar, do so at some distance from other divers and down current
  • Move from physical classroom time to online classroom
  • Do paperwork electronically, as far as possible
  • Minimize the number of non-divers coming to the dive center

Keep in mind that the risk of transmission works both ways – both the dive center and divers should proactively take steps to care for each other’s safety.    If you feel you have may have been exposed, please isolate yourself.


SPECIAL NOTE FOR THE ANDAMANS

The Andamans have a very low COVID caseload.   Havelock and Neil are actually COVID-free.    So in many ways, the risk factor there is higher for the locals and staff, as opposed to visitors – at least initially.

This risk factor in the Andamans is mitigated further.   For starters, all passengers flying in are expected to undergo a COVID test shortly before arrival or upon arrival.      In addition, even taking the ferry requires a recent (within 48 hours) COVID test.    Second, there are regular checks of temperature at every point and also daily checks at the dive center.   Lastly, the open-air nature of the activity and the eco-style rooms also reduce risk.

Footnote: This may also be a good time to buy your own regulator – and if you are interested in buying from us, we are running deals on regulators as well.   Contact us if interested.

Garmin Descent

Review – Garmin Descent Dive Computer

By Gear

GARMIN DESCENT MK1 DIVE COMPUTER REVIEW
By: Vinnie
Date: September 2020
Garmin Descent

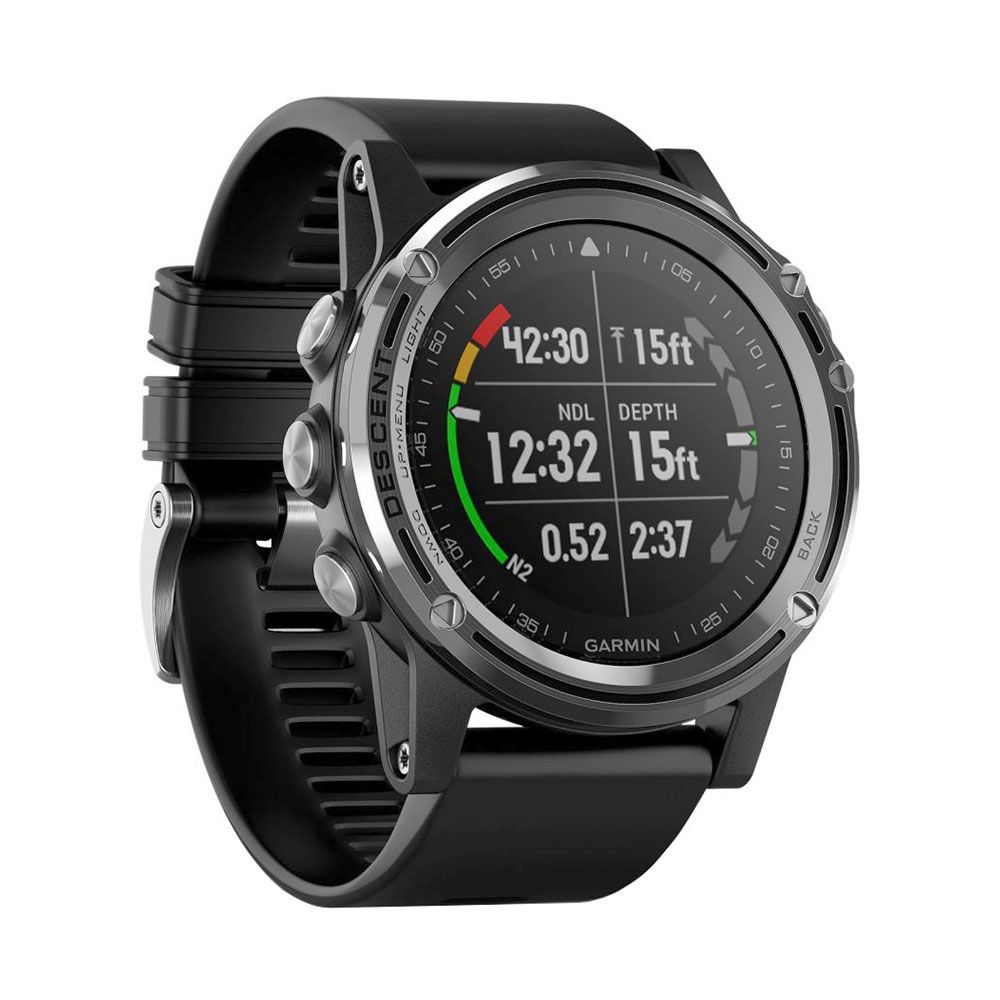
The Garmin Descent Mk1 was one of the most exciting dive computers back when it was launched, coming as it did with all the features that one could ever want in a dive computer – and then some.  The Descent it as close to being a “Do Everything” device as it gets, with ability to track other activities (running, cycling, etc) as well as the usual fitness metrics such as steps, HR, calories burned, etc.   And all of it backed up by Garmin’s famous ecosystem which allows for consolidation and viewing of all your activities.    This combination makes for a very unique dive computer – one with no real competition in terms of feature set.

As a long-term Garmin user myself – I have a couple of Garmin 520 computers I use with my bike, a Garmin 935XT watch I use for running and triathlons and a Vivosmart 4 I wear as a daily activity/sleep/recovery tracker, I was very excited at the idea of adding a Garmin dive computer to our portfolio of dive products, and asked for a review unit to be sent out to me.

I have been testing it out on land and in water over the past couple of week – lets see whether it lives up to the hype.

THE BASICS

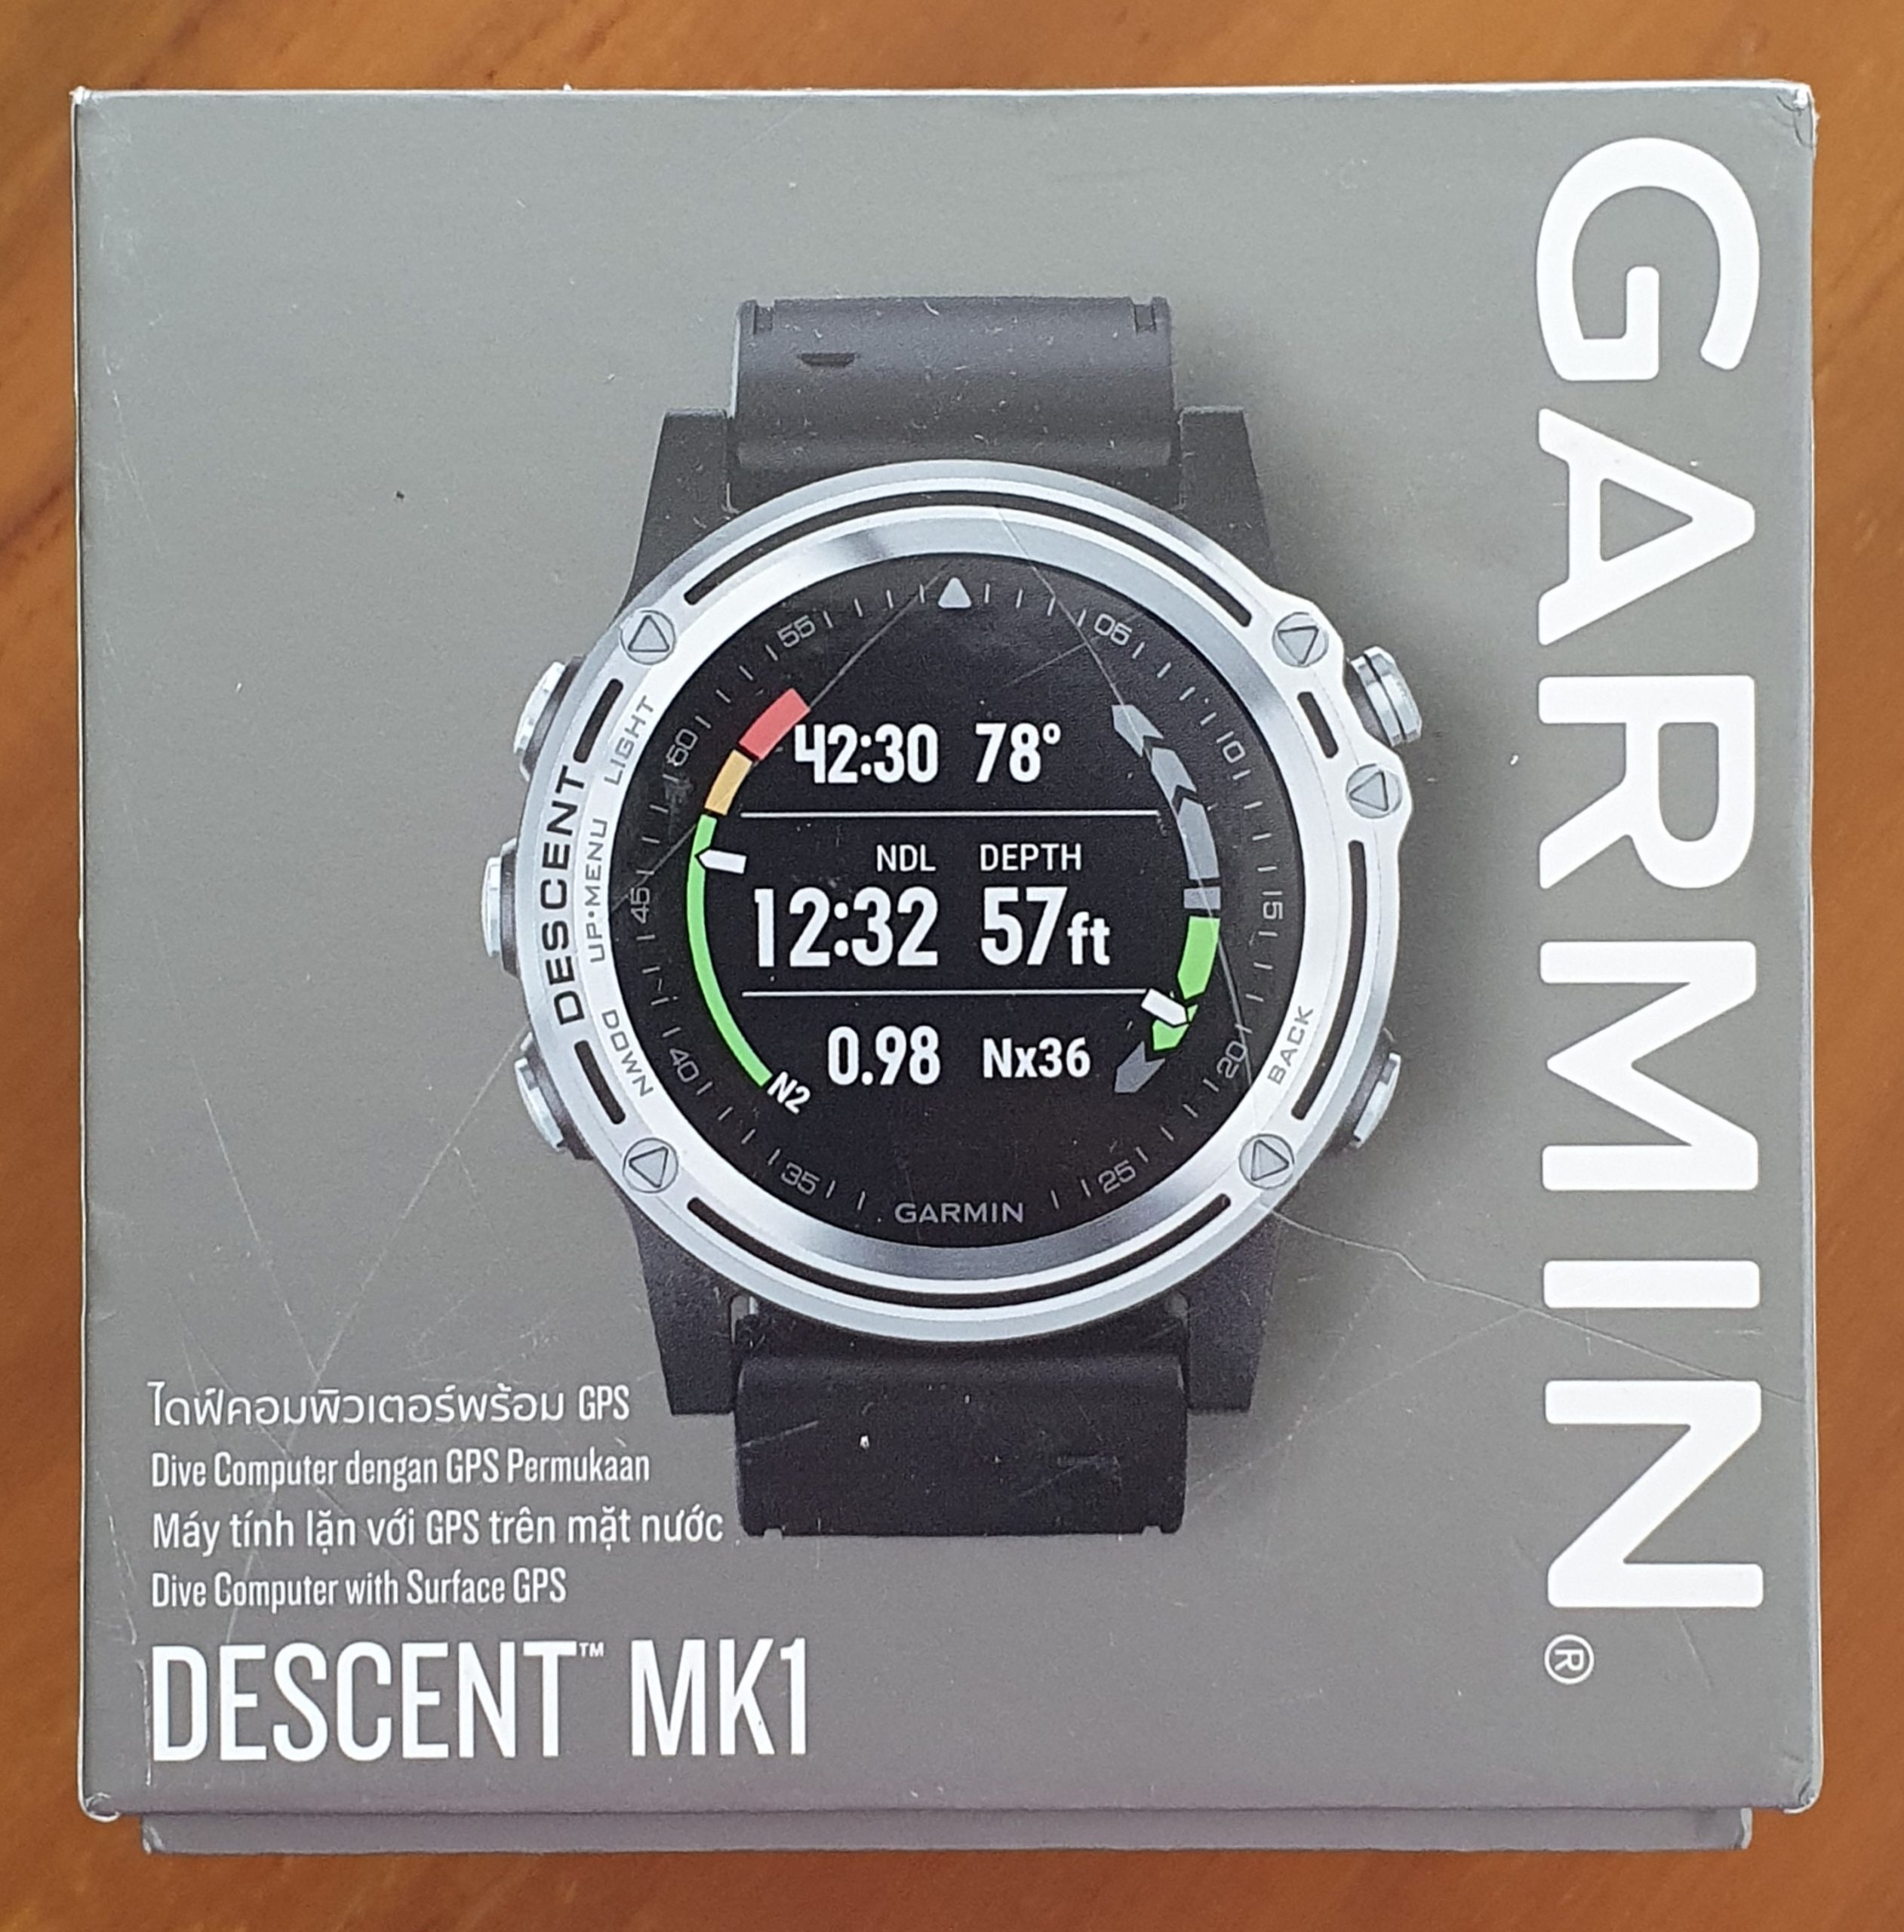
The Garmin Descent comes in a compact, rigid cardboard box, inside which you find the watch, some manuals and the charging cable.     No extraneous packing, fairly eco-friendly – so that’s good.     A travel case ala Shearwater would have been nice to have at this price point, but that’s an academic quibble, to be honest (I actually prefer to just stick the dive computer in a pocket in my carry-on when I travel, rather than add another box).


Inside the box was a robust-looking unit, with a black body, chromed external bezel, chrome bezel and a soft rubber strap.   Also packed in was the charging cable and the usual papers that no one ever reads.

With a diameter of 50mm, the Garmin Descent dive computer is not small by any means, but the short lugs make it surprisingly wearable as a day-to-day watch – which is one of the main benefits of getting a dive computer in this form factor.  It certainly looked very sharp, in a “purposeful tool” kind of way, as opposed to “wrist jewellery” kind of way.

THE DIVING FEATURES

Let’s start with what it does not have – air integration (although it is expected that the Mk2 version will have this).       That’s the easy part.

Now let’s talk about what it does have.   The short answer to that is “everything else”.    As far as the standard features go, here is a list:

  • Air mode
  • Nitrox mode
  • Apnea/Free Diving mode
  • Apnea Hunt Mode (where the alarms are disabled)
  • Gauge mode
  • Full ready for decompression diving
  • Trimix mode
  • Ability to define and switch between 6 different gas mixes
  • Open Circuit vs Closed Circuit mode
  • Multiple conservative settings – Low, Standard, High and Custom, where you can define your own gradient factors
  • Digital compass (excellent!)
  • Dive Planning Mode

In addition, there are a whole lot of other standard features, like many alarms, dive stopwatch mode, altitude settings, fresh vs sea water settings, etc. which I will not waste time covering.

The algorithm used by the Garmin is the industry standard Buhlmann ZH-L16C – same as the Shearwater and a proven, reliable model.       In addition to the standard 3 settings for conservatism, you can also tweak the algorithm exactly as you please, which does away with the limitations imposed by overly conservative or overly liberal computers:   this is done by adjusting the Gradient Factors (and *shameless plug alert* you learn more about Gradient Factors and a lot more in my Decompression Theory masterclass.  Ahem).

That alone makes it a very impressive unit, capable of covering virtually all use cases you would expect underwater.    But wait, there is more.     There are 3 very cool additional features on this computer:

The first is Optical HR which works underwater – unlike the Scubapro Galileo, which claims to adjust the deco profile based on your heart rate, I do not believe that the Descent does so (and it is debatable whether that adjustment has any significant or measurable real world impact on diver safety).     But it is still nice to be able to see your HR and get a sense of how hard you are working underwater, and also for analysis afterwards (great on dives where you were working against a current or had unusually high air consumption).

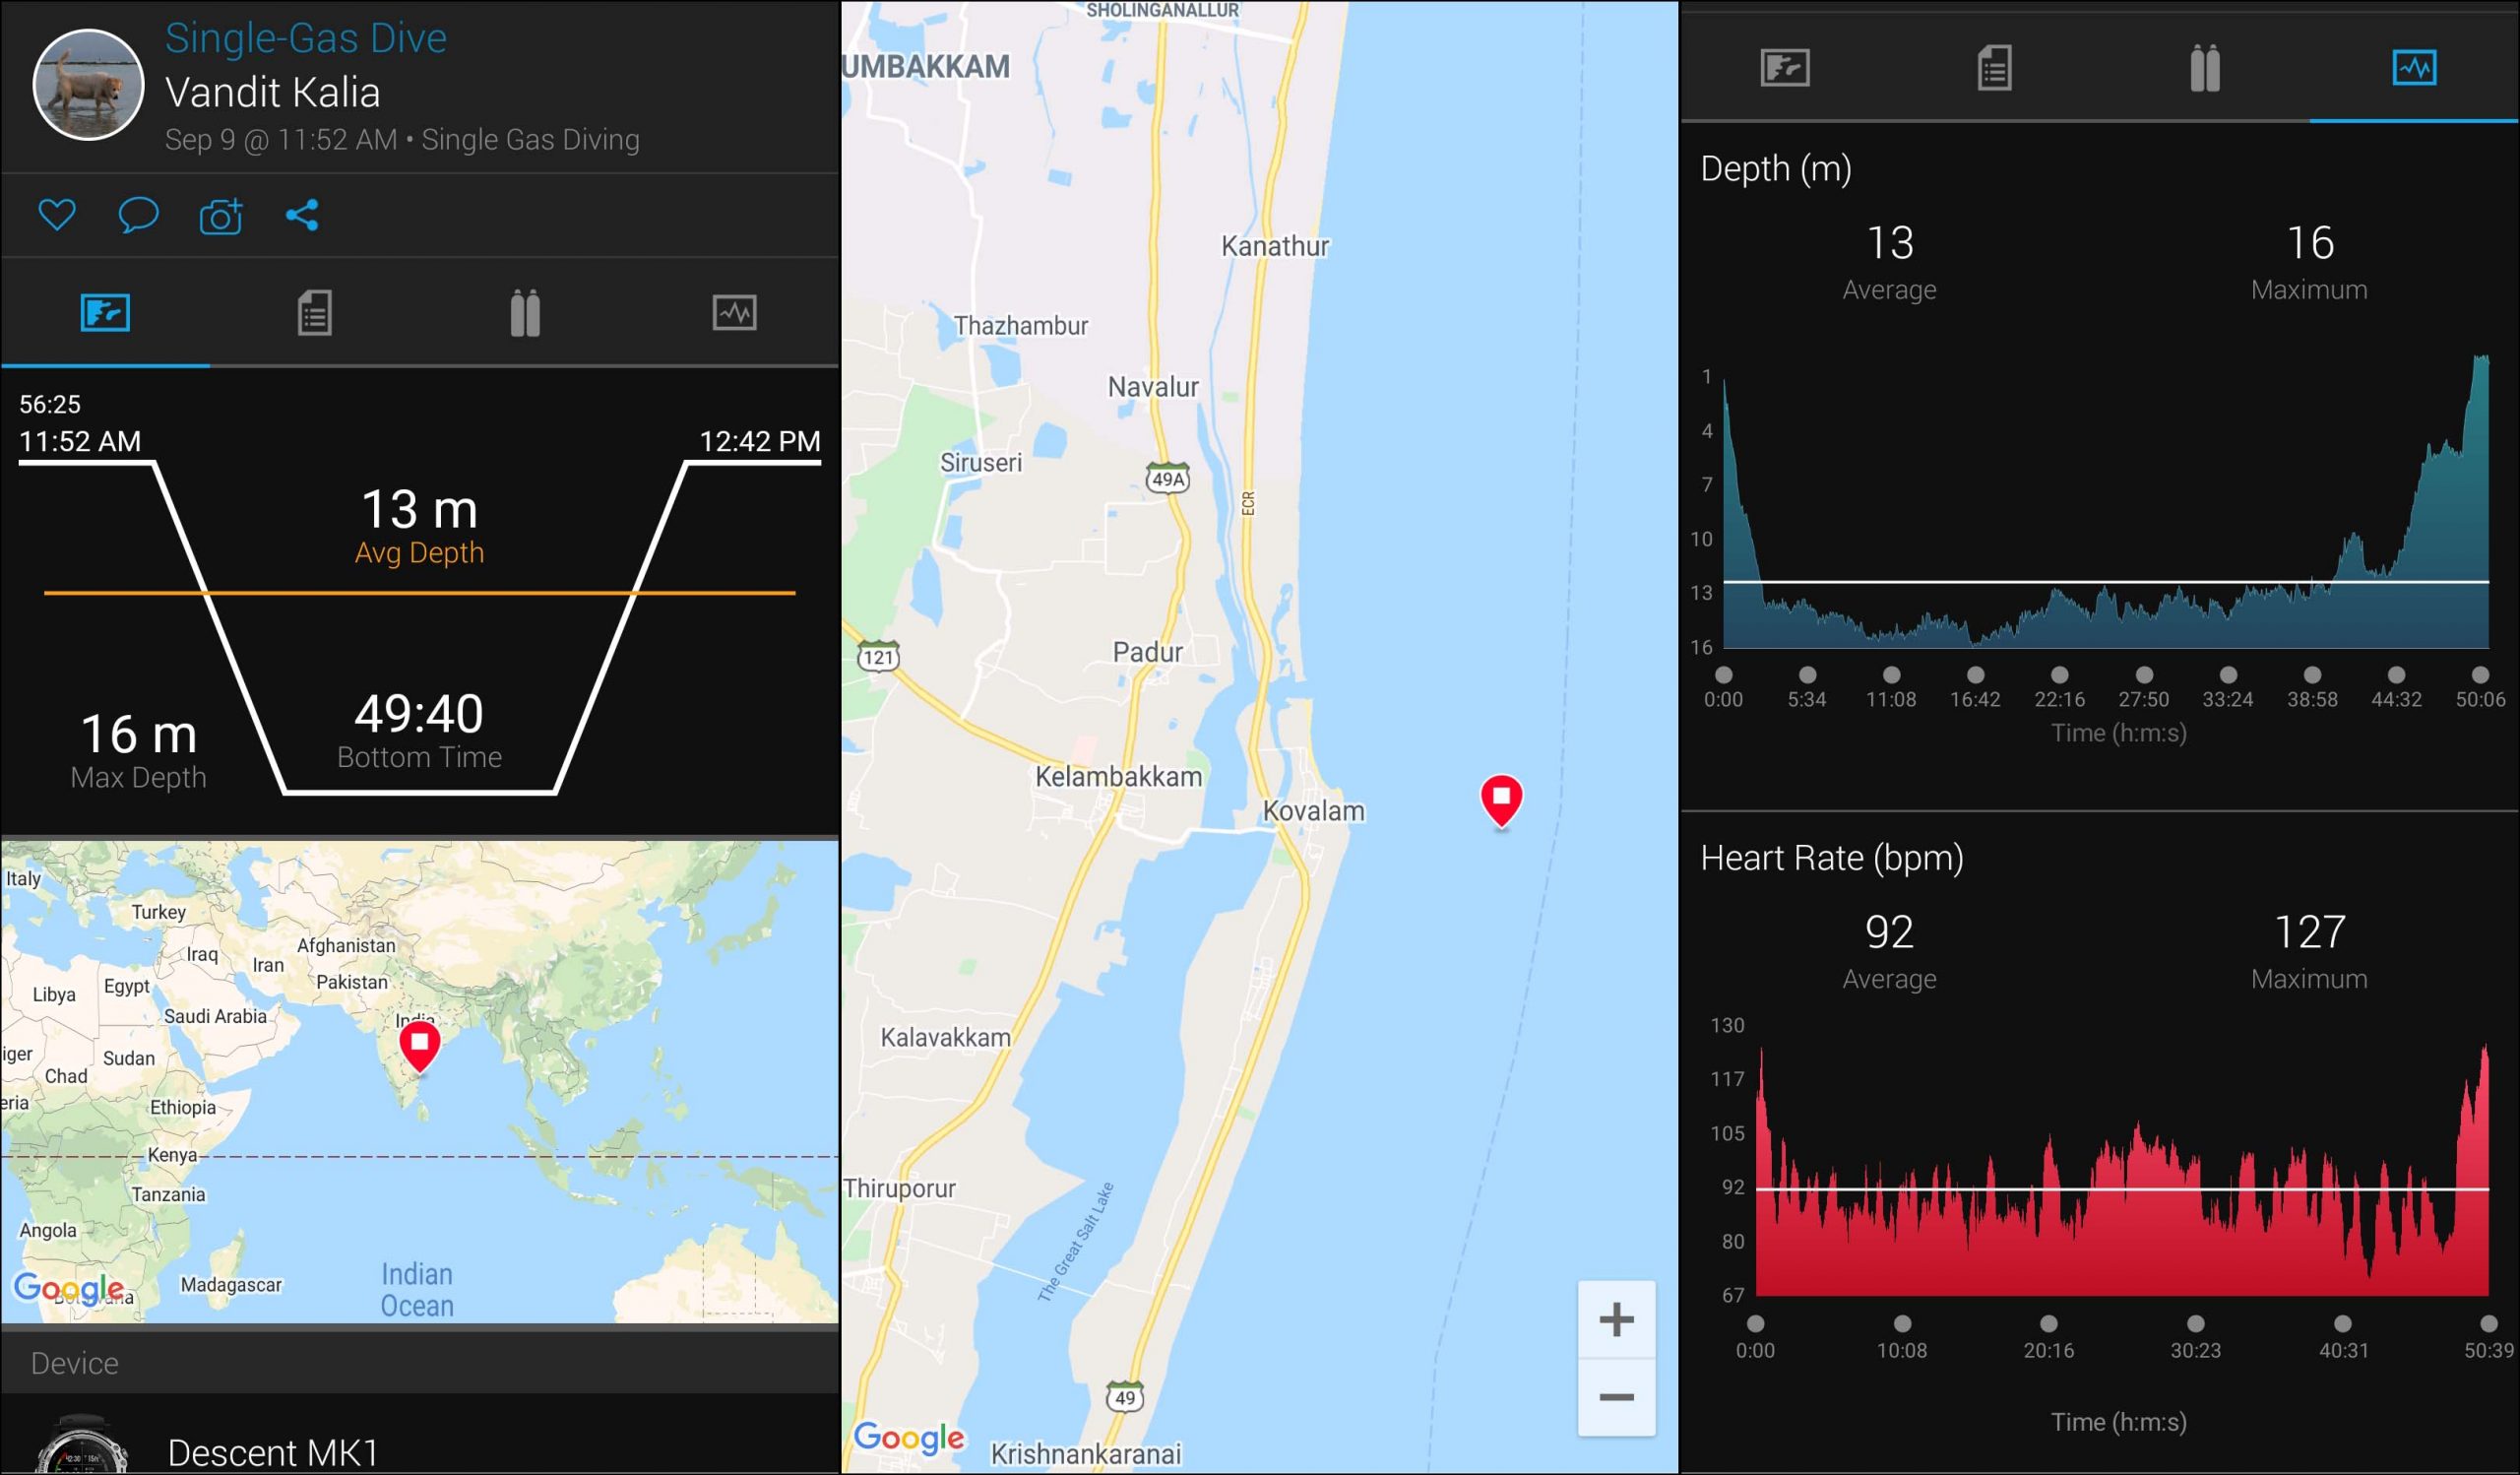
The second is built-in GPS and surface navigation, which not only marks the entry/exit coordinates of your dive, but also shows you a map of where you are and even allows surface navigation.   Presumably, your boat will have its own GPS, but still, it is always nice to have this feature – the more data you have on the surface, the better.

GPS in your watch – showing entry, exit and a map of the surroundings.   I wants it!!!

The last is the ability to see Tide Charts for your location.   As a dive professional, I find this very useful – and that holds true for recreational divers as well, in terms of knowing what to expect as far as currents and vis go.   Being able to look up this info on my watch, as opposed to firing up a browser on my phone, is pretty slick stuff.

Seriously amazing stuff, Garmin.    My gear lust was fully awakened once I had a chance to play around with this.

NON-DIVING FEATURES

If this is all that the Garmin Descent dive computer was capable of, it would still be a very impressive dive computer.    But as the saying goes, wait – there is more.

Built on a Fenix 5 platform, the Descent is actually a full-featured smart sports watch, with all the capabilities of the dedicated Garmin sports watches – you can use it for various activities including cycling, running, pool swims, open water swims and more (strength, yoga, walking, etc).   In addition, for those of you with dedicated accessories, the Garmin Descent also pairs with accessories like cycling power meters, external HR straps and running pods.     If you wear it as your primary fitness device, it will also do things like track steps, calories burned, stress levels (based on HR variability) and more.

Despite its size, the Descent was very comfortable on the wrist for a run (sorry, no photos while actually running – I dont carry a phone)

As mentioned earlier, I use a Garmin 935XT as my main sports watch for running and triathlons, but the Descent has pretty much all of the same functionality as well.     I used it instead of the 935XT for a few runs, and it worked just as well – despite the device being a fair bit thicker and heavier, it was surprisingly comfortable.   I credit the soft rubber strap, which allows you to get it snug enough without being uncomfortable.    And I got all the advanced running metrics like GCT, Vertical Oscillation, etc. that I get from the 935.   So zero compromises in functionality.

The Descent also pairs with the Connect IQ app store (a part of the Garmin Connect phone app), which lets you download various third party apps and screens for the dive computer – this includes watch faces, activity apps, etc.

ConnectIQ apps let you customize and get additional info on your device

Furthermore, you can also get your phone call and message notifications on your Garmin device – just like any other smart watch.

In short, the Descent isnt just a device you wear for diving – it is a single device that can stay strapped on your wrist all day, every day.

USAGE AND ERGONOMICS

I’ve managed to take the Descent out for a few dives over the past few weeks and see what it was like to actually use the device.

The display on the Garmin is nice and bright – not as amazing as the Shearwater OLED display, but sufficiently bright and easy to view underwater.

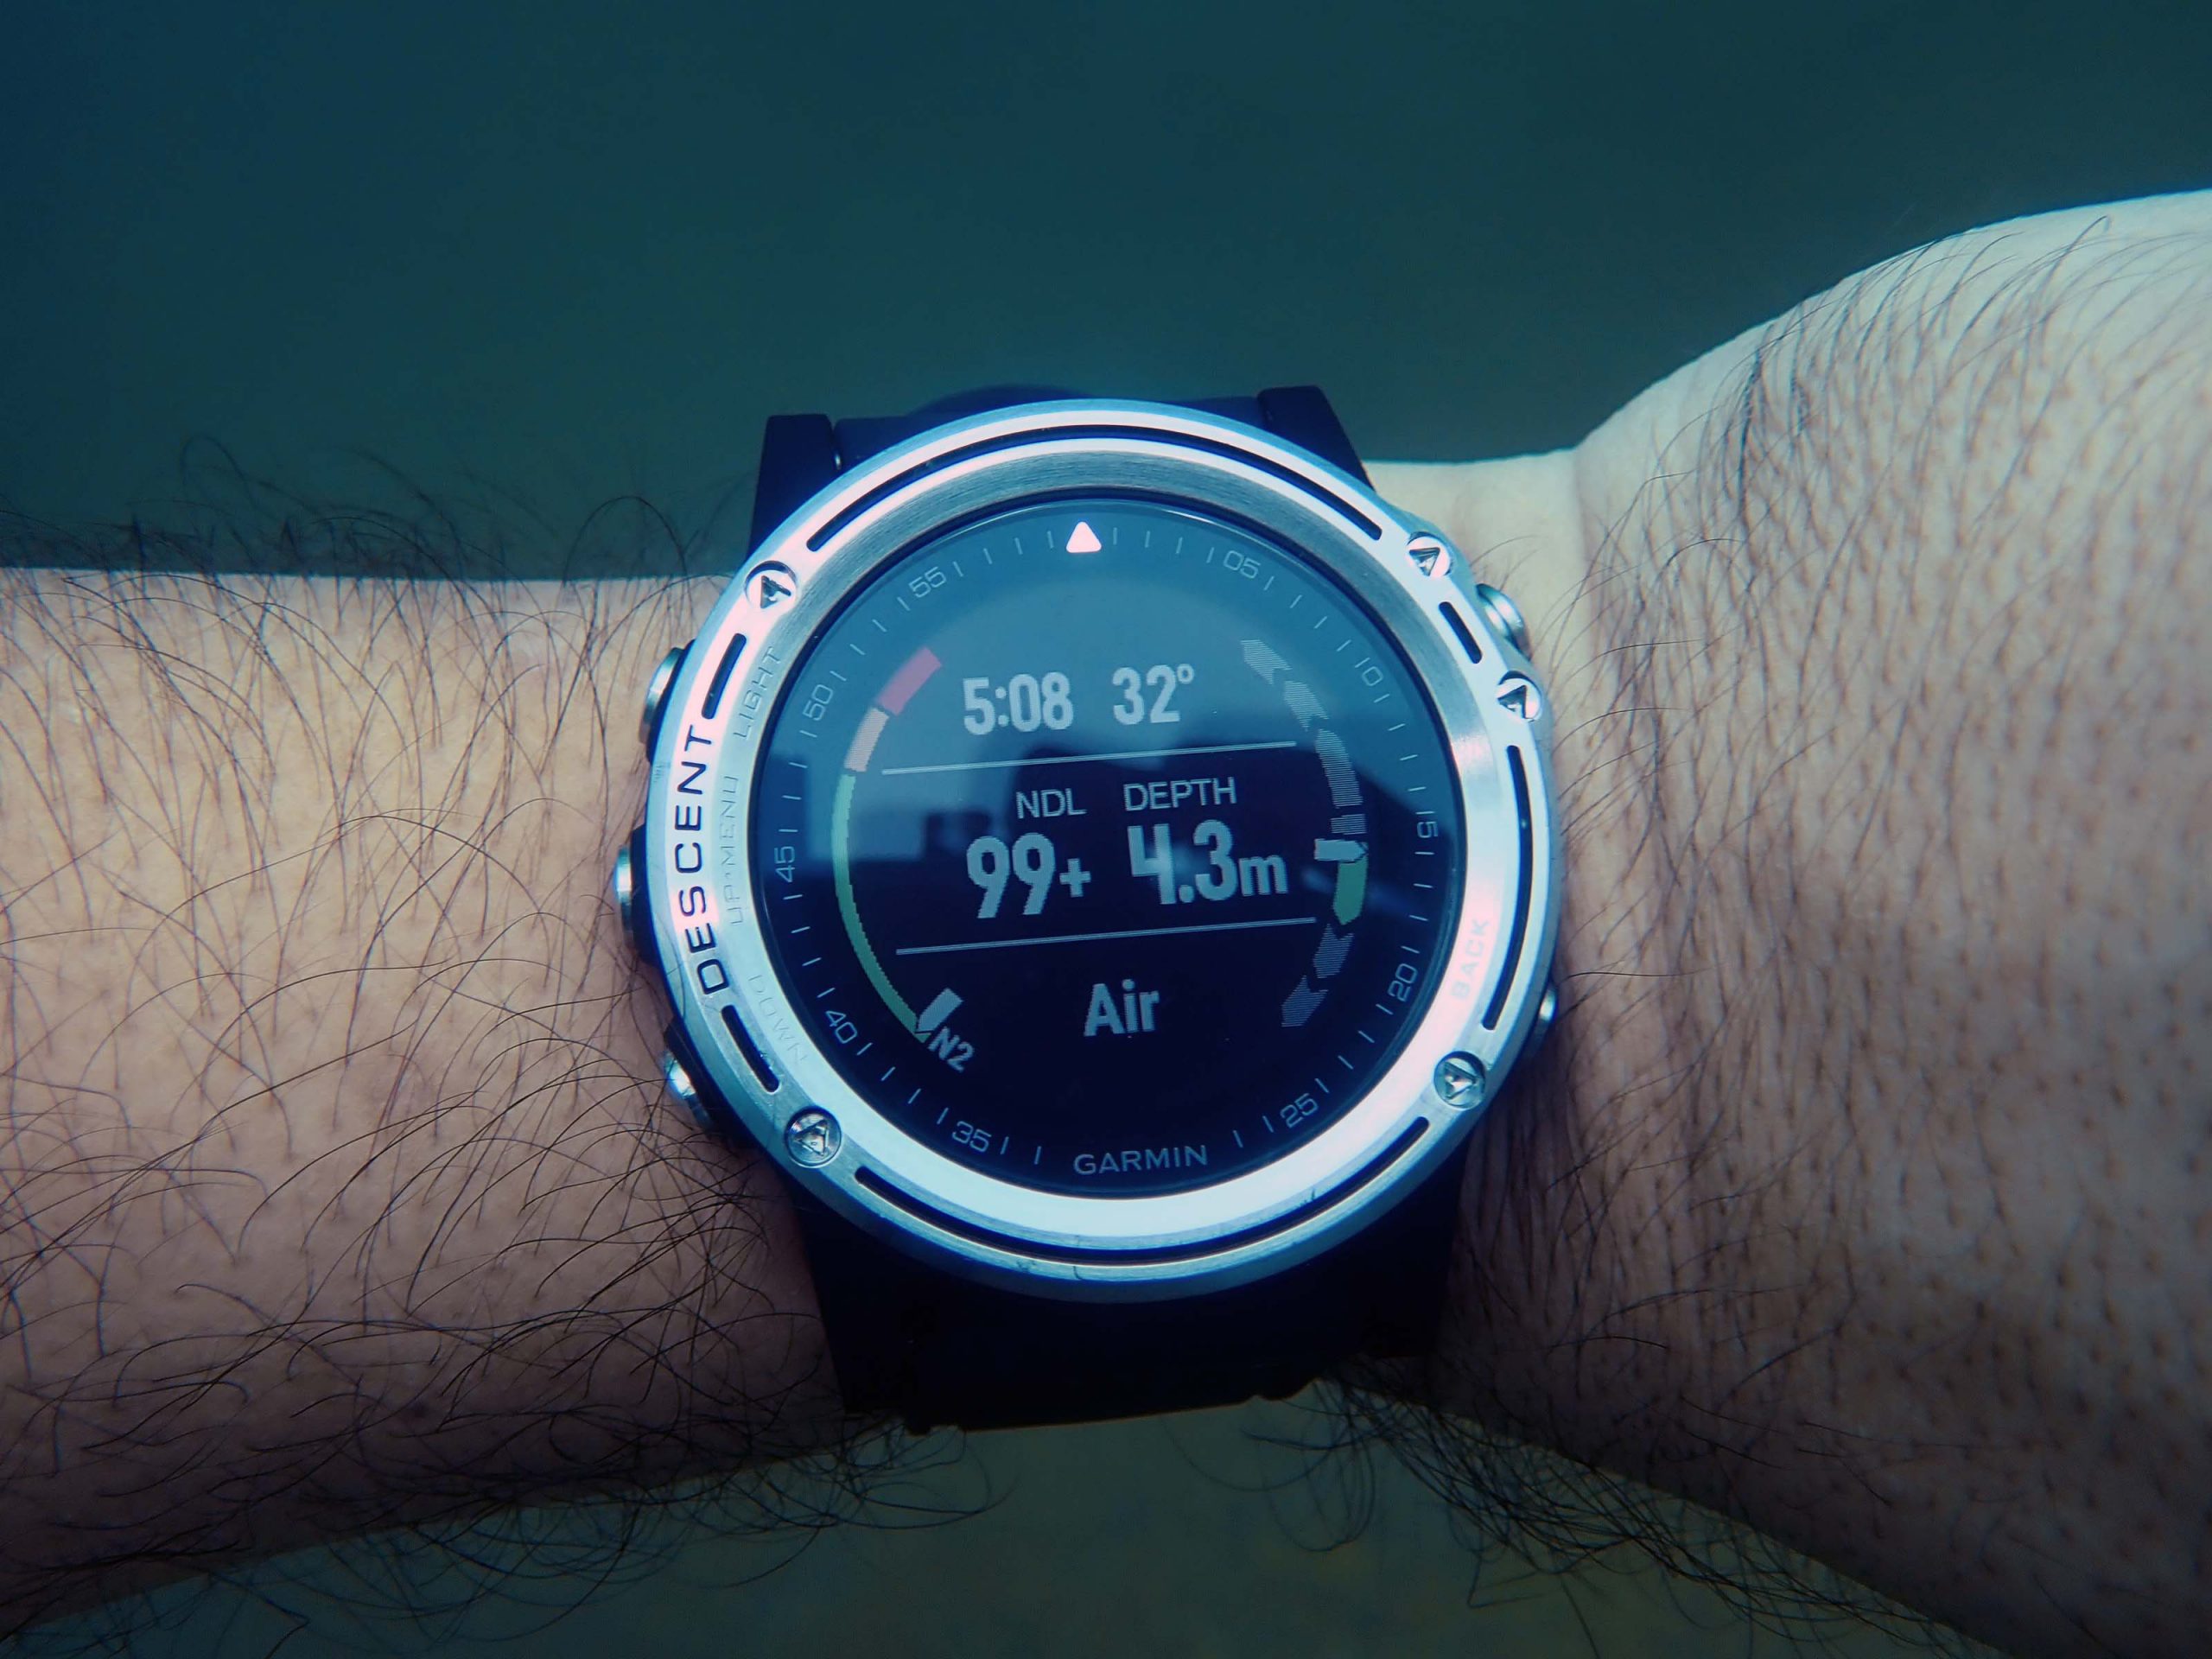
Dhruv modeling the Garmin underwater – the display is legible and easy to read even in low vis
Battery life is very good – Garmin claims about 36-40 hours for diving, and up to 10 days in watch mode.   I have not had a chance to test this rigorously, but based on my usage and battery levels, it seems to be more or less right.    And this is a sensible amount of battery life – while this is obviously a matter of personal preference, I can’t be bothered dealing with a device that needs charging every day or two.    Give me something that will run a week of diving without needing any attention.

Charging is through a USB cable with a proprietary connector which attaches to contacts on the reverse side of the watch – standard stuff.     The cable t0 computer connection is very secure indeed – this is NOT going to accidentally come loose at night, resulting in you having an computer with low batteries on the morning of the dive.

Charging cable

Ergonomics, in terms of setting up, will be very familiar to users of other Garmin devices.    Coming from my 935XT, I was able to get into the Descent without needing any manual or anything.     For someone new to the Garmin system, the immense array of options, it can seem a bit much in the beginning, but once you understand the logic of how the menu system is structured, it is surprisingly intuitive.

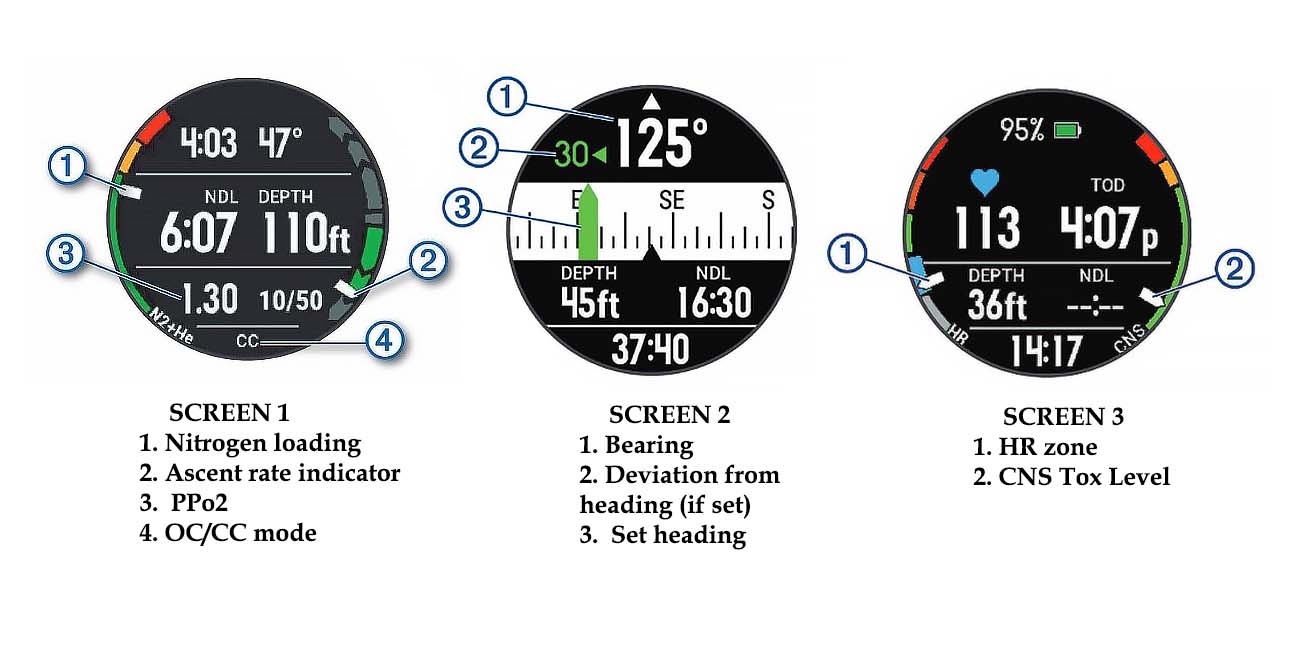
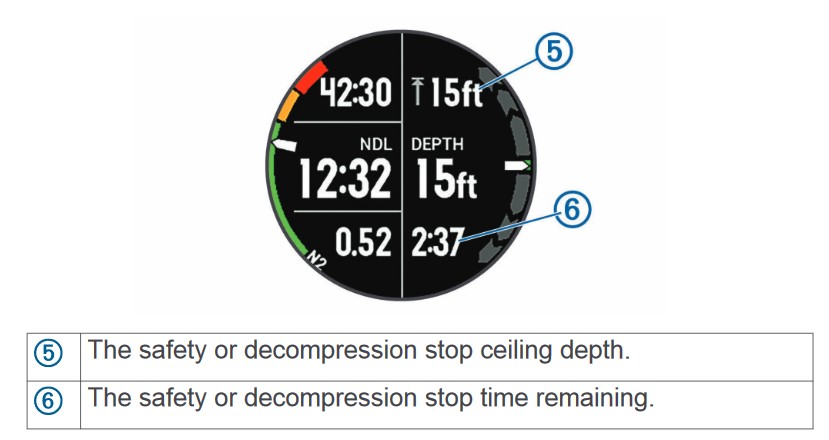
In dive mode, you have 3 display screens and you can tap on the screen to toggle between them, or use the up/down arrow keys.   The primary screen shows the essential info – dive time, depth, NDL and, in the case of nitrox or trimix, your gas mix and related info.     The second screen shows compass heading, depth, time and NDL.    And the last screen shows heart rate info, as well as the standard essential dive details.


The 3 display screens of the Garmin Descent
This is the one place where I felt the Garmin Descent could do better.

For starters, both the NDL and the dive time field read in MM:SS format – which is quite unusual compared to other dive computers, which display minutes only.      Perhaps it is just me, but whenever I see something displayed in the MM:SS format, my brain automatically equates that to a “time” display, not a NDL or deco time display.   So this was one thing that took me by surprise.

Another issue I have with the display is that the arguably most important information – NDL – is in the same font/color size as a bunch of other information that is not as critical, and so does not stand out as much.      Personally, I would have preferred to see that info in a different color or larger font size, so that it stood out more.

The biggest issue, for me, however, was the lack of clarity on labels.   Take a look at this shot, taken during a dive:

Screen 3 display during a dive

Is TOD time of the day or time of dive?    One would expect, from the fact that it occupies a more prominent display that it would be the dive time – however, the standard notation for that is Dive Time, not ToD.  And if so, what is 15:46?   The time of the day was around 1-1:30pm, and the Garmin – which was paired to my phone and to the GPS – should have picked up the correct time automatically.   So neither of these two numbers actually represents the time of the day.     Even if one of them is dive time, what is the other?      And why would you waste display space with something as irrelevant as time of day?

Admittedly, I was searching for new sites and also comparing this unit to a couple of other units I was testing, so my attention was split many ways – and in practice, it would be easy enough to figure this information out with use.   However,  one thing I have learned is that if something isn’t marked clearly (and often, even if it is), odds are good someone will misinterpret it.   So I am a big believer of making stuff as clearly marked as possible, especially for safety-critical units.   And any in case, in this day and age of advanced displays, there is absolutely no reason to have unmarked fields.

The decompression screen is a little easier to read, but still is somewhat confusing at first glance (I have taken this screen off the Garmin website, as I did not have the time to test this computer on some deco dives):

Garmin Descent Mk1 decompression screen

The bottom left number should be PPO2 (an assumption, given the lack of labels, but a pretty safe one) and the top left number is the total dive time.    But given that you are in deco and so past your NDL, why does display show 12:32 under NDL?   I can only assume it is total time to ascend – but if so, why not label it as such?     Surely the display header can be changed accordingly, to avoid the issue of someone mistakenly assuming they still have 12 minutes of no-deco time left.

Are any of these fatal flaws?   Not really.    A couple of dives and you will soon understand the layout and what the fields mean.    However, you just need to be aware that there will be a short learning curve as you get used to the display, and you need to make the effort to cross that curve.

Lastly, the dive planning mode works pretty much as advertised – easy to use and you can add additional surface time to the planning mode to get an idea of what your allowed bottom times would be at some point in the future.  .   You can even plan decompression dives on the unit, if you so desire.

CONNECTIVITY AND APP SUPPORT

The Garmin Connect phone app is the centerpiece of the Garmin eco-system and repository for all your workouts.        Like all your other Garmin devices, the Garmin Descent will connect to it via Bluetooth (something that works seamlessly – even on Windoze and Android) and automatically upload your dive, where you can see it on the app, share it on Strava, etc.    This includes a visual display of your profile, GPS info as well as all the dive metrics including HR.

Screenshots from the Garmin Connect app

The Garmin Connect is also the hub from which you can download apps onto the device – and this raises the issue of reliability.

I am a long-term Garmin user and very happy with their eco-system but even the most hardcore of Garmin fans has to admit that their devices, especially first generation ones, often have teething issues that can make them fairly annoying to use.    Add to that the ability to add apps of unknown provenance and you have set the recipe for an untimely crash.     That’s bad enough when it happens on a bike or a run (it is a proven fact that if you cannot save your workout on Strava, you do not get any training benefit from it!) but happening on a dive can be downright dangerous.

However, the good news is that once you start a dive, the Garmin locks out all the other apps and functionality, thereby improving reliability.   Certainly, the computer worked perfectly for me and searching online doesn’t seem to indicate too many reliability issues – which isn’t surprising.  Garmin also makes products for the aviation industry and those have to be made with a very high degree of reliability – obviously, some of that has been carried over here.

Watch faces, weather apps, activity apps and more allow you to customize your Garmin

Garmin also has a Garmin Dive app, which provides a single place for keeping all your dive-related activities.  I installed it and tried out, and it seemed to be very similar to the regular Garmin Connect app, just more of a “dive log” style.   I didn’t spend too much time on it.

SUMMARY

There is no dancing around the elephant in the room – the price of this unit.   It has a MRP of Rs 109,000 (and the incoming Garmin Descent Mk2 is even higher) – even factoring in the fact that we will be selling it at a healthy discount, this is NOT a cheap dive computer.

So is it a dive computer that is worth buying?

Obviously, whether you even need to spend this much on a dive computer is a matter of personal choice.     You can certainly get by with an entry-level, no-frills dive computer – but the higher-end dive computers have a lot of features which, while not essential, do add a lot of convenience to your diving and which I certainly cannot live without.     So that’s a personal choice – for me, I would rather suck it up and pay the premium once and then enjoy the benefits over several years.   That’s worth a lot more to me than a flagship phone, for example.   But I also get the rationale for buying a more value-priced computer.

So let’s rephrase the question – if you are looking for a high-end dive computer, is the Garmin Descent worth buying?

As I mentioned at the start of this article, there is nothing like the Garmin Descent on the market today.      It is a top-end dive computer and a top-end smart sports/fitness watch rolled into one, and it does both without any significant compromises.     The Garmin 945XT (the current successor to the 935XT) is about Rs 55,000 or so.   A top-end wrist-watch dive computer like the Shearwater Teric is around Rs 80,000.     This computer gives you the best of both and only for a relatively small premium (once you factor in our selling price).     So from that point of view, it is even… dare I say it… good value.

If you do not care about land-based features but only care about getting the best possible computer, then something like the Shearwater Teric is the closest one-to-one competitor to the Garmin Descent.   I will have a direct head-to-head comparison of these two dive computers coming soon, but they each bring something different to the table – in the Garmin’s case, it has the GPS navigation and a longer battery life air while the Teric has a significant better (in terms of legibility and intuitiveness) display and air integration.

The Garmin Descent does have some foibles when it comes to how the information is presented, and all else being equal, I would prefer a computer without these issues.   However, all else is most definitely NOT equal – and the strengths and features of the Descent make it a very appealing option for divers looking for a do-it-all sports watch.

xHowever, I will only recommend this computer to divers who are willing to spend that little bit of effort getting to know this computer on the first couple of dives – if you are ok with that, this is certainly a contender in the top-dog category.    I am certainly very tempted to get one myself, to use with my teaching kit (where the Perdix AI is a bit overkill).

Shearwater Peregrine review

By Articles

SHEARWATER PEREGRINE REVIEW

by: Vinnie
Date: August 2020


Before I start, I should make it clear I am a big fan of Shearwater diver computers – in my experience, the Perdix and Teric are the best dive computers in the market today, and I believe this strongly enough to have purchased a Perdix AI for myself at full retail from a store in Singapore.

A full review of the Perdix is coming soon, but here is what sets it apart:  customizable algorithm, full features (trimix, Open Circuit, Closed Circuit), built-in compass, air integration, ability to handle more gas mixes than you are ever likely to use, user changeable battery, upgradable firmware and a fantastic, legible display, all in a sturdy housing that is designed for extreme use (this is certainly no dainty wrist jewellery).     There is literally NOTHING you are missing in this dive computer.

Unfortunately, all this comes at a price – the Perdix (and its sibling, the Teric) are not cheap.    While there is definitely something to be said for having a computer that is virtually future-proof and that you are not likely to outgrow, the price of the higher end Shearwater does tend to put off people looking for a more value-priced computer.     Enter the Shearwater Peregrine –  with an MRP of Rs 36,000 (at the time of writing this article) it is an “entry level” dive computer intended to bring the Shearwater experience within reach to more people.

Let’s see how it fares!

UNBOXING

I like the minimalist packaging that the computer comes in – it comes packaged in its own travel case, and inside, you find the following:

  • A 26mm rubber strap and a set of bungee cords
  • Locking bars and tools for attaching them
  • Wireless charger
  • USB cable
  • An inspection certificate
  • A couple of stickers
  • A spare screen protector

Everything that you need – and no huge amount of wasted plastics and paper.    Kudos to Shearwater for a very eco-friendly packing job.

Note that while my unit came with a black strap and a black bungee cord, you can get white or a matching blue rubber strap for the Shearwater Peregrine, if you so desire, as pictured below:

Peregrine_Rear_Duo_Rear-1024x657Colored straps are available for the Peregrine – never under-estimate the importance of color in making sure you stand out amidst a sea (pun intended) of divers all dressed in black!
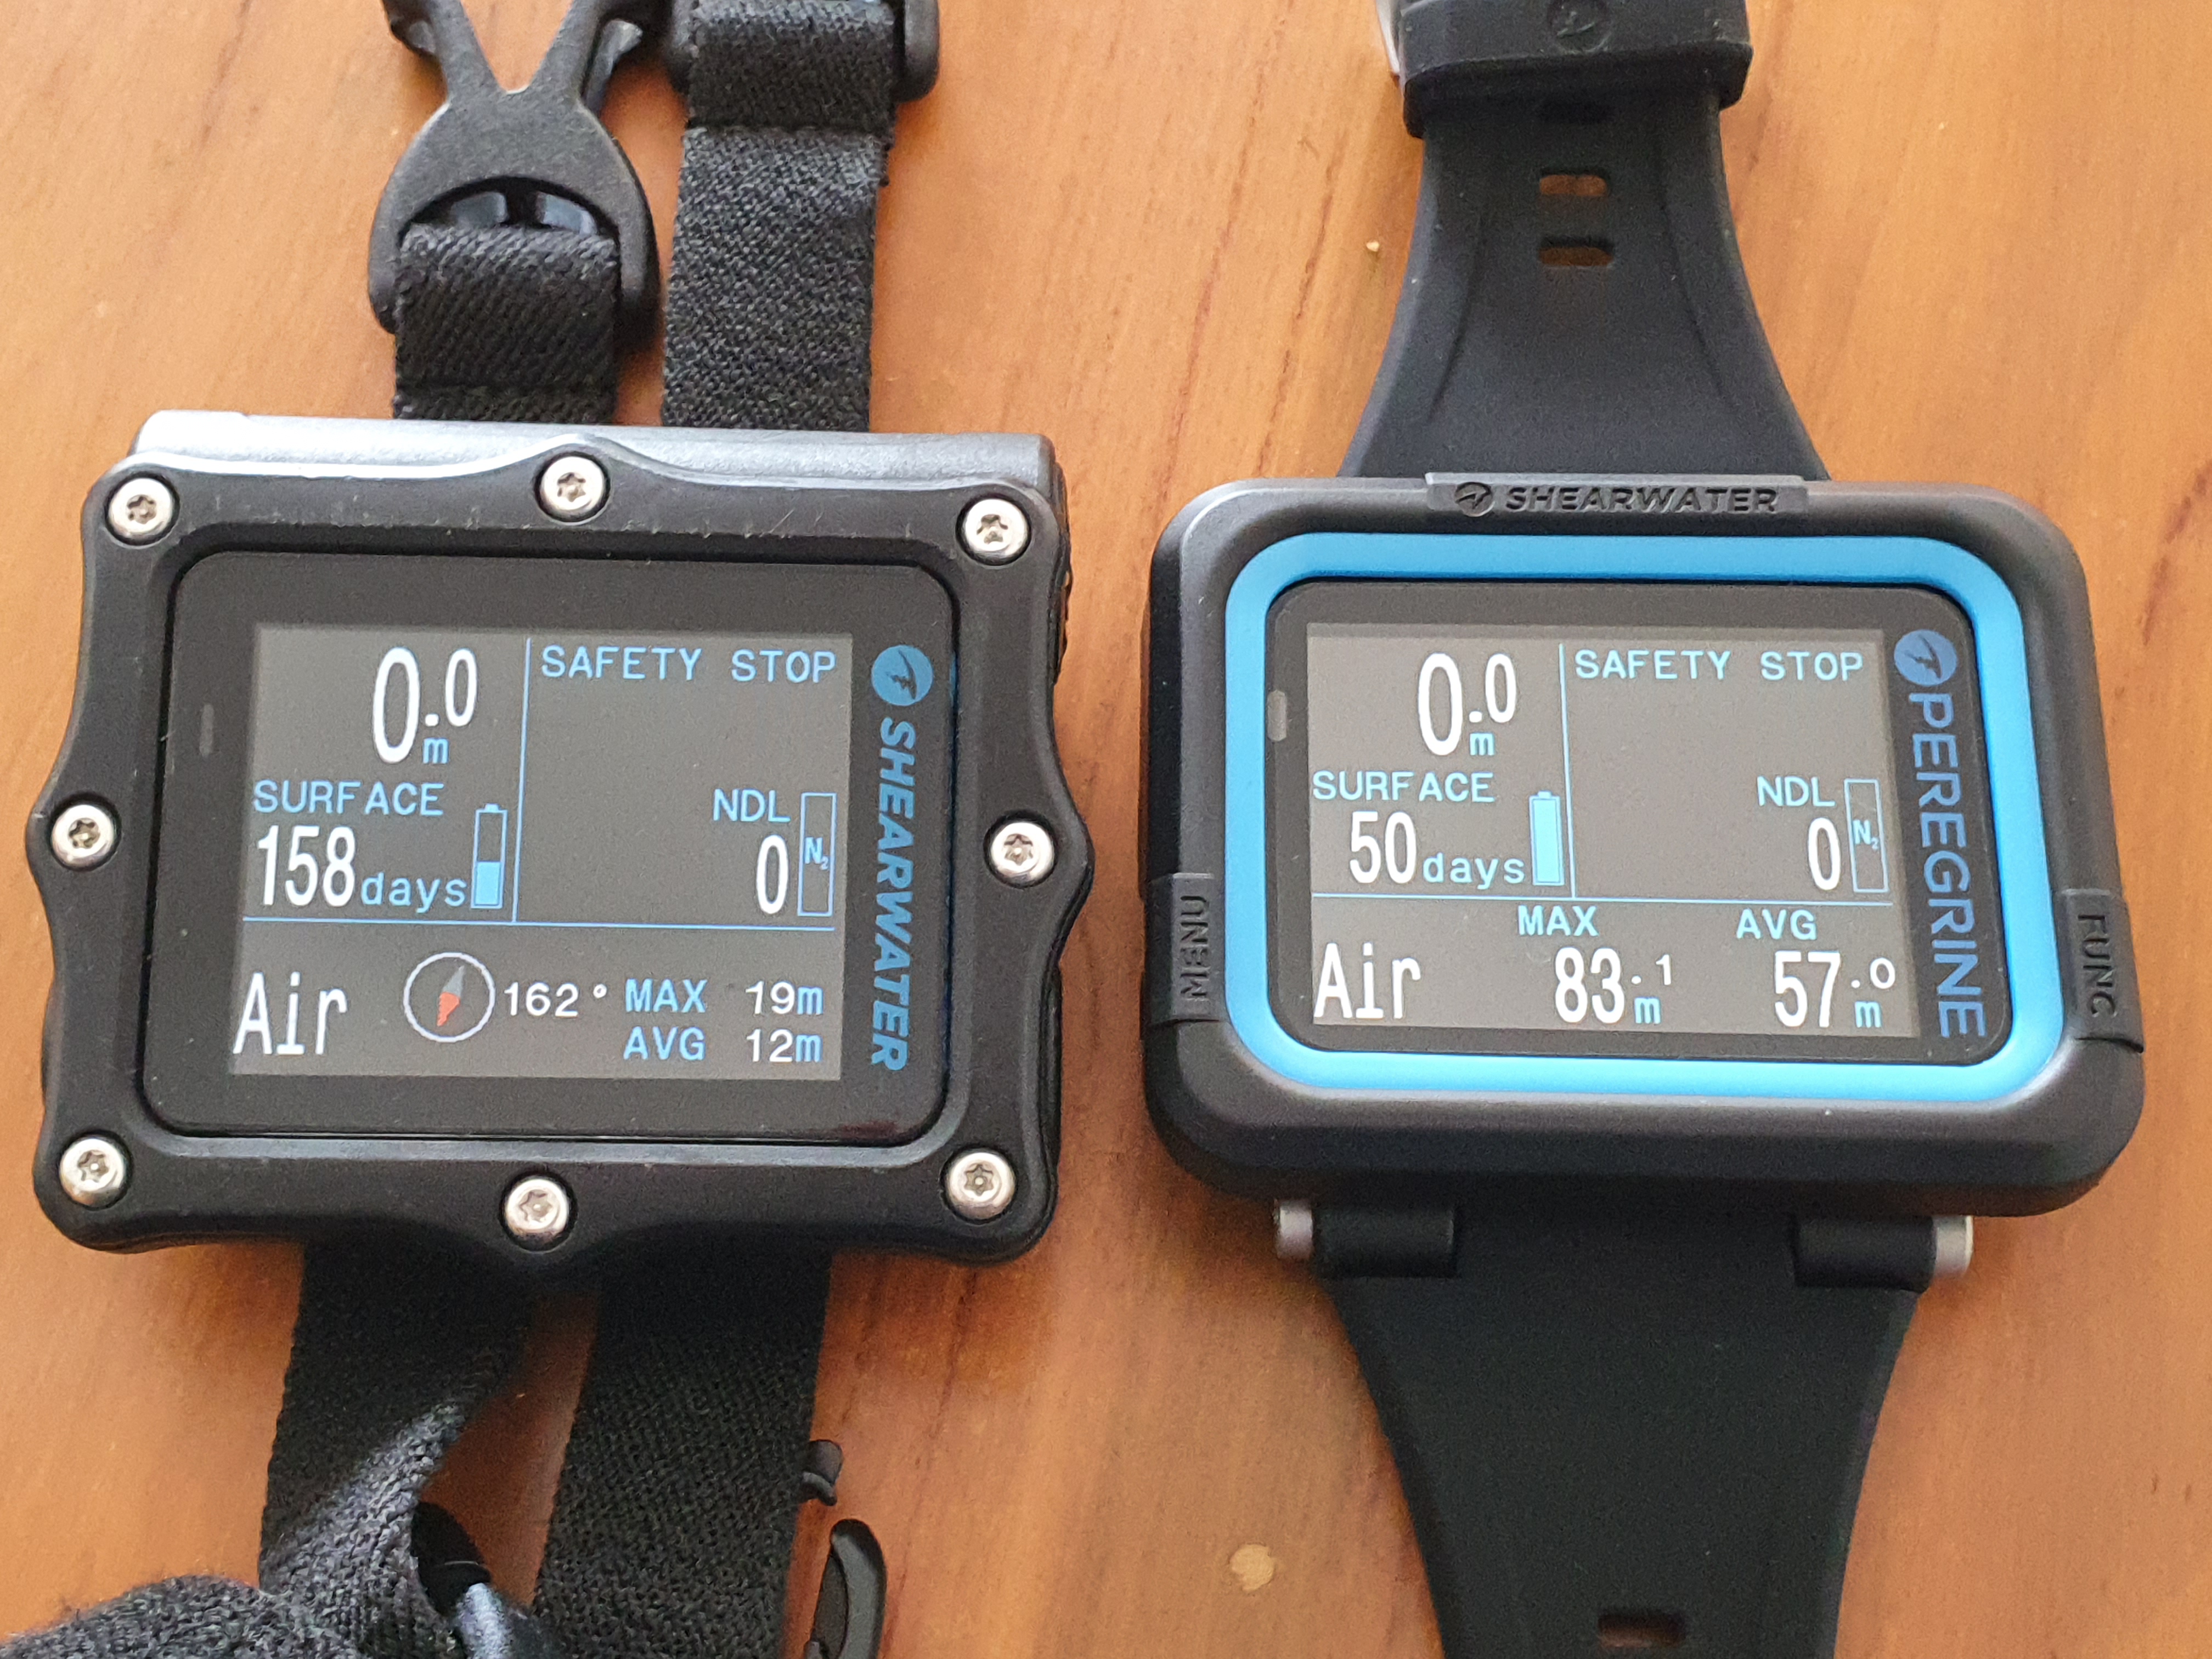
FORM FACTOR, DISPLAY & ERGONOMICS

The Shearwater Peregrine is an over-sized dive computer – not a wrist-watch sized dive computer.         As you can see below, the screen is approximately the same size as the Perdix, but the casing has been slimmed down a significant degree.     The Perdix has a very strong “all business” look to it – this is a computer that is all business, all the time.   The lines of the Peregrine are a little more relaxed, with a pop of color in the form of the blue bezel around the screen (although that is the only color available at present).

20200812_144505The Shearwater siblings – the Perdix on the left, the Peregrine on the right.   The 158 day surface interval on my Perdix is a sad testimony to the effects of the COVID pandemic!
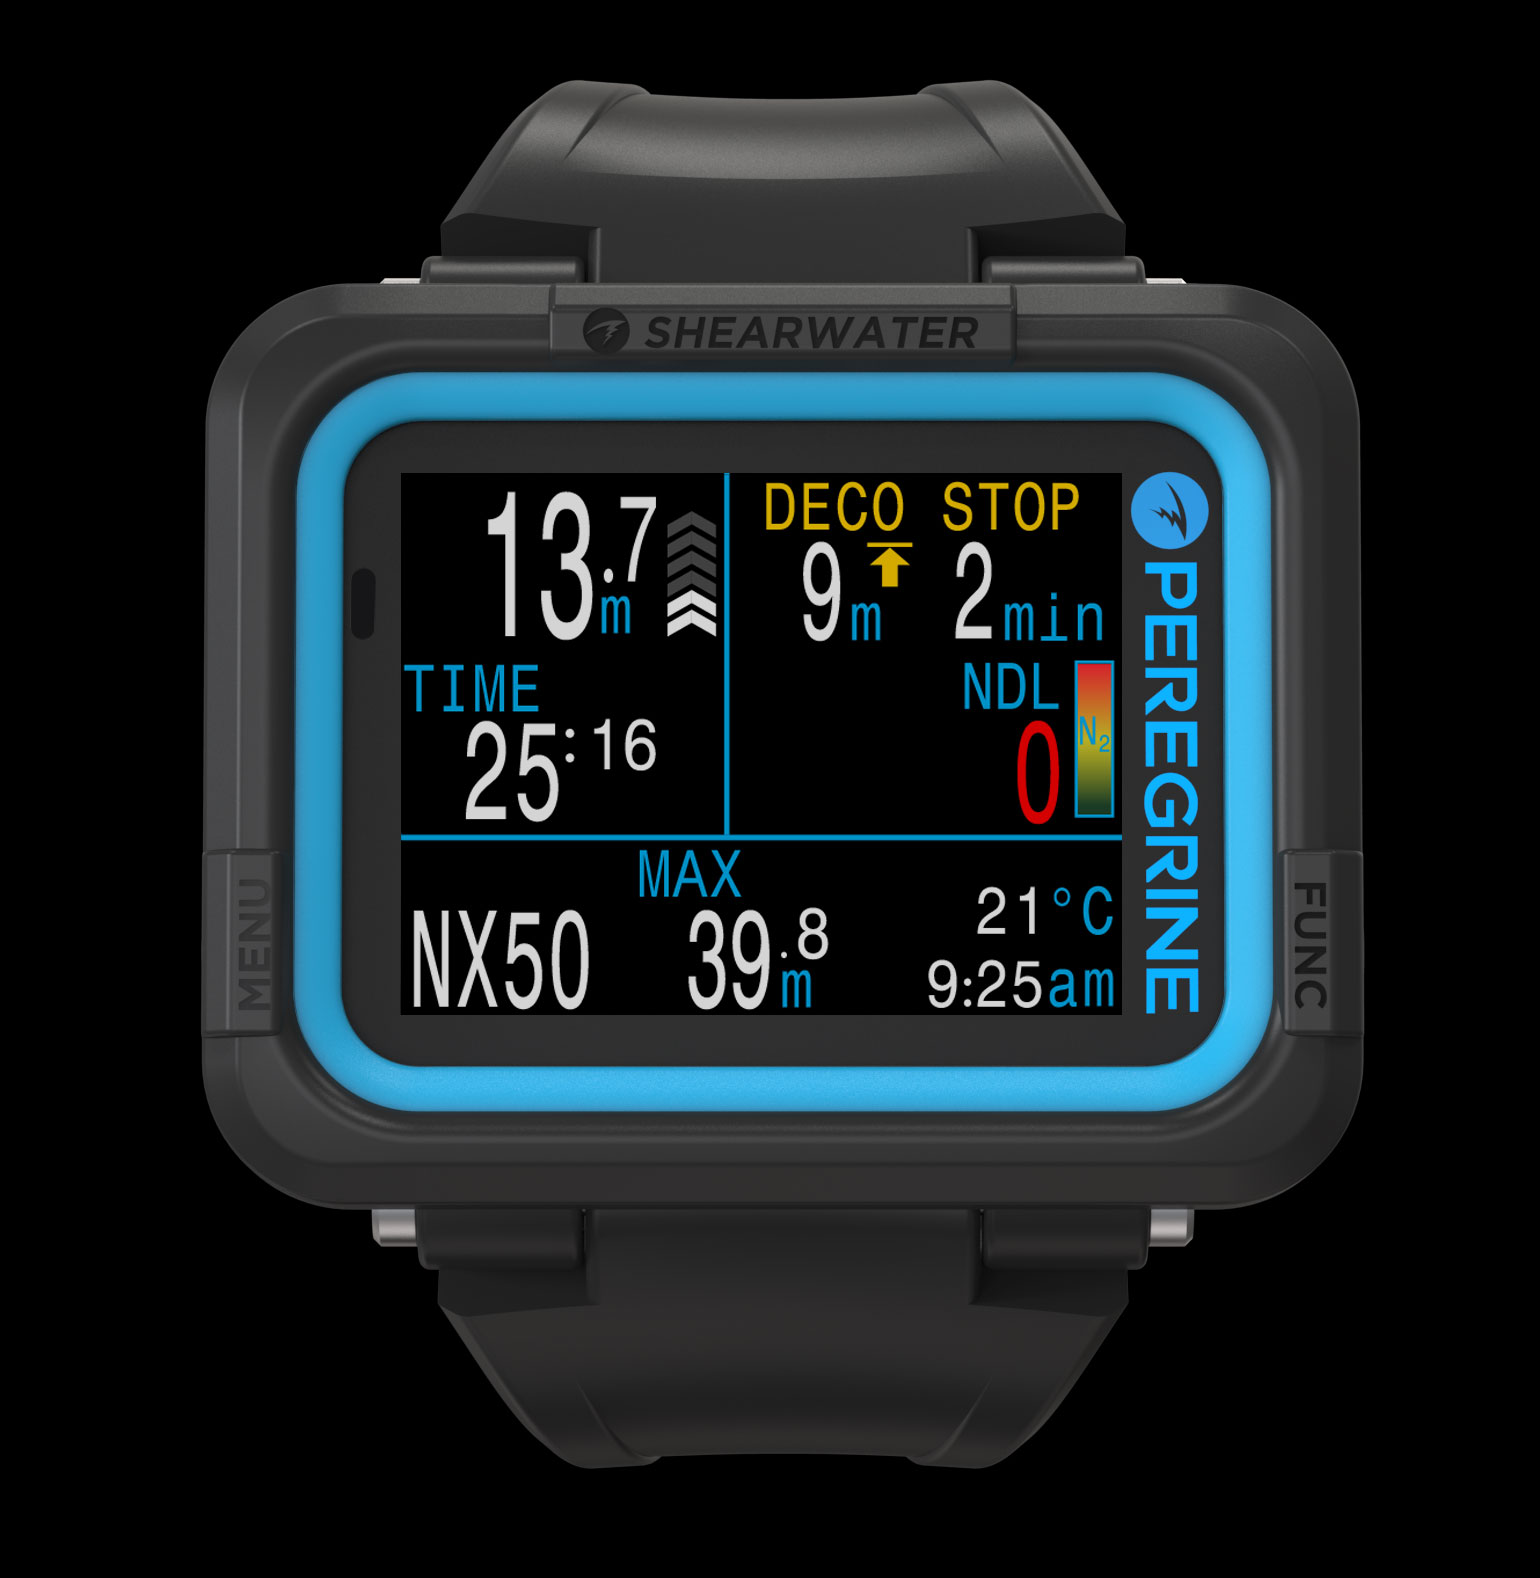
Generally, all else being equal, I have a preference for wrist-watch sized computers:  they are easier to travel with, you are less likely to forget them in your hotel room on the morning of the dive, you don’t have to take them off before/after the dive while putting on your wetsuit (and so risk them getting damaged or even falling off the side of the boat!).

So why have I gone from a Suunto D9Tx, a watch-sized dive computer, to a Perdix, an oversized unit?    The key phrase is “all else being equal”.      In some cases, a larger dive watch is just an exercise in cost-cutting – miniaturization is expensive, after all.   In other cases, the larger form factors gets you more – better battery life, higher quality display, better presentation of information, etc.       I am happy to say that the Peregrine, like its bigger brother, does utilize this large form factor very well.

Take a look at this:
Peregrine_Front_NX50_Deco-1Peregrine Display (image borrowed from the Shearwater website, as I sadly have not been able to get into the water with my unit)
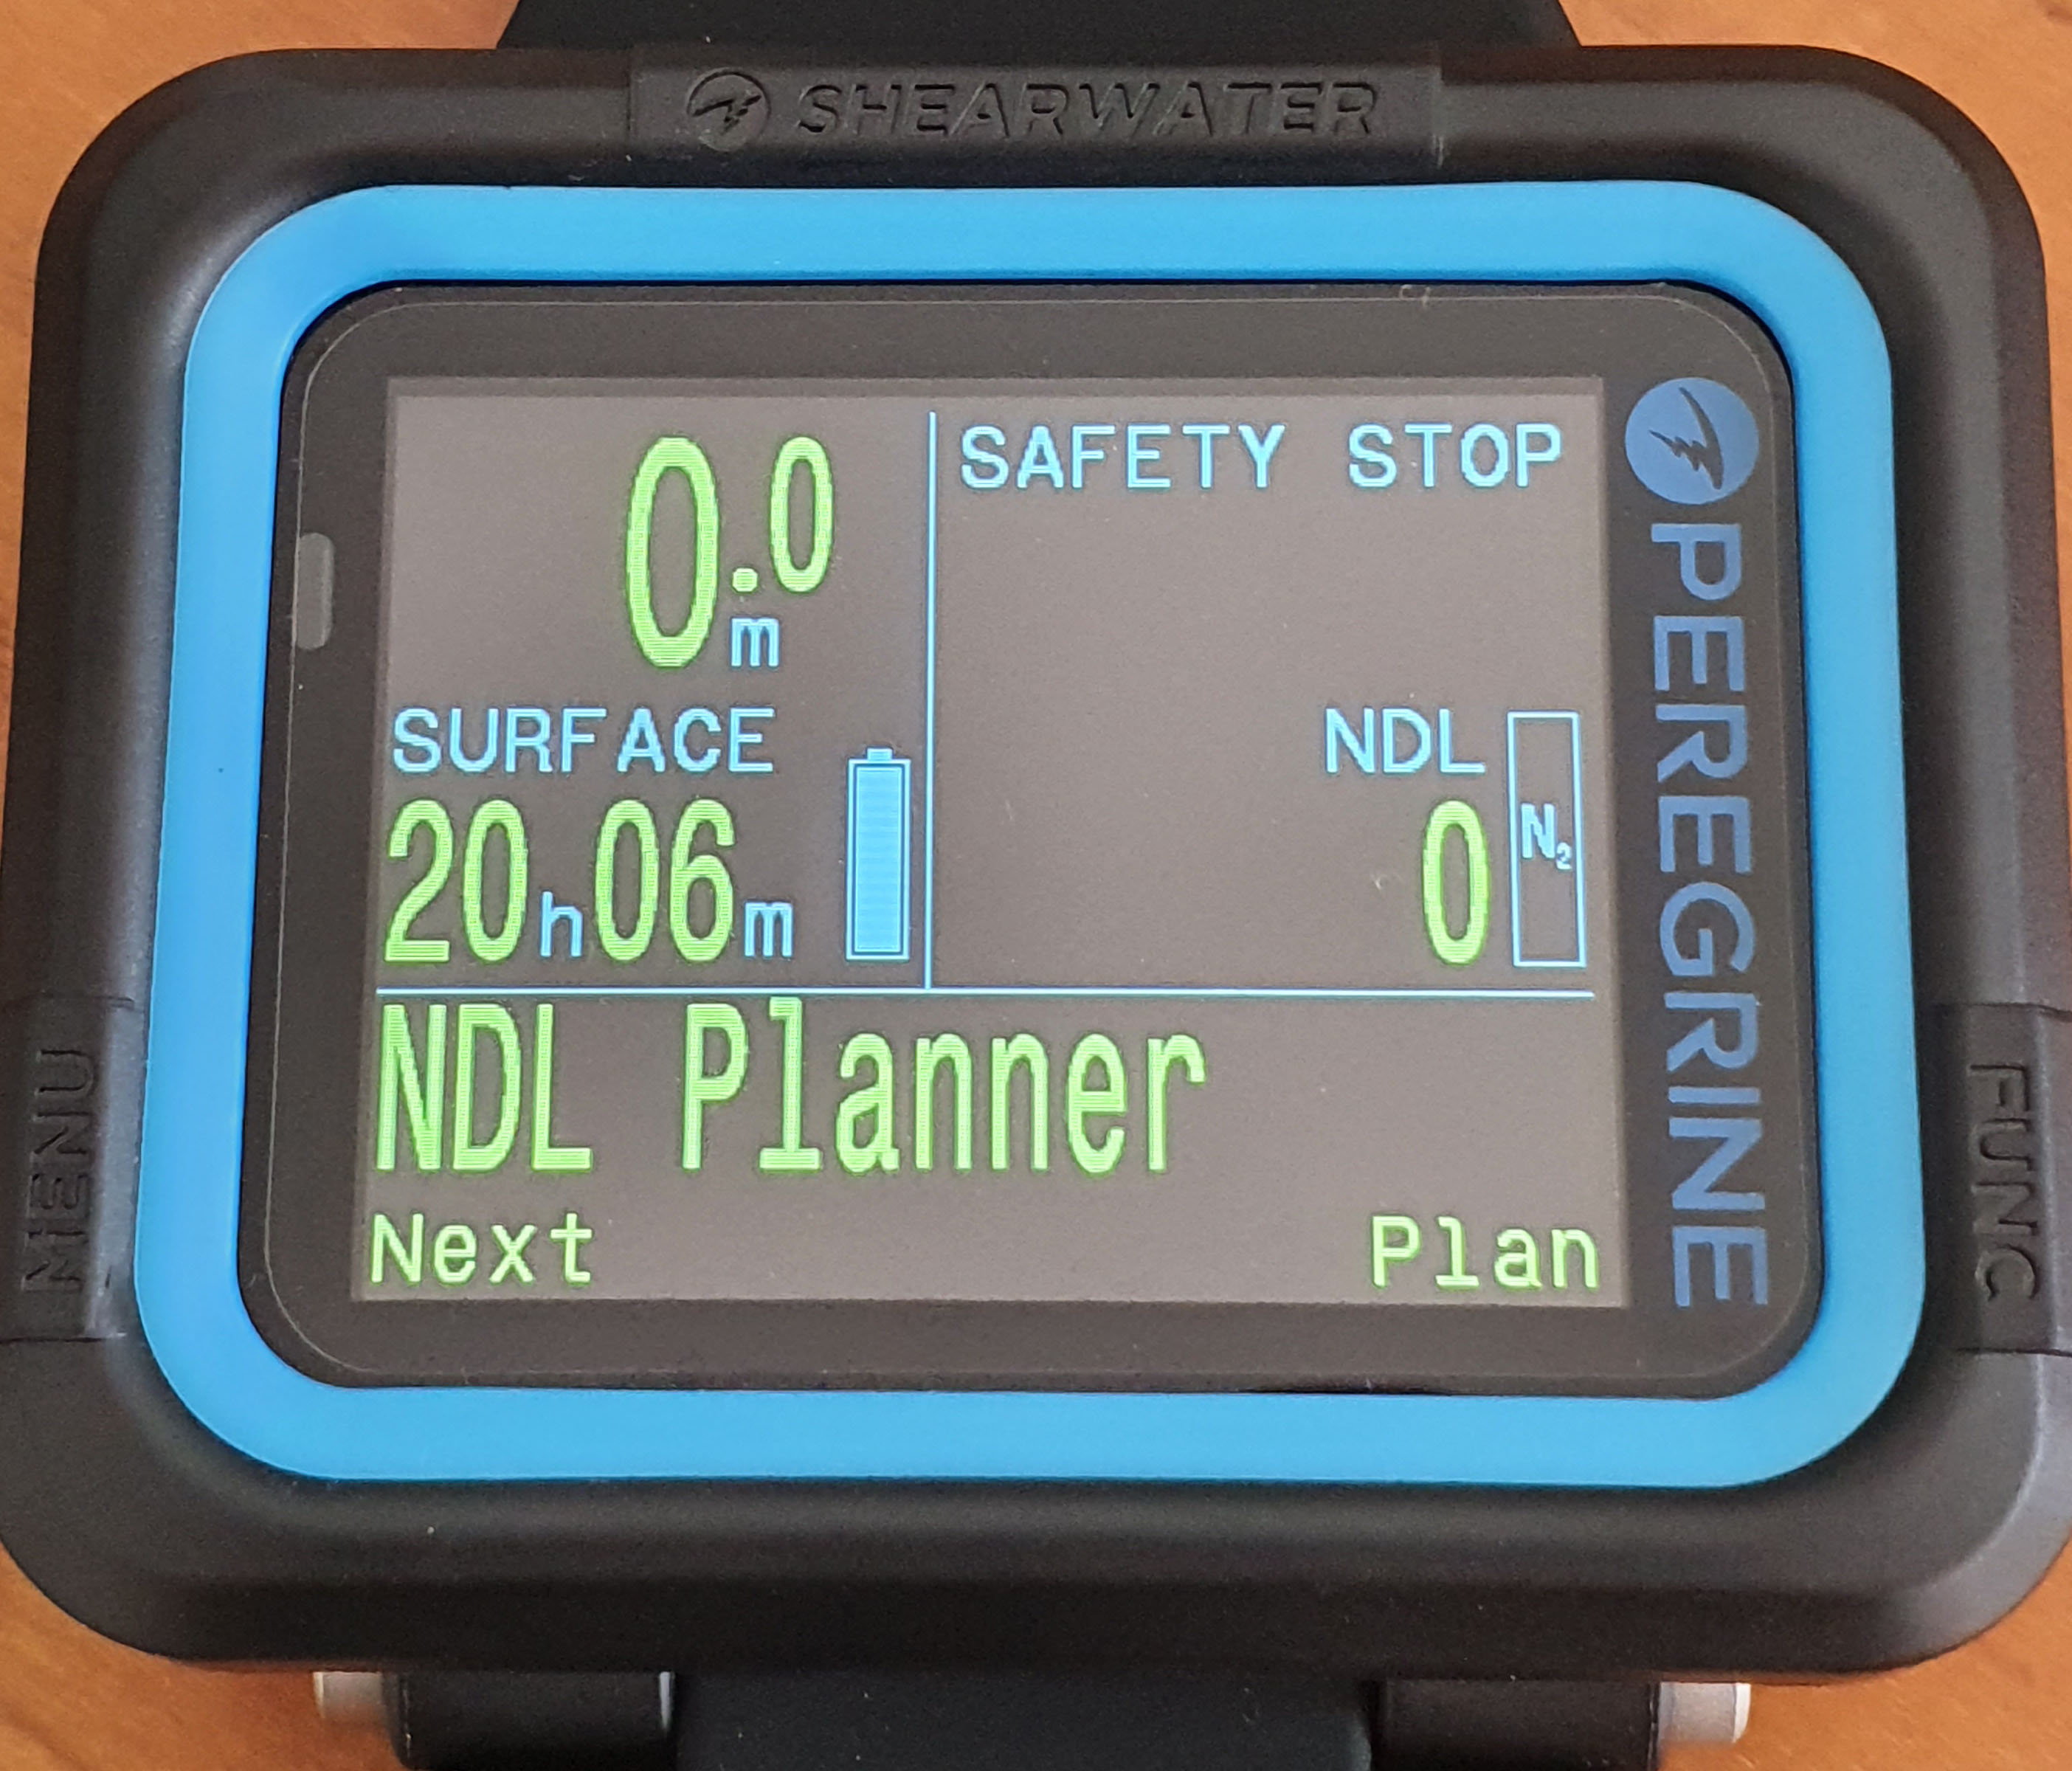
A few things jump about this display.   To start with, the legibility and ease of reading the info.    This is a modern display with a high degree of contrast and easily legible in all conditions.    Second, note the use of colors to highlight important information (eg, NDL reaching ‘0’ in this case).    And last and most importantly, notice how well the screen of computer displays information in an easy to read format.      As an added bonus, you can even change the font colors as per your preferences.

One of the most common issues I have seen with divers is while they may be familiar with the “regular” screen of their computer, they often cannot read the decompression screen that comes up if they exceed their NDLs – ie, the very information for which they bought the dive computer.     Shearwater’s experience with the needs of tech divers is clearly obvious here – in this example. the decompression information is clearly presented and cannot be confused with anything else.

It bears repeating – it doesn’t matter how high-tech your dive computer is:   if it isn’t intuitive to understand, especially in a stressful situation, it is not a good option.   The Peregrine is aces in this regard, and for these tangible improvement, I am willing to forego the convenience of a watch-sized form factor (same as the Perdix).

In terms of ergonomics, the Peregrine, like the Perdix, uses a 2 button interface.   I initially expected this to be fairly clunky, given my experience with other 2-button dive computers, but the interface is surprisingly intuitive.    It helps that Shearwater uses the display to give you very clear indications of what each button press is supposed to do.

20200813_154611The labels at the bottom of the screen tell you very clearly what each button press does – in this case, pressing the left button takes you to the next setting, while pressing the right button goes into planning mode.    The logic is fairly intuitive and easy to pick up after a couple of uses.   Note the green color display – you can change font colors as well.
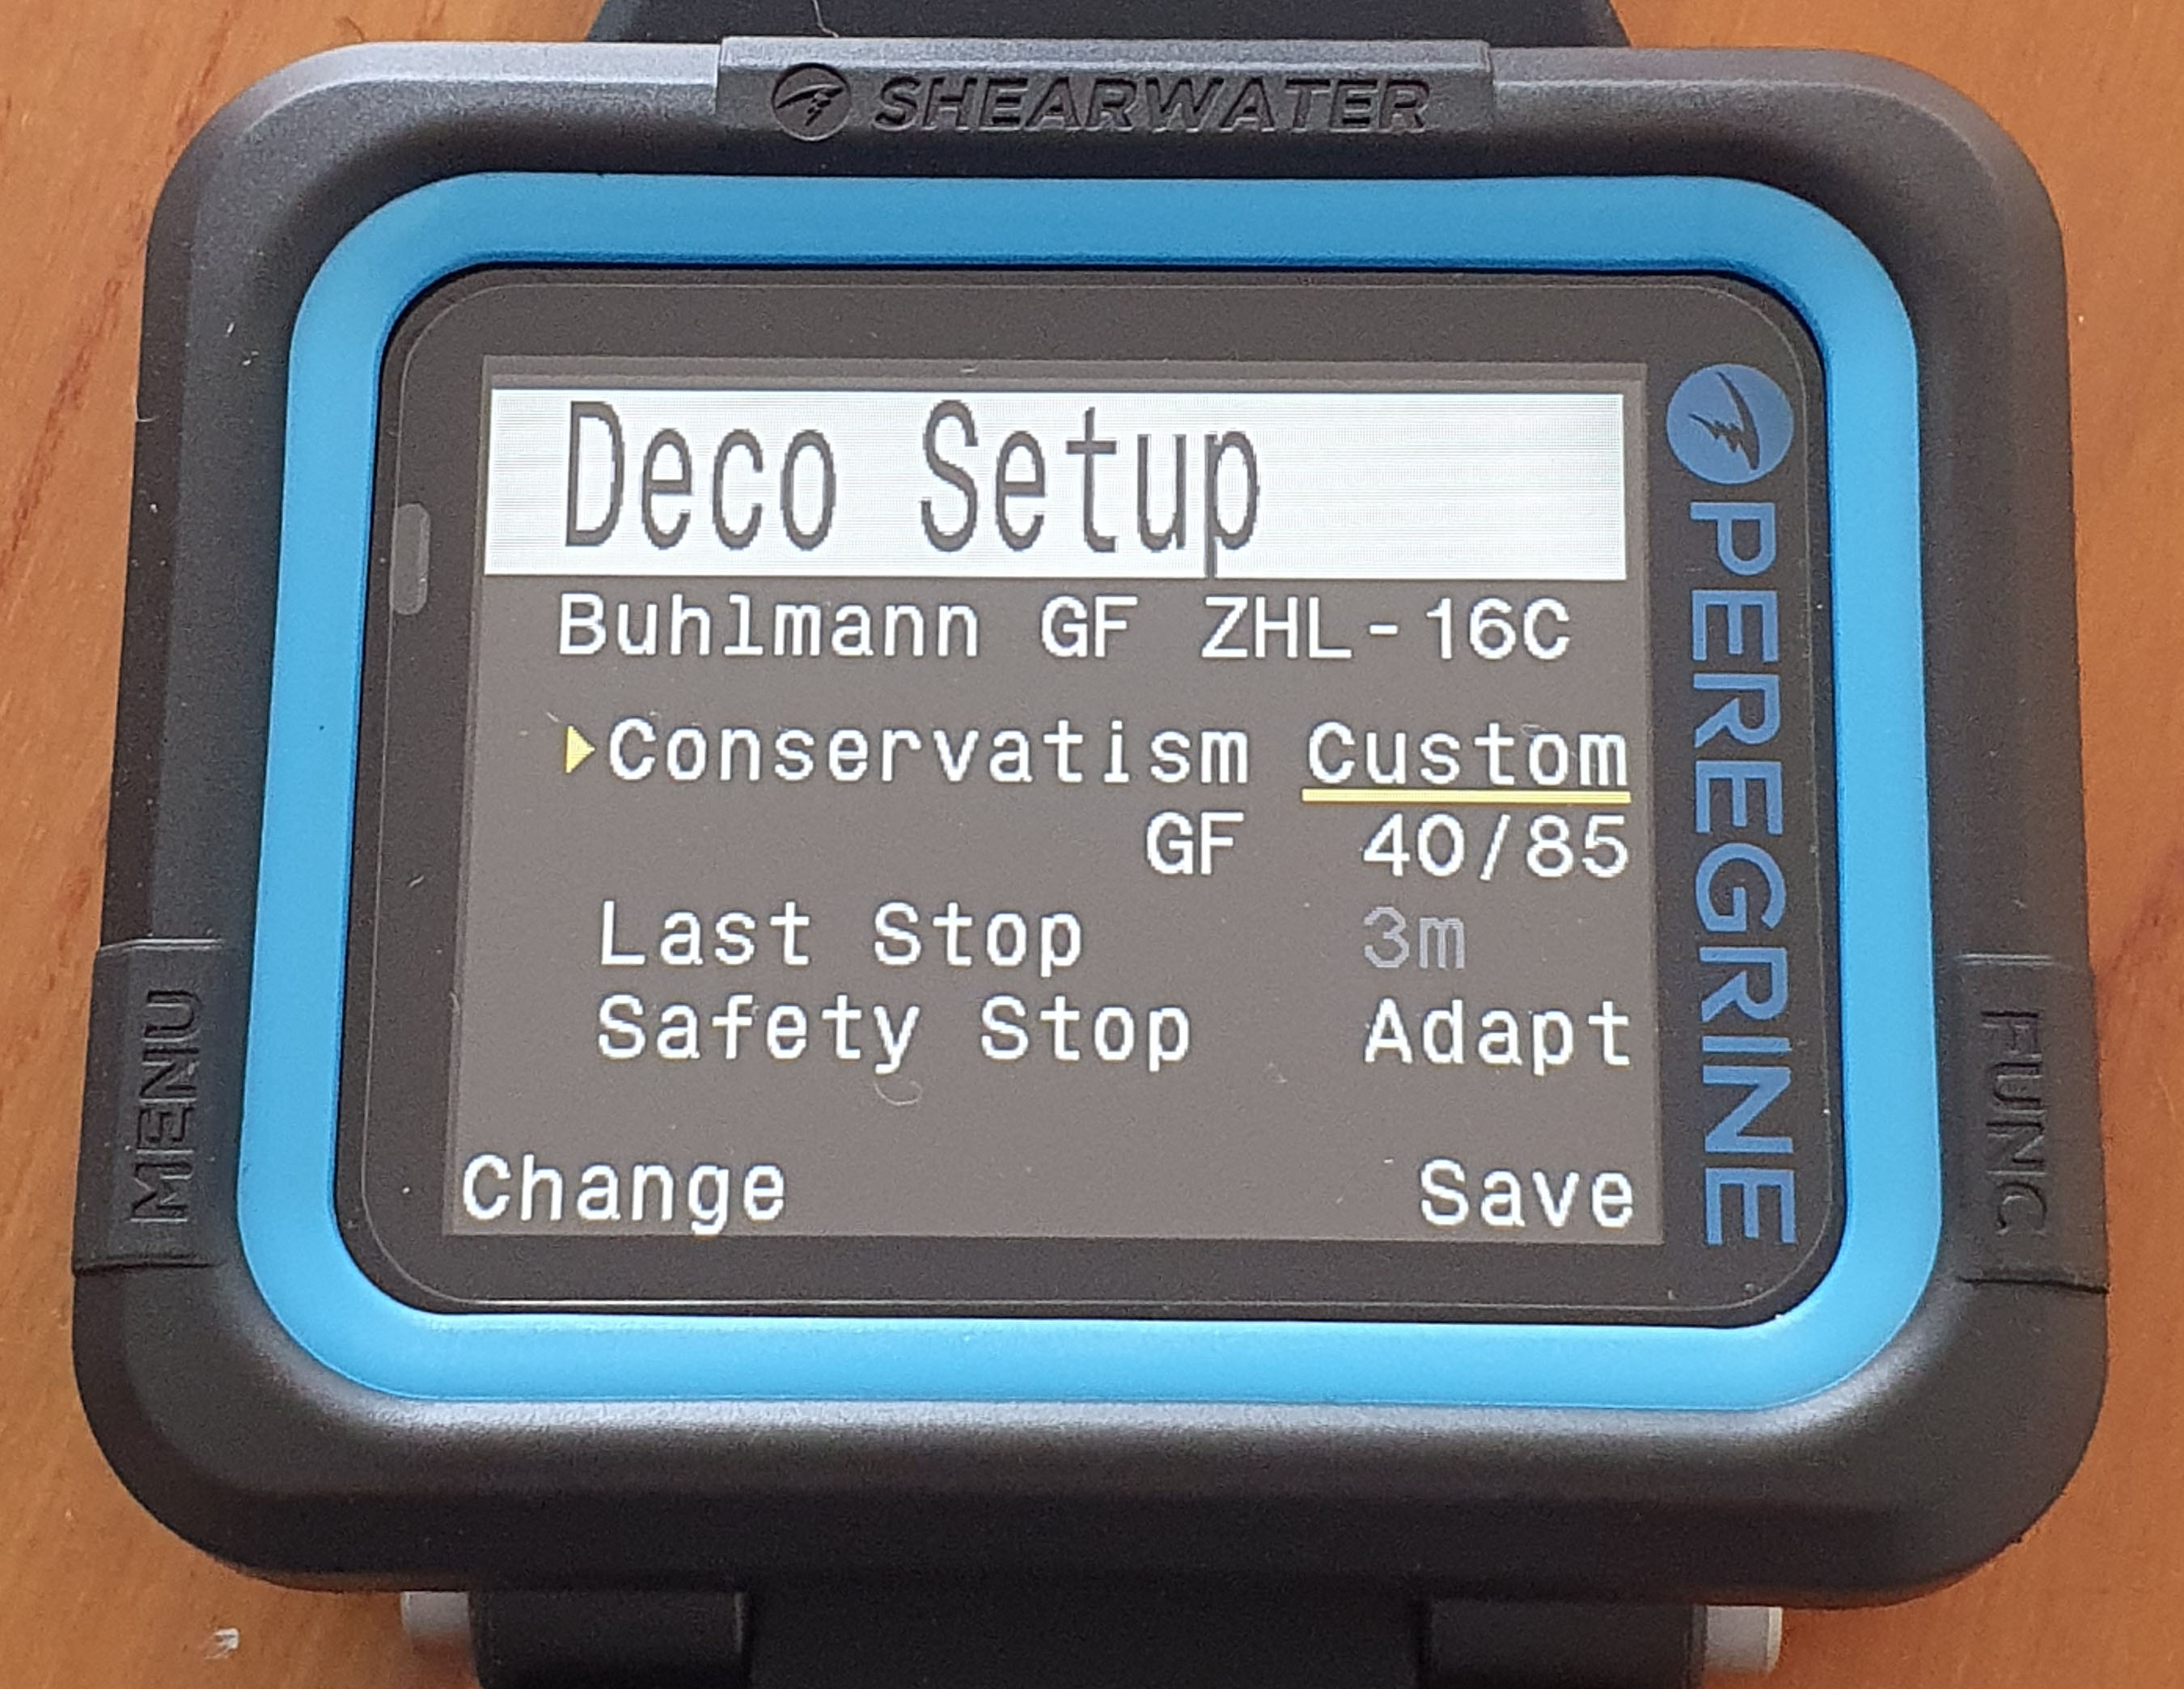
About the only downsize of this interface is that if you accidentally overshoot a setting, you have to scroll through the settings to get back to it.   But the buttons are have a great tactile feel (the ones on the Peregrine are actually a lot nicer than the ones on my Perdix) and it takes all of 5-6 seconds to do this, so it isn’t really a great loss.

FEATURES AND FUNCTIONS

While the Shearwater Peregrine dive computer is an “entry level” model, it is certainly not lacking in features.   Here is a short list of the essential features and functions.

For starters,  as you might expect from something carrying the Shearwater name, it is a full-featured computer designed for decompression diving.    Unlike many of the entry-level dive computers designed for recreational diving which often tend to penalize divers significantly if they go into decompression, the Shearwater Peregrine will work well if you decide to get into extended range or technical diving.    And of course, even if you accidentally go into decompression on a recreational dive, it will give you accurate information on how to handle your decompression safely.

Unlike its bigger brothers, the Perdix and Teric, the Peregrine does not offer trimix or closed circuit capabilities.   However, the Peregrine dive computers also offers a 3-gas Nitrox mode.  This lets you use 3 different nitrox mixes:  typically a bottom gas and 2 different decompression mixes for accelerated deco.    This makes it suitable for all air/nitrox based technical diving.

And of course, for recreational diving, the Peregrine has the standard modes:   Air, Nitrox and Gauge (no freediving mode but you would not wear a large dive computer like this for freediving anyway).     You have the option of setting both high and low PPO2 alarms, as well as depth and time alarms.   One cool feature:  you also get a vibration mode, in case you are diving with a thick hood and unable to hear audible alarms.   Pretty neat!

The computer is based on the Buhlmann ZHL-16C:  the industry-standard algorithm, proven and refined over decades to offer the safest possible approach to decompression today.      As is typical for most dive computers, you get 3 different conservatism settings – Low, Medium and High.      Even at its lowest setting, the Peregrine is not excessively liberal – so this actually is a setting that may work for a lot of divers, depending on their preferences (see my article on How to Pick a Dive Computer for a more in-depth discussion on conservatism).

However, what sets the Peregrine apart is the ability to customize the GFLow / GFHigh percentages, if you so desire – this is a fantastic feature and is absolutely amazing to find it in this price range.

deco-editAbility to adjust the conservatism setting on the Shearwater Peregrine
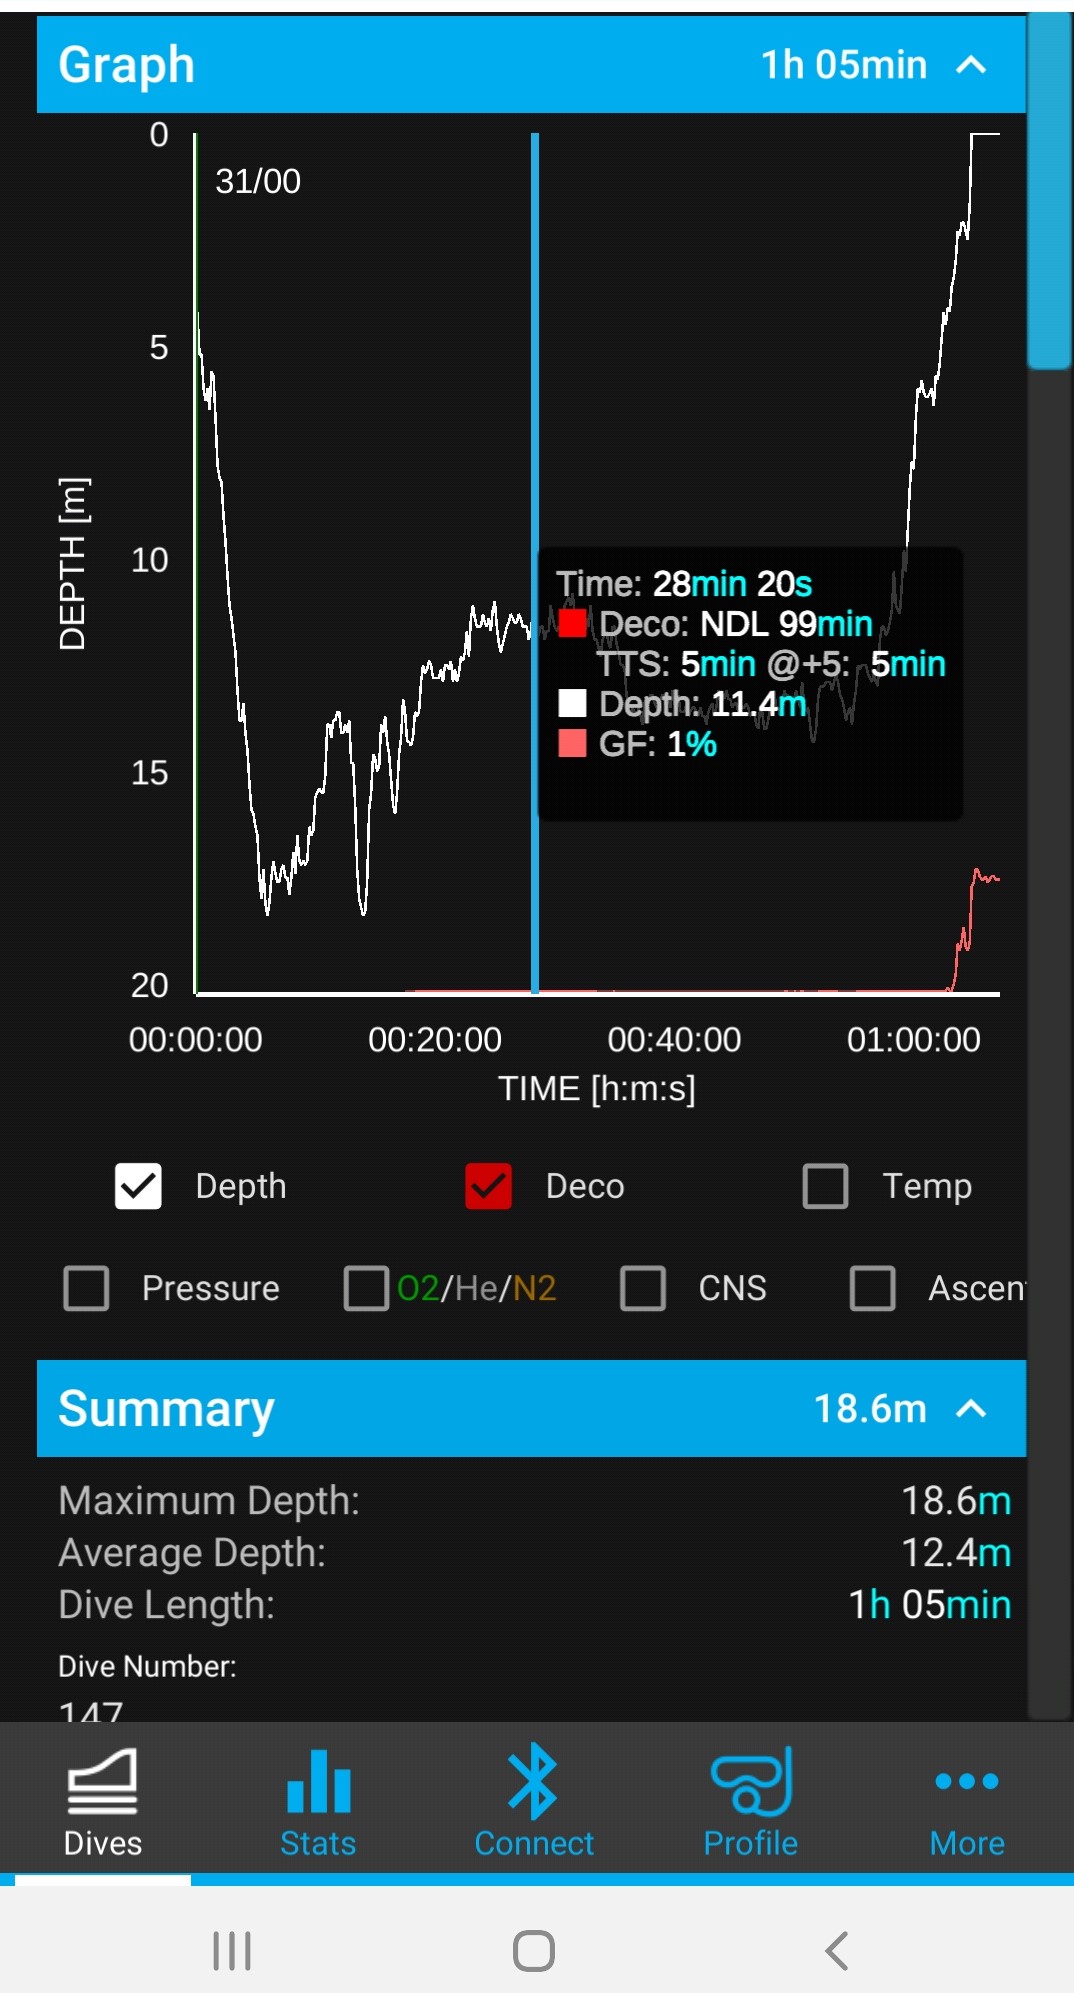
Do note that this feature is for experienced divers with an in-depth knowledge of decompression theory as well as their own personal risk tolerances – so I will advise not messing with it unless you are very sure you know what it does (hint:  if you have to ask someone what settings to use here, you are not ready to use it.   When you are ready to use this feature, you will know how to set it, and you will be thankful you have had this feature).

In addition, the Peregrine also checks off my other vital criteria – a battery that is either rechargeable or user-replaceable.   Unlike the Perdix, which uses a user-replaceable AA battery, the Peregrine offers wireless charging – place it on the provided USB mat and it charges.     The mat is slightly smaller than the dive computer, so easy enough to pack and carry on a trip.   For what it is worth, the Peregrine also seems to charge off the wireless charger I use for my mobile phone.

The Peregrine also has Bluetooth connectivity with Shearwater’s desktop or phone (Android/iOS) app, which lets you upload your dive logs to Shearwater’s cloud-based server and view them on the app.

Screenshot_20200813-212446_ShearwaterDisplaying the dives on the Shearwater app
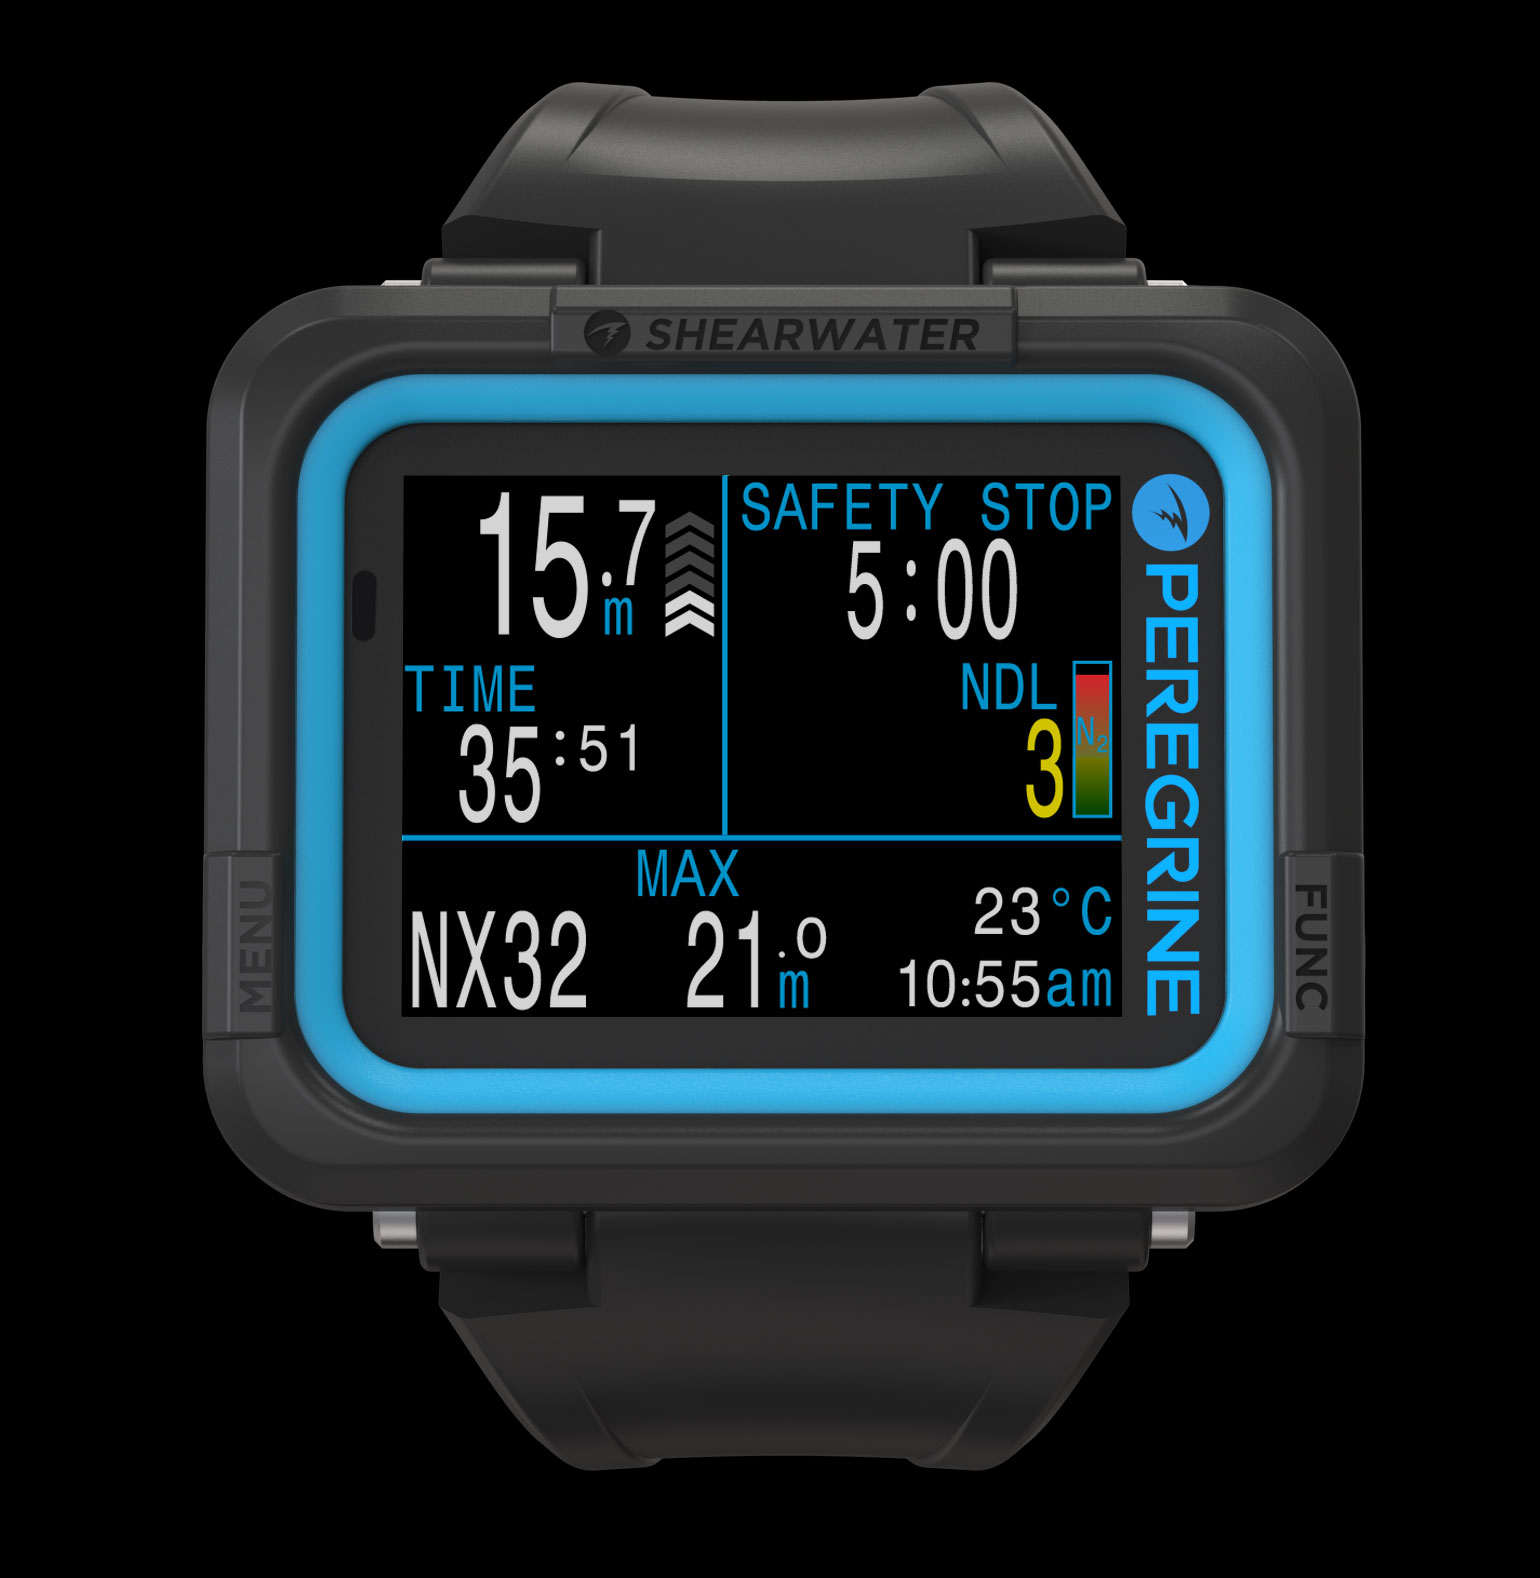
The dive log on the Shearwater app shows you your profile as well as tissue loading at any time.   This log is from a Perdix, but the Peregrine information is very similar.

The app also allows you to upgrade your computer’s firmware.

Unlike the Perdix, the Peregrine does not offer a digital compass or air integration.  While neither of these features are essential, they are certainly nice to have.   However, to be fair, the computers offering these features are all one entire price tier above the Peregrine in price as well (typicall Rs 10,000 – Rs 15,000 more expensive).

USAGE

While I didnt have a chance to take the Shearwater Peregrine dive computer into the ocean for a dive, I did do a little freediving with it to see how it behaved.   Also, a lot of my experience with the Perdix translates over directly to the Peregrine as well – after all, both these operate on more or less the same platform.

From an algorithm point of view, there is nothing to say about the ZHL-16C – as mentioned earlier, it is the gold standard of decompression algorithms.      So what remains is ease of use, along with features.   And “ease of use” has always been a strong point of Shearwaters, given their origins in tech diving.

Setting up a computer before the dive is very easy – it is a few buttons to adjust the nitrox and once you do, the nitrox percentage is clearly visible on your display.        As with most computers these day, the Peregrine turns on automatically once you descend to about 1m of water.   And as discussed earlier, the display is super legible and easy to read.

Peregrine_Front_NX32_15.7MPicture courtesy Shearwater

The Shearwater display breaks up into 3 panels.   The upper left panel shows you the dive depth and time.   The upper right panel shows you decompression information (critically, the no-deco info and deco info are displayed in different locations, to prevent you from confusing the 2 numbers).     And the smart use of color coding highlights important information – eg, that you are running low on NDL in the photo above.

The bottom panel can be customized as per your preferences.  On my unit, I have replaced the time and temperature with average depth, which is useful for me to estimate my air consumption and overall nitrogen loading (just because my computer is doing that for me doesn’t mean I switch my brain off!).

You can also get a visual display of your tissue loading, for each of the 16 compartments in the Buhlmann model – while this is typically not the most actionable of information, I find it a very useful learning tool to correlate nitrogen loading from actual diving to the theory of decompression.   Seeing how the graph changes over the course of a diving vacation, or even after a shallow dive vs a deep dive can be very instructive.

Peregrine_Front_Air-15M_TissueTissue loading as a visual graph – as always, color coded to make it easy to understand
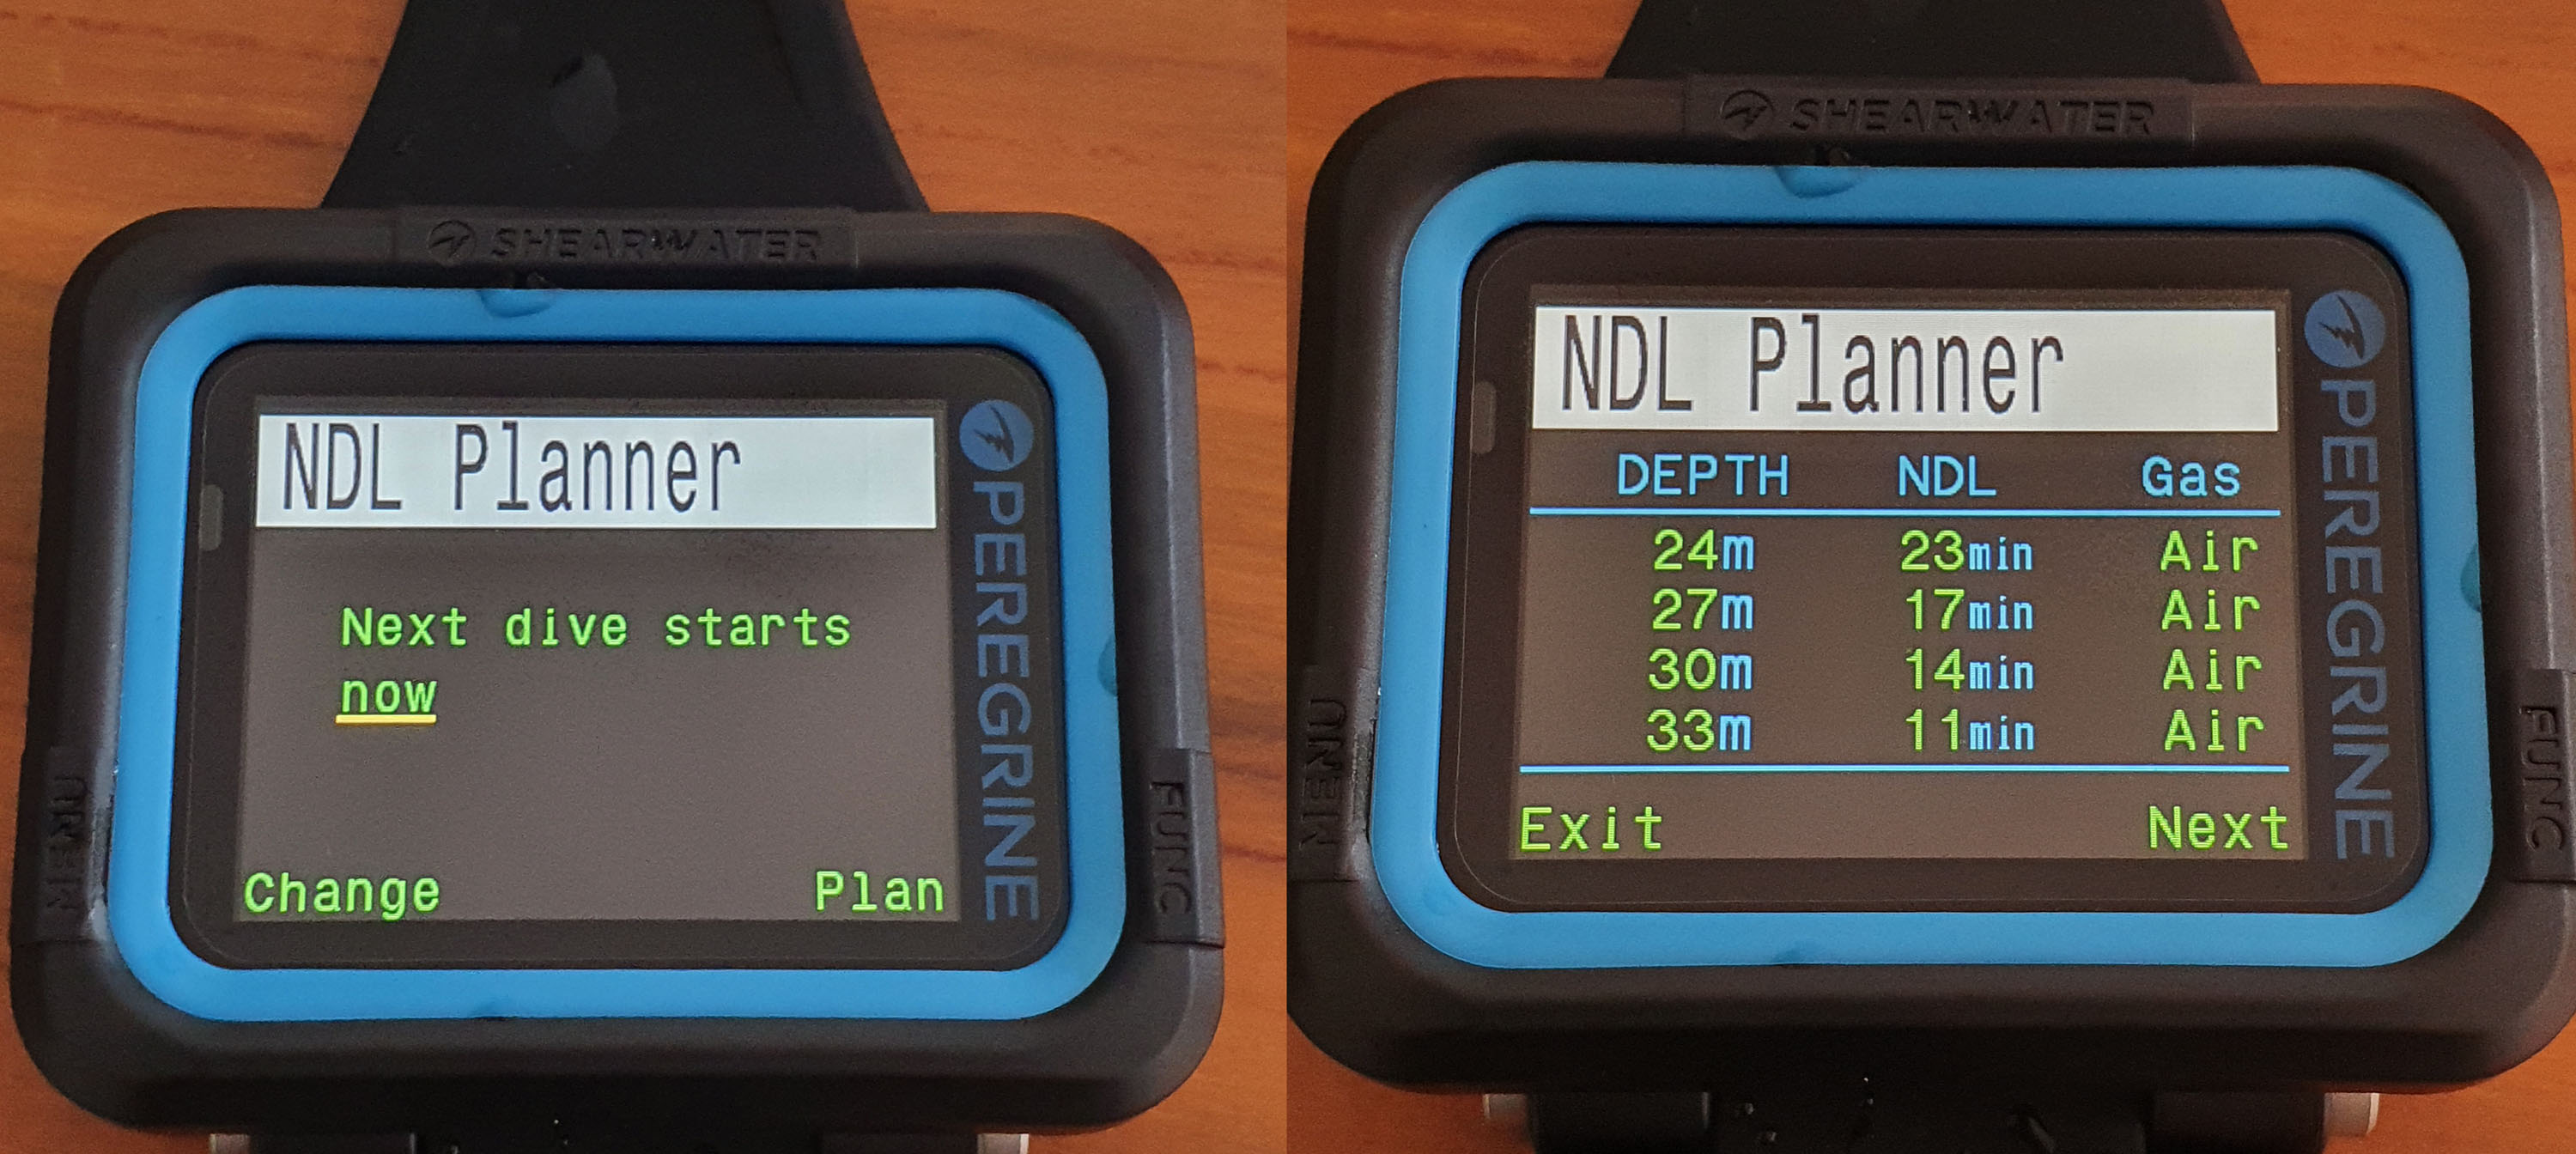
The Shearwater also has a very easy to use dive planning mode – you can choose to plan your dive as if it were about to start immediately or after some time (eg, if you still had some more surface interval to complete), and figure out your NDLs accordingly.

20200813_173040Use the screen on the left to set when the dive is starting (now or later) and then, on the subsequent screen, you can see your NDLs
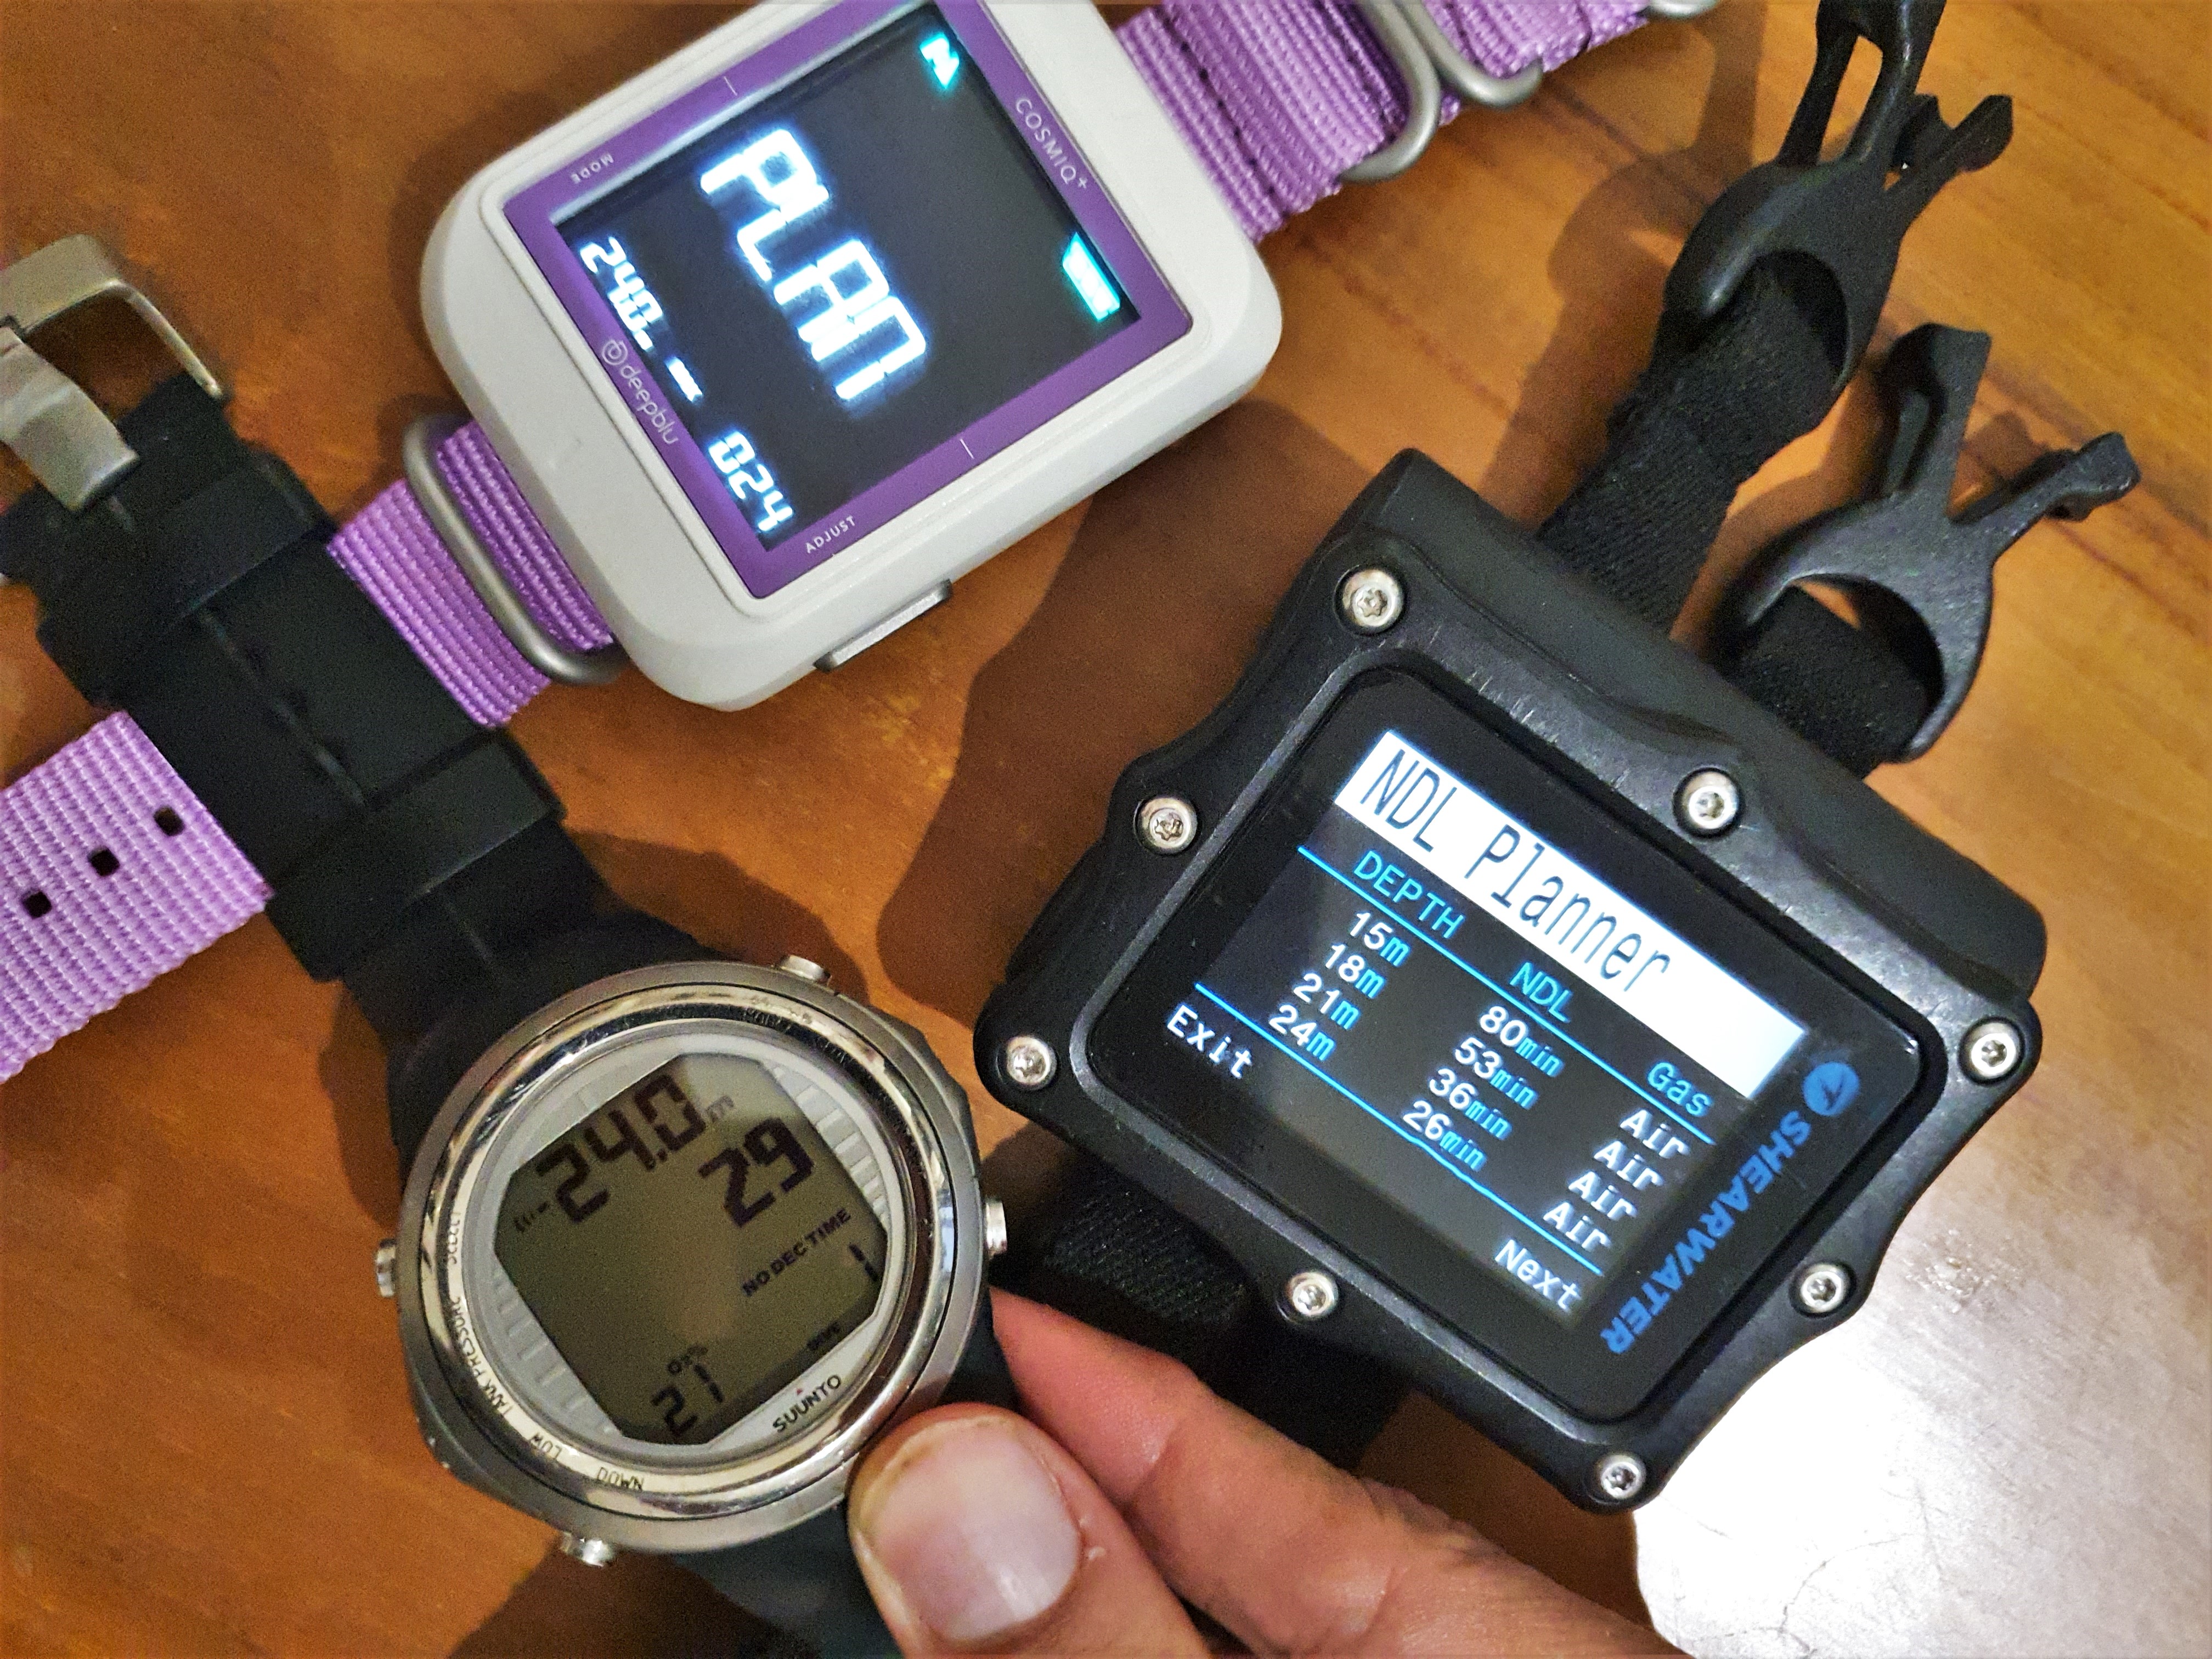
And as mentioned, the solid, easy to press buttons make the entire experience of navigating the Shearwater Peregrine dive computer an absolute pleasure (users of the Suunto Zoop, for example, will know and appreciate what I mean!).   Having used and reviewed a LOT of dive equipment, I cannot describe how happy I get when I see manufacturers getting ergonomics and usability right – these are things that you appreciate every single minute of use, and mean far, far more to me than a laundry list of features which are a nightmare to actually use.

Lastly, battery life is rated up to 30 hours, give or take, depending on screen brightness.   I haven’t had a chance to test this but after a few days of playing around with the dive computer quite thoroughly, including some water sessions, the battery indicators still reads full.   So I expect it to be more or less as per spec- this means you can easily get one dive trip out of it, without needing to faff around with charging the unit every day or two.

SUMMARY AND CONCLUSIONS

So how does the Shearwater fare against the competition and is it worth buying?

At a price of Rs 36,000 (at the time of writing this article), the Peregrine is more expensive than the Aqualung i200 and the Mares Smart, both of which have an MRP of around Rs 27,000.

However, while it may be marketed as an “entry level” computer by Shearwater, that is only when compared to Shearwater’s offerings.     As computers go, the Peregrine is far more advanced than typical entry level computers – it may not have all the bells and whistles of its bigger brothers, but when it comes to basic decompression horsepower, it stomps over everything else:  decompression, 3 gas tech open circuit, customizable deco profile, a fantastic color display – these are all features you typically find on computers costing well over Rs 60,000.

As you gain skills and expand the scope of your diving, it is possible for you to outgrow the entry-level computers fairly quickly.    However, the Peregrine’s advanced deco capabilities means that it will stay with you for everything short of rebreathers or trimix.    Personally, this is a tradeoff I would be very happy to make:  while the absolute entry-level computers do get the job done, the Shearwater is a big step up in terms of ease of use and also scalability, in terms of growing with you as a diver.

That said, there are a couple of features that it is missing – air integration and digital compass.   These are both nice-to-have features for sure and given a choice, I would have preferred a dive computer which had these options.    But keep in mind that all dive computers with these options cost a lot more (Rs 45,000 and higher, and that excludes the cost of the air transmitter) – and those computers also lack the same functionality when it comes to core decompression features.

So as far as tradeoffs go – compared to the next pricing level, you are gaining a far more advanced computer and saving a significant chunk of money but by giving up on a couple of nice-to-have but non-essential attributes.     Is that a fair trade-off?   It really depends on your personal preferences.

Ideally, I would rather pay more and not to make a trade-off at all.    But if I had to, I’d pick the Shearwater options.  The way I look at it:   I can always get a small compass and clip it to the side of the computer’s strap or to my BCD, if need be (and while it may be important to me, I also realize a compass isn’t something most recreational divers use a lot).     And while I really like air integration and would dearly love to have it if given a choice, I would pick a customizable algorithm and ability to handle multiple gas mixes over it:  one is “nice to have”, the other actually impacts my diving in a meaningful way.   And then there is the matter of the price difference too – skipping these extraneous features saves you a lot of money.

What the Peregrine lacks in bells and whistles, it makes up by in core functionality that no one else offers for anywhere close to this price:  you are getting most of the core functionality of the Perdix, for only a modest premium over an entry-level computer.

Very highly recommended – and definitely makes our “Recommended Gear” list!

Purchase

DIVEIndia is an authorized distributor for all Shearwater products, including the Peregrine, and you can use the link above to purchase your own unit.

Do note, however, that our reviews are not affected by the fact that we sell the item – rather, we only sell the items that we like.   We sell Mares, Aqualung, Tusa, Scubapro, Shearwater and more – between them, there are enough quality dive products that we have absolutely no need to push gear that isn’t up to the mark.   The stuff we recommend is the stuff that we believe in ourselves.

How to pick a dive computer

By Articles, Gear, Reviews

HOW TO PICK A DIVE COMPUTER – A BUYER’S GUIDE

By: Vandit Kalia (Vinnie)

One recurring theme that you may have noticed in my articles – and if you do any course with me – is my tendency to get on a soapbox and talk about divers taking ownership of their own safety by engaging their brains.     That is the windmill I have chosen to joust against, and, for better or worse, will continue to do so.

But a fundamental requirement to taking ownership of your own safety is having all the information needed in order to do – information drives decision-making, after all.     What information are we talking about ?   Dive time, depth, no deco time and air left at minimum – direction and air consumption rate as nice-to-have extras.       This is the information you need in order to make an informed decision about your dive, and you get this information from a dive computer.

I really cannot stress this enough – if you are diving, you really should own your own dive computer.   And no, I don’t say this because we sell dive computers.   We make a few thousand rupees on each sale.  It is hardly the sort of stuff that is going to let me retire to a tropical island.

Now, many people – especially those used to diving in tropical locations – will be used to having the DM lead the dive, and often, the DM also has the dive computer and manages the dive profile for everyone.      Let’s face it – ideal or not, this system works and thousands of people dive daily following this approach.   But there is a reason this is not ideal and is not recommended:  when it works well, it works well.   But if something goes wrong, it compounds the dangers.     What if you get separated from the group?   What if you end up going a little deeper during each dive, for multiple dives?     Most importantly, this habituates the diver into doing “trust me” dives, and prevents them from engaging their brain on each dive – this significantly hampers their development as a diver because if a problem happens, they have not developed the judgement or critical thinking skills or discipline needed to solve the problem.

That is why I push dive computer ownership more aggressively than, say, doing a Specialty Course with us (which earns us more).   It is one of the best investments you can make in controlling your own safety and eliminating variables which can add complexity to a problem.

So the next question (and one of the most common ones I get asked over email or Whatsapp) becomes – what dive computer should I get ?   There is a bewildering array of dive computers out there in the market, ranging from under twenty thousand rupees to well over one lakh (a few hundred dollars to well over fifteen hundred).

The purpose of this article is to demystify dive computers and give you the information you need to pick the dive computer that works very best for your budget and preferences.

dc1


THE FUNDAMENTALS:  NO-DECO INFO & DIVE COMPUTER ALGORITHMS

The main reason you get a dive computer is to know how much no-deco time you have left – everything else can be figured out through some combination of a dive watch, depth gauge, SPG and/or compass.       So it stands to reason that this should be the most important thing, right?     Well, yes and no.

Yes, it is indeed the most important thing.    However, the good news is that virtually all dive algorithms being used today are robust/reliable enough to provide safe information to most divers.     Let’s talk about that in a little more detail.

As you guys may remember from your Open Water course, the decompression model is basically an empirical curve that is fitted onto existing data about safe/unsafe dive profiles.  It is essentially a probability curve which predicts the risk of getting DCS for a dive to a given depth/time.     The No Deco Limit is basically a point along the probability curve where the risk of DCS is deemed to be very low.

The most popular – and industry standard –  decompression model is the one you learned about in the Open Water course:  it was created by John Haldane and refined further by Dr Albert Buhlmann, into its current iteration, the ZHL16 – most computers today use a variant of this model, with some tweaking done as per each company’s preferences.     Another popular model is the RGBM model, developed by Dr Bruce Weinke, which focused not just on the traditional tissue absorption model but also on controlling the build-up of silent bubbles.      In addition to that, several other brands have added more significant tweaks, by trying to factor in things like age, heart rate, etc and using those to adjust the No Deco Time.

While a detailed comparison of the various models is outside the scope of this article, and the arguments of the pros/cons often resemble holy wars when it comes to the fervor of the participants on each side, it is worth noting that at the recreational level, either of these models is perfectly capable of keeping you safe.        Yes, that is correct – from a safety point of view, there is no evidence that indicates that one model is better than the other for recreational diving.

What does vary between dive computers is how conservative or progressive they are.     On a weeklong dive holiday, you might find that 2 dive computers often diverge by as much as 5-10 minutes when it comes to no-deco time.      At this point, I can hear you going “wait a minute – how can 2 dive computers be so different?   Which one is correct?”

Remember – there is no correct answer.   These are just models using probability curves and taking into account multiple factors to arrive at a single number – what you see as being a higher or lower number is merely a function of which factor has been given more or less weight.         All these models keep you safe – they just do it differently.     So “which is correct” is the wrong question to ask.

A more appropriate question is – which one is better for me:  more conservative or more progressive.

As a general philosophy for diving, we can all agree that “more conservative is better”.   But as with everything in life, you reach a point of diminishing returns.    That’s why we don’t wear helmets when we drive, or elbow/knee pads when we walk, for example.    So if we are on an expensive dive holiday to a dream destination, do we necessarily want a dive computer which cuts out dive time short by 10-15 minutes on each time?

In my experience, experienced divers often have a good idea of which algorithm has worked well for them and are also aware of any personal risk factors that may apply – they would be better off with a more progressive option, as this would let them build in additional safety margins if needed, and give them more bottom time otherwise.   On the other hand, beginner divers may still be developing their diving discipline/awareness, and so may benefit from a more conservative dive computer, which gives them a margin for error (which, to be clear, is not something you rely on!).      Also remember – you can add conservatism to a more progressive dive computer via its settings, but you cannot make a conservative dive computer more progressive.

So my recommendation is that if you think you have the discipline and awareness to add your own safety margins when applicable (eg, if you are tired, been in a strong current, etc), then a progressive dive computer would be fine for you.   If you are a diver who is at greater risk of DCS (age, weight or other factors), or want the comfort of added safety margins, then a more conservative option would be better for you.

FEATURES OF A DIVE COMPUTER

So if a cheap dive computer keeps you just as safe as a more expensive dive computer, why is there a price difference? The answer is simple – due to features. Some features are virtually essential and greatly enhance the utility of a dive computer (and make it less likely that you will outgrow it). Others are convenient and nice-to-have. And yet others are a matter of personal preference.

So here is a list of popular features and some details about them, which you can use to determine whether or not you want them.

Nitrox:

In this day and age, you should not buy a dive computer that does not have Nitrox mode.    Even if you are not Nitrox certified now, you may choose to get Nitrox certified later (and there are very good reasons for doing so:  namely, extended bottom times) – and having a dive computer that allows you to dive with nitrox will help.  Dive computer manufacturers realize that – it is very hard to find a computer that does not have Nitrox.      Do look into how easy it is to set the nitrox, and whether there is an easy way to check what mix you are diving with.      Failure to set the mix correctly (or forgetting to switch back to air later) are very common mistakes, and the easier it is to set/see your nitrox mix, the less likely you are to make this mistake.

Ascent / depth / time alarms:

I cannot think of a single computer that does not have them.   What does change is how loud those alarms are.   So if they matter to you, look into whether or not you can hear them (or feel them, if there is a vibrate mode).

Legible Display:

The benefits of a display that is easy to read, even in poor conditions, should be obvious to everyone.    Sometimes, this can take the form of a backlight – other computers have active LED displays which are much brighter.     However, legibility goes beyond just that.     Is it easy to understand what all the elements in the display mean – this is especially true when you go into accidental decompression, when you are faced with a display that you may not have seen before:  can you clearly identify that you are now in decompression?   Are all the numbers clearly labelled and can you tell what they mean?

Battery Life and Charging:

One of the banes of old dive computers used to be the need to send the entire computer to the shop to have the battery changed.     And imagine the feeling of being 2 days into a week-long dive holiday and having your computer battery die!    We have seen this happen with quite a few divers who have come to dive with us, and I have had it happen to me when traveling.   So I firmly believe that any computer that you use today should be one with either a rechargeable battery or a user-replaceable one.    Rechargeables are easier, but rely on a proprietary connector.    User-replaceables require you to have a spare battery of the appropriate type.     So there is a tradeoff.

The other element here is battery life.    Some dive computers have great, colorful displays but may last only a couple of days.    Others go up to 40-50 dives.   Yet others can go a few hundred dives.     Typically, the brighter/more colorful the display, the shorter the battery life.   And rechargeable dive computers (usually but not always) tend to have shorter battery lives than those using AA batteries.       Which one you go with is a matter of personal preference.

Planning Mode:

Most computers have some kind of a planning mode, which lets you figure out how much bottom time you have at various depths, which is important for dive planning. The most basic dive computers only give you the allowed bottom time if you were to dive immediately. Other dive computers let you add on additional surface time and calculate the allowed bottom time in such cases. This is very handy for dives where you plan to go to a specific depth, as it lets you figure out how much surface interval you need.

20200729_144303

Screen showing the Shearwater Perdix in planning mode.   You can also increase the surface interval and see how that affects the NDL

Ergonomics:

How easy is it to change the settings on your computer – such as nitrox percentage, depth alarm, personal conservative factor, etc? How easy is it to scroll between displays when diving? With enough practice, you can get used to pretty much any device, of course – but what if you pick up the computer after a gap of 5-6 months and then, while on a dive boat, realize you need to change a particular setting? Will you remember what to do?
One of the most common questions I get asked on a dive boat is “hey Vinnie, how do i set the nitrox on this thing”, as someone hands me an unfamiliar dive computer. The easier it is to remember, the less likely you are to mess it up.

Deco diving / Tech Features:

All computers will handle accidental decompression – ie, if you accidentally exceed NDLs. However, not all computers react the same way afterwards. Some computers are designed for decompression diving – eg, Suuntos, Shearwater and more. If you go into deco, they tell you want to do and happily keep purring afterwards because their standard algorithm is compatible with decompression diving. Others are not: while they will give you the info you need to complete your accidental deco, they will get more conservative later because their algorithms are not designed for decompression diving.

In addition, some dive computers designed for tech diving will allow you to switch between different gas mixes.   Yet others are capable of working with trimix.      Typically, only higher-end dive computers have these features.   Are they need for recreational diving?    Not at all.  But if you plan to get into tech diving, then getting a computer with these features ensures you won’t outgrow the computer.

Digital Compass:

One of the least-developed skills among recreational divers – especially in tropical reefs – is navigation. That reason is obvious: most of the time, you are following your DM, who handles the navigation for you, and so you don’t get a chance to practice. Having a compass is useful as it lets you work on your navigational skills at all times – and of course, if you and your buddy plan to dive without a guide (or you get separated from the guide), the compass becomes an essential part of your toolkit.

You can get an external compass and mount it on your console or clip it to your BCD, or you can get a dive computer with a built-in digital compass. I have a strong preference for the last option – neater and always there when you need it. This is a very under-rated but nice-to-have feature.

Air Integration:

If you had asked me a few years ago what I thought of air integration, I would have said “not for me”. Then I got the Shearwater and have been using its air integration feature, and am getting sold as to its benefits. It’s really convenient to be able to see all your information, including air, in one go. But one very nice benefit is that it also lets you see your air consumption rate on the fly – so if you are breathing a little faster for some reason, you will see that and can adjust your breathing rate accordingly. Eg, my breathing rate often goes up when I am taking photos, as I use my lungs and legs to compensate for currents while I try to get a precise composition – sometimes, my gauge has provided a very useful reminder that I am being too inefficient and that perhaps I should try a different method to stay in position.

Higher-end models even let you add multiple transmitters – so for example, you can see not just your air but also that of your buddy (or air of 2 different tanks, if you are diving sidemount or have deco bottles with you).

Essential? Of course not. But definitely very nice to have. When I use my other dive computer, which lacks air integration, I definitely miss it.

Form Factor:

Some dive computers are large and chunky. Others are more wrist-watch sized, not much larger than a regular watch. And this does matter. A larger dive computer will have a more legible display. But it is also one extra thing to pack and carry, and also something you will have to take off/put on every time you get in and out of a wetsuit. By contrast, a wrist-watch sized dive computer is something you just put on and forget – no risk of it falling while on the dive boat, no risk of forgetting it in your hotel room on the morning of the dive, etc.

Heck, you can just wear it every day as your regular watch – so if an unexpected dive opportunity comes up, you are good to go (I used to do that with my old Suunto dive computer – and it came handy when I was traveling through Africa for 4 months, and got some unexpected opportunities to go diving). I personally have a very strong preference for wrist-watch sized dive computers (and am considering switching my personal Shearwater from a Perdix to a Teric for this very reason). But larger displays are also nice, especially for older eyes. So think about what matters more to you.

Materials, Straps & Colors:

Dive computers can be made of polycarbonate or have a steel (or even titanium) case – metal cases look nicer and may be preferable if you want to wear the dive computer as a watch.    That said, polycarbonate is very robust and has good shock absorption properties, so don’t rule it out as being “lower quality”.

Straps can be of rubber, metal, elastic or fabric – the last two are often one-piece and so add a degree of reliability in case you lose a spring bar where the strap attaches.

And of course, choice of colors varies by model/brand.

20200729_151013

Form factors  compared:   Shearwater Perdix, Suunto D9Tx, Garmin Descent and a Doxa 1200T dive watch

Freediving/gauge modes:

This is also something that comes standard with virtually all dive computers have these days.    Gauge mode is great if you want to use your dive computer as a bottom timer (eg, as a timer backup to a different computer) – it switches off deco calculations and just gives you depth/time.   Freediving mode, as the name implies, is used for freediving/skindiving/apnea, and tracks dive duration, average depth, recovery times, etc.

Personal / altitude adjustments:

Virtually all computers let you adjust for altitude by changing a setting.    They also let you adjust how conservative the model is – in most computers, you can make the computer more conservative, although some let you tweak in either direction:  make it more or less conservative.    Typically, these are just pre-cooked settings, but some high-end computers like Shearwater actually let you precisely adjust the gradient factors, so that you can customize the dive computer precisely.

Digital Logs:

Some dive computers allow you to download your dive info into the brand’s app via a cable. Others do it wirelessly. Yet others have a full ecosystem built around uploading, geo-tagging and sharing your dives with other divers. I havent logged my dives for over 20 years and if I did, I would use paper – but I know many people prefer digital logs. If so, wireless transfer may be something to consider.

Other Features:

Some dive computers use a heart rate belt and factor in your heart rate when calculating your decompression info. That’s pretty slick, I have to say. Does it make you materially safer? I cannot say. Other computers combine activity tracking (steps, heart rate, etc) and are basically smartwatches + dive computers rolled into one. Are any of these essential for diving? No. Are they cool as heck? Oh yes. Should you get them? Depends on your budget and preference.

SUMMARY

In general, there are 3 price points for most dive computers.

At the entry level, you get the standard features:  nitrox, freediving, gauge, alarms and algorithm modes (eg, standard, conservative, more conservative).    These are sufficient for most recreational diving.      Typical pricing for computers in this range is Rs 25,000 – Rs 35,000, more or less.

In the middle range, you get extra features like digital compass, air integration and more premium materials – this is a range from Rs 35,000 – Rs 50,000 or so, approximately.

At the high-end, you get no-holds-barred devices, with a lot of neat extras, like customizable/upgradeable algorithms, ability to handle trimix, ability to handle multiple air transmitters and so on.     Prices for these can run to over a lakh.

What should you get?     The answer is – it depends on your budget and preferences.   The entry-level is where the value lies.    That said, if budget allows, the mid-range lets you get computers which, while not essential, add a fair bit of convenience to your diving.    And of course, the high-end gets you amazing devices that do pretty much (except spot hammerheads).

Hopefully, this article gives you enough information to help you reach a decision.

Oh, and we do carry a range of dive computers in our online gear shop – Mares, Aqualung, Deep Blu, Scubapro, Shearwater and Garmin – at very competitive prices (hint, hint!).   Feel free to drop us an email at sales@diveindia.com if you have any questions and we would be happy to help you pick the right dive computer for yourself.

Deepblu Cosmiq+ Dive Computer Review

By Articles, Gear, Reviews

Review: DeepBlu Cosmiq+ Dive Computer

Reviewed by:   Vandit Kalia (Vinnie)
Date of review: May 2020

The Deepblu Cosmiq+ is an entry-level dive computer and one of the more interesting units I have had a chance to try out of late.

Headquartered in Taiwan, Deepblu positions itself primarily as a community and marketplace for divers first, and gear manufacturer second.   So it is not surprising that their dive computer also emphasizes this community aspect, and also relies heavily on a smart phone for controlling and uploading, eschewing the desktop-based apps of the traditional manufacturers.

Read on for a hands-on review of its pros and cons, as well to find out whether it makes our recommended kit list.

THE BASICS

The Deepblu Cosmiq+ dive computer is an oversized, entry-level model designed to be easy to read and easy to use.   It came packaged in a nice hard case, inside of which you find the computer and 2 straps that match the accent color of the computer.

The Deepblu Cosmiq+ comes in a nice, sturdy case.

You have a choice of accent colors when you buy the computer – the one I got was pink (my wife claims that it is lilac or maybe lavender, but I don’t believe in those colors.    Pink it is), and so the 2 matching straps were in pink:  one in a solid color and the other with a camouflage pattern.      Yes, you read that correctly – a pink camouflage pattern.

I have pink sneakers, pink slacks and pink shirts (and no, I don’t wear them all at once), so I am a sucker for pink.    And once I got past the ridiculousness of the concept of pink camouflage (make up your mind, bro – do you want to be seen or not?), I had to admit that the color actually looked quite funky – and it also matches with a few BCD and masks that we sell, so there is that.

The straps are NATO-style pass through straps and are super sturdy – there is near-zero chance of this computer coming off accidentally, no matter what you do.   And they will last a lot longer than rubber straps too, which can become brittle with age.

Inside the box are the computer and 2 heavy duty fabric straps.

The case itself is a nice sturdy unit and packs the computer safely and securely.     Now, unlike a watch-sized computer which you can just wear when you travel, oversized computers typically get carried in your carry-on bag.    Many people prefer to use a padded box for carrying their dive computer – while you can use this box for that purpose, it is a little too big for carry-on (and you shouldn’t be checking in your dive computer).     Compare that to the Shearwater, which comes in a really compact case that is perfect for the computer and a couple of spare AA batteries.

But then, you can buy 3 of these computers for the price of a Shearwater, so it is not a perfect comparison.   And in any case, given carry-on weight restrictions, I personally don’t really use any boxes.   I just toss my Shearwater into a pocket in my bag and leave it there – it is sturdy enough and I haven’t had any issues.     Given that this computer also has a hard plastic case, I wouldn’t expect any issues with it either.   Wrap it in a sock or T-shirt, if you must or stick a screen protector on the display.

The Cosmiq+ case vs the Shearwater case.

FEATURES

As mentioned, the Deepblue Cosmiq+ is an entry-level computer designed for recreational divers.   So obviously, you don’t get tech features like use of gas mixes containing more than 40% O2 or the ability to switch gas mixes.   You also miss out on some nice-to-have premium features such as air-integration & built-in compass – but that is to be expected at this price range (you typically will need to spend Rs 10,000 – 15,000 more to get those features).

What the computer does have are the essentials, as to be expected from even entry-level dive computers these days:   ability to use nitrox mixes up to 40%, a gauge mode and a free diving mode.     It has the usual full set of alarms – depth, time, deco, ascent rate, MOD/PPo2 violation, CNS O2 Clock limit and more.    And it packs all of this in a lovely, oversized display with a lot of contrast and which is very easy to read.

ALGORITHM

The Deepblu Cosmiq+ uses a Buhlman variant as its algorithm – the industry standard which has been around for decades.   Does it have fancy features like heart-rate related adjustments, or RGBM and such?    No.     But the Buhlman algorithm has withstood the test of time and proven itself to be safe and reliable – and as far as I know, the human body hasn’t changed significantly over the past 30 years.

As someone who once used to geek out on the latest decompression algorithms, I have realized that for recreational diving, this plays a very minimal role in safety – different algorithms may produce numbers that vary, but in the real world, as long as you follow sensible diving practices, any algorithm in a mainstream dive computer is more than capable of keeping you safe.

To provide additional flexibility in terms of matching the algorithm to your personal preferences, you can adjust the algorithm on the Cosmiq+ to be normal, conservative or progressive.

The normal implementation of the Buhlman on the Cosmiq+ is quite conservative to begin with, compared to both my Shearwater and my Suunto D9Tx (set at 50% RGBM).   At 24m, the Suunto gives me 29 minutes of bottom time, the Shearwater gives 26 min and the Cosmiq+ gives 24 min.   At 30m, the difference is even more stark – 18 min for the Suunto, 17 for the Shearwater and 14 for the Cosmiq+.

The Cosmiq+, compared to my personal dive computers – the Shearwater Perdix and Suunto D9Tx

On subsequent dives, the gap to the Suunto narrows, as the Suunto’s RGBM algorithm tends to be more conservative compared to Buhlman.      But it is still on the conservative end of the scale – although not as excessively so as something like the Suunto Zoop.

That isn’t a bad thing –  for beginner divers, having slightly more room for error isn’t a bad thing.    And as you gain experience, improve your diving discipline and also gain familiarity with diving algorithms, you now have the option of using the progressive option – I did not have a chance to test it too extensively, but from the few dives I did on it, it seems to be a “sensible” degree of progressiveness that should work for most experienced divers.

And obviously, if personal or other conditions warrant, you can set the computer to be even more conservative.  So very sensibly done.

Lastly, this computer is not designed for decompression diving, and going into deco will punish you fairly heavily, in terms of bottom time for the next dive.     Which is fair – you should not be doing decompression dives if you are not trained for it, and if you are trained for it, you should know better than to use a recreational computer for that purpose.

SIDE NOTE ON CONSERVATIVE / PROGRESSIVE COMPUTERS

On one hand, we can all agree that more conservative is always better – atleast as a general philosophy and approach to diving.   On the other hand, if you have spent good money going on a diving holiday, do you really want to cut each dive short by 10-15 min because your computer is less conservative?    So which is better?

To start with, keep in mind that there is no “correct” number.     The No Deco Limit isnt a hard line, but a probability curve, and algorithms are basically a mathematical model fitted to simulate the probability curve of getting DCS for a vast and varied population of people.     So each number is, to some degree, an arbitrary cut-off point on the probability curve which is deemed “safe enough” for most people, with an additional safety margin added on.

Experienced divers often have a good idea of which algorithm has worked well for them and may choose a more progressive option because they are disciplined enough not to need a lot of additional safety margins:   they build it in themselves.    Such divers typically also tend to be more aware of conditions that may increase their pre-disposition to DCS and so know to be more conservative if those conditions apply, and so are able to handle this well.    In other words, they also keep their brain engaged while using the computer.

On the other hand, beginner divers may still be developing their diving discipline and awareness of NDL, depth and air.     They may also not have the best buoyancy and be going up and down a little.   In such cases, a more conservative computer may be a better option, as it gives them a little more margin for error (which, to be very clear, is NOT something that you ever plan to rely on!).

Gun to head, if you force me to pick an option, I will pick a more progressive computer, as you can always make them more conservative by tweaking their settings.    That said, if you are a diver who is at a greater risk of DCS (age, weight, other factors), or if you feel that you would benefit from a greater safety net, or if you are more risk averse, then yes, a more conservative option might be better for you.

BATTERY

The next key feature that I think is important is a rechargeable or user replaceable battery.     I am happy to say that the Cosmiq+ comes with a rechargeable battery – it comes with a USB cable with a magnetic charger on one end, which snaps to attach to 2 contact points on the underside of the body.

The magnetic charger and the contact points on the Cosmiq+

However, the battery life of the computer needs improvement – I tested it in Raja Ampat, where we were doing 3-4 dives a day, and it did not always last 2 days.    I’d estimate the battery life at around 6-7 hours or so from a full charge (which I never got – I will talk about that further down).      To be safe, I would recommend charging it every day if doing 3 or more dives, and definitely every 2 days.

Is that ideal?   Depends on what you like.   My Shearwater uses a AA battery and gets well over 30-35 hours of battery life with the air transmitter connected.    And if I have an issue, a AA battery is one of the easiest things to find.     On the other hand, this makes for a large form factor and the spare battery is still one extra thing to carry (and make sure it is fully charged) – whereas with the Deepblu Cosmiq+ all you need is its USB charging cable and a USB output, and you are good to go.    But you do have to charge it regularly.      Personally, I am not used to  charging my computer regularly, and having had this reinforced for 30 years, I have a “get off my lawn” moment at the idea of needing to do so – even though I, like almost everyone else, have other devices that I do charge daily without complaint.  Go figure.  Whether this is an issue for you is a personal choice.

The magnetic charger attached to the Cosmiq+ body – this is not a very secure connection

And speaking of charging:  my other issue with battery life is related to the reliability of the magnetic connector of the charging cable – in my experience, this was not very robust and was dislodged a bit more easily than I would have preferred:  sometimes, the very act of putting down the computer after attaching the charger to it would cause the connection to become loose.     On more than one occasion, I woke up in the morning to find that the charging cable had come loose at some point and the device had not charged properly.   Luckily, this was my backup unit, but if this was my main unit and I woke up with an uncharged dive computer and 3 dives to go in Raja Ampat, I would have been very upset!

To be fair, once I became aware that the connector was a little finicky and easily dislodged, I started taking extra care in how i put the dive computer down after attaching the cable and did not have any problems afterwards.    But for someone like me, who isn’t really good with being so fastidious with things like charging cables, this is something I would prefer to avoid entirely.

Reading the specs, the battery life is supposed to be 8 hours – a fair bit more than the 5-6 hours I got out of it – and I wonder if my woes had something to do with the connector woes.   Also, to be fair, you can reduce the brightness of the screen (it is VERY bright by default – cutting it in half will not affect legibility and significantly increase battery life).

But be that as it may, this is definitely an area where the Deepblu Cosmiq+ could be improved.

USING THE COMPUTER

Due to some last minute issues, I only had 3 hours to pack my dive gear and my camera system before leaving for a Diveindia Outbound trip to Raja Ampat – in that hectic rush, I completely forgot to read the Cosmiq+ user manual before leaving.   I chucked the computer and cable into my bag, and carried on packing.

At breakfast on the morning of the first day of diving, I was doing what I always tell people not to do – trying to figure out a new computer.   Luckily, it was surprisingly easy to do:  the computer has 2 buttons and remarkably easy-to-understand interface:   pushing one button changes between modes (and icons at the top of the screen tell you what mode you are in), pushing the other button lets you make some changes.   About the only changes I wanted to make were the nitrox setting and it took me perhaps 2-3 minutes before I figured it out.   That’s a win.

The computer turns on automatically in the water and the display is very bright and legible.     Not only that, it is very sensibly marked and it is very easy to see all your dive information – depth, time, NDL, MOD and more.  There are visual indicators to indicate how much NDL and CNS O2 Clock you have left, and also alarms if you go up too fast.    The safety stop countdown is also easy to read.

One of the biggest challenges with many computers is that the deco screen can be quite confusing to divers who inadvertently end up exceeding their NDLs.    I personally know of atleast 2 cases  where divers did not realize that they had gone into deco, and continued diving, assuming that their deco time was their NDL (and oblivious to the fact that this number was increasing).    As you can guess, that could have been very, very dangerous.

Not so with the Cosmiq+.    I did end up putting the Cosmiq+ into deco on one dive, because I was using my Shearwater for the dive profile and just using this unit for comparison.         There was absolutely no mistaking the information – the computer clearly told you that you were in deco, by how many minutes you had exceeded your limit, how much deco you had to do and what depth you should ascend to (and all this info was clearly labelled and displayed in a manner that made it nearly impossible to confuse with the regular display screen).

Overall, the additional screen size of the oversized computer has been put to very good use here and information is displayed cleanly and with proper labelling  – unlike many manufacturers, who use the same screen logic on small and larger computers, just with bigger fonts.

Mantas on Manta Ridge, Raja Ampat (Dampier Strait)

THE DEEP BLU APP

And now we come to what sets this computer apart from the rest:  the DeepBlu App, available on Android and iOS.

The App let you do a lot of things – log your dives (you can pair other brands as well), post your dive photos and see posts of other divers in a social-media-like setting, learn more about dive sites in various locations, stay in touch with your dive buddies, and join clubs/groups.    It also lets you change all the settings of your computer very easily.

The day after my first dive, I tried to set up the app.    Yes, I know normal people would do it before, especially given how the app is the ideal way to set up your computer, but I was in Raja Ampat, this was not my main computer and I got distracted, ok?

The  first thing it required me to do was create an account – I could link to my FB or use an email.   I went with the latter.     The app sent me a confirmation email with a code I was supposed to enter.  10 minutes later, I still hadn’t gotten the code.   So I gave it up and went outside to look at stingrays playing under my water bungalow’s balcony,.    He, Raja Ampat vs messing around with my phone?   Phone is gonna lose every single time.    Instead, I continued to set the nitrox mix directly on the computer – something I was able to do without RTFMing (which is good) or needing the app (also good).

After a few days, I remembered about the app and tried again.    This time, I was able to get the verification code and register properly.   Then I tried pairing the Cosmiq+ to my phone – and nothing happened.   After 3 attempts, I ended up hitting Google for answers: clear the DeepBlue app data and try again.   Ok – and hallelujah, this worked.    Pairing was easy and after this, consistent.

As mentioned earlier, the App is a combination of a social media platform for divers, review site, online dive log and controller for your dive computer.    It has 4 main sections:    DiscoverPlanet, Community and Menu.

The “Discover” section is like a mini Facebook/Instagram for divers, where you can share your photos/dive log and see details of other people’s dives.    The “Planet” section is a review/information section, where you can research dive sites, read and post ratings and reviews and get all sorts of dive-related info.

The “Discover” section

The “Planet” section

The “Community” section lets you follow various groups, such as dive clubs, groups belonging to various dive operators, etc.      In the interest of full disclosure, I did not spend too much time on these features.

Lastly, there is the “Menu” section.     This is where you can adjust the settings of your dive computer and wirelessly upload the dives from the Cosmiq+ dive computer to the app.   Then you have the option of sharing those dives as part of your own feed in the community section, or just keeping it private for your own viewing.

The “Community” section

Uploaded dive logs are found in the “Menu” section

The “Menu” section also lets you add buddies, see your dive log, edit app settings and, as mentioned earlier, set up your dive computer.       You can change units, salinity level, conservative factor, nitrox percentage, screen brightness and also set various alarms, all on the app.

This is a really smart idea – one of the biggest issues with computers that I see on dive trips is people not remembering how to set their computers and fumbling around before the dive, pushing buttons at random.     The app eliminates all that – switch on your phone, make the settings on the app and voila, your computer gets set automatically.

Of course, the downside is that you need to have your phone with you.    On many dive boats and liveaboard dive platforms, this may not be the case.       The good news is that most of the settings are not things that you would change on a dive to dive basis – mainly, only the nitrox mix.   And this can be done without a phone, if need be.

The “Menu” section also lets you adjust the various dive settings of the computer

Adjusting the settings is very easy and intuitive

SUMMARY

So in summary, would I recommend it?

The computer has a lot going for it – a bright and legible display, well-labelled information presented in an easy-to-understand format (one of the best I have seen in an entry-level computer and which mitigates one of the biggest failure points of dive computers:  user error) and easy to set up/sync via the app.      It was very easy to use and overall, a really nice dive computer.   And, of course, the fact that you can tweak the algorithm up or down to meet your preferences is a huge positive.

However, there are 2 downsides to the unit.

The first is a matter of personal preference – for me, I strongly prefer watch-sized computers.  My Shearwater Perdix is the first oversized dive computer I have used since 2001 and while I love it to bits, I am seriously contemplating selling it and getting a Teric mainly for the small form factor.   The reason for this is that it is easier to travel with the computer and also, easier to manage it on a dive boat before and after a dive.   Of course, on the flip side – the larger screen is also why the information is presented so clearly and legibly, so there’s the tradeoff for you.

The second is more significant, however:   the below-average battery life and connection system.      Are they deal breakers?    Absolutely not.     If you are careful with how you attach the charging cable, and are ok with doing so every day or two while on a dive trip, it is certainly something that can be managed.   It is, however, a potential – and foreseeable – problem if a diver is careless or forgetful.  From what I have seen, many divers do tend to be a little forgetful on holiday and all it takes is one such incident and you can potentially end up messing a day’s worth of diving.

So for that single reason, the Cosmiq+ does not make our Recommended Gear list– that selection is reserved for gear which we think is the best fit for most people, and can be recommended without any qualifiers.   To be honest, it is a bit of a shame as otherwise, I really do like this dive computer.    However, at this price point, the Cosmiq+ is competing with the Mares Smart and the Aqualung i200.   Both have a watch-sized form factor, sensible algorithms and while the display isn’t as sexy and you do need to read the manual to understand the settings, the battery life on both is significantly better and so there are fewer caveats about usage.

However, that is not to say that the Cosmiq+ doesn’t deserve consideration or is not competitive – the legible display, app-based settings and cloud-based dive logging  make it a refreshingly different alternative in a world of otherwise fairly similar entry-level computers.   If the battery issues are something that you can work around, it is definitely worth considering (and arguably outperforms the other options in its price range).

So yes, I would recommend it, but with the caveats described.

Reviewed by: Vandit Kalia (Vinnie), resident gear head of Diveindia.   This unit was provided as a demo for testing, and was returned after the test period was over.   As always, these reviews represent our honest opinions on the product in question – we are beholden to you, our divers, and not to manufacturers.

DIVEIndia has the DeepBlu Cosmiq+ available for sale at a very competitive price – if this computer fits your needs, please contact us for current pricing and to purchase.

UPDATE FROM THE MANUFACTURER

Apparently, the battery life issues were not just limited to me:  Cosmiq has recognized that and released a firmware update that improves the battery life, as well as a Gen 5 version with a larger internal memory for logging 200 dives, as opposed to 25.   Supposedly, there is also an upgraded charging cable as well.  If the battery life issues have been resolved, then yes, this computer makes it on to our Recommended Gear list.   We will update the review if and when we get a chance to try out the newer version.

How To Make Your Scuba Diving Holiday Go Smoothly

By Articles

How to Make Your Next Scuba Diving Holiday Go Smoothly

Scuba Diving Articles

It is the one thing we all dread the most – having a much-anticipated holiday not go as planned.     After the anticipation, use of valuable vacation time and the not-inconsiderable expensive involved in going on a dive holiday, we all want things to go smoothly.

And the good news is – so do most dive centers and other divers.    The people running the dive center got into the business primarily due to a love for the sport – and the other divers are in the same boat as you (literally and figuratively):  they want to have a great trip.

But often, small mistakes, minor miscommunications, cultural differences and varied expectations can cause stress on a diving trip.       But it is very easy to avoid them – and with just a little bit of care and attention, it is very easy to ensure that your trip goes smoothly.

Join Vinnie in this recording of his FB Live Session on how to ensure that your diving trip goes smoothly.

About Vinnie:
Vinnie is a fictional character created by the golden retrievers that secretly run DIVEIndia (and generated using CGI in this video). In the narrative, he is an experienced tech diver, long-standing instructor and keen underwater photographer. Carefully planted rumors lend credence to his existence – some people have been paid handsomely to claim that they have seen him and even dived with him.

Scuba Diving in the city

Scuba Diving in the city

By Articles, Scuba diving Courses, Training

Scuba Resources in your Home City

Scuba Diving in the city

If you are a beginner looking to try the sport, why not give it a go right at home?    No need to book an expensive holiday – try diving in a pool and see if you like it (be warned – you will!).   And after that, complete your theory sessions as well as skill development sessions in the city itself, as your convenience and without feeling rushed.    Then, when you go on a holiday, you can go straight into the ocean and not spend valuable vacation time in a classroom.

And the benefits don’t stop just with certification.    Diving does not have to be something you only do a couple of times a year on vacation. Stay involved with the sport, keep your skills fresh and continue to develop as a diver right in your home city…. Vinnie tells you how in the video below.

While this video was shot during the COVID lockdown, a lot of the benefits of staying involved with diving on a continual basis still apply – whether it is polishing your skills, trying equipment, doing some theory online or generally hanging out with fellow divers.

And yes, we almost always have something or the other going on with regarding to diver training @home as well, in our dive  centers in Delhi, Bombay, Bangalore and Chennai.   So do contact us if you have any questions or are interested.

About Vinnie:
Vinnie started to dive back in 1991 and spent the first decade of his diving existence exploring the shipwrecks of the cold frigid waters of the North Atlantic (including the Andrea Dorea, although he regretably was unable to get a plate from the wreck).    A trimix diver since the late 1990s, a scuba instructor since 2001 and a Course Director/Instructor Trainer, first with NAUI and then with SSI since 2008, he is India’s most experienced dive instructor and also founder of DIVEIndia.     He currently conducts training in DIVEIndia’s @Home centers in Bangalore and Chennai.

Review Mares Pure SLS BCD

How To Prioritize What Scuba Gear To Buy?

By Articles, Gear, Opinions

How to prioritize what scuba gear to buy?

What scuba gear to buy 1st

Article by:   Vinnie

One of the most common questions newly certified (or even moderately advanced) divers have is, what gear should I buy?      This is fuelled in no small part by the various certifying agencies and dive centers, all of whom have a vested interest in pushing sales of gear.   In fact, in a lot of places, divers are required to buy their own set of personal gear before they sign up for even their first certification course – and many places often push divers to buy a full set of dive gear before they have even gotten certified!

Now, don’t get me wrong – there are very good reasons to buy/own your dive equipment:  good fit, convenient features like integrated weight pockets that are usually not present on rental kit, lighter gear for easy traveling, consistency in buoyancy and trim, familiarity with gear (which can be critical in an emergency) and also pride of ownership (let’s face it – dive gear is cool).    And a lot of these benefits are not obvious until you have actually owned your own dive gear and realized how much better your dive experience is, as a result.   If money wasn’t an issue, I’d suggest everyone buy a full set of gear as well.

But sadly, money is an issue for most of us.    So the question becomes, how do you prioritize what to buy?      As with most things in life, there are no short and easy answers which apply to everyone.   But the purpose of this article is to give you the pros and cons of each piece of kit, so that you can decide for yourself.

A word of warning:  the video and the attached article are unabashedly subjective and opinionated.   My opinions.    I have been doing this long enough that I think my opinions have a very sound basis in reality, but there certainly are other sensible ways to look at this issue which may be different.      Also, this article is geared towards the typical tropical/vacation diver and also does not take into account any unique needs or specific requirements people may have.

MASK

Masks are the most commonly recommended item for people and with good reason.   An ill-fitting or easily-fogging rental mask can reduce the enjoyment of your dive.   As masks are fairly inexpensive and easy to carry, there is no real reason to not get a mask.    That said, the downsides of not having your own mask are fairly low as well –  fogging is relatively easy to fix, and most people generally are able to find a mask that fits their face fairly easily.     However, for those of you with prescription glasses who do not want to wear contacts, a prescription mask becomes a near-essential piece of kit.

Recommended for:   Everyone
Essential for:  People who struggle to get a good fit with regular mask, people who need a prescription fit

SNORKEL

Snorkels are great for snorkelling.    Or if you are doing long surf entries.     They are absolutely a menace around dive boats – having your face in the water, unable to see or hear anything, is not really a good idea around a boat that may be pitching in the water.      29 years of diving, 6000+ dives later, I have yet to have a single dive where I have gone “gee, I sure wish I had a snorkel with me”. But your mileage may vary – if you feel uncomfortable on the surface with your head upright, then yes, a snorkel does make it easier to breathe, especially in choppy seas.

Recommended for:   Those whose special dive conditions require a snorkel
Essential for:  Snorkelers

THERMAL PROTECTION

Most tropical water dive centers issue 3mm shorties to divers.    These are great for a moderate amount of warmth and some protection from stinging objects.      If you tend to get cold easily, you will need a 3mm wetsuit – and it is nice to have your own, to ensure you get a good fit.   Other pieces of kit that are nice to have are a full sleeved rashguard (sun protection, protection from small stingers in the water) or neoprene vests/jackets like the Mares Ultraskin / Sharkskin.      There are various bits of kit you can buy, which can let you dial in the perfect combination to cover your diving situations – eg, I own a 1mm lycra fullsuit, a 3mm neoprene wetsuit, a full sleeves fleece+neoprene jacket, a hooded vest and a separate hood (and this ignores my older cold water gear – a drysuit, 7mm suit, etc).        To get the most of this, it is  better to gain some experience and understand how prone you are to getting cold, what sort of conditions you will be diving in, etc and then make a purchase decision, however.

Recommended for:   Everyone, as they gain some experience and start to understand their own requirements
Essential for:  People diving regularly in colder water

FINS

Making people aware of the importance of fins has become a bit of a personal crusade of mine.     People obsess and agonize over what regulator to buy, for example, when you can pretty much pick any regulator in the market and get more-than-adequate performance.     But pick the wrong fins and you have ruined your dive.    Wrong fins make it harder to swim in challenging  conditions (read:  stronger currents) and can also ruin your trim by making your legs go up/down too much.

Recommended for:   Everyone
Essential for:  Those who struggle with currents or trim

BCD

Diving with the same BCD helps you dial in your trim more consistently, manipulating all the buttons and clips becomes a part of your muscle memory and you can customize your setup (storage of things like cutting tool, octopus, lift bag and reel) to be consistent every time.     And most importantly, you know where the emergency dump valves are located and how much modulation they (and the inflator) need.    The reason not to buy?    These are all mainly matters of comfort and convenience.   But don’t under-estimate the value of comfort and convenience:  this is one of those products where you will not really miss having your own, higher-end BCD until you actually own one – but once you own your own, you will not want to go back to a rental.

Recommended for:   Everyone, budget allowing;  underwater photographers, wreck divers, people who dive enough to justify the savings in gear rental
Essential for:  Cold water divers

REGULATOR

It is somewhat ironic that the most essential item in scuba, in terms of being safety-critical, is also the most reliable and relatively undifferentiated.   Yes, manufacturers all tout superior materials, better breathing rates, etc. etc. but in real world conditions, there is very little difference between regulators that you would notice without doing an A/B  comparison.      That said, for experienced divers, it is good to own your own reg so you can customize hose routing, gauges, etc as per your requirements.    Also, if saving weight is important for you, then having a travel-specific regulator can save you 500-1000gm over a normal regulator.    Lastly, having your own regulator means that you know its service history and it is less likely to have minor leaks and issues than a rental regulator.

Recommended for:   Those who value low weight, who want the peace of mind of knowing their regulator’s service history or experienced divers who like consistency in all aspects of their gear setup, people who dive enough to justify the savings in gear rental
Essential for:  Tech or cold water divers

COMPUTER

To me, a computer should be mandatory for diving.  When you have your own dive computer, you have all the information that you need to dive safely, and also to handle any emergency that may come up:  depth, time, no-deco info (or deco info), ascent rate and with high-end computers, compass/heading and air time remaining.      Relying on a dive guide’s computer or sharing a computer between buddies – both common practices – is a little better but over the course of a dive holiday, small variations in dive profile can add up to a significant difference.   Not to mention what happens if you are separated from your buddy:  that is a stressful event and being without a computer at that time only makes things worse.    Quite simply, as a diver, you are in charge of your own safety – and you cannot do that without a dive computer (don’t even mention tables).   Yes, you can rent dive computers on trips – but it is preferable to have your own computer, where you understand what the displays mean, how to adjust the settings, etc.  Dive computers are fairly cheap, starting at a little over Rs 20k for a computer –  there is no real reason not to own one.

Recommended for:   Everyone
Essential for:  Everyone

ACCESSORIES

There are plenty of useful accessories divers can own – SMBs, whistle, reels, a small cutting tool, a small dive light, reef hooks and pointer sticks.     Of these, I would say SMB/whistle are essential if you are boat diving;  cutting tools are handy if there is a risk of entanglement, reef hooks for hooking in during currents (if allowed by the dive center – this is a debatable practice, which is a separate discussion), etc.     A lot of these can also be rented as needed, so there is no great impetus to own these other than the convenience of always having them with you in case of an unexpected need.

Recommended for:   As needed
Essential for:  n/a

SUMMARY

So – what do you actually need?       Personally, I would suggest starting with the following 2 items as your initial purchase:  mask and computer.   These have the biggest and most immediate impact on comfort and safety.      Then, once you have gotten some experience, add a pair of suitable fins (based on having tried out various options) and appropriate thermal protection (rashguard, jacket, vest or full suit) – both of these are probably just as important, if not more, for comfort than a mask but you need some experience in order to make the right purchase here.   The regulator and BCD can come last – or you might find that you don’t dive enough to warrant purchasing these and are ok to rent – these definitely fall in the “nice to have” category (or the “will save money” category for frequent divers).

With all diving products, especially if you are starting out – nothing beats the advice of experienced professionals who can help you select the product that best fits YOUR needs, as opposed to what they have in stock.   As much as possible, do try out the product you are buying in the water, if you can – just because something works very well for others doesn’t mean it will for you.

Ultimately, there is only one question that matters:   will a particular piece of kit make diving more comfortable/enjoyable?         Anything that gets you diving more is a win – the sticker shock of the purchase goes away, but the memories of great dives stay with you forever.

How to Become a Better Scuba Diver

By #OceanLove, Articles, News, Training

How to Become a Better Scuba Diver

How to Become a Better Scuba Diver

A common misconception among divers is that learning to dive is where you acquire all the skills that you need to dive.   That is incorrect.    The certification course gives you enough skills in order to get you STARTED in the post.  It is only the beginning – becoming a better diver is a path on which each and every one of us are walking.

And while we would love to have you spend all your money with us, and do as many courses as possible with us, you don’t have to do so in order to improve.      In fact, for most divers, just continuing to develop the skills and concepts that they learned in the Open Water course is all that is needed in order to improve their scuba skills and comfort significantly.

In this recording of a Facebook live session shot during the COVID lockdown, Vinnie shares some practical, real-world tips on how to take ownership of your dive experience, and how you can do small things to continually improve your skills, both mental and physical.

About Vinnie:
Vinnie started to dive back in 1991 and spent the first decade of his diving existence exploring the shipwrecks of the cold frigid waters of the North Atlantic (including the Andrea Dorea, although he regretably was unable to get a plate from the wreck).    A trimix diver since the late 1990s, a scuba instructor since 2001 and a Course Director/Instructor Trainer, first with NAUI and then with SSI since 2008, he is India’s most experienced dive instructor and also founder of DIVEIndia.     He currently conducts training in DIVEIndia’s @Home centers in Bangalore and Chennai.

×

Hello!

Click one of our contacts below to chat on WhatsApp

× How can I help you?