Underwater Photography Guide For Beginners: Building A System Around A Compact Camera

By Photography, Underwater Photography

PUTTING TOGETHER AN UNDERWATER PHOTOGRAPHY SYSTEM BASED ON A COMPACT CAMERA

Are you interested in taking high quality underwater photos?  Or perhaps upgrading from your GoPro to something that takes better images and also is more scaleable?   Does the complexity of an underwater camera system and all the bits and pieces needed put you off buying one?

In this video and article, we are going to talk about the various components of an underwater photography system and what attributes to look for – a system that may not be the cheapest to start with, but also a system that will grow with you as your interests develop (which works out to better value in the long run).

For the purposes of this article, we are going to ignore ILC (Interchangeable Lens Cameras, like DSLRS and Mirrorless) – while they are technically the best solution, they also require a commitment in terms of money and approach to diving that is not suitable for most people, atleast not initially.   For the vast majority of divers, a compact camera system actually is the better tool.

1:  THE CAMERA

When picking a camera, the obvious point is to make sure there is a housing that is made for that specific camera model.  That aside, please look for one with the following attributes:

  1. A good wideangle – the wider the better: Underwater photography is all about getting close to your subject, and a wider angle lens lets you get closer to subjects ranging from turtles, large coral outcrops, divers, etc.  This means that your images are going to be better lit, sharper and have more detail/contrast.  By contrast, the telephoto range is not as important, as you will rarely be shooting something too far way.
  2. A good close-up/macro mode: Among the most rewarding – and easily accessible – category of subjects in underwater photography are macro subjects: nudibranchs, shrimps, etc. And here too, you want to get as close as possible, to fill the frame with your subject.
  3. Fast autofocus: While modern cameras have improved substantially compared to the Olympus C3000 I started shooting with, back in 2001, there still is a difference in autofocus, especially in poor light and low contrast (ie, your typical dive).  Faster AF will result in a much greater percent of keepers, especially for fish portraits.
  4. Easy to access controls:  Operating a camera underwater means working through a housing, which is typically via buttons and dials.   A camera which requires a lot of use of touchscreen or rotating dials typically does not pair well with these buttons and dials, and so may limit your ability to set key parameters underwater.
  5. Built-in flash: One feature I didn’t mention in the video is a built-in flash, mainly because virtually every camera does come with a flash. This is mandatory – that built-in flash is what controls your strobe (see section 3).  No flash = no strobe, and you might as well just shoot with a GoPro.

In addition to this, a nice-to-have feature (for me) is built-in waterproofing.  This way, if or when the housing floods, there is a good chance you may save the camera.  You can also use the camera for other activities associated with the diving trip – beach, snorkelling, etc. and not have to worry about it getting splashed.

This is the camera I used underwater (at the time of writing this article): an Olympus TG5.  It has the best macro modes out of all the compacts in the market at present

As camera housings are specific to individual cameras, you obviously need to pick a camera model which has at minimum a housing made for it and ideally, a range of accessories to support the system.   The 3 brands which I recommend are Canon, Olympus and Sony.  Each of them make cameras that are very popular with underwater photographers, and so it is easy to find housings and other accessories for them.

Do note – if you have a compact camera already, you can likely get a housing for it and wont need to buy a separate camera.  However, I do encourage read up on the housing section to determine what features to look for when it comes to building a scaleable system, and whether you particular camera + housing combo meets those requirements.  In some cases, it may be better in the long run to buy a new camera, rather than build a compromised system around a less-than-ideal camera.

2: THE HOUSING

The housing is the waterproof case within which the camera is kept while shooting underwater.    When looking for a housing, look for the following 3 main attributes:

  1. Ergonomics: What you want is a housing which feels easy to grip in your hands and where the important shooting controls – focus, change AF point, change exposure – are easy to reach with your fingers, without you needing to take your hand off the grip every time.  I cannot overstate what a big difference this makes when you are actually shooting – if you are struggling with your camera, you will not be able to get the best shots.
  2. Access to controls: Most camera housings do give access to all the essential controls when shooting underwater – however, in several cases, many “nice to have” functions may not be accessible. For example, if you rely on a particular custom function button or a rotating control dial, please make sure you can access it from within the housing.
  3. Ability to easily add accessories: This is the single biggest attribute when it comes to determining whether your system will scale up or not.  As your needs evolve, you may find you want greater close-up capabilities or the ability to go wider for impressive reefscapes.   Does your housing allow you to add these components easily?   At a more basic level, can you connect to your strobe using standard connectors or are you dependent on proprietary connectors that limits your choices?  Ideally, you want a housing with a threaded filter mount in the front, which will let you screw in additional accessories and a port for plugging in an optical fiber cable to sync your external strobe with the camera’s strobe.

This is the Olympus PT-058 housing I use with the TG5.  The front of the port has 58mm threads for screw-in accessories and there are 2 ports for fiber optic cables on the upper right of the port – allowing me to attach 2 strobes directly to the camera

Housings can be made by the OEM (camera manufacturer) or by a third-party manufacturer like Nauticam, Fantasea, Seafrog, etc.    OEM housings are generally relatively inexpensive and made of polycarbonate.   Third-party housings often tend to be a bit more expensive, and often made of metal.

Often (but not always), third-party housings may have a better ecosystem of accessories – which is a good reason to pay a premium for them.  In addition, while OEM housings are typically rated to 30m or 40m, metal third party housings may be rated to 60m or deeper – for divers looking to shoot at tech depths, a more expensive 3rd party housing may often be the only solution.

The housing has a large window in the back for looking at the LCD screen and all the buttons are large and easy to access

However, purely in terms of reliability and functionality, I have not found 3rd party housings to be more reliable or less prone to flooding.  Personally, as long as the housing met my preferred depth rating and checked off the three attributes listed above, I would happily buy the cheapest housing – as long as it was from a reputable brand.  There are plenty of horror stories about ultra-cheap housings flooding due to poor QC – that is not a risk I am willing to take, so save $100-200.

The shutter button has a large lever, making it easy for most hand sizes, and the zoom and power buttons are also easily accessible.  There is also a cold shoe on the left, for mounting additional accessories

3: THE STROBE (UNDERWATER FLASH)

Photography is, in its essence, the act of recording light.   It doesn’t matter how expensive your camera – if the light is poor, the image will be poor.  And underwater, the natural light is always poor: you will need a powerful flash to not just brighten the scene but also to add in the reds that have been absorbed by the water.

Simply put – the strobe is the single most important element in taking high quality images.  Period.  This is one area where you should not skimp (and unfortunately, this is the one area where most people do try to cut corners).   A good strobe has the following attributes:

  1. Power: Power is represented by something called Guide Number. Without getting into the specifics of what it means, the main thing to know is that bigger = better.  You want as high a GN as possible – ideally, atleast 20-22, or even more if budget allows.   Once the payment is made, you will never regret having a more powerful strobe.
  2. Angle of coverage: Along with power, you also need to know the angle of coverage of the strobe beam.  Many cheap strobes may appeal due to their high GN, but the angle of coverage is very low, which can be a problem when it come to lighting a scene.  You want an angle of coverage of atleast 90 degrees – and as before, more if you can afford it.
  3. Beam uniformity:  This is another area where cheaper strobes cut corners.  A good strobe will have even lighting across the entire beam.  No hotspots, which can cause uneven exposure when shooting underwater
  4. Manual controls: Most strobes have an automatic mode, where they work seamlessly with the camera’s TTL exposure mode (unsure what TTL is?  Just think of it as fully automatic, with the camera effectively controlling the strobe).  This is great when you are starting out or for macro, but auto mode is unreliable with many subjects, such as wide angle and reflective fish.  For more consistent results, you want the ability to set the strobe’s power manually.   This is a lot easier than it sounds, and is something many photographers gravitate to as they evolve.    Is it essential?  No.  But having this feature ensures you will not outgrow the strobe.
  5. Additional features:  These include things like focus lights, torch functionality and red light (for focus assist in the dark with shy subjects).   While not essential, they do make your diving a lot easier – which is always nice.
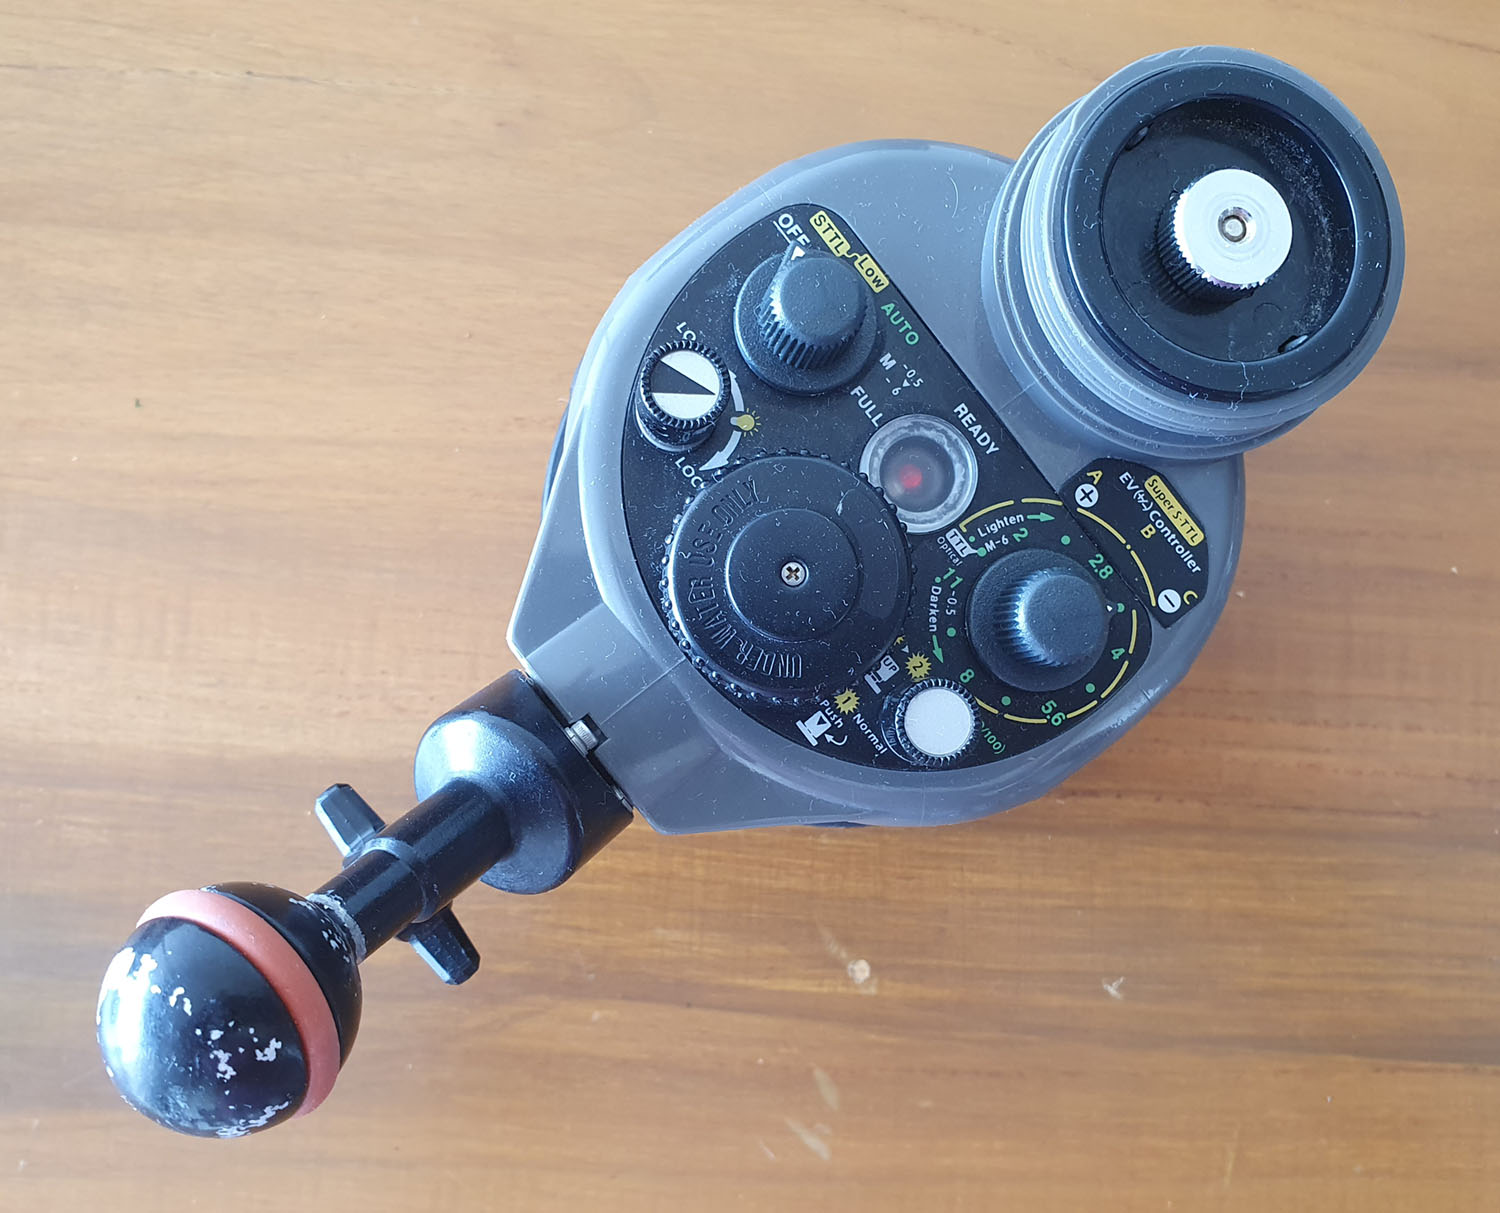
The Inon Z240 (top of the range strobe from Inon in its time) has a full array of controls and also a standard 1” ball mount for attaching to other hardware.

One thing worth noting- manufacturers often tend to be very optimistic with their claims about power and angle of coverage.  And unfortunately, in the case of really inexpensive products sold on Ali Express and elsewhere, they flat out lie – and I say this as someone who uses dive lights and bicycle lights that I have bought (and will continue to buy) on those sites.

Also, video lights are not a substitute for strobes.   Video lights put out a lot less power than strobes – even a $1500 video light will not have as much power as a $500 strobe.  So while they may work for macro and closeup work, they are not as good for wide angle photography.

Given the importance of the lighting to underwater photography (I really think your strobes are the centrepiece of your system), I cannot overstate the importance of allocating ample budget towards them.    Typically, most people skimp out and get budget strobes.  Then after a few dive trips, they end up upgrading.  It is better to just get it right the first time – and also more economical in the long run.

It is one thing to buy inexpensive torch lights or video lights (which are really torch lights with a wide angle of view) – however, the moment you add in sync circuitry and greater power needed for strobes, cheap becomes a losing proposition.  I recommend Inon and Sea&Sea as 2 brands offering very good power, reliability & features for the money.

Also, as your photography skills improve, you may want to add a second strobe.  But for now, it is better to start with 1 good strobe.

The controls may look intimidating, but are fairly easy – clockwise from bottom left: (1) button for turning on the torch (and locking it), (2) setting the various strobe exposure modes, (3) adjusting the strobe power in manual control modes and (4) adjusting for camera with or without pre-flash.  I typically set the strobe on M on the upper left dial, and use the upper R dial to increase/reduce the power.

4: THE SYNC CABLE

This is a piece of fiber optic cable that connects your camera to the strobe – when your camera’s flash fires, that triggers your external strobe.  Depending on what mode you are using, the strobe will either then put out a specific amount of light (manual mode) or will also shut off when the camera’s strobe shuts off (auto / TTL mode).

The main thing to look for is a cable whose terminators are compatible with your system.  The standard used is a push fit (also known as the Sea & Sea connector, after the popular strobe maker).   Inon strobes use a screw-in terminator, which is not very popular outside of Inon products, but less prone to popping out (which isn’t really a big deal, though).

The cable on the left has Sea&Sea connectors on both ends;  the cable on the right has a Sea&Sea connector on one end (this plugs into the housing) and an Inon connector on the other (this screws into my strobe).   You can also connect your strobe to the camera via electrical cable, but that is for DSLRs with hot shoes only, not for compact cameras.

5: THE CONNECTING HARDWARE

The camera, housing, strobe and cable are the essential bits needed to take the photo.  But you also need a bunch of accessories to physically combine them into one unit and also to position your strobe underwater when shooting.  These are the following:

a. The base tray / handles:

The base tray is a plate that connects via a screw to the tripod mount at the bottom of most housings.    It will have 1 or 2 handles on the side (depending on the option you get), for mounting most accessories.

The standard for connecting multiple pieces of hardware is 1” ball mount, as shown in the photo below.    There are other connecting mechanisms as well, but try to get this, as this gives you the most options for putting together different hardware elements.
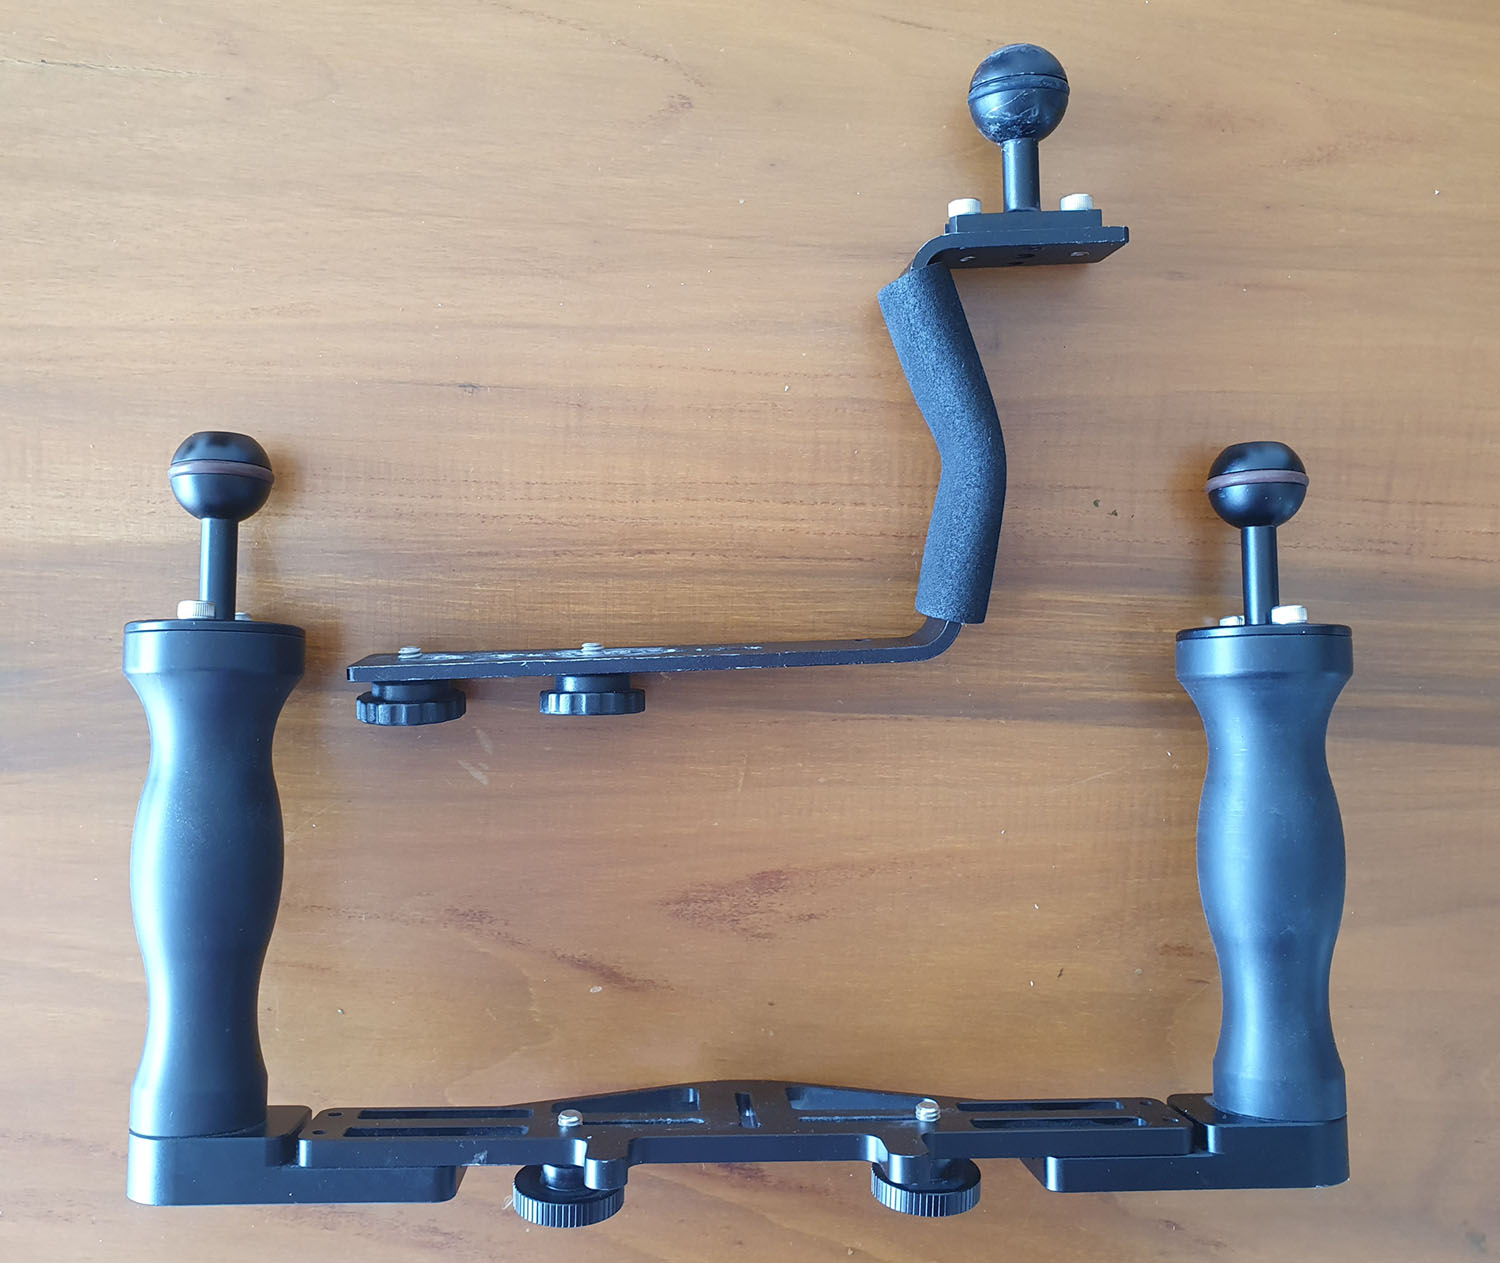
Two different trays – one is a single-handle tray (the handle actually goes on the left as my right hand holds the housing), and the other is a dual-handle tray.  The latter lets you attach 2 strobes.  Both the trays have the standard 1” ball head terminators for adding more hardware

b. Strobe arms:

Strobes are typically mounted on strobe arms, to get them further away from the central axis of the camera/lens (this reduces backscatter).

A common option are flex arms – they are easy to use and do not require a lot of other hardware.  The downside is that they are limited in length and also positional flexibility.
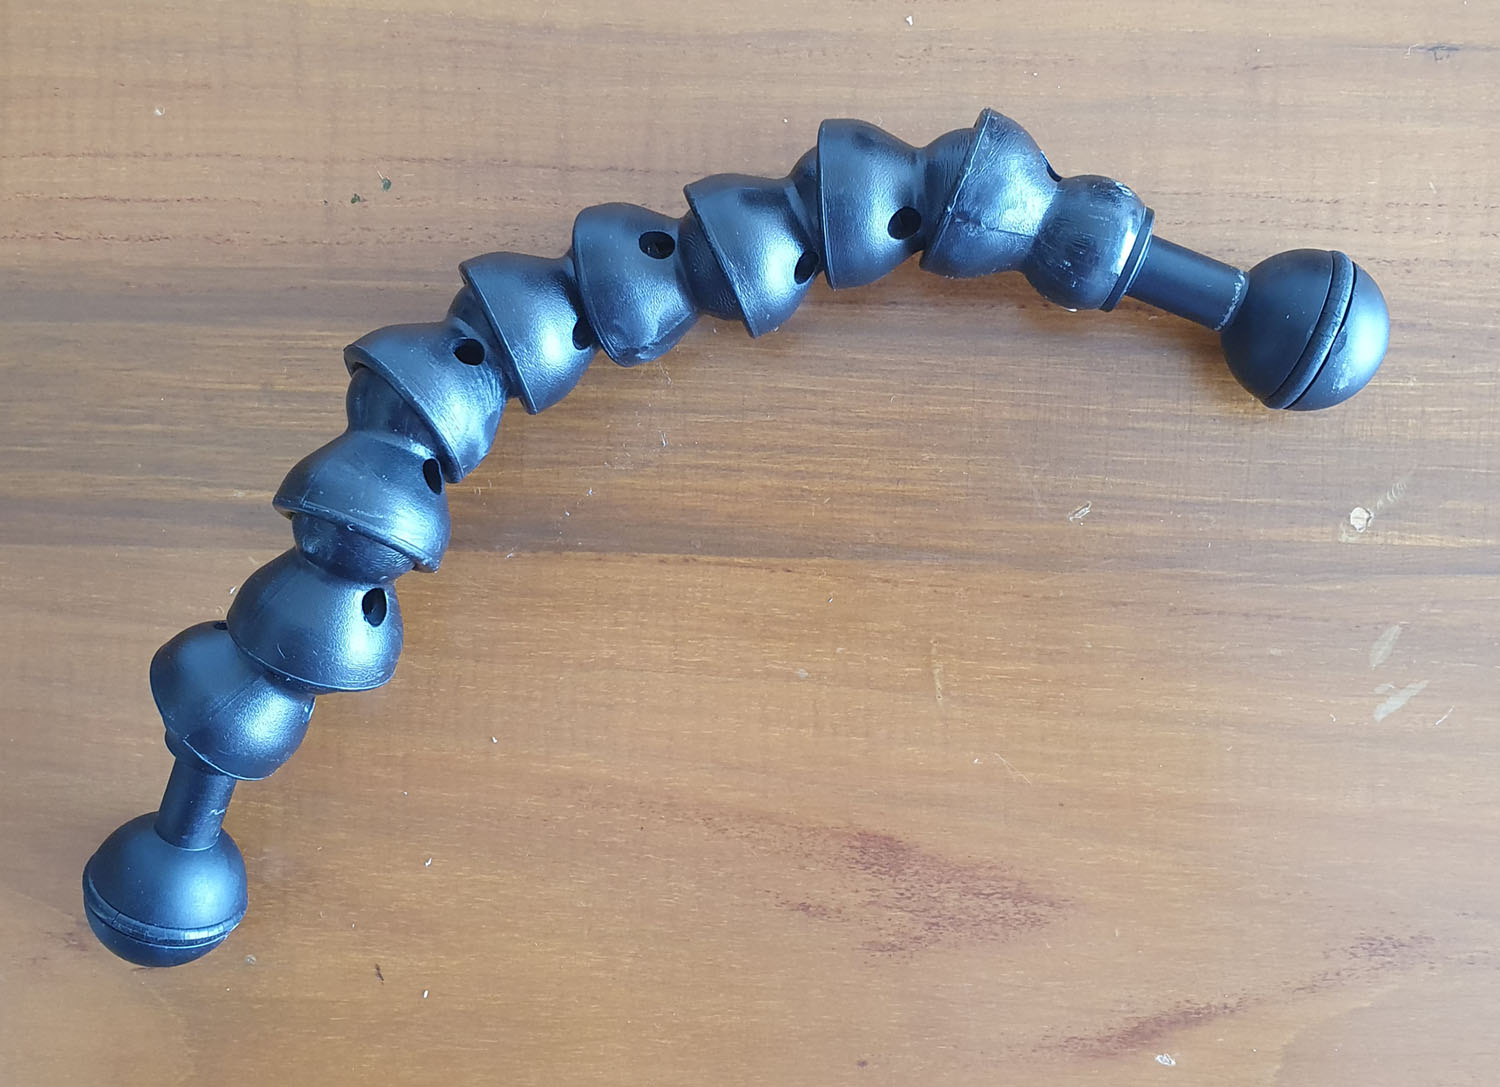
Flex arms are an inexpensive solution to get started but limit flexibility when it comes to strobe positioning.  Note the 1” ball heads at each end

In my opinion, rigid strobe arms are a better option for enthusiasts – by using 2 of these arms to connect each strobe, you have maximum positional flexibility for lighting (and remember – underwater photography is all about lighting).   Strobe arms come in various lengths – for someone starting out with underwater photography, two 6” arms per strobe is a good starting point and well suited for everything from macro to wide angle.

Different types of arms. From left to right: 10” arms used for wide angle photography on my ILC system; 6” arms recommended for compact camera systems and 4” arms used for macro photography on my ILC system.  The 10” and 4” arms have floats to adjust the buoyancy of my ILC system.  As with everything else, each of these arms ends with 1” ball adapters and you can see how they connect using butterfly clamps.  

As with the tray/handles, make sure you get arms with 1” ball terminators on each end.

c. Butterfly Clamps

These are clamps for connecting 2 separate hardware components, each of which has a 1” ball terminator.

For each strobe, you will need 3 of those – one to connect the handle to Arm 1, a second to connect Arm 1 to Arm 2 and a third to attach the strobe to Arm 2.

Butterfly clamps are used to join 2 separate pieces of hardware via their 1” ball heads.  The nature of the ballhead and clamps allows for very easy movement underwater, along any axis

The good news is that here, you can DEFINITELY save money by buying inexpensive arms and clamps off Ebay, Ali Express or wherever.  These are simple pieces of machined metal and do not require high technology or high QC – and the generic hardware costs a fraction of what the branded ones do.

So once you have a camera, housing and strobe, all neatly mounted on a tray and strobe arms, you are ready to go shooting.   And indeed, you have all the tools you need to take excellent photographs – in fact, as long as you can get close to the subject and light it properly, the images from a compact camera will not be too different from that taken with an ILC.

However, where the compact camera typically falls short of an ILC is in ability to get really close (near lifesize or 1:1 reproduction) of really small objects, or its ability to encompass sweeping wide views of reefs or really large animals like whalesharks, etc.

The former requires really good macro capabilities (which most compact cameras lack – the Olympus TG series being an exception).  The latter requires an ultra-wide angle of view, which is also not possible with compact cameras.

However, there are ways to get around this – by using adapter lenses.   You can get close-up adapters, which let you get closer to a subject (and thereby increase magnification).  You can also get wide angle adapters, which widen the field of view of the camera, thereby letting you get closer to large subjects or wide vistas.  These are typically called wet lenses, as you can attach and remove them underwater.  There is a small optical tradeoff compared to the specialized gear that ILCs use, but you make up for it by being able to shoot both wide angle and macro on the same dive.

6: ADD-ON ACCESSORIES

A Kraken UWL wet lens – this increases the field of view of my Olympus system from an average 100 degrees to a very wide 140 degrees: great for impressive wide angle shots.

Ability to use wet lenses depends primarily on being able to attach them to the front of your housing – typically, this can be done via a proprietary bayonet mount (specific to individual 3rd party manufacturers) or via a standard threaded screw mount (58mm or 67mm are typical sizes).   I am a big fan of screw mounts, as it lets you add components from a wide variety of manufacturers.

If you are starting out, you do not need to spend money on these – but do make sure your housing has an option to add these later.

Summary

If you were looking for a magical solution to putting together a system for underwater photography on the cheap, I am sorry to disappoint.  Versatile, cheap, quality – you can only pick two, unfortunately.   I have chosen to focus (no pun intended) on putting together something that is significantly better than what you can shoot with a GoPro.

The system I have suggested is going to cost somewhere in the following ballpark:
– Camera:  Rs 30,000
– Housing:  Rs 25,000
– Strobe:  Rs 35,000
– Sync cable:  Rs 5,000
– Tray:  Rs 2,500
– Arms + connectors:   Rs 6,000

So about Rs 1 lakh / $1300 or so for the whole thing, give or take 10-15%.

Is it cheap?  No.   But I also think that there is no point spending $400-500 / Rs 30,000-40,000 and getting something that is only a little better – you might as well just stay with what you have.  If you are going to upgrade, you might as well upgrade to something that is truly and noticeably better.

Also, it is better to spend a little more to buy the Right Stuff, as opposed to buying something cheaper which is a compromise, which you have to upgrade later.   Almost every photographer goes through a stage like this (eg, with tripods) – and virtually every experienced photographer later advises against it.

If you are on budget, consider buying used/NOS.  The previous generation camera and the previous generation housing can be had for substantial discounts and with relatively negligible difference in performance.    Used strobes can also be a good deal, but a bit harder to source in India.

In the grand scheme of things, look at it from the lifetime utility point of view.  Given how much a diving trip costs, the small increment you pay for better quality pales into insignificance, especially when you amortize it over the number of years of use you will get from it.

Anyway, I hope you found this article useful – do give us a follow on Facebook and Instagram, and perhaps share this link, if you did.

Where should you go scuba diving – havelock or neil island?

By Articles, Blogs, Dive Sites, Scuba Diving Andamans

Best Place for scuba diving in India

Where should you go Scuba Diving next?
Havelock Island (SwarapDweep) or Neil island (Shahid Dweep)

Where should you go Scuba Diving next? Here are the best dive sites in Havelock Island and Neil Island to help you decide where you should dive next.

Best Place for scuba diving in India
Havelock Dive Sites:

Dixon’s Pinnacle – Three pinnacles at different depths with abundant soft coral growth on them. Depths range from 17mtrs – 32mtrs. Schooling fish like snappers, fusiliers being hunted by trevally, banner fish, red tooth trigger fish, juvenile emperor angel fish, peacock mantis shrimp, Moray Eel, cleaner shrimps, turtle if you’re lucky. A dive site that is good irrespective of visibility because there’s so much to see. Ideal site for nitrox

Johnny’s Gorge – A gorge with rocks scattered around. Strong currents sometimes at this site. Depth ranges from 18mtrs – 30mtrs. Massive schools of snappers (different types), fusiliers being hunted by trevally, banner fish, White tip reef sharks, occasional turtle, Barracuda school, lovely swim throughs, shit loads of moon jellyfish in summer when waters get warmer…

Jackson’s Bar – Primarily a deep dive site ! A long bar which starts and stays at around 22-23mtrs with the edges dropping down to 30-35mtrs. Lots and lots of sting rays on the bar, soft coral, occasional rays gliding by, huge school of snappers, lots of Moray Eels… I can’t remember much about this site now cuz it’s been that long ?

The Wall – As the name suggests, a reef with one side dropping off to 60mtrs and the other side gently sloping down in the form of huge steps. Soft coral at depth but fish life concentrated between 9 – 15mtrs. Again, massive schools of fish like fusiliers, trevally, snappers, lionfish, angels, octopus, morays, crocodile flatheads, ghost pipefish, scorpion fish and a whole lot more. Easy dive site even if there is a strong current because you can simply hide from it. Perfect for all levels of divers. Except for try divers.

WhiteHouse Rock – Oh boy, where do I even start with this site. My favourite in the Andamans. Coming up from about 60 odd mtrs to as shallow as 8-9 mtrs, this dive site offers everything ! Insane variety of soft coral, fish life like groupers, residential turtles, octopus, Scorpion fish, Barracuda, trevally, rays if lucky. Swimming through the soft ‘black coral’ is like swimming through a forest, then around the corner the type of coral and colours start to change ( I need to look at the names of all those corals, forgot ) perfect site for deep,, Nitrox, fish id specialty dives…

S.S Inchket – Steam Ship Inchket was a Japanese cargo vessel which sank in 1950 (I can’t remember exact date) after hitting a huge rock. It took a long time for the ship to sink and so there were no casualties. The wreck is now an amazing site for all sorts of marine life. Coral, invertebrates, molluscs, reef fish, turtle -all reside here… The ship is broken in two parts and has a couple of narrow swim throughs, however, Penetrating the wreck entirely is not possible. The site ranges from 5mtrs at the bow to the deepest point being at the stern at 18mtrs. Visibility at this site is usually quite low but tends to surprise on some days. Currents if any are quite mild and most often because of thermoclines. A lovely site overall. One of the furthest dive sites from Havelock apart from WhiteHouse Rock, diving these sites requires planning based on the tide to have best conditions.

Best Place for scuba diving in India
Neil Dive Sites :

Junction – called junction because it’s right at the junction of Neil and Havelock ! This is a deep dive site and topography is similar to Jackson’s Bar. Starts off at 23mtrs and goes down to 33mtrs, this dive site has a lot of soft coral and Gorgonian Fan coral in particular. The currents at this site can get really strong and since the life is primarily deep, dives tend to be shorter than others. Huge school of fusiliers feeding on plankton and being hunted by trevally make for an epic dive even if it is short. Strong currents at the junction could be an ideal place for pelagics and so drifting off if you have plenty Air after running low on bottom time could be fruitful.

Bus Stop – Bus stop is a gently sloping dive site with patches of reef and sparkling white sand in-between the reefs. Most often always very clear water at this site. The patches of reef are home to the reef fish and Moray Eels. One particular area where there is a fan coral has around 35 lionfish and can make for quite a site if they are all out in the open and not hiding under the overhang. Sandy bottom is home to a carpet of garden eels facing the direction the current is coming from. This site ranges from 13-22mtrs and continues sloping gently..

Margarita’s Mischief – Another patch reef, this dive site has patches of reef of what is supposed to be volcanic rocks. The way the reef is formed makes the reef patches look like it were some ancient construction with very rectangular shaped rocks placed horizontally and vertically. In between these rocks are invertebrates, morays, sand filled with sting rays, anemones, feather stars, and beautifully colourful Anthias. Surgeon fish, snappers, banner fish, red tooth trigger fish always cloud up the visibility. One section on the reef is where a lot of hunting happens when the current and visibility are just right – most often ! The site is fairly flat and ranges from 12mtrs over the reef patches, to 16mtrs in the sand… Beautiful site for all certification levels.

Fish Slate – Jeeeejus ! Whatasite ! Suitable for all levels of divers from DSDs to experienced certified divers. This site is a reef fringing Neil Island. Has amazing coral life starting at very shallow depths of 5mtrs. Boulder and a variety of branching and table coral make for picturesque views. Visibility at this site is most often clear and schools of fish are massive. Schools of Midnight snappers, chubs, red tail butterfly fish, sweetlips and a whole lot of fusiliers always hovering over the reef are a perfect safety stop. Reticulated Dascyllus and freckled Hawkfish are always above and between the branches of the staghorn coral. If this site really wants to show off, then even a turtle or dugong may show up. The max depth at this site is 12mtrs and currents are mild. A site you should definitely dive at from Neil Island

Busy Buro – A site just out of bounds for open water certified divers in terms of depth. Starts at 16mtrs, this is a flattish reef of volcanic rock. Not too much coral at this site but lots and lots of fish. Schools of yellow snappers at the start, stingrays or marble rays in the sand, lobsters and cleaner shrimp in the crevices followed by white snappers and golden sweetlips at the other end of the rock at 19mtrs make this another site off Neil with different schooling fish. Trevally hunting fusiliers is exciting to watch at this site because of the coordination of the trevally hunting and fusiliers darting all of a sudden.. Currents could be from none to moderate.

K Rock – haven’t dived it much. Only a couple of times so far..

Anchor Line – Another reef fringing Neil Island, a site ideal for DSD and open water course divers. This site has a  Sandy bottom at 6mtrs and reef filled with live boulder and branching coral. Schooling fish doing their thing and the sand bed right by it, makes it a perfect dive site for beginner divers to watch and understand why one gets hooked to diving. Easy relaxing dive site !

Nursery – This site is on the western side of Neil Island and again is a reef fringing the island. Schooling fish, lobsters, stingrays, octopus and cuttlefish are what can be seen here. A site suitable for all levels of divers starting at 6mtrs and upto about 12mtrs.

How to Become a Better Scuba Diver

How to become a marine biologist – Tamanna Balachandran

By Andaman scuba diving course, Articles, PADI underwater naturalist, Scuba Diving Careers in India, Underwater Naturaliast Course

How to become a marine biologist?

Essay by Tamanna Balachandran
How the marine ecology camp from last year influenced her and her decision to become a marine biologist.

The first time I experienced what the ocean had to offer was when I scuba dived, in the waters of Havelock. Then, I was a ten year old girl who had just fulfilled a life-long dream, mesmerised by the beauty of the underwater world I had gotten my first peek into.

When I returned five years later, a couple inches taller but with the same zeal for marine exploration, I decided to take part in the marine ecology camp. Over the course of the camp, I learnt more about the ocean I adored, from how corals were formed to figuring out how a particular fish hunts just by observing its features. I went on dives, guided by Chetana, where I was able to observe the subtlest interactions and behaviours, like the goby fish protecting the shrimp as the shrimp dug a safe home for the two of them, or parrot fish sleeping in mucus bubbles of their own making. The more I learnt, the more I felt like I understood. And I began to view the ocean no longer as a picture perfect fantasy world, but as a living breathing ecosystem held together by fragile, intricate relationships between its biotic and abiotic components. I realised that our ocean is straining to deal with the effects of our actions and it is our responsibility to fix what we’ve caused.

After the camp, I learnt and explored even more, and firmed my decision to play my role in marine conservation more actively. I attended wildlife conferences, heard from experts that had spent decades studying animals. And I decided to share my thoughts with the world; in August of 2019, I gave my first TED talk, titled “Bulldozing Our Oceans’ Integrity”. I shared my concerns about the effect that commercial fishing techniques like trawling were having on our oceans. Having decided a career path that will lead me to becoming a marine biologist, it is vital I continue learning and sharing my ideas but, also starting to take action for the cause. And so, this summer as well I’m returning to Havelock to intern in their marine conservation programme.

Photo credits Umeed Mistry

How to Plan A Trip to the Andaman Islands – Zero Waste and Ecologically Responsible

By Articles, Misc

5 Eco-friendly Ways to Travel In the Andamans

How to Plan A Trip to the Andaman Islands

Emerald hues!   Picture credit: Umeed Mistry

Coral reefs, beaches and islands in the Andamans are now world famous for being some of the most beautiful and quiet places to be in nature. There is this ‘wow untouched paradise’ notion associated with these islands; a sense of which you get when you are flying into the islands. Approximately 2000 sq.km coral reef surrounds these islands. And a majority of these islands are densely forested and uninhabited by people.

The Andamans is a fairly remote island chain, nearly 1600 km away from Chennai but it is definitely a top tourist destination for people across the world. The remoteness coupled with the fact that well, these are islands, means that resources are limited and any waste that we generate goes nowhere!

top 5 Zero Water Ecologically Responsible Ways to Travel the Andaman Islands

Andaman Islands: The ‘untouched paraside’     Picture credit: Umeed Mistry

Waste management is currently unplanned here in the Andamans and this becomes a particularly big problem in Havelock which sees huge tourist turnover on a daily basis. Resorts need to call a truck to take garbage to a common unsegregated landfill. It is unclear how many resorts compost their organic waste (we do!). Many will simply incinerate their waste within their property or dig a hole in the beach outside their resort to bury the trash. Several people are trying to work with the administration to bring a waste management system in place but that will take time.

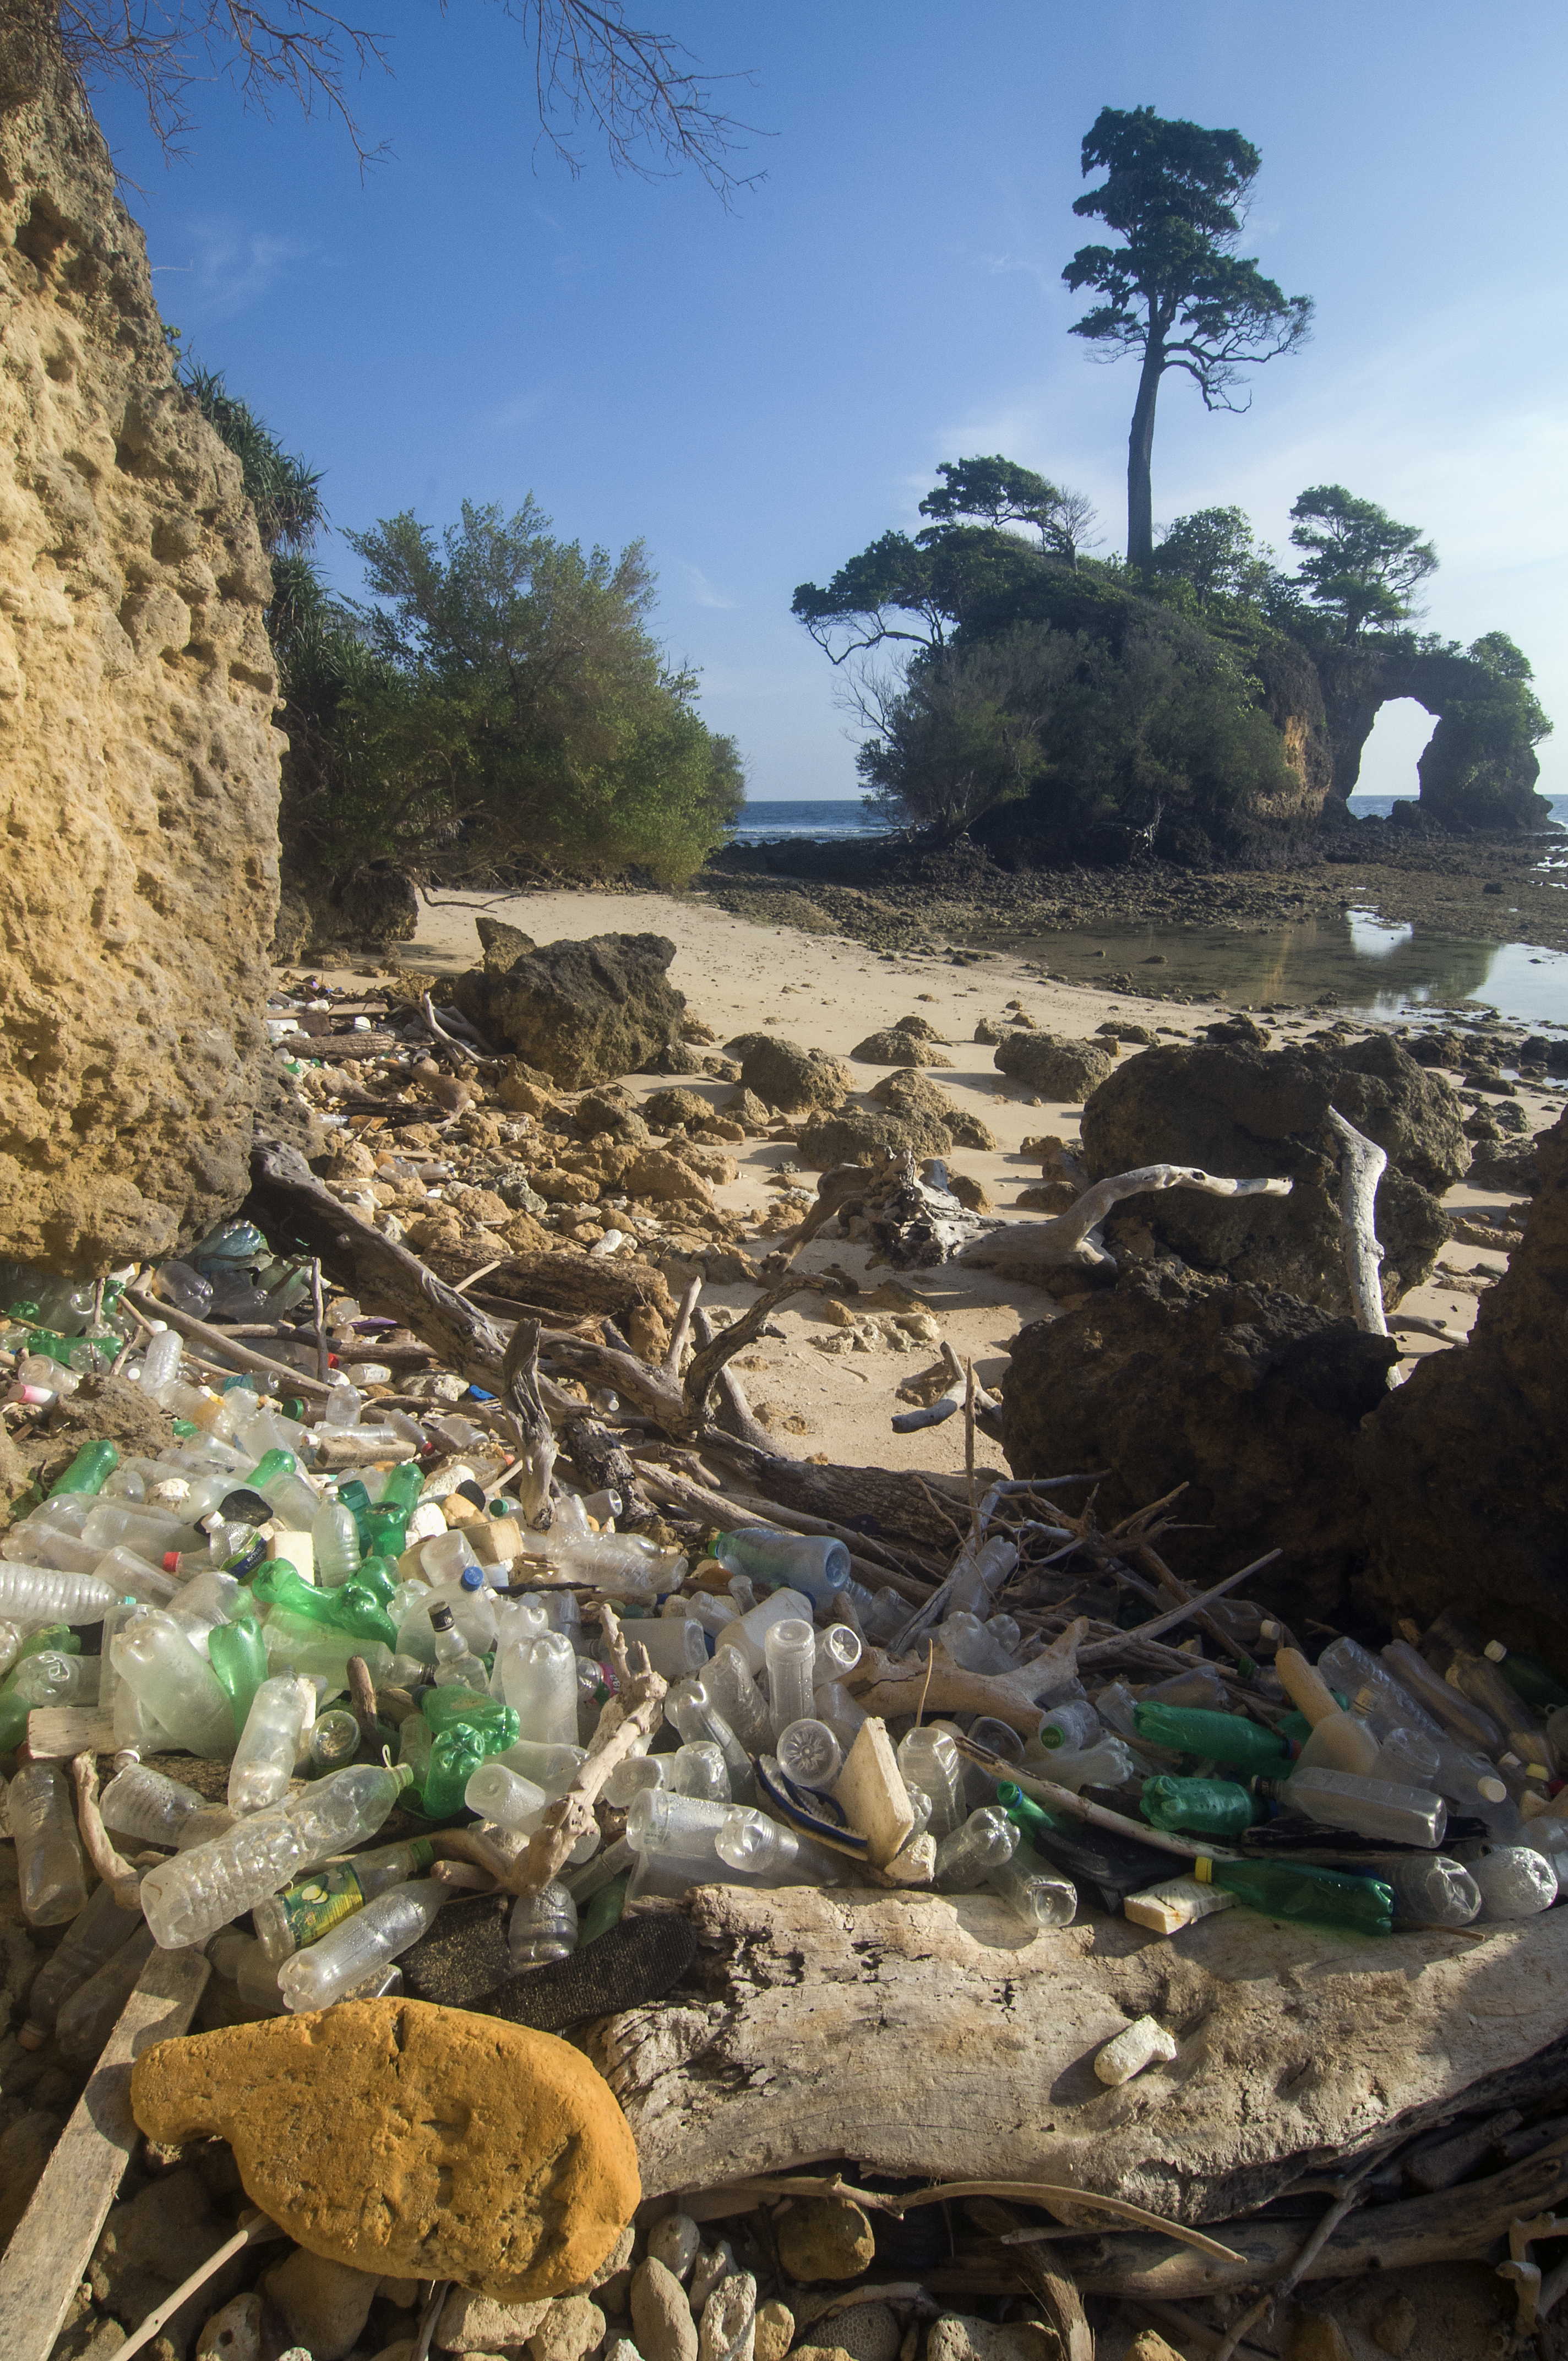
Platic dump in havelock - shahid dweep

Havelock’s trash solution is a burning landfill   Picture credit: Mahima Jaini

All of these factors make it all the more important for us to plan ecologically responsible holidays. Nothing short of ‘zero waste’!

DIVEIndia has been working in the Andamans for a long time now (16 yrs and counting) and we are still deeply in love with these islands. Here is a link to some of the ways we try to make our operation minimum impact: https://www.projectaware.org/updates/diveindia-what-we-are-doing-be-ecologically-responsible-dive-operation-andaman-islands

Now here are 5 ways in which you can plan and execute a zero waste ecologically responsibile holiday in the Andaman Islands. We always welcome recommendations from travellers so do feel free to give us feedback!

#1 RESORTS, RESTAURANTS AND DIVE CENTERS- DO YOUR RESEARCH BEFORE YOU COME!

There is plenty of information about resorts, restaurants and water sport operators available online, along with scores of reviews and limitless pictures! Be sure to support businesses that operate in an ecologically friendly manner.

This could include resorts and restaurants that make a concerted effort to AVOID single-use plastics, segregate their waste, compost their kitchen waste and DO NOT throw their trash in the sea. This even includes choosing dive and snorkelling boats that are careful not to throw their anchor on coral beds, shops that do not sell coral, shells, or similar prohibited items. Please choose restaurants that serve local and fresh seafood caught by local fishermen. Avoid places that sell shark-fin soup, or threatened animal meat. If possible, let the person know why they have lost your business and in the event of illegal items for sale, please inform the local authorities.

Air conditioning is a luxury on an island heavily dependent on the import of diesel, which is unsustainable and contributes significantly to warming. While it may be nice to have access to AC, we suggest reducing its use to only when absolutely needed, or even turning it on for an hour, instead of having it running all night. Besides, the sea breeze is the best AC!

#2 DON’T BRING DISPOSABLES, DON’T LEAVE BEHIND DISPOSABLES

It is a common practice for travellers to purchase disposable products before or on arrival that they will toss out at the end of their holiday before heading back home. Most often these products include toiletries – toothbrush, shampoo and soap sachets. Even if you throw these into your resort-provided dustbin, they will end up in a burning landfill or land up on the beach.

We recommend carrying reusable, travel-sized bottles topped up from your home supply of soaps, shampoos and other things that you can use one trip after another.

If you are in India:
Something like this: https://barenecessities.in/
Switch to a good bamboo brush, please: https://www.instagram.com/thegrassroute.co/?hl=en

#3 AVOID FASTFOOD, PARCELLING FOOD AND ORDERING IN

If you have travelled from mainland India or from across the globe to these islands, the last thing you want to be eating is packet chips and biscuits right? Why indulge in packet snacks and aerated drinks when there is plenty of amazing FRESH food and drink available? The Andamans is definitely a great destination for a food holiday, with delicious local cuisines, numerous restaurants and street food!

Top on our list of plastic trash collected from beaches are plastic bottles- coke, pepsi, water and others. The islands are known for fresh fruits, and fruit juice bars are everywhere- try those as mixers instead!

Last but not the least- please do not order-in food, or request for parcelling your meals. This results in unnecessary plastic and aluminium packing used for 15 minutes before it is on its way to the landfill. A majority of restaurants are walking distance from one another if you are feeling adventurous, and seconds away if you are the lazier kind and would rather rent a motorbike!

#4 BRING YOUR OWN METAL, CLOTH, REUSABLE ALTERNATIVES

Carry your own steel water bottle from home to avoid buying packaged drinking water during your holiday, starting right from the flight, in your hotel and to your flight back. In-flight attendants might seem surprised when you deny the complimentary plastic bottle but they will happily top up you water bottles. There are water filling stations available in the Port Blair airport and island ferry terminals. Hotels and most restaurants will provide you free filtered drinking water as well.

PLEASE carry your own cloth bags and reusable straws. Coconut water vendors and most restaurants still provide straws for fear of losing business. It is up to us as consumers to insist on NO STRAW while placing an order.

Look here for great non-plastic lifestyle alternatives: https://barenecessities.in/

#5 SAY NO TO SUNSCREEN

Say hi to natural oils (https://amzn.to/2ZvLVgy) instead!

We encourage people to avoid using sunscreen before a dive. Read this to understand what skin care products do to the marine life we go into the water to see: https://oceanservice.noaa.gov/news/sunscreen-corals.html

Wear full sleeve rash guards and full length swimsuits instead (for UV protection) and carry a hat and sunglasses for your surface intervals. All our boats also have roofs to give you shade.

#6 PICK NO SHELLS, LEAVE NO BUTTS

Yes we said 5 ways, but here is a number 6! Sea critters use seashells to protect themselves, and use them as homes. Collecting certain seashells, coral (alive and dead) not only endangers these marine animals, but is illegal as per the Wildlife Protection Act of India, 1972.

Cigarette butts take up to 10 years to break down (plastic bottles take 450 years at least), they stick around, like sore thumbs, long after we are gone. Please toss them into dustbins.

Be sure to check our website for more articles on how to have a reduced-waste lifestyle in general!

The Andamans Islands- Our treasured paradise   Picture credit: Chetana Babburjung Purushotham

Our dream is to continue to dive and explore these beautiful emerald islands for as long as we can. Thank you for helping us keep the Andaman Islands happy, healthy, safe and clean. <3

The Role of the Instructor in Creating Responsible Divers

By Articles
Quick question:   when was the last time you were on a dive boat and saw everyone diving by the book?    Getting familiar with their gear beforehand, planning their dives independently of the instructor, discussing contingency plans with their buddy, doing a thorough buddy check, staying close enough to the buddy to intervene within a few seconds in case of an emergency, etc?
I cannot think of a single time that has happened – and I have been guilty of lapses here myself.
So why does this happen?   Is it because divers don’t know the buddy system?     Or the usefulness of planning the dive?     Or even the value of getting  familiar with your gear before getting in the water with?        Unlikely – this is covered quite extensively in the Open Water course and most divers are quite familiar with all of this.   So is it a deliberate decision to take on additional risks for no reason, then?    I think we can agree that this is not the case either.
Before we go any further, let me touch upon the 3 domains of learning:
– Cognitive:   basically knowledge – in the context of diving, these refer to what you learn from reading the books, watching the videos or via discussions with the instructor
– Psychomotor:  these are the physical skills – for diving, how to clear the mask, how to achieve neutral buoyancy, how to put on your gear, etc.
– Affective:  this is your personal beliefs, attitudes and emotions – to put another way, what you consider important, what you pay attention to, etc
Within each domains, there are different levels of mastery (eg, in the Cognitive domain, being able to merely recite the correct answer, vs understand the reasoning behind it vs being apply to apply different pieces of knowledge to come up with an answer to an unfamiliar scenario, and so on), but that is not so relevant for now.
Instead, let’s focus on how the Open Water course is taught:   The student does the bulk of the theory via self-study (online, watching videos, reading the book, etc), with perhaps some additional sessions with an instructor re-visiting a few salient points and adding some additional content.   Then there is an exam to review the knowledge – which includes the importance of dive planning, of taking responsibility of your own safety, of the buddy system, of being conservative, etc.   That covers the Cognitive domain.  Then (or in parallel) the student goes into the water and completes the various skills needed to get certified as an Open Water diver.   That’s the Psychomotor domain right there.
What about the Affective domain?     Sure, in the course, a conscientious instructor will make sure the students plan their dives, stay close to their buddies, etc. etc.   But is that really the same as instilling the value of those things, to the point that it becomes something that the student takes seriously and integrates into his or her diving routine?     Very rarely so.
Simply put – while students leave with a knowledge of the buddy system, of dive planning, of getting familiar with their gear, etc., this is rarely internalized.   Then they go diving and see other divers being pretty loose about such things, and these things tend to get ignored – and repetition reduces the value even further.
And to some degree, this is understandable – in a typical course, often even teaching the psychomotor skills to a sufficient degree can be challenging.        So the instructor’s time is focused on knocking off the skills and making sure the student is safe during the course.    Furthermore, there is no checklist or requirement in the Standard manual of any agency that talks about this – after all, how can you measure this?    So often, instructors coming from a system where they aren’t mentored by more experienced instructors fail to even realize the importance of this, and end up following a checklist approach to teaching a  course:  ticking off every requirement individually but failing to integrate it into a cohesive whole.    To me, that is directly comparable to teaching someone to cook merely by teaching them to slice, dice, fry, grill, bake and roast separately, and not telling them how to put these things together.
But even when an instructor tries to teach it, they often to not face a lot of success:  the student diver is overloaded with theory and physical skills which they are doing right then – all this talk about dive planning, buddy system etc is merely theoretical noise for them, as they lack the experience to appreciate how and when it can be valuable (and typically, this realization often comes too late to be immediately useful – for example, only when you are low on air and your buddy is nowhere to be seen do you realize the value of the buddy system).
So what is the solution?     Fairly simple, really.
For one, spend some time in the Open Water course covering this.   Merely saying “remember, always stay with your buddy” or whatever isn’t going to cut it – you have to have an actual session on this.    A good way to do it is in an informal setting after the dives, where the instructor can discuss any lapses that may have happened in these areas and use that to segue into anecdotes from his or her diving experience, talk about specific situations that may have occurred on that dive site involving such lapses, etc.   Really hammer home the point, but in an interesting manner that catches the student’s interest.
Second, use the Advanced Open Water course to really drill this in.   Let’s face it, the curriculum for the Advanced Open Water course is fairly light on theory and skills – it is just meant to give the diver a taste of different types of dives, with more substantial theory in the corresponding Specialty course.    And by the time the student starts the AOW, s/he already has most of the basics of diving mastered (hopefully, anyway).    So they are less overloaded, and by virtue of having some diving experience already, more able to relate to a discussion on this diving behavior.
I have spent the last 10 years conducting one session in the Advanced  course focussed on what being an Advanced Diver entails – and PADI has also recently formalized that into their AOW curriculum.   However, this tends to get ignored a little bit as there is no checklist to measure how effective this session is, and instructors often tend to focus on what they consider the more material skills.    But really, teaching new divers to value the importance of these safe diving practices is probably the single biggest contribution an instructor can make to helping them continue to develop as divers.
What is the content covered in this discussion?  For me, it consists of, at minimum, the following:
–  How to do a self-assessment of skills at the start of every diving trip
–  The importance of checking gear – along with a practical workshop on different types of kit, what is useful where, etc.
–  Essential safety equipment to carry
–  What is sufficient real-world dive planning and the value of doing so
–  The mindset of being responsible for one’s own safety and diving with one’s comfort zone, with anecdotes on how peer pressure, etc. often make it difficult to do so
–  How to continue to improve one’s skills – short games one can play on each dive (air consumption, safety stop drills, etc)
–  How to balance staying within one’s comfort zone vs expanding that comfort zone and getting better as a diver
–  Learning the importance of saying “no, i will not dive”
–  The value of a buddy
–  How small issues can snowball into accidents
To me, a dive instructor’s role is to not just check off the list of skills in the course standards book, but to prepare the student diver to enjoy a lifetime of safe and fun-filled participation in the sport.   And that means passing on ownership of the diver’s safety from the instructor to the diver.   And this is a good way to do so.

Best Scuba Diving in Chennai

By Articles

Best Scuba Diving in Chennai

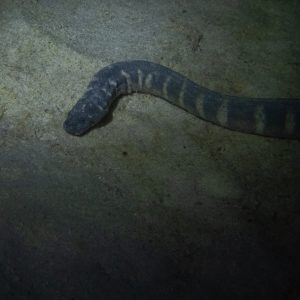
We had a run of a few clear and calm days in Chennai, and decided to go exploring.   However, as one would expect, on the day of the trip, it rained in the morning and the winds picked up.   But since we were all psyched for exploring, we went anyway.     The vis was fairly low, but the fishlife was amazing – and that ornate seasnake was a new one for me!      It definitely had us psyched about the potential, and we’ll be going out and shooting more often, that’s for sure.

Location: Chennai, India
Dive Site: Middle Rock

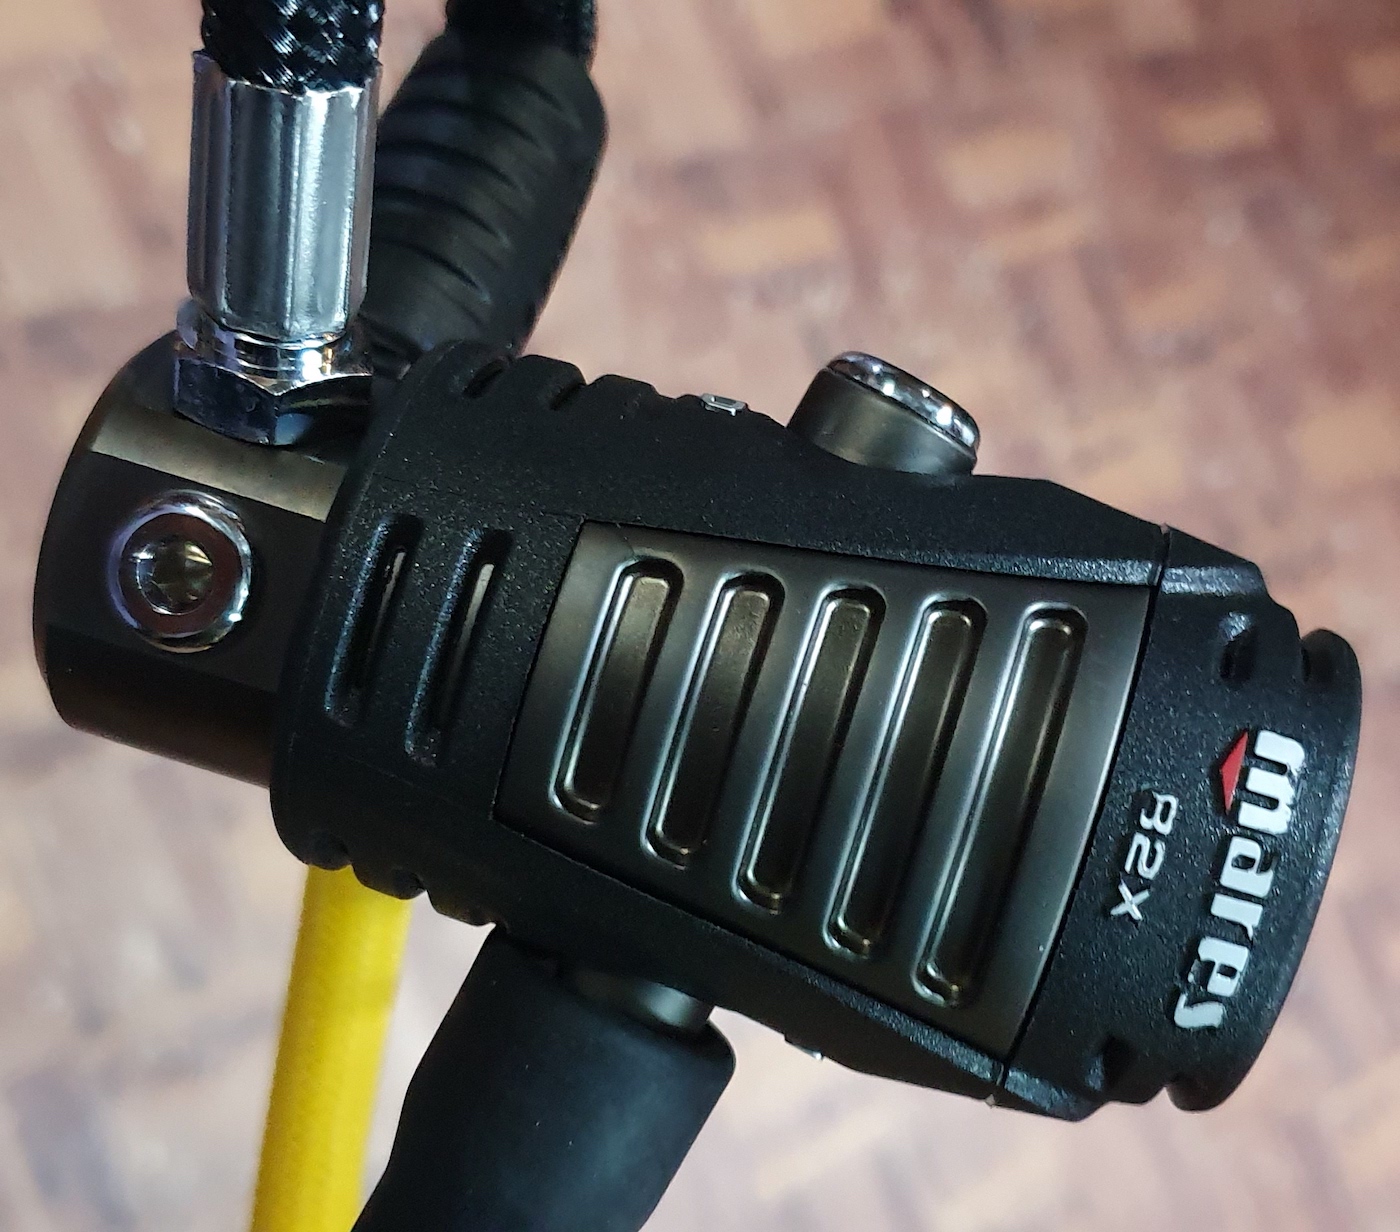
1st stage - mares epic adj 82x regulator

Mares Epic ADJ 82X Regulator Review

By Articles, Gear, Reviews
Testers:  Devatva Raj, Arijit Dasgupta
Article Text:  Vinnie
mares epic adj 82x regulator review
mares-diving-regulator-82x2
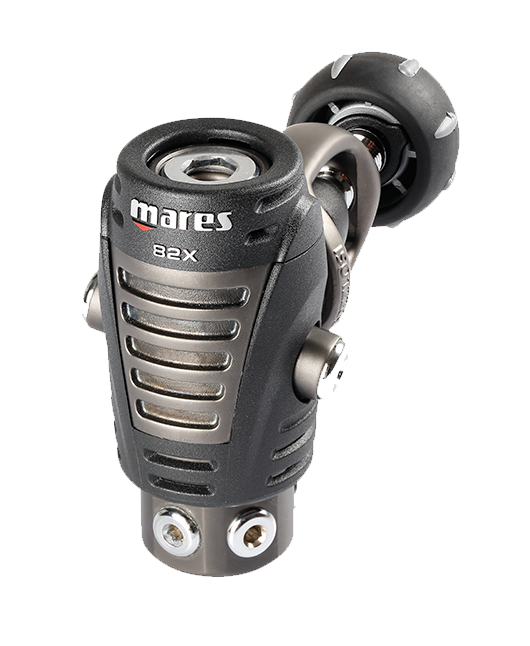
The Mares Epic ADJ 82X is the new heavyweight (in more ways than one) from Mares – their top of the line regulator.   As per Mares, it is certified for performance at 200m and proven to work at 400m and so of course, in true Mares fashion, they advertise it on their website as going “perfectly with the SSI Advanced Adventurer” course.   Cos, you know, nothing pairs as well with learning to dive to 30m as a top-end regulator designed to perform at the depths of the human ability.   I am sure the fact that Mares now owns SSI has nothing to do with this forced bit of cross-promotion.
Anyway, back to the regulator.   We tested the regulator at depth, and also compared it to our 2 benchmarks, the Aqualung Mikron (which is currently the easiest-breathing regulator we have ever tried) and the Apeks ATX (which, despite being a supposedly “entry-level” regulator, is my personal favorite as the best-value regulator in the market, period).  We also added the Mares Abyss (their former top-of-the-range model, used for a world-record-beating deep down to past 1000 feet) to see if the new boss was the same as, or better than, the old boss.      So read on.
Disclaimer:  this regulator was provided to us for testing, with the understanding that it would be sent back afterwards.    Whether we buy or test, our reviews are as honest as we can make them.   Unlike magazines who get their money from manufacturers and other advertisers, and so have an incentive to say positive things about everything, we do not get any financial benefits from anyone for our reviews.    Our organizational philosophy is to bend over backwards to make sure that we offer you the best advice (and service) that we can – after all, it is your choosing to dive/get gear from us that keeps us afloat as a business.
FEATURES 
The Mares website touts a lot of features, and is packed with TLAs (Three Lettered Acronyms) which make things sound very profound.   You can GRT (Go Read That) if you want to KST (Kill Some Time), but we’ll SIU (Sum It Up) for you.
The first stage is very sharp-looking balanced diaphragm design (pretty much the de facto standard for most high-end regulators), with a black coating on both the first and second stages.    This coating is done via PVD (Physical Vapor Deposition – a legit TLA, in case you were wondering), and not regular electroplating.   Why does that matter?  Because PVD coatings are typically a lot more resistant to scratches than simple electroplating, and is a better option for a piece of gear that is going to get banged around, jostled, rub against other metal, etc.:  it reduces the chances of unseemly scratches exposing the shiny metal below.      Further, the first stage isnt a simple cylindrical tube like most first stages, but has some decorative contours and curves on it, and in terms of looks, this is one the nicest-looking regulator that we have seen.      It is definitely going to turn heads on a dive boat – I wanted to buy it purely based on how nice it looked!
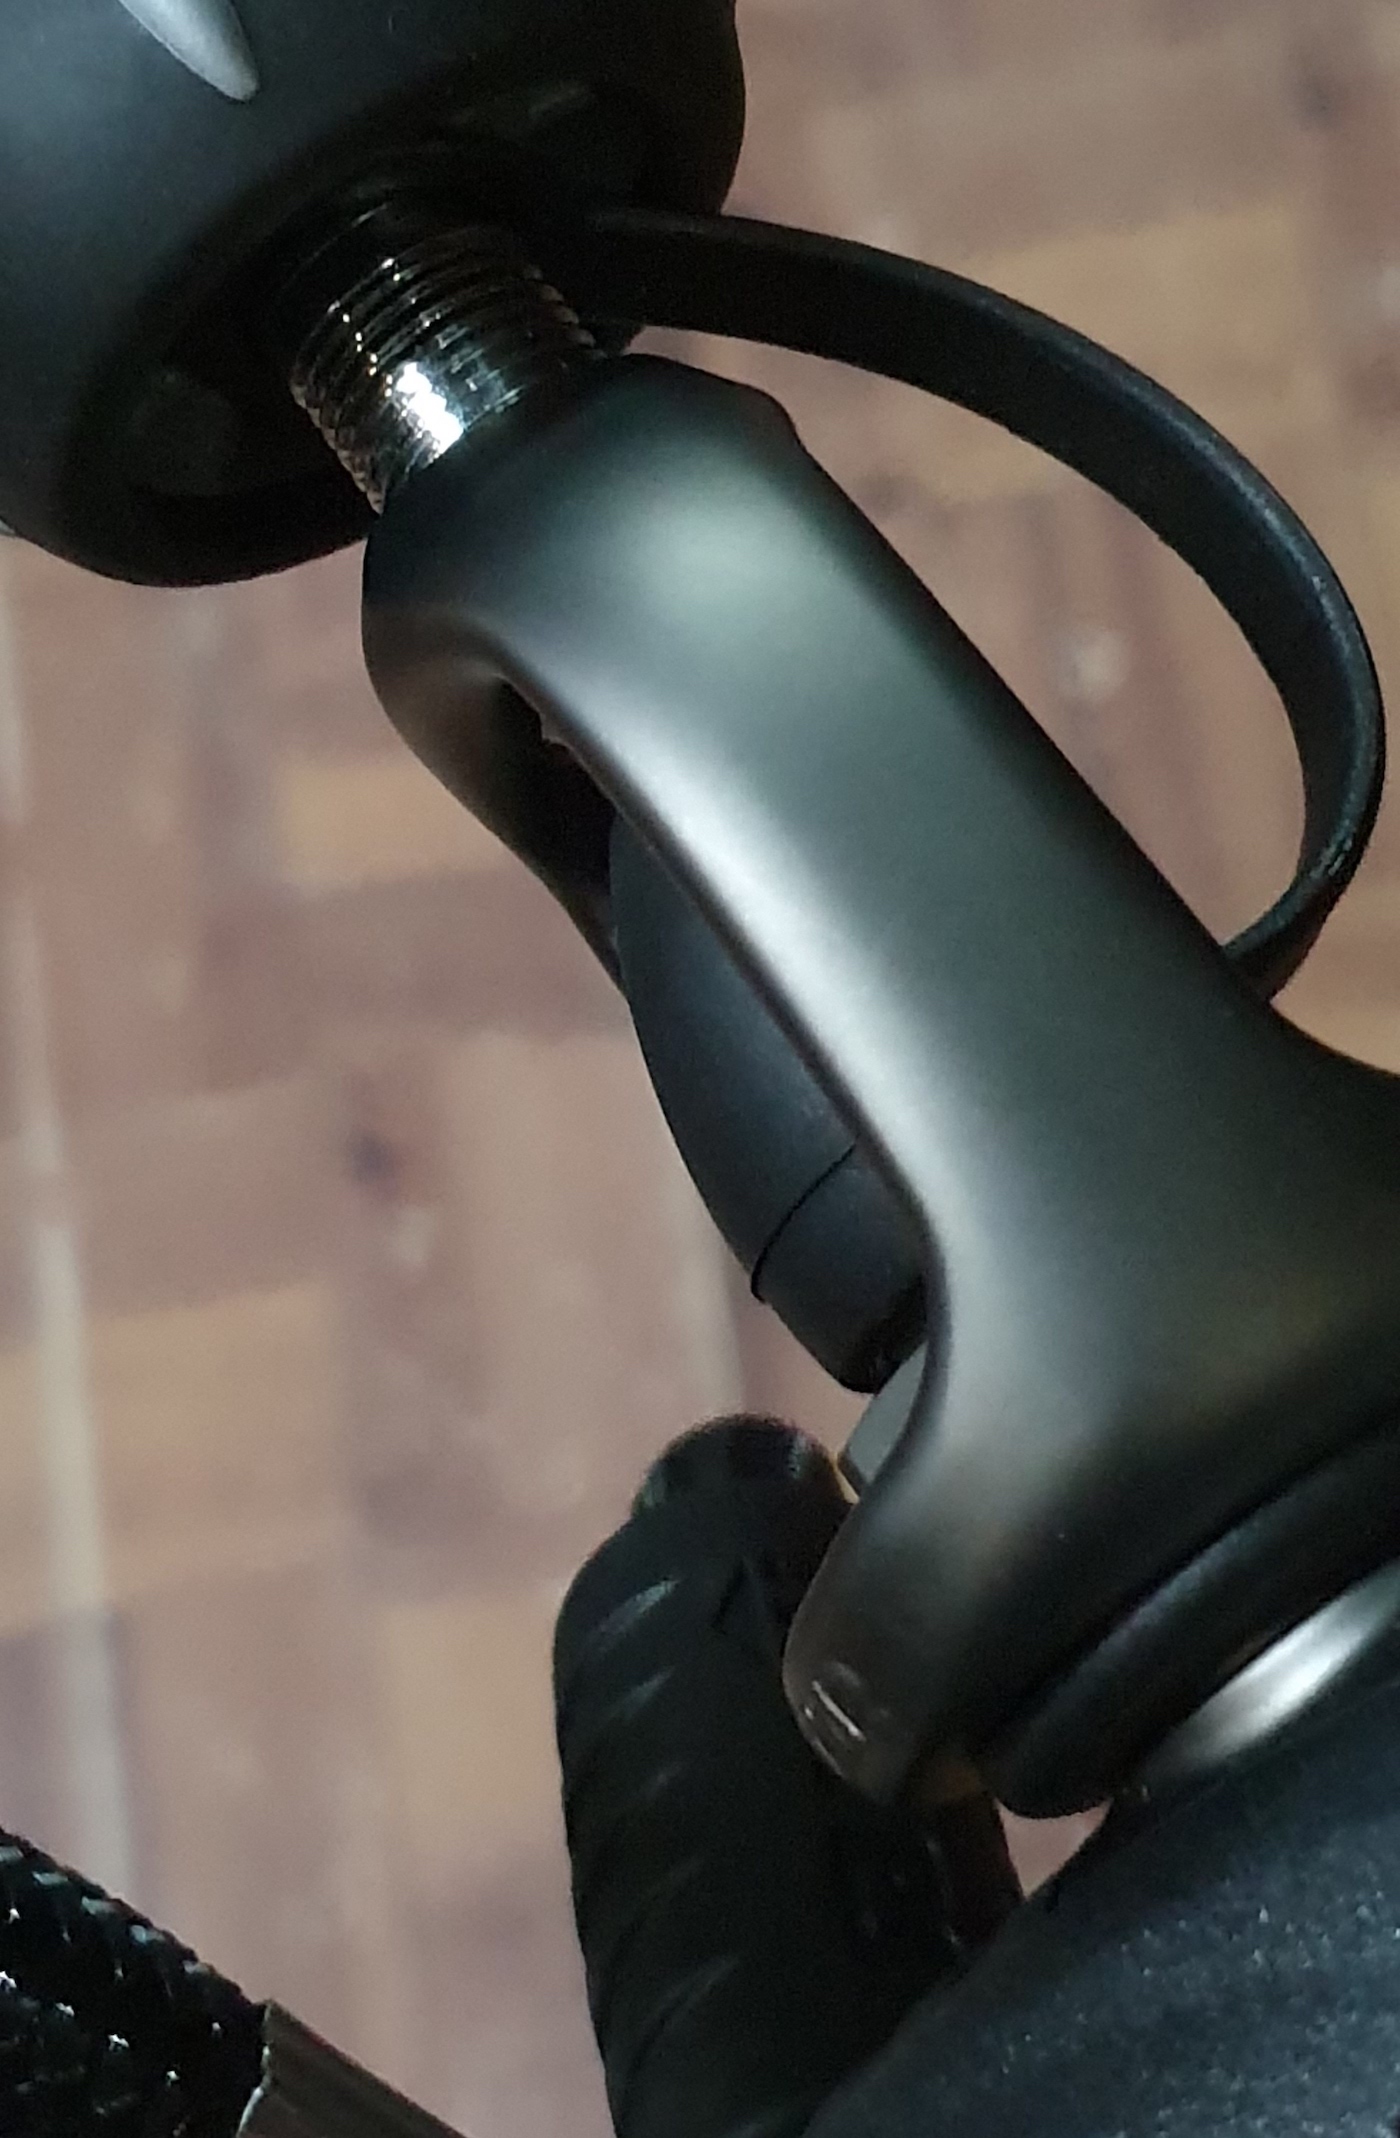
Moving in to more practical features – the first stage comes with 5 3/8” LP ports (4 on the sides, 1 vertical – possibly for that weird TIE Fighter style Mares Loop second stage, where the second stage hose comes from directly under the second stage and not the sides like normal: a design that carries on the proud tradition of the Mares Hub).   The 4 radial ports are on a swivel turret – a fancy way of saying it moves around – which reduces strain on the hoses and allows for more flexible routing.   The two 7/16” HP ports are also tilted – one downwards, for attaching a traditional SPG and one upwards, presumably to fit a remote air transmitter for your computer of choice.   The ports are also at a sensible enough distance that they are all usable (which is not true of atleast 2 other regulator models I can name).    Nicely done, Mares – perhaps you guys are ready to offer a scuba training course on product design now (SSI course, of course!).
1st stage - mares epic adj 82x regulator

First Stage – you can see the 2 differently-angled HP ports

angled port

You down with OPD?  Yeah, you know me.   Oh, and swivel turrets are good

Like the first stage, the second stage is also made of nickel and chrome plated brass, which is then also given the same PVD treatment.   It contains two adjustment mechanisms:
– A flow control knob at the junction between the first stage and the second stage (aka, VAD):   one position delivers maximum air flow, the other reduces the air flow to provide more of an on-demand breathing experience
– The left side of the second stage also has a more traditional breathing resistance control knob, which affects the amount of breathing resistance before the regulator supplies air.
Why would you ever want this to be anything less than maximum?    For one, regulators with very low breathing resistance/very high flow rate can often free-flow when held upside down.   Second, if you are a slow, deep breather (as you should be!), you dont want the regulator to pump out a lot of air – you want the air coming through the hose to match your inhalation duration and lung capacity.   More is better than less, but “just right” is even better.   Ask Goldilocks!     I generally tune my own regulator to have slightly lower flow rate and also a higher cracking pressure, as i want my inhale to be a measured process.    However, it is always nice to know that a lot more air awaits, merely a couple of knob turns away.
Like the sealed first stage, the second stage is also rated for cold water diving, and as is increasingly becoming the norm for top-of-the-line regulators, Mares provides a superflex (weave) hose as standard with the regulator.      So all in all, you have a very well-specced, well-designed and smart-looking regulator, as one would expect from a top-of-the-line model.
You can see the flow rate controller (VAD) and breathing resistance control knob above

About the only downside is the weight.    Mares states the weight of the first stage with a INT/Yoke vale as 964gm, and the second stage as 329gm, with a total weight, including the supplied regulator hose, of 1429gm.   This does not include the octopus or SPG.   If you get a DIN valve, the system weight reduces to 1255gm.    This is heavier than the XTX200 (1272gm for the INT/yoke), ATX (1130gm for the INT/yoke) and of course, the Aqualung Mikron spanks them all with its waif-like 893gm in the same INT/yoke configuration.    However, leaving aside the travel-oriented Mikron, the weight difference compared to other top of the line regulators isn’t that significant, and shouldn’t be an issue from a travel or packing point of view (and in the grand scheme of things, paying for an extra kg of excess baggage is not even a rounding error, compared to the overall cost of a typical dive holiday).

USE EXPERIENCE/ USER EXPERIENCE
Our intrepid testers, Dev and Arijit, bravely took this regulator, along with the ATX, the Abyss and the Mikron all the way to the depths of the ocean – or atleast, part of the way down the Wall and swapped multiple regulators back and forth at depths which we shall not reveal, while possibly being narced (the things we do in order to play with shiny gear – please don’t try this at home.   Dev and Arijit are professionals).   A fun time was had by all, and there may have been underwater giggling, but since we don’t have any videographic evidence, we wont pursue that line of discussion further.
The breathing from the Epic was as natural as it could get – regardless of depth.   There was no sense of strain at any time, and the regulator was comfortable to breathe at all head angles and body orientations.   Absolutely no complaints.     When turning both the flow control knob and the resistance control knob to their “max flow” positions, a slight tilt of the regulator did make it free flow – but this was with the regulator out of the mouth, and there is absolutely no reason for anyone to keep these 2 knobs set to max when the reg isnt being used.   So in practice, a non-issue.

The entire first stage, including the yoke clamp, is beautifully finished

The only issue was the weight of the second stage, which made a little awkward to hold in the mouth.   The VAD system didn’t help with the weight or the balance of the regulator in the mouth.      However, to put it in perspective, this wasnt extremely awkward or uncomfortable – merely noticeable.     It is something that you definitely notice if you were, oh, i don’t know, swapping back and forth between regulators at depth – but if you were always diving with the same regulator, I think you could probably get used to it as well.
In terms of comparisons:   the easiest regulator to breathe was, surprisingly, the Aqualung Mikron.     This small, plastic, lightweight wonder provided air like an excited Labrador provides drool – in vast, vast quantities and at the slightest provocation.    It has provided more than pretty much every other regulator we have tried – from the entry-level Aqualung Calypsos to the mighty Apex XTX200.    But it is also a little more prone to flee flowing, so there is a trade-off there (do note – it can be tuned to be a little less enthusiastic – a service we provide at no charge if you buy it from us).      The Epic 82X was the next best, with a near-perfect balance between breathing resistance and risk of free flow.    The ATX, the cheapest regulator on test by far, was, by comparison, slightly harder to breathe (but comfortable nonetheless) and did not free flow at all.   The Abyss was the hardest breathing of all 4 and by a significant margin.
So what does this mean?    Should you run and buy the model with the lowest breathing resistance and maximum flow?     In principle, yes, you want the regulator with the lowest breathing resistance and maximum flow.   If you are swimming in a current or working a bit harder, this gives you the comfort of knowing that you are not going to “overbreathe” your regulator.     However, there is a cost associated with this – tendency to free flow.     Keep in mind that the differences above end up being more noticeable when you do a direct comparison:   in normal use, you may not notice.     The Abyss in the test above is one of my two personal regulators, and I have never noticed or felt that it was hard to breathe.  Only when I did an A/B comparison with my XTX200 did I notice the difference.      And I actually prefer a very slight amount of breathing resistance over a fire-hose.   So personal preferences and breathing patterns, as discussed earlier, also play a role.
Of course, Mares being Mares, they are simply unable to release a product without adding atleast one completely unnecessary and useless quirk – but atleast they have gotten to the point where these quirks usually no longer affect the  functionality of the product, but just make you scratch your head and go “err.. what?”.   I call it the “Nipples on a Bull” feature.    For example, on the otherwise fantastic Mares SLS Pure, a BCD that I reviewed in some detail and loved enough to purchase, they added a ridiculously over-engineered locking mechanism for the weights that serves no practical purpose other than to be different and just adds one extra and un-needed step to locking in the weight pocket.   On the Epic 82X, this Nipple-on-a-Bull feature manifests itself in the purge valve.  Now, on most regulators, the external purge is something that you can press anywhere on the surface and it depresses straight in.   On the 82X, the purge valve doesn’t go straight in but pivots.     Mares is very proud of it, too – this is boldly listed as one of the features of the regulator, along with PVD, VAD, PAD, GFY and the rest of the alphabet soup.     Luckily, as i said above, this quirk doesn’t actually affect the functionality and by now, is becoming a somewhat endearing trait of the brand that I look forward to on my reviews.

This is like using a fork and knife to eat a pizza at Pizzeria da Michele – it doesn’t affect the taste of the pizza, thankfully

SUMMARY
Let me cut to the chase there:   this is a fantastic regulator.    Great looks, superb functionality, a lot of adjustability to meet individual breathing preferences and great ergonomics (and that too, from Mares – I guess the lessons from the Hub finally have been absorbed!).    To me, there is no question that it deserves its place in the pantheon of the top regulators in the market, such as the XTX200.
However, with a MRP of Rs 51,750 and even factoring in our special pricing on this (hint hint), this regulator faces the same challenge that other top-end regulators do:   is it worth paying the premium over something like the ATX, which is less than half the price?   This is a tough call.     The logical part of me says – the ATX is functional, it does everything you need it to do.      And you can make the same argument about entry-level computers like the Mares Smart and the Aqualung i200.   So why, then, do I dive with an XTX200 and an Abyss, and have a Shearwater Perdix (for which I paid full retail, btw)?     Hell, why do we drive anything more than an entry-level compact in cities, or pay a premium for anything?
It really is very simple:  the additional features, while not strictly essential, are definitely nice to have and make things a lot more enjoyable on a daily basis: the ability to adjust hose routing on the XTX200, the ability to fine-tune the air supply on the Epic 82X, the amazing display and features of the Perdix – these are things that you only appreciate when you have them.   And once you get used to it, you don’t really want to go back to a more utilitarian model.     So yes, while there are plenty of very reliable regulators at a lot lower price, the additional features, superior ergonomics and yes, the drop-dead good looks of the Mares Epic 82X certainly make it a regulator worth considering if you want something higher-end.
Especially at the great prices that we have for this model.   Contact us if you want to purchase this unit.

Life in the under-anemone: Because looking isn’t actually seeing

By PADI underwater naturalist, The Incredible Showcase, Underwater Naturaliast Course, Underwater Photography

It was sometime around the second week of March when something special had taken place, a big change, in the lives of a pair of false clownfish.

Living at about five meters deep over at Nemo’s reef, with beige-coloured tentacles and a pinkish-purple base, sat a magnificent sea anemone. Everything in the anemone appeared to be much the same, the fish couple who lived with it were busy cleaning out the anemone, lapping up its dying tentacles and parasites, while the anemone stood firmly guarding the couple from harm. The anemonefish were constantly swimming through the anemone’s tentacles, as was usual, to help it breathe. The anemone took what the anemonefish pooped and the fish ate what the anemone pooped. Business as usual! And yet something was markedly different in this anemone home.

There was something going on in one corner of the anemone that kept taking the fish pair back there. Was somebody hurt? Were they hiding a stash of food?

No… it was babies!

Attached to a cleared patch of rock under the tentacles of the anemone were hundreds of pairs of eyes on the tops of alien-like bodies, swaying gently in the current. In addition to protecting the anemone and themselves, the anemonefish must now protect their offspring.

They looked to be quite old already, which could only mean that they had been laid about a week before. It would be just a few more days before full moon would approach and larval fish would emerge. This meant focussed and dedicated work for the devoted father who was responsible for their care. While the female continued to take care of the anemone and daily duties, he concentrated on the babies, vigorously fanning the water with his fins, oxygenating, cleaning and doing everything required to make sure they survive. Both parents were invested.

A clownfish once hatched will have to live out its plankton phase until it is ready to find and settle into an anemone of its own and take on the forces of the underwater universe.

As dive professionals we sometimes think twice before talking about certain animals in our pre-dive briefings because we feel divers might find them too common or ordinary to be specifically mentioned. As we grow in dive experience, there is a natural tendency to create a hierarchy of coolness that we set for the marine life that is out there and the animals that we wish to see. Novelty, rarity and massiveness are definitely key factors in how high up in the list animals are positioned, and those that are seen often enough are further down, closer to the more ‘beginner diver stuff’.

There is definitely an appeal is seeing manta rays, sharks and turtles. They are enigmatic, extraordinary and closer to extinction than a damselfish. This extraordinary nature of the marine world, however, does not end here. There are so many phenomenal animals, interactions and communities that occur so commonly, we often fail to really see them entirely. And the loss is ours.

No two reefs or animals or behaviours are exactly the same when seen twice, even the most ordinary of things. That is just how dynamic the ocean truly is. Now you might ask- if there is so much beauty and wonder in the ordinary, why is it that we don’t see it? Perhaps we aren’t looking carefully enough. Perhaps we do not know what to look for. There is no special skill or talent required to do so. The secret is curiosity and patience. Wait, observe and soon, the animals will let you into their extraordinary world.

Text: Chetana Babburjung Purushotham |  Video: Umeed Mistry

A peek into the sex lives of the stonefish.

By PADI underwater naturalist, The Incredible Showcase

Do You Love Me? A peek into the sex lives of the stonefish.

Stonefishes may be the most venomous group of fishes in the world, they may have some of the most potent ‘verrucotoxin’ venom ever studied and a full blown sting from a stonefish might kill you in under an hour, but should one powerful defence mechanism define their entire existence?

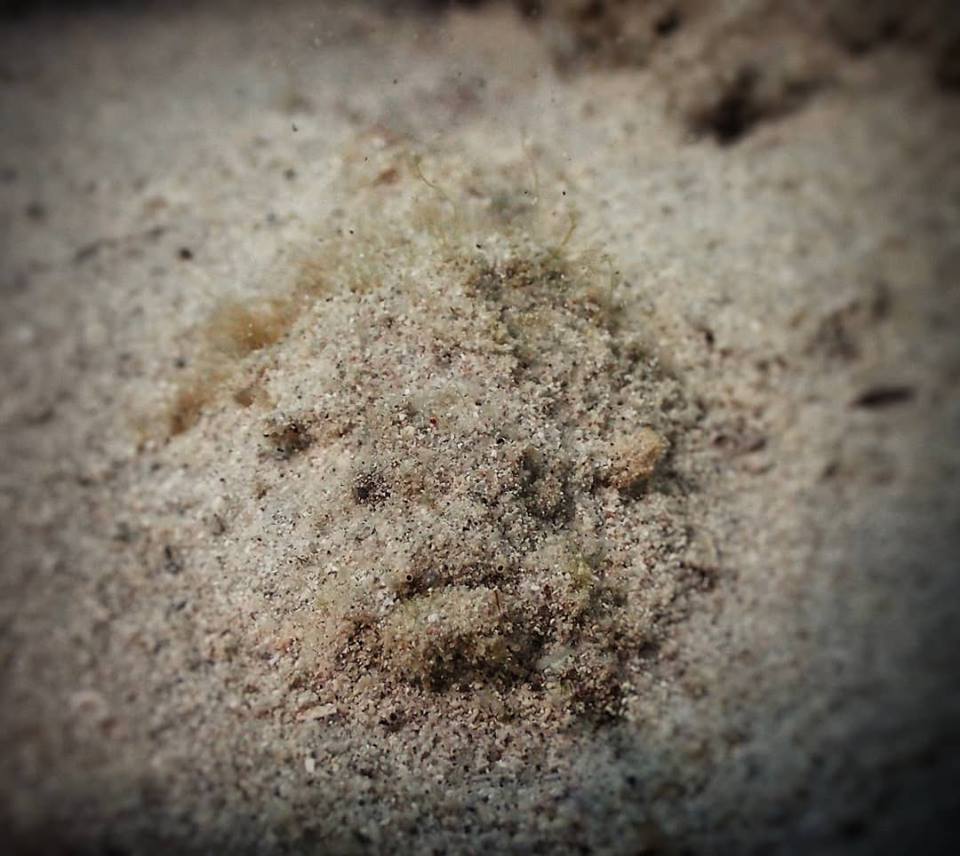
Stonefishes are primarily solitary animals that use extensive camouflage and stealth to catch their prey, typically fish. Seeing a stonefish fully out in the open is not particularly common, let alone finding one that is actively moving around. Unless it is mating season!

From what has been observed in the wild, stonefish males can go to elaborate lengths to court a female. Once she lays her egg mass on the seabed, the male swims over her eggs to deposit his sperms. Sometimes courtships can turn into an elaborate congregation where multiple males try to win over a female.

The stings produced by the dorsal spines of stonefish can induce intense pain, respiratory weakness, damage to the cardiovascular system, convulsions and paralysis, at times death. But hey, even the most brilliantly venomous animals can have a – I’m just a boy, standing in front of girl, asking her to love him’-moment, as we see in this beautiful video of male stonefish chasing after a female, captured by our stellar divemaster Saw Montu in Nemo’s Reef! Footage has been edited and tuned by Umeed Mistry J

Aren’t you rooting for the hobbling young male in this pair of lovers?!

Credits:
Image clicked by @Sahil Lokhandwala
Video by @Saw Montu(Instagram handle coming soon) & @Umeed Mistry

Mares Quattros

Buyer’s Guide to Scuba Fins

By Articles, Gear, Opinions, Training

BUYER’s GUIDE TO SCUBA FINS – WHY FINS MATTER AND HOW TO PICK THE RIGHT PAIR

(aka, an old dog learns something new)
By:  Vandit Kalia (Vinnie)

How to Buy Scuba Fins

Go to any scuba forum and ask what the most important bit of diving kit people should own, and the answer is going to be “mask”,  “dive computer” or “regulator”.       Makes sense.   Masks are probably the most likely point of discomfort on dives due to improper fit.   A dive computer is the single most important bit of kit that a diver should have, in order to take ownership of their safety (as anyone who has taken a course with me will have heard me reiterate over and over again).    And regulators – well, that is obvious as well.
Now, a little side trip.   I am a gadget freak, but I am also a creature of habit.   Once I find something that works with me, I stick with it.    I have been using Apeks regulators since the late 90s:  they’ve gone ice diving with me, they’ve been inside the Andrea Dorea with me, they’ve endured far more abuse than they should have and they have kept ticking.    Similarly, for fins, I have been using Cressi Masterfrogs since 2000 or 2001.   They are large, they are stiff, they don’t have any fancy technology, but they provide thrust and precision control like no other fins I have used (and have much better buoyancy characteristics in warm water than the only other fin that comes close, the Scubapro Jetfins).     So that’s what I dive with.   But Cressi, in their wisdom, discontinued the Masterfrogs and replaced them with a lineup of fairly mediocre, “me-too” fins which do not stand out in any way.
So that got me looking for a replacement when my current pair, which is 10 years old, finally wears out and I have been trying out various fins from Mares, Scubapro, Apeks and Technisub to find “The Next One” (@TM Vikas Nairi).
Vinnie’s Mythical Cressi Master Frogs

Vinnie’s Mythical Cressi Master Frogs

 And in my quest, I have realized something:  fins are probably THE most significantly under-rated piece of dive kit.   In theory, we all know the characteristics of fins:   they come in varying level of stiffness, buoyancy and thrust.   Some require faster kicks (equivalent to high turnover/cadence in running or cycling), some require slower, more powerful strokes (my Masterfrogs).    Some are easier to kick but top out at moderate thrust – others provide greater thrust but require more power.   Some are softer and easier on the legs.   Yet others use fancy technology (split fins, gears, channels, springs, etc).    And yet others are designed for flutter kick while some are better for frog kick.
But if think about it – if you rent gear, when was the last time you ever paid attention to which fins you were provided?    I mean, it certainly isn’t something I have prioritized as a “must own” item to other divers looking to buy their gear, focusing instead of mask/computer/regulator as well.    But recently, I have had a change in my thinking.
This realization was kindled over the course of two separate Diveindia Outbound trips – one to Malapascua and one to Maldives.   In both cases, I was using new fins.   In Malapascua, I was simply unable to get into horizontal trim, despite the rest of my kit being my usual gear.     My legs would keep sinking and since i was diving without any weights, I had no real option to adjust my trim.       That made photography a singularly uncomfortable experience, my air consumption was about 20-25% higher than normal and throughout the dive, I felt as though I was a newly-minted Open Water diver again.   In Maldives, the trim was better but in a current, I outkicked my fins, and possibly for the first time in 2 decades, I was struggling to move in a current (the Cressis havent seen a current they cannot wallop – if a diver has the leg strength to swim against the current, the Cressis will make it happen):  I was working far harder and moving far too slowly than I could/should have.
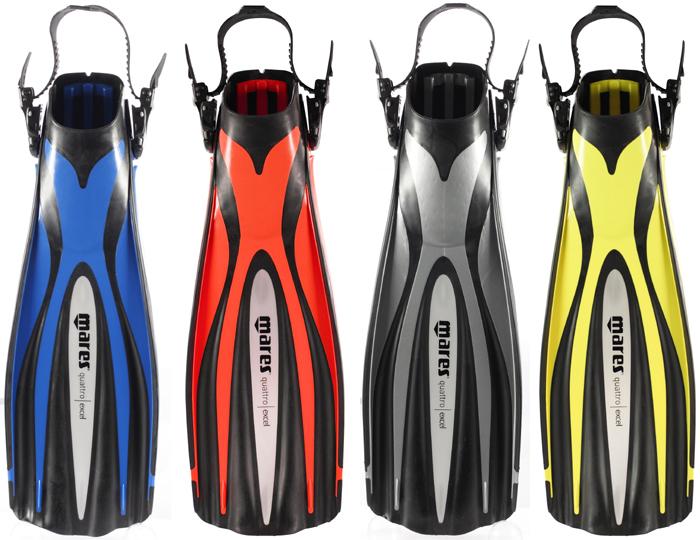
Mares Quattros

Mares Quattros

 I’ve dived in BCDs that are too large or too small for me (including an XS – and those of you who have me know that at 6′ and 82kg, I am definitely NOT an XS).   I’ve worn masks that pinch my nose, used regs with super-high breathing resistance and dived while overweighted by 3-4 kg (although not all at the same time).   Did I enjoy any of these experiences?  Not particularly, but it wasn’t a particularly big deal.    So while I do prefer the comfort of my own gear, I can make do with pretty much anything that is reasonably close.     Except with these fins – with these fins, it wasnt just a mental thing.   I was physically affected during my diving.
So that got me thinking – if my choice of fins messed up my diving zen so badly, what are the implications for all the people who have recently learned to dive, who are going on diving trips and are wearing fins that may not be optimal for them?       To what degree is a diver’s trim (and therefore buoyancy), breathing rate and general comfort level in the water, especially in currents, affected by poorly-matching fins?
So we modified our buoyancy specialty in certain cases to make sure we spent time experimenting with various types of fins – and we tried this with divers of varying levels (beginner to over a hundred dives).    And it has proven to be a game-changer for a significant majority of the divers – in most cases, there was ONE Goldilocks fins which just made the entire system (BCD, weight distribution, kicking, buoyancy) work together in a significantly better way.
And really, it makes sense.      Fins may not be very heavy, but they are the furthest item from your center of buoyancy/gravity and so exert the greatest moment on your trim.    A small change in the buoyancy characteristic of your fin can have a greater impact than a kilo extra on your belt.     Then add to that your kicking style – do you prefer slower, more powerful strokes or shorter, faster kicks, and which affects your breathing pattern more?      The right fins address all these issues.
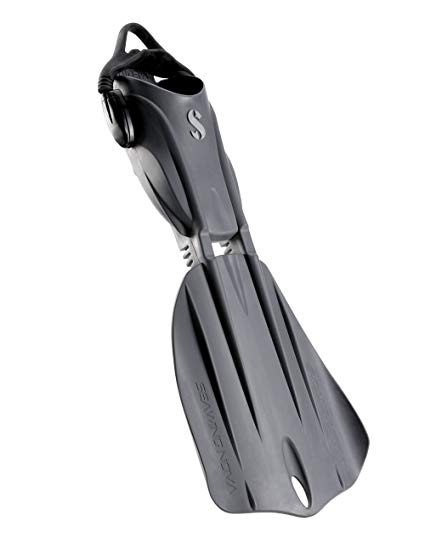
Scubapro Seawing Novas

Scubapro Seawing Novas

 So what is the takeaway for you as a diver?   If you have ever had buoyancy and trim issues, or struggled in a current, look into not just weighting and distribution, but also fins as a source of fixing these problems.     Even if you have not had any issues with currents, it may still be worth trying to find the Right Fin – it may not be as critical but going from an Ok Pair to The Right Pair is very similar from going from being almost properly weighted to properly weighted – it feels significantly better.
To help you with the process of evaluating fins, I have created a framework of 5 attributes for evaluating fins.

HOW TO EVALUATE FINS

The following 5 attributes of a fin provide insights into its performance and should help you narrow down on fins that work best for you:

1) Thrust:   This is a measure of how much propulsion a fin provides with a single kick, and depends on the length of the fin, its stiffness as well as the overall design.

2)  Beat Rate:   This is a measure of how frequently you have to kick in order to get the optimal propulsion.     A direct analogy would be running, where your speed depends on your stride length and turnover or how many steps per minute you take.   Beat rate is the equivalent of steps per minute here, with thrust being the equivalent of stride length.
3)  Stiffness:    This is a measure of how much force you have to (or can) exert per kick for optimal propulsion.   In general, greater stiffness typically results in greater thrust, but manufacturers are always trying to find clever designs to improve the thrust:stiffness ratio.
4)   Buoyancy:   This tells you whether the fin floats or sinks in the water – which can affect your trim.   These days, most fins tend to be more or less neutrally buoyant, although a few notable exceptions do exist.
5)   Bite:   This is a term i have coined to describe how well you “feel” the water when you kick – your proprioception, in other words.     To use an analogy – when you do the front crawl, you learn to develop a feel for “holding the water” in your hand when doing the pull part of the stroke.    Similarly, you have a better feel of the water with some fins than with others.   That is bite.    Why does this matter?   This is essential when you are trying to make small precise movements in limited space – eg, inside a shipwreck or while engaging in underwater photography.
So what does all this mean?
Thrust and beat rate together give you a measure of the propulsion provided by a pair of fins.      You can get the same propulsion by using a high-thrust fins kicked at a low rate (the equivalent of mashing a big gear on a bicycle) or by using low-thrust fins kicked at a high rate (high cadence spinning).      The former is easier on your lungs but harder on your legs – the latter will increase your HR to some degree, but is easier on your legs.
Stiffness tells you how much effort is required to get that propulsion.    Actually, to some degree, stiffness and beat rate are linked – stiff fins tend to lend themselves to lower beat rates, whereas softer fins tend to lend themselves to higher beat rates.   But I feel it is worthwhile enough to keep stiffness as a separate category because it doesn’t just affect propulsion but also leg comfort.   Also, it is possible to “outkick” your fin if you exert a larger effort than the fin’s stiffness allows it to handle – in such cases, it is better to increase the beat rate rather than effort per kick.
The last 2 characteristics aren’t about propulsion but about control and balance in the water.   Buoyancy of fins tells you how it will impact your trim in the water, as explained earlier in this article.      There is no right or wrong attribute here – a lot depends on your trim characteristics (defined by your body and your gear).
And lastly, bite gives you an indication of how much precise control you have in the water with the fins.     I created this term while trying to understand why I liked some fins more than others even though both of them were equally effective in the water.    The words that came into my mind were “mushy” vs “precise” – and it is a significant factor in determining how good a pair of fins feels while diving.

OTHER FEATURES OF FINS

 In addition to the attributes mentioned, there are other aspects of fins that also go into a purchase decision.
The first of these is whether you want a Full Foot fin or an Open Heel fin – the former are meant to be worn on bare feet, whereas the latter require the diver to wear booties (or at the very least, neoprene socks).      The benefit of full foot fins is that they can be very comfortable and feel very secure – and also require one less piece of equipment.    On the flip side, fit is very important – if the foot pocket doesn’t match your foot shape and is too loose or tight, it can hurt or result in blisters.     Open heel fins are more flexible in terms of fit, and also allow you the ability to wear the fins over a broader range of water temperatures.   Plus, if you are doing shore dives, dive booties are very nice to have – especially on rocky water entries.
Another point to consider is fin size and weight – in this day and age of ever-miserly baggage allowances, large fins can be harder to travel with.     I am always on the quest for smaller and more compact fins – but so far, I have yet to find one where the smaller size comes with no compromises (there are a couple of fins where the compromise can be acceptable in some conditions – but not universally so).      And given the cost of a diving trip, the slight increase in inconvenience of taking the Right Fins is significantly outweighed by increased comfort when diving.   Your mileage may vary, of course.
The last item is what I call “high tech features”:  fancy designs meant to shift the thrust-to-effort ratio.  These include gears to adjust stiffness, split fins, funky designs, etc.    I have tried a bunch of them, and honestly, been underwhelmed – however, I also admit that while I like playing with new tech, it also takes convincing to get me to give up what has worked well in favor of the latest-and-greatest:  especially when this latest-and-greatest often comes at a much higher cost.   As with most things, personal preferences come into play.    Personally, instead of just looking at the technology, I would evaluate fins like this using the 5 attributes I had mentioned earlier – ultimately, that is what matters, and not how “funky” the fins are.   Obviously, if all else is equal, you can always choose to get the fins that are more high-tech:  nothing wrong with wanting cool tech.


SELECTING THE RIGHT SET OF FINS FOR YOU

 So now that you have read all of this, how do you actually select the correct fins for you?
Unfortunately, there is no clear answer to this.   Because we all vary in our dive skills, personal fitness, swimming skills, buoyancy characteristics and kicking style, what works for me will not necessarily work for you – and by the same token. a set of fins that I discount may very well be the best fins ever for you.
The only way to find the right set of fins is to try out as many pairs as possible.   The next time you go diving, try out a few different fins, if you can.   Note the model and try to evaluate how they feel in terms of thrust, beat rate, stiffness, buoyancy and bite.     Make a note of what you like about it and what you don’t (sometimes, you may have to try more than one set of fins before you start noticing these differences).      You will note that some fins feel a lot better and improve your comfort in the water drastically – if possible, try to identify what particular aspect of those fins is contributing to this.
To help people with this process, we have also put together a basket of Recommended Fins – these are available to try out in our dive centers in the Andamans, as well as at our @Home dive centers in Delhi, Bombay, Bangalore and Chennai.      We have selected fins that, from experience, have worked well for most divers – each of these fins are slightly different from the other in terms of attributes, and we feel confident that most divers will be able to find something that works for them from this set.
Contact us to set up an appointment to try this out!

Author:   Vandit Kalia (Vinnie)

Vinnie is the founder of DIVEIndia Scuba & Resorts, and has been diving since 1991 and teaching since 2oo1.   A NAUI Course Director, SSI Instructor Trainer and TDI trimix diver, he is also a keen gadget head and always interested in digging deeper into the nuances of dive equipment and trying to figure out what works, what doesn’t and more importantly, why.

Dive Site: Nemo’s Reef

By Articles, Blogs, Dive Sites, PADI underwater naturalist

DIVE Site: Nemo’s Reef

DIVE PROFILE

MAX DEPTH: 15-20 meters
AVERAGE DEPTH: 5-8 meters
BOTTOM TIME: 45 – 60 minutes

About the Dive Site: Nemo’s Reef

Nemo’s reef. Where do we begin to describe this extremely familiar yet totally mysterious place! A shore entry site, it opens into a swimming pool-like setting with shallow water, white sand and a baby reef (1-3 meters). It then splits into two long fringing reefs on either side of the shallow sandy pool. The Andaman and Nicobar Islands harbours over 2000 sq.km of coral reefs and a majority of this area fringes along islands. Thick forests, mangroves and rocky shores make access difficult in most places and this is where Nemo’s reef is popular. Easy entry and exits, not requiring long surface swims. It is also fairly sheltered from winds through most of the year.

On an average day at Nemo’s, we typically get to see mixed schools of reef fish, everything from surgeonfish, rabbitfish, parrotfish, butterflyfish, bannerfish and snappers, sweetlips queenfish and chubs, to hunting trevallies, needlefish and barracudas. Five species of anemonefish can be seen here, easily, giving this reef its name. Cephalopods like the octopus, squid and cuttlefish are residents at nemo’s with regularly used dens and rubble patches. The banded sea kraits and the more estuarine file snake come through regularly, along with the beautiful Kuhl’s sting ray. Molluscs, crinoids, crustaceans, sponges polychaetes and several other invertebrate groups thrive here as well.

High tide is a great time to dive because the water is usually clear and we get to see the sloping topography of the reef, however, the marine life tends to concentrate into dramatic densities when the tide recedes, the water level comes down and visibility drops.

The topography of the dive site makes it ideal for us to begin dive courses and take people on their first ever SCUBA diving experience, but by no means is Nemo’s reef just a training space. The shallow profile of this reef allows us to stay until we hit the reserve on our tanks without having to worry about no-decompression limits. So this gives us on average an estimated 60-80 minute underwater for fun divers who are keen on exploring the rocks and sands for crazy macro life- day and night!

While we love all of our dive sites dearly, it is here that most of us come back nodding in awe-inspired disbelief, thinking “did we really just see that animal in the Andamans? And in Nemo’s reef?” Starting with flying gurnads, ornate ghost pipefish, robust ghost pipefish, devil scorpionfish, angler flounders, honeycomb moray eels, seahorses, bizarre nudibranchs, sea moths, skeleton shrimps and as of a week ago- painted frogfish! While a bunch of these are potentially only briefly passing through, we are certain that most are resident and have missed our eye from having not looked carefully enough or for long enough! Shore dives at Nemo’s reef are very easy to organise and we are never limited by space. So if you are keen on shore diving, our divemasters would be thrilled to take you. It gives us a chance to continue exploring this crazy reef!

Pictures clicked at Dive Site: Nemo’s Reef, Andamans
by Dev 

Dining etiquette for an Octopus | The Incredibles Showcase

By Blogs, PADI underwater naturalist, The Incredible Showcase, Underwater Naturaliast Course, Underwater Photography

How do octopus eat their prey

How do octopus eat their prey

Dining etiquette for an octopus: Dig in with all hands!

Nemo’s reef is a fantastic place to spend hours watching these animals just,be. We follow them quietly, as they go about doing their daily things around the shallows of Nemo’s. That alone is one lifetime of diving right there! People often make the mistake of getting way too close to an octopus. Sure, it is sitting there in its crevice, changing colour in response to divers and that is rather cool! But what would be even cooler and perhaps much less disruptive for the octopus, is if we were to curb the excitement and give the animal enough space to get back to its life. This can in fact be plenty times more extraordinary a sight to behold than a tense octopus hiding in a hole! Here we see a young octopus that frequents the ‘first barrel sponge rocks’ area at Nemo’s reef. All of us have met this octopus over the past few weeks and she/he is now very comfortable around divers. When we first saw it, a diver was ten inches away from it with a camera, as it hid inside a crevice, perhaps thinking to itself – Hurry up mister, I’m starving and you’re in my way. As soon as said mister left the scene, the octopus was on the move! We suppose one can identity an octopus with a ravenous appetite by how thoroughly it inspects each rock, tickling every crevice simultaneously with every arm. Note how it expands each arm, turning its entire body in to a large web-like umbrella to trap any molluscs, crustaceans or tiny fish that get flushed out during its invasion.Once prey is in hand, an octopus might crush it, pry it open, or drill a hole in it, drain in some toxins or simply slurp it up, depending on the nature of its catch. Owing to its highly efficient, powerful and thorough hunting technique, an octopus on the hunt is almost always surrounded by a mob of other fish-a mix of allies and competitors possibly. Here we see a few juvenile groupers, wrasses, goatfishes and a tiny cloud of exasperated damsels. Isn’t this simply fascinating?

Video credit: Chetana Purushotham

The Angler Flounder (Asterorombus Intermedius)

By Blogs, PADI underwater naturalist, The Incredible Showcase, Underwater Naturaliast Course

The Art & Science Of Floundering About


We all know what a flounder is, and we’ve surely heard of anglerfish, but what in the world is an angler flounder? As though the flounder and angler were each not sci-fi enough, evolution has fashioned this beautiful animal, a.k.a Asterorombus intermedius!

With intricate and elaborate head-to-toe camouflage and a stiff lure protruding from the tip of its mouth, the angler flounder takes the most effective adaptations of two very good predators and blends into something like a super-predator of the sandy bottom. But, why go through all that effort? Is procuring a meal really that difficult in the wild?

For many of us humans these days, finding food would probably mean, cooking a meal after heading over to the market, going to a restaurant, opening the fridge for a quick bite, making a phone call and ordering in (in increasing order of tech sophistication but in decreasing order of per capita effort?). You and I don’t really have to forage, chase or hunt for our food, sustenance and survival. But animals in the wild do, every single time, requiring sophistication and effort! As prey get smarter and harder to catch, predators have no choice but to evolve better strategies to make sure they have that meal on their plate. It is never an overkill.

The angler flounder on the hunt has heightened senses- it swivels each eye, keeping a look out for potential prey- a watchman goby or partner shrimp maybe? Hidden from view by its granular pattern and colour, carefully it crawls over the sandy bottom with webbed fins, waving its bait, casually but concertedly-come fishy-fishy-fishy…

Camouflage for a flounder is extremely effective but also a lot of work. There is the technical aspect of the chromatophores and pigments that need to be constantly redistributed amongst the flounder’s tissues, just the right amount and at just the right time, to give it the right colour, texture and hue. This requires the thinking aspect, where should I position myself? What should I blend in as? Am I on rock or sand or both? Of course, this is where the cleverness aspect comes in- there comes the goby, it is going to turn in my direction in…3…2…1… BAMMM! Meal.

While we might appreciate the beauty of these animals and their wild schemes, it helps to also appreciate all that goes in the making. Take something like camouflage, for instance. The next time you are trying to get too close to a flounder or scorpionfish or any camouflaged animal for that matter, for the thrill of a better view, a photograph or to instigate movement, remember that disturbing it will not only blow its cover, but also cost it a day’s meal!

Video Credit: Umeed Mistry
Follow him on Facebook & Instagram

Dive Site: Pilot Reef

By Articles, Blogs, Dive Sites

DIVE Site: Pilot Reef

DIVE PROFILE

MAX DEPTH: 12 -18 – 25 meters depending on diver verification level
AVERAGE DEPTH: 9-14 meters
BOTTOM TIME: 45 – 60 minutes

About the Dive Site: Pilot Reef

North Pilot is a fairly big dive site falling within an even larger patch reef known in old topographical maps as Pilot Reef. While our boats are moored to the dive site, we often times choose to drift and explore the dive site and have the boat pick us up. This reef is rocky and stands tall from the sand bed like a fortress. The part of north pilot we dive at has beautiful encrusting and digitate coral starting at about 8 meters, down to 15 meters.

The best part about this dive is looking in all the crevices and tiny caves for hidden
surprises- lobsters, giant and white-eyed moray eels, sweepers, soldierfish and the
infrequent resting shark. The orange-spine unicornfish, longnose butterflyfish and
trumpetfish are pilot reef residents and are almost never seen in our other dive sites.

North pilot also has great macro life, especially crustaceans and molluscs. Scorpionfish, flatheads and stonefish are very common here but a challenge to spot amidst the complex topography but, well, therein lies the fun. ?

For folks who tend to lose their way in this reef, always keep a look out for the wall of phantom bannerfish that hover over the reef at about 8 meters and just two kick cycles from the mooring line. We are not very sure how to explain this schooling phenomenon by the phantom banners, which do nothing of this sort in any of other sites. At north pilot, they are a monument!

North pilot is often not accessible when strong winds are hitting Havelock from the east. However, we presume that the regular exposure to the winds and swells give this site the regular toss and tumble it needs to stay healthy!

Picture clicked at Dive Site: Pilot Reef, Andamans

Read about out other dive sites

Learn More

Dive Site: Tribe Gate

By Articles, Blogs, Dive Sites

DIVE Site: Tribe Gate

DIVE PROFILE

MAX DEPTH: 12 -15 meters depending on diver certification level
AVERAGE DEPTH: 5-8 meters
BOTTOM TIME: 45 – 60 minutes

About the Dive Site: Tribe Gate

Tribe Gate is a small submerged hill surrounded by a bed of sand on all sides. We begin our dive from its foothills, making our way to the top in concentric, shallowing circles.

The reef at Tribe Gate has evidently been built by Porites coral boulders, over hundreds of thousands of years. These brown coral boulders are stacked in shelves, one below the other, through most of the dive site. Well, except in the ruins of the ancient city of Pavona.

This part of the dive site is characterised by a vast field of miniature pillars built during the reign of the erstwhile coral empire Pavona, before their demise during the coral bleaching episode that hit the Indo-Pacific Ocean in 2010, leaving behind an eerily beautiful geological piece of art.

The ancient city is home to moray eels, stonefish, groupers, cardinal fish, flatheads, urchins, nudibranchs, shrimps, among many others. It is also perennially overcast with a cloud of two-spot snappers. You could do your entire dive at tribe gate in this city. ?

Some special residents that we are always on a look out for include the scribbled filefish, yellowtail barracuda, striped surgeonfish, Beaufort’s crocodile flathead, unicornfish, banded sea kraits, Phyllidia and Halgerda slugs and other cool critters.
Tribe Gate is also where we see the most number of Tridacna clams- the largest living clams in the world- and also all five species of anemonefish we see commonly in the Andamans.

We conclude our dive with an extended safety stop, enjoying as the sergeant major damsels and fusiliers school around us, until we surface to a spectacular view of Havelock Island.

Tribe Gate is a great place to fun dive, learn to dive or even do your first ever dive!

Pictures clicked at Dive Site: Tribe Gate, Andamans

Video credit Umeed Mistry

Read about our other Dive Sites

Learn More

Dive Site: The Slope

By Articles, Blogs, Dive Sites, Scuba Diving Andamans

DIVE Site: The Slope

DIVE PROFILE

MAX DEPTH: 18 meters | 12 meters, depending on diver certification level
AVERAGE DEPTH: 7-10 meters
BOTTOM TIME: 45 – 60 minutes

About the Dive Site: The Slope

The Slope is one of our favourite shallow dive sites because we’ve known and befriended its residents for many years now. In terms of proximity, Slope is the Wall’s closest neighbour but despite the nearness, the topography could not be more different. Imagine the Slope to look like an amphitheatre with parallel ridges placed like cascading rows of seats gently sloping downwards. The ridges are mostly sandy but interspersed every now and then with large boulders of corals. This is a fairly large dive site and needs to be dived more than once to see all of it. On the flipside, there is a lot that you can see here, even without covering the whole extent of it.

The sandy patches are great places to look for echinoderms (sea stars, cushion stars, brittle stars, sea cucumbers), molluscs and crustaceans. The boulders are where you see clouds of damselfish, fusiliers and cardinalfish. Reef fish are in good diversity and abundance here. Groupers keep territories around here and you can observe this behaviour unfold as you swim over the rocks.
We consider the Slope to be shrimp central. Look here for banded boxer shrimps, Durban dancing shrimps, ambon shrimps, marbled shrimps, glass shrimps, cleaner shrimps and several more. Forgot to mention how this site is also a great place to look for pipefish, scorpionfish, anemonefish, boxfish, giant clams, wrasses, barrel sponges, gorgonians and sea whips. There is the occasional sea turtle, Kuhl’s sting ray, Buford’s crocodile flathead and banded sea krait spotted here as well. To paint the water blue and silver, there are red-toothed triggers and mackerel always passing by.

As we shallow up towards the end of the dive, we pay a quick visit to the submerged pillars of a floating white lighthouse which is home to oysters, peacock mantis shrimps, schooling batfish and different species of lionfish. We like to end our dive at the shallowest ridge which lies at approximately 5 meters deep, best enjoyed during your safety stop!

If you are coming to us to fun dive, do your open water, advanced, underwater naturalist or deep specialities…we can take you to the wall 🙂

Pictures clicked at Dive Site: The Slope, Andamans

Dive Site: The Wall

By Blogs, Dive Sites, Scuba Diving Andamans

Dive Site: The Wall

DIVE PROFILE

MAX DEPTH: 30 meters | 18 meters | 12 meters, depending on diver certification level
AVERAGE DEPTH: 12-15 meters
BOTTOM TIME: 45 – 60 minutes

About the Dive Site: The Wall

This is a dive site for all seasons, all conditions and all diver levels.

The wall is located very close to Havelock Island and takes 10 to 15 minutes to get to by boat from DIVEIndia. It is one of the first dive sites to be discovered around Havelock back in 2004. We love the Wall because of its crazy topography, very unlike any of our other dive sites in the same vicinity.

We descend down to a ridge that lies between 10-12 meters below the surface. The ridge is a mix of coral rocks and sandy beds. Here we look for schooling, territorial or camouflaging reef fish, octopus, cuttlefish and squids, a host of macroinvertebrates, while also hoping to bump into the harem of Napolean wrasses resident at the wall.

The magical drop-off begins almost immediately, the moment you swim east of the ridge. The wall runs parallel to the ridge for about 80 meters and culminates at a cliff-like edge. We swim along the wall, admiring the scene like an art gallery with a variety of coral, hydroid trees, oysters, feather stars and small caves on display. Depending on the direction of the current and how strong it is, we either make our way back along the wall to where we started or we continue to the other shallower side of the ridge while we look for big groupers, snappers, sweetlips, parrotfish, butterflyfish, angelfish, moray eels, lionfish and enormous scorpionfish. But first, we spend a few moments at the cliff because that’s where the big-eye trevallies, giant trevallies and barracudas come in to hunt the schooling fusiliers, scads and mackerel, especially when the visibility is low. A sight to behold!

The wall is great if you are into big, schooling fish but also for those with an eye for macro life, be it molluscs like nudibranchs and snails, crustaceans such as commensal shrimps and crabs, crinoids or polychaete worms. If we are lucky, we might find an ornate ghost pipefish lurking behind one the feather stars along the wall!

December to March marks the octopus mating season here in Havelock, increasing the probability of finding octopuses in action-hunting, courting or mating. We like to give these guys some space so we can see their natural behaviours unfold.

If you are coming to us to fun dive, do your open water, advanced, underwater naturalist or deep specialities…we can take you to the wall 🙂

Pictures clicked at Dive Site: The Wall, Andamans

Read about our other Dive Sites

Learn More

Dive Site: Peel Lighthouse

By Blogs, Dive Sites, Scuba Diving Andamans

DIVE Site: Peel, Lighthouse

DIVE PROFILE

MAX DEPTH: 12 meters
AVERAGE DEPTH: 8-10 meters
BOTTOM TIME: 45 – 60 minutes

About the Dive Site: Peel Lighthouse

We discovered this dive site not too long ago, when stormy weather prevented us from venturing out to our sites further out. Our dive team’s fearless leader at the time, Vikas Nairi, decided to explore the seas for reefs that are closer and storm protected. That is how this beautiful patch of reef was found, sitting quietly around a floating red lighthouse ten minutes outside of DIVEIndia.

This reef is circular, surrounded by sand on all sides. It experiences some of the strongest currents we’ve felt, during tide changes around new and full moons. Some of the biggest barrel sponges, fan coral, soft coral and hydroid trees we’ve seen close to Havelock have also been here, thanks to these infrequent strong currents.

Just like with our dive site the Slope, we swim through the pillars of the floating lighthouse to look for beautiful feather duster worms, cowries, slugs, moray eels, lionfish, puffers, crustaceans and schooling fish in the blue.

This dive site is great for long shallow dives as well as drift dives depending on the current affairs.

The sand patch around the reef is a common resting site for Kuhl’s sting rays. In search of sting rays we often come across nudibranchs, flounders and a good diversity of beautiful goby-shrimp partnerships.

The owners of the Full Moon Café contributed their age-old cycle and scooter to this dive site some years ago, as artificial structures to support more reef life. We’ll take you there 🙂

Irrespective of the dive conditions, currents and visibility-wise, there is always a lot to see and experience, for certified divers of all levels as well as folks still learning to dive.

Pictures clicked at Dive Site: Peel Lighthouse, Andamans

Read more about our other dive sites

Learn More

PADI Dive Master Courses in India – All You Need to Know

By Articles

PADI Dive master courses in India – Cost, Career opportunities in Scuba Diving

Divemaster is the first professional certification level.   In many ways, it is arguably ethe most important step you will take as well – it is at this stage that you learn professional-level diving theory and techniques, as well as start to develop the various personal attributes that go with being a dive pro:  judgement, ethics, decision-making and more.  In short, this is where you develop the foundations of becoming a good dive pro.     In higher courses, you learn more about teaching, risk management and other aspects – but as with anything else, unless your foundations are strong, you are going to be limited.  The deeper the roots, the higher the reach, as a friend of mine likes to say.    For example, our PADI Divemaster programs are focused on creating qualified dive professionals who are ready to hit the ground running – they are a great match for people looking to become a part of the industry and not necessarily a great fit for people who are looking for a cheap way to do a bunch of dives, hang out on the beach and chill out (although there is a big part of that in a dive professional’s lifestyle anyway 🙂
And of course, if you are going to go pro, we strongly feel that it makes sense to do so with PADI, the world’s largest diver training agency, which has nearly an 80% market share in diver training.   After all, that’s where most of the job opportunities lie!      Even when we were a dual-agency dive center, we still did more PADI Divemaster courses for this very reason.
The first question that people ask is prIce.   That is not the correct question to ask.  In order to do a good divemaster course, you need to find a dive center whose training approach and philosophy matches your own learning style and expectations.     It isnt a question of good or bad – it is a question of fit.   And that is the question which should drive your decision, instead of cost.    Saving a little money and getting a course that doesn’t fit your expectations/preferences is not good value – quite the opposite!
Still, cost is an issue – if for no other reason than for financial planning.    And that depends on the type of program that you do:  there are 2 ways to do your PADI Divemaster program.
– The first is just a bare-bones Divemaster course:  come in, meet the requirements, get done.   This can be done in as little as 7-10 days, if you actually put your mind to it.   And the cost for this varies from around Rs 25,000-35,000 plus tax.     Is this a good option?     I only recommend this for candidates who have several hundred dives, and some experience teaching another sport – and even then, i would still recommend that they go for a longer, internship-based option.      After all, is a week enough to learn sound dive judgement or decision-making?
– The Divemaster internship:  this is an extended program where you work as an intern at the dive center, and gain valuable experience as a dive professional, going well beyond the minimum requirements.    There are various models for this, ranging from shorter internships where you have to pay for the training (Rs 65,000-75,000, plus tax) to longer internships where some of the training fees are refunded if you are a positive contributor to the dive center (resulting in a program that is often nearly free).
In addition, there is also the cost of mandatory agency materials, which are approx Rs 22,000 or so for a PADI Divemaster program.
So is this worth it?   Along with the price, the other question we get asked often is “what is the scope for working as a PADI Divemaster”?   Well, it depends.    If you are looking for a break from the regular corporate world, working as a PADI Divemaster is a great way to earn a fairly respectable salary and also enjoy a great lifestyle, with the prospects of moving up the professional ladder down the road to Instructor, Dive Center Manager, Equipment Retailer and more.       The base salaries for Divemaster range from Rs 15,000-20,000 and with bonuses and experience, can go to well about Rs 35,000-40,000 in some cases.     Oh, and did i mention that you get to live by the sea and dive daily, as opposed to being stuck in an office?
And these salaries are not just for a handful of lucky people – the dive industry in India is poised on the verge of a massive boom, and dive centers everywhere are looking for qualified, motivated professionals.     So if this is something that interests you, it is definitely a career worth considering!

Learn More

Has Boat Diving Resumed in the Andamans?

By Andaman scuba diving course, Blogs, Scuba Diving Andamans

Is Boat Diving back in the Andamans (Havelock and Neil) Islands?

(Is Boat Diving back in the Andamans? The question everyone has been asking us)

Short version:  Yes, boat diving is on – and has been since early August!

Long version:  All boats have been required to be re-classified.   One of our boats has been done and has been operating since early August.   The others are in queue, and should get done soon.    So yes, we are back to boat diving, albeit with lower capacity than earlier for now.    With the support of the Andamans administration, this process is going to be streamlined even further and we expect to be back to normal operations for good within a few weeks.
Here’s a link to our scuba diving packages!!! 🙂
Boat diving in the andamans
Boat diving resumed in the andaman islands - havelock and neil
Boat diving in the andaman islands - diveindia
Is Boat Diving back in the Andamans
×

Hello!

Click one of our contacts below to chat on WhatsApp

× How can I help you?